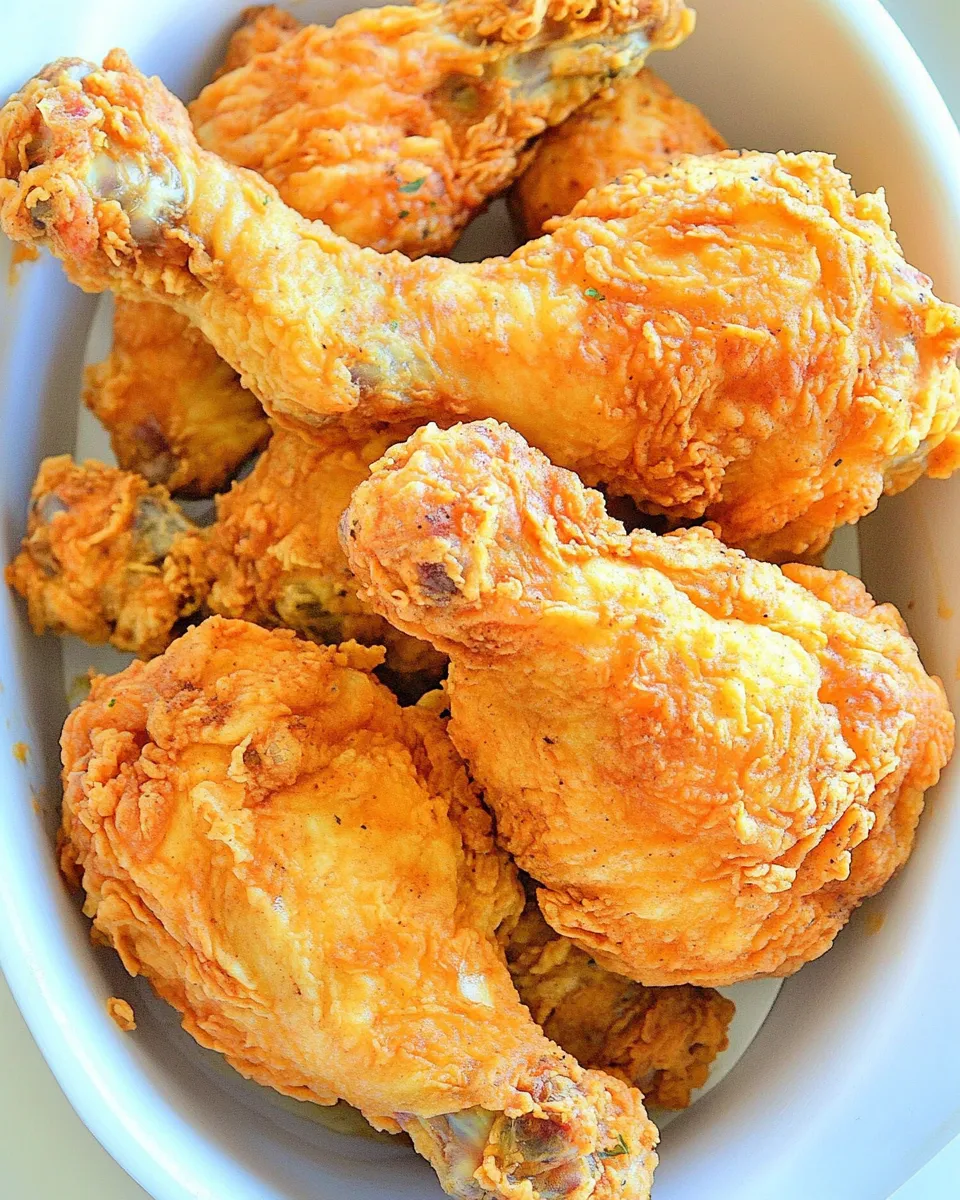
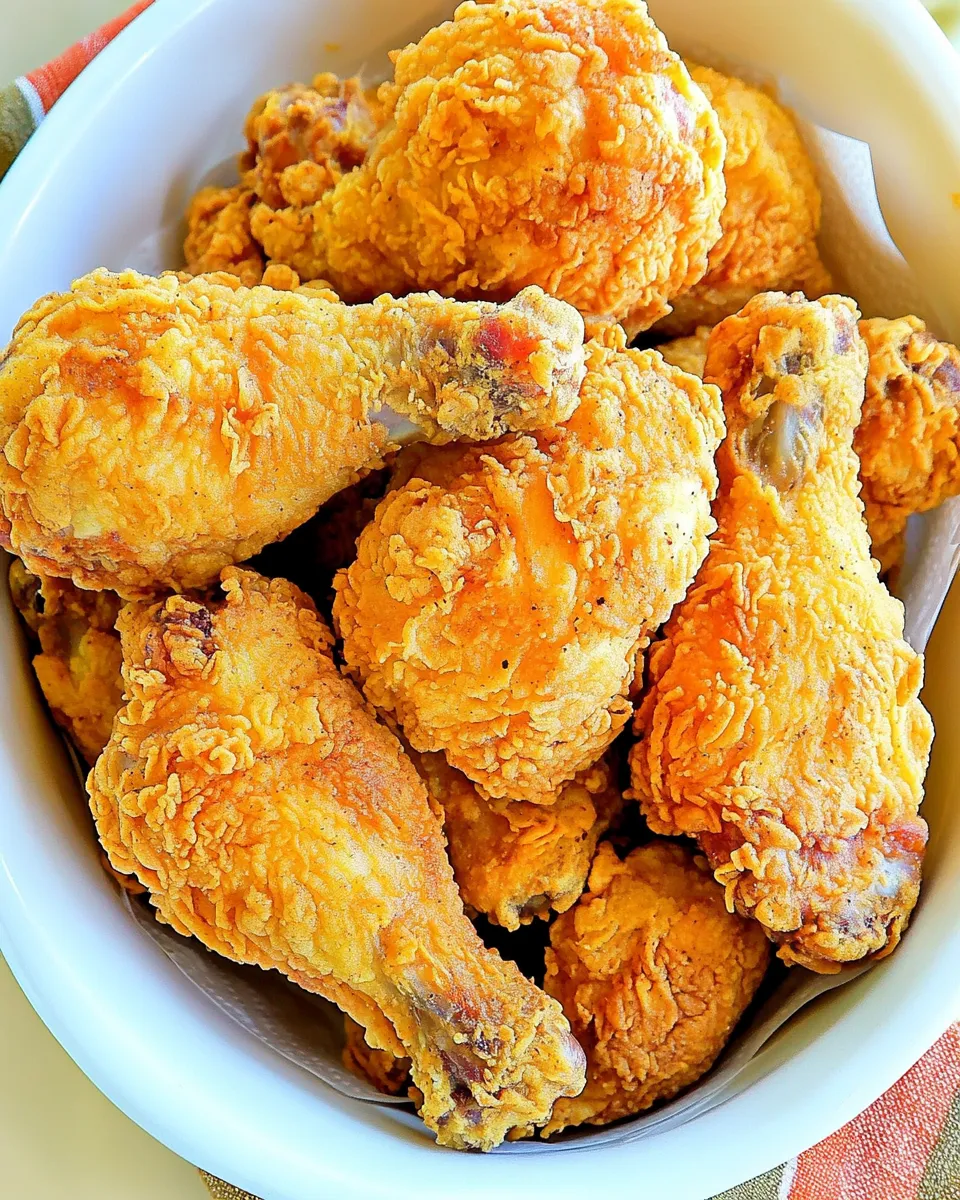
Cracker Barrel Southern Fried Chicken
This is the kind of fried chicken that comforts you at the plate and makes the house smell like Sunday afternoon. It’s straightforward, old-school Southern frying: a seasoned flour, a buttermilk dip, and careful frying to golden-brown perfection. If you want the kind of crunchy crust that shatters on the first bite and tender, juicy meat inside, this method delivers every time.
I test recipes in a busy home kitchen, and I appreciate techniques that are forgiving and repeatable. This version is faithful to the proportions and steps you need: no mystery ingredients, no complicated double batters beyond what the method calls for, and clear timing for each piece. Read through the steps, gather your tools, and you’ll be frying confident, restaurant-quality chicken at home.
Below you’ll find a rundown of the ingredients, the precise step-by-step guide, reasons to try it, allergy-friendly swaps, tools, common missteps, ways to personalize the dish, the flavor logic behind it, storage notes, a short Q&A from readers like you, and a final note to send you off to the stovetop. Let’s get to work.
Ingredient Rundown

- oil for frying — The frying medium. Choose a neutral oil with a high smoke point; you need enough to keep pieces partly submerged (3–4 inches).
- 3 cups all-purpose flour — The base for the seasoned coating. Provides structure and the crispy crust.
- 3 teaspoons salt — Essential for seasoning both the flour and the final flavor; don’t skimp.
- 3 teaspoons ground black pepper — Adds bite and classic peppery warmth to the crust.
- 3 cups buttermilk — Tenderizes the meat and helps the flour adhere; it also adds subtle tang to the crust.
- 3/4 cup water — Thins the buttermilk slightly so it coats the chicken evenly.
- 1 whole chicken cut up — The protein. Cutting your own chicken lets you control portion sizes; use breasts, thighs, wings, and legs as you prefer.
Cracker Barrel Southern Fried Chicken: Step-by-Step Guide
- Pour 3 to 4 inches of oil into a deep fryer or large, heavy pot and heat the oil to 350°F (use a deep-fry thermometer).
- In a large bowl, combine 3 cups all-purpose flour, 3 teaspoons salt, and 3 teaspoons ground black pepper; stir well to make the seasoned flour.
- In another bowl, whisk together 3 cups buttermilk and 3/4 cup water.
- Pat the cut-up chicken pieces dry with paper towels and set them on a plate or tray.
- Working with one piece at a time, dredge the chicken in the seasoned flour, shaking off excess.
- Dip the flour-coated chicken into the buttermilk mixture, letting excess drip off.
- Dredge the chicken again in the seasoned flour, pressing lightly so the flour adheres; shake off excess and place the breaded pieces on a wire rack set over a baking sheet.
- Let the breaded chicken rest on the rack for at least 5 minutes to help the coating set.
- Fry the chicken in 2 to 3 batches (do not overcrowd the pot) and maintain the oil temperature near 350°F. Fry breasts and thighs about 15 to 18 minutes, wings and legs about 12 to 13 minutes, turning occasionally for even browning.
- Confirm doneness by checking that the chicken is golden brown and the internal temperature of the thickest part reaches 165°F.
- Transfer cooked pieces to a clean wire rack set over a baking sheet to drain while you finish the remaining batches.
Top Reasons to Make Cracker Barrel Southern Fried Chicken
It’s reliably delicious. This recipe uses time-tested proportions and a simple double-dredge technique that produces a crunchy exterior and a juicy interior. You don’t need exotic spices or complicated steps—just attention to temperature and timing.
It’s family-friendly. Fried chicken pleases a crowd, and this format lets you cook to order: fry pieces when you need them, keep finished pieces on a rack to stay crisp, and finish the rest without rush.
It’s adaptable. While the core recipe is classic, you can tweak the crust texture, add seasoning layers, or switch up the oil. The method treats the chicken gently and rewards small changes with big results.
Allergy-Friendly Substitutes
- Buttermilk — For a dairy-free option, use unsweetened dairy-free yogurt thinned with a little water to a buttermilk-like consistency. It still offers acidity to tenderize the meat.
- All-purpose flour — For a gluten-free option, use a 1:1 gluten-free baking flour blend formulated for frying; note the texture will differ slightly from wheat flour.
- Oil for frying — If you need to avoid certain oils, choose an allergy-safe, high smoke-point oil such as refined avocado oil (if allowed) or a labeled safe alternative your diet permits.
Toolbox for This Recipe

Good tools make frying safer and easier. You don’t need a professional setup, but you do need a few essentials.
- Deep-fry thermometer — Non-negotiable. Keeping oil near 350°F is the single biggest factor in even cooking and minimal greasiness.
- Heavy pot or deep fryer — A Dutch oven or a dedicated deep fryer works. Heavy metal retains temperature better.
- Wire rack and baking sheet — Drain fried pieces on a rack set over a sheet pan to keep the crust crisp; paper towels will make the bottom soggy.
- Large bowls — One for seasoned flour, one for the buttermilk mix. Set them up assembly-line style for efficiency.
- Tongs — Long tongs keep your hands safe when lowering and turning pieces in hot oil.
Steer Clear of These
- Overcrowding the pot — It lowers oil temperature and yields greasy, underdone chicken. Fry in batches per the recipe.
- Skipping the rest — Let breaded pieces sit on the rack for at least 5 minutes. That pause helps the coating adhere and reduces spattering when they hit the oil.
- Guessing temperatures — Eyeballing oil heat leads to overcooked crust or raw interior. Use a thermometer and aim for around 350°F throughout.
- Using a shallow pan — Too little oil means uneven frying and a much messier process. Aim for 3 to 4 inches of oil as the recipe states.
Make It Your Way
Want changes? Small tweaks let you personalize without breaking the method. For a spicier crust, add cayenne or smoked paprika to the seasoned flour. For herby notes, fold finely chopped fresh thyme or rosemary into the flour—just don’t add wet herbs, which can burn in the oil.
If you like an extra-crisp shell, try adding a tablespoon or two of cornstarch to the flour. That will tighten the crust. If you prefer a thicker, rustic breading, don’t shake off too much flour on the first dredge—let a little extra cling before you dip into the buttermilk.
Flavor Logic
There’s a clear reason this method works. The first flour dredge creates a dry base for the buttermilk to cling to; the wet dip provides moisture and acid to tenderize; the final dredge builds the crust layers. Cooking at a consistent 350°F ensures the crust browns and dries while the interior cooks through to 165°F without toughening.
Salt and pepper in the flour season the crust directly. Buttermilk brings subtle tang and helps the proteins in the chicken denature in a way that yields tender meat. Keeping the pieces on a rack rather than a paper towel prevents steam from softening the crust after frying.
Keep-It-Fresh Plan
Storage: Cool the chicken completely on a rack before refrigerating. Store in an airtight container for up to 3 days.
Reheating: The oven is your friend for reheating. Preheat to 375°F. Place pieces on a wire rack over a baking sheet and heat for 12–15 minutes, or until warmed through and the crust crisps. Avoid microwaving; it makes the crust soggy.
Freezing: Freeze fully cooled fried pieces on a sheet pan until solid, then transfer to a freezer bag. Reheat from frozen in a 400°F oven for 20–25 minutes, checking to ensure the interior reaches 165°F.
Reader Q&A
Q: Can I brine the chicken first?
A: This recipe relies on the buttermilk for tenderizing, but a brine can also help. If you brine, reduce standing time in buttermilk to avoid over-tenderizing. Keep the method for dredging and frying the same.
Q: My crust fell off after frying. What happened?
A: That usually happens if the coating wasn’t set. Let the breaded pieces rest on the wire rack for at least 5 minutes before frying so the flour and buttermilk can bond. Pressing the flour gently on the second dredge also helps.
Q: Can I roast instead of fry?
A: You can, but it won’t be the same. Baking will produce a drier crust and different texture. If you must bake, use a hot oven and a wire rack to allow air circulation, and expect a different result.
The Last Word
Fried chicken rewards patience: a steady oil temperature, a calm assembly line, and a few minutes of resting time for the breaded pieces. Follow the steps and exact proportions here, and you’ll end up with golden, flavorful chicken that’s crisp on the outside and juicy inside. Make a mess, laugh a little, and serve it hot with your favorite sides—mashed potatoes, coleslaw, or simple green beans. This is comfort food done right.
If you try it, tell me how you adjusted the seasoning or what side made the meal perfect for your table. There’s always room for a little twist, but the core of good Southern fried chicken is texture, temperature, and simple, bold seasoning. Enjoy.

Cracker Barrel Southern Fried Chicken
Ingredients
Ingredients
- oil for frying
- 3 cupsall-purpose flour
- 3 teaspoonssalt
- 3 teaspoonsground black pepper
- 3 cupsbuttermilk
- 3/4 cupswater
- 1 whole chicken cut up
Instructions
Instructions
- Pour 3 to 4 inches of oil into a deep fryer or large, heavy pot and heat the oil to 350°F (use a deep-fry thermometer).
- In a large bowl, combine 3 cups all-purpose flour, 3 teaspoons salt, and 3 teaspoons ground black pepper; stir well to make the seasoned flour.
- In another bowl, whisk together 3 cups buttermilk and 3/4 cup water.
- Pat the cut-up chicken pieces dry with paper towels and set them on a plate or tray.
- Working with one piece at a time, dredge the chicken in the seasoned flour, shaking off excess.
- Dip the flour-coated chicken into the buttermilk mixture, letting excess drip off.
- Dredge the chicken again in the seasoned flour, pressing lightly so the flour adheres; shake off excess and place the breaded pieces on a wire rack set over a baking sheet.
- Let the breaded chicken rest on the rack for at least 5 minutes to help the coating set.
- Fry the chicken in 2 to 3 batches (do not overcrowd the pot) and maintain the oil temperature near 350°F. Fry breasts and thighs about 15 to 18 minutes, wings and legs about 12 to 13 minutes, turning occasionally for even browning.
- Confirm doneness by checking that the chicken is golden brown and the internal temperature of the thickest part reaches 165°F.
- Transfer cooked pieces to a clean wire rack set over a baking sheet to drain while you finish the remaining batches.
Equipment
- Equipment
- Deep Fryer
- Wire Rack
- Baking Sheet
Notes
Never crowd the fryer
Let chicken come to room temperature
Check oil temperature between batches
Rest the chicken on rack, not paper towels
Season flour mixture generously