Coconut Protein Bars
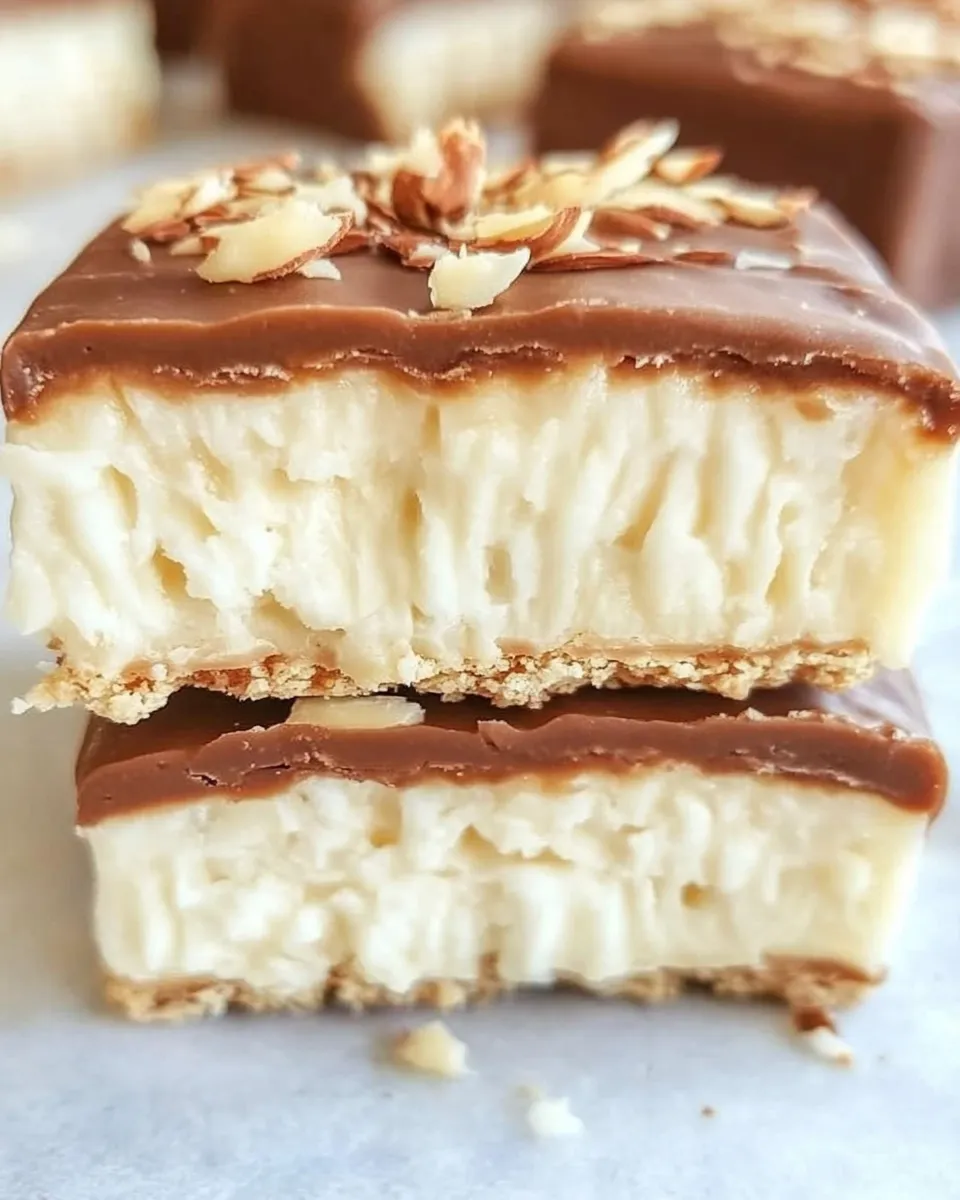
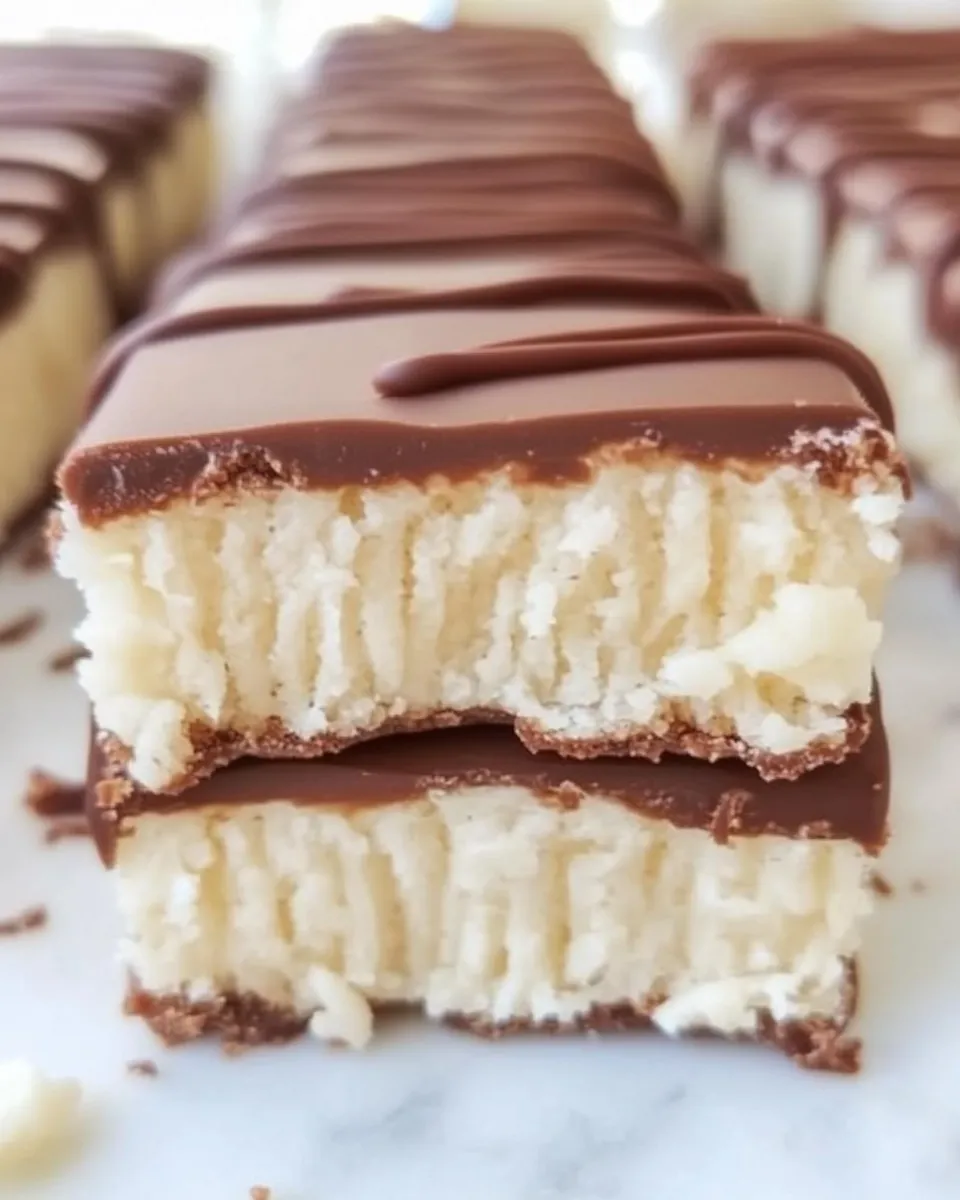
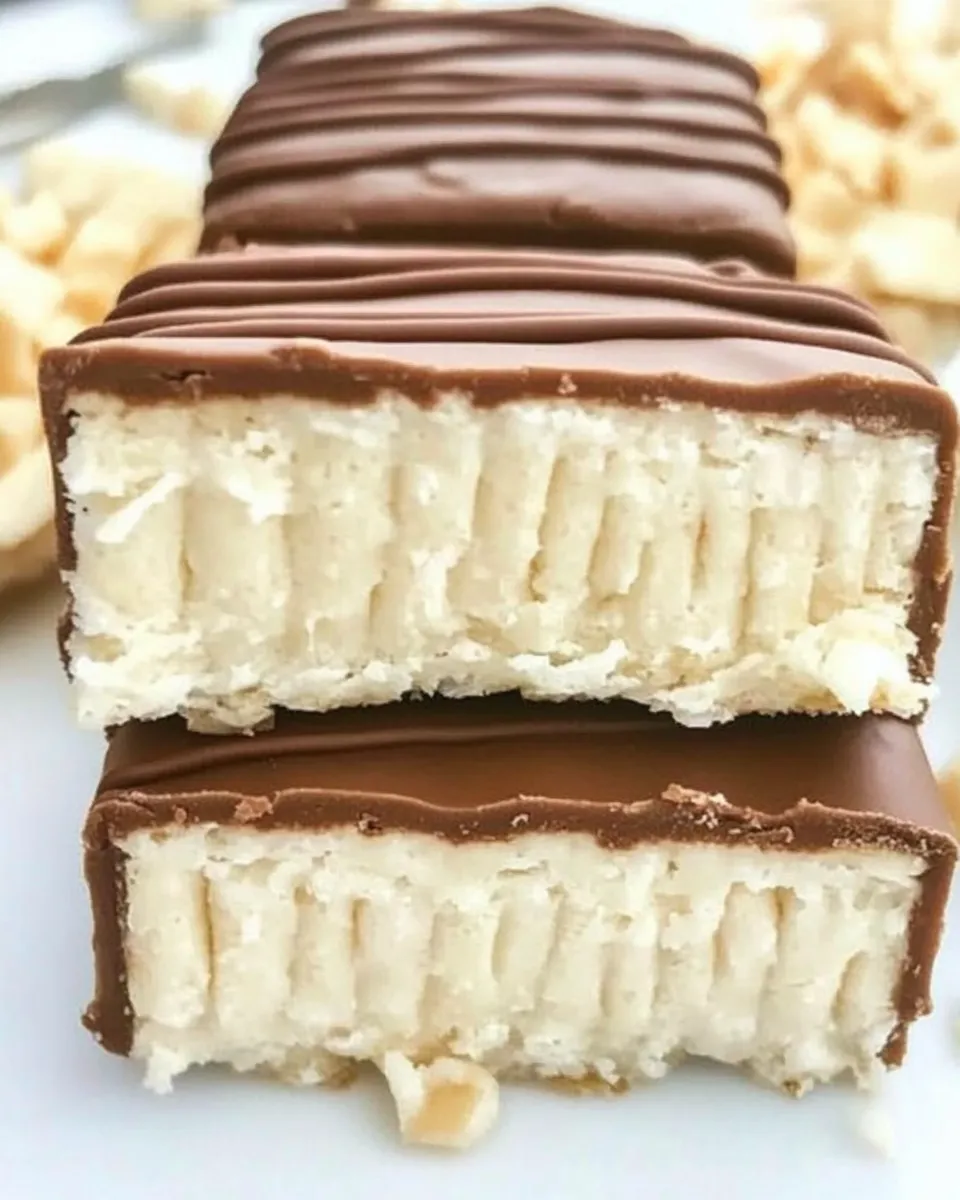
These coconut protein bars are the kind of snack I reach for when I need something that feels indulgent but actually fuels me. They’re chewy, coconut-forward, and cloaked in a thin layer of chocolate — perfect for breakfast on the go, an afternoon pick-me-up, or a post-workout bite. The texture is dense without being dry, and the chocolate adds a familiar finish that makes them feel like a treat.
I keep the recipe simple on purpose. A handful of pantry staples, a short set of steps, and a quick chill in the freezer are all it takes. No baking. No complicated equipment. That means you can make a batch before the week begins and grab one as you head out the door.
Below you’ll find a clear ingredient list with notes, the exact step-by-step method, and practical swaps and troubleshooting tips. Read through once, then gather your ingredients and get started — these come together fast.
Ingredient Breakdown

I like to think of these bars as built around a few core roles: texture, protein, binder, sweetness, and coating. Shredded coconut gives structure and chew. Protein powder lifts the protein content and tightens the crumb. The powdered sugar substitute adds sweetness without raising the sugar load, while the sugar-free condensed milk binds everything together. Chocolate chips finish the bars and provide a satisfying snap when they set.
Because the recipe is short, each ingredient plays an outsized role. Use shredded coconut that you enjoy the flavor of — sweetened coconut will alter sweetness, and super-coarse coconut will change the mouthfeel. A neutral or complementary-flavored protein powder (vanilla, coconut, or unflavored) blends best. If your powdered sugar substitute is grainy or clumps, sift it first so the bars are smooth and cohesive.
Temperature matters a little, too. You press the mixture firmly into the pan and chill it briefly so it holds for cutting and dipping. Chill time is short, but essential — skip it and the bars will be messy when you try to coat them.
Ingredients
- 3 cups shredded coconut — provides the chewy texture and coconut flavor backbone.
- 1/2 cup protein powder — raises protein content and helps the bars hold together; choose a flavor that complements coconut.
- 1/2 cup powdered sugar substitute — sweetens without sugar; sift if clumpy for a smoother texture.
- 2/3 cup sugar free condensed milk — acts as the binder and adds creaminess; warm slightly if it’s very thick.
- 1 cup chocolate chips — melts into the coating; dark or semi-sweet works well with coconut.
Cook Coconut Protein Bars Like This
- Line an 8 x 8-inch pan with parchment paper or plastic wrap, leaving an overhang for easy removal.
- In a mixing bowl, combine 3 cups shredded coconut, 1/2 cup protein powder, and 1/2 cup powdered sugar substitute; stir until evenly mixed.
- Add 2/3 cup sugar-free condensed milk to the dry mixture and mix until the coconut mixture is evenly moistened and holds together when pressed.
- Transfer the mixture to the lined 8 x 8-inch pan. Press firmly and evenly into the pan to create a uniform layer; smooth the top.
- Place the pan in the freezer for 10 minutes to firm up.
- Remove the pan from the freezer, use the parchment overhang to lift the block out, and place it on a cutting board. Slice into 12 bars (arrange as a 3 x 4 grid). Put the sliced bars on a lined plate or tray and return them to the refrigerator or freezer briefly while you melt the chocolate.
- Put 1 cup chocolate chips in a microwave-safe bowl. Microwave in 20-second increments, stirring thoroughly between each increment, until the chocolate is fully melted and smooth.
- Using two forks, dip each chilled coconut bar into the melted chocolate to coat it. Tap the forks together over the bowl to remove excess chocolate, then place the coated bar on a lined plate or tray.
- Refrigerate the coated bars until the chocolate is firm, then serve.
What Makes This Recipe Special
What I love most is the balance: bright coconut flavor, a solid protein hit, and a chocolate coating that makes each bar feel indulgent without feeling heavy. The recipe is built to be approachable — no oven, no timing guesswork, and no tempering chocolate. The freezer does the heavy lifting for structure, and the microwave melts the chocolate safely and quickly when you stir between short bursts.
Another strength is adaptability. The formula is forgiving, so a slightly different protein powder or a different sugar substitute won’t derail the whole batch. Small changes will shift texture and sweetness, but the structure remains consistent because the shredded coconut and condensed milk form the base.
What to Use Instead
If you can’t use one of the listed ingredients, there are sensible swaps that keep the bars intact. Remember, these swaps change texture and flavor, so adjust your expectations and taste as you go.
- Shredded coconut — If you have unsweetened flakes and prefer finer texture, pulse them briefly in a food processor. Avoid coconut flour; it’s too dry and will soak up liquid.
- Protein powder — Any whey, plant-based, or collagen powder works. Unflavored or vanilla is safest. If your protein powder is salty or strongly flavored, reduce any additional flavorings.
- Powdered sugar substitute — Use a powdered allulose or erythritol-based sweetener. If you only have granular sweetener, pulse it to a powder first to prevent grittiness.
- Sugar-free condensed milk — If you can’t find sugar-free condensed milk, a thick nut butter + a little liquid sweetener can bind, but the texture will be denser and less creamy.
- Chocolate chips — Use a chocolate bar broken into pieces if you prefer, or try sugar-free baking chips for a lower-sugar option.
Equipment at a Glance
- 8 x 8-inch baking pan — for shaping the bars to a uniform thickness.
- Parchment paper or plastic wrap — for easy removal and clean edges.
- Mixing bowl and spoon or spatula — to combine the dry and wet ingredients.
- Microwave-safe bowl — for melting chocolate in short bursts.
- Two forks — for dipping and removing excess chocolate without touching the bars.
- Cutting board and sharp knife — for slicing the chilled block into 12 even bars.
- Lined plate or tray — to place dipped bars while the chocolate firms.
Don’t Do This
Don’t skip chilling. If you try to cut and dip warm or room-temperature bars, they’ll crumble and smear chocolate everywhere. The short freezer step firms the block so you get clean slices and an easier dipping process.
Don’t overload the coconut with too much liquid. The recipe gives a specific ratio for condensed milk; add any additional wet ingredients cautiously. If the mix looks too wet, add a tablespoon of shredded coconut at a time until it holds when pressed.
Avoid overheating the chocolate. Microwaving for too long will seize it. Stick to 20-second blasts and stir thoroughly between each one. If the chocolate looks grainy, add a teaspoon of neutral oil or a small pat of butter and stir until smooth.
Dietary Swaps & Alternatives
If you’re adjusting for dietary needs, here are tried approaches that preserve texture and flavor as much as possible.
- Vegan — Use a plant-based protein powder and a vegan condensed milk alternative (some coconut condensed milks are available). Choose dairy-free chocolate chips.
- Low-carb / Keto — Stick with a low-carb powdered sweetener and sugar-free condensed milk, and use sugar-free chocolate chips.
- Nut-free — This recipe is naturally nut-free if you avoid using nut butters as a substitute. Check protein powder labels for cross-contamination.
- Dairy-free — Use a dairy-free condensed milk and dairy-free chocolate; check the protein powder for whey content.
Flavor Logic
Coconut is the dominant flavor, and everything else has to play supportive or complementary roles. Vanilla or unflavored protein powder blends into the background and lets coconut shine. A chocolate coating creates contrast: the fat and bitter-sweetness of chocolate offset the dense, chewy coconut interior.
Salt is subtle but helpful. If any of your ingredients are completely unsalted, a light sprinkle of flaky sea salt on the chocolate while it’s wet brightens flavors. If your protein powder is flavored (especially chocolate or salted caramel), account for that when choosing chocolate and sweetener so you don’t end up with a clash.
Save It for Later
Storage is easy and forgiving. Keep the bars refrigerated in an airtight container for up to 10 days. Layer parchment between bars to prevent sticking. If you prefer a firmer, almost candy-like texture, freeze them for up to 2 months; thaw in the refrigerator for 10–15 minutes before eating so they soften slightly.
If you transport the bars, keep them chilled in a small cooler or insulated lunch bag. At room temperature, the chocolate can soften and the bars may sweat if they’re chilled then left in warm conditions.
Ask the Chef
Q: Can I make the bars without protein powder?
A: Yes, but the texture and nutritional profile will change. You can omit it and add an extra 1/4 cup shredded coconut or a tablespoon of coconut flour to help maintain structure. Expect a slightly chewier, less protein-forward bar.
Q: My mixture is crumbly and won’t stick together. What did I do wrong?
A: The most common cause is not enough binder or not mixing thoroughly. Warm the sugar-free condensed milk slightly and mix well. If needed, add a teaspoon of condensed milk at a time until the mix holds when pressed.
Q: How do I get a smooth chocolate coating?
A: Ensure the bars are well chilled before dipping. Melt chocolate gently and stir to a glossy smoothness. After dipping, tap off excess chocolate with the forks and place bars on parchment to set. If the chocolate thickens while dipping, microwave for 10–15 seconds and stir to loosen.
Hungry for More?
If you liked these bars, try making a batch with shredded coconut toasted lightly in a dry skillet for 3–4 minutes before mixing — it deepens the flavor. For a nutty twist, press a thin layer of crushed toasted almonds or hazelnuts on top of the chocolate before it sets.
And if you’re building a repertoire of quick, fridge-or-freezer snacks, this method scales: double the recipe and use a 9 x 13-inch pan, but increase chilling time slightly before slicing. These bars are a dependable base for experimentation — once you know how the texture behaves, you can customize flavor and sweetness to your taste.

Coconut Protein Bars
Ingredients
Ingredients
- 3 cupsshredded coconut
- 1/2 cupprotein powder
- 1/2 cuppowdered sugar substitute
- 2/3 cupsugar free condensed milk
- 1 cupchocolate chips
Instructions
Instructions
- Line an 8 x 8-inch pan with parchment paper or plastic wrap, leaving an overhang for easy removal.
- In a mixing bowl, combine 3 cups shredded coconut, 1/2 cup protein powder, and 1/2 cup powdered sugar substitute; stir until evenly mixed.
- Add 2/3 cup sugar-free condensed milk to the dry mixture and mix until the coconut mixture is evenly moistened and holds together when pressed.
- Transfer the mixture to the lined 8 x 8-inch pan. Press firmly and evenly into the pan to create a uniform layer; smooth the top.
- Place the pan in the freezer for 10 minutes to firm up.
- Remove the pan from the freezer, use the parchment overhang to lift the block out, and place it on a cutting board. Slice into 12 bars (arrange as a 3 x 4 grid). Put the sliced bars on a lined plate or tray and return them to the refrigerator or freezer briefly while you melt the chocolate.
- Put 1 cup chocolate chips in a microwave-safe bowl. Microwave in 20-second increments, stirring thoroughly between each increment, until the chocolate is fully melted and smooth.
- Using two forks, dip each chilled coconut bar into the melted chocolate to coat it. Tap the forks together over the bowl to remove excess chocolate, then place the coated bar on a lined plate or tray.
- Refrigerate the coated bars until the chocolate is firm, then serve.
Equipment
- 8 x 8-inch pan
- Parchment Paper
- Mixing Bowl
- Microwave-safe bowl
- Forks
- Cutting Board
- Plate or tray
- freezer
- Refrigerator
Notes
TO STORE
: Coconut protein bars can be stored at room temperature, covered, for up to four weeks. They will keep longer if you refrigerate them.
TO FREEZE
: Place the bars in a ziplock bag and store them in the freezer for up to six months.