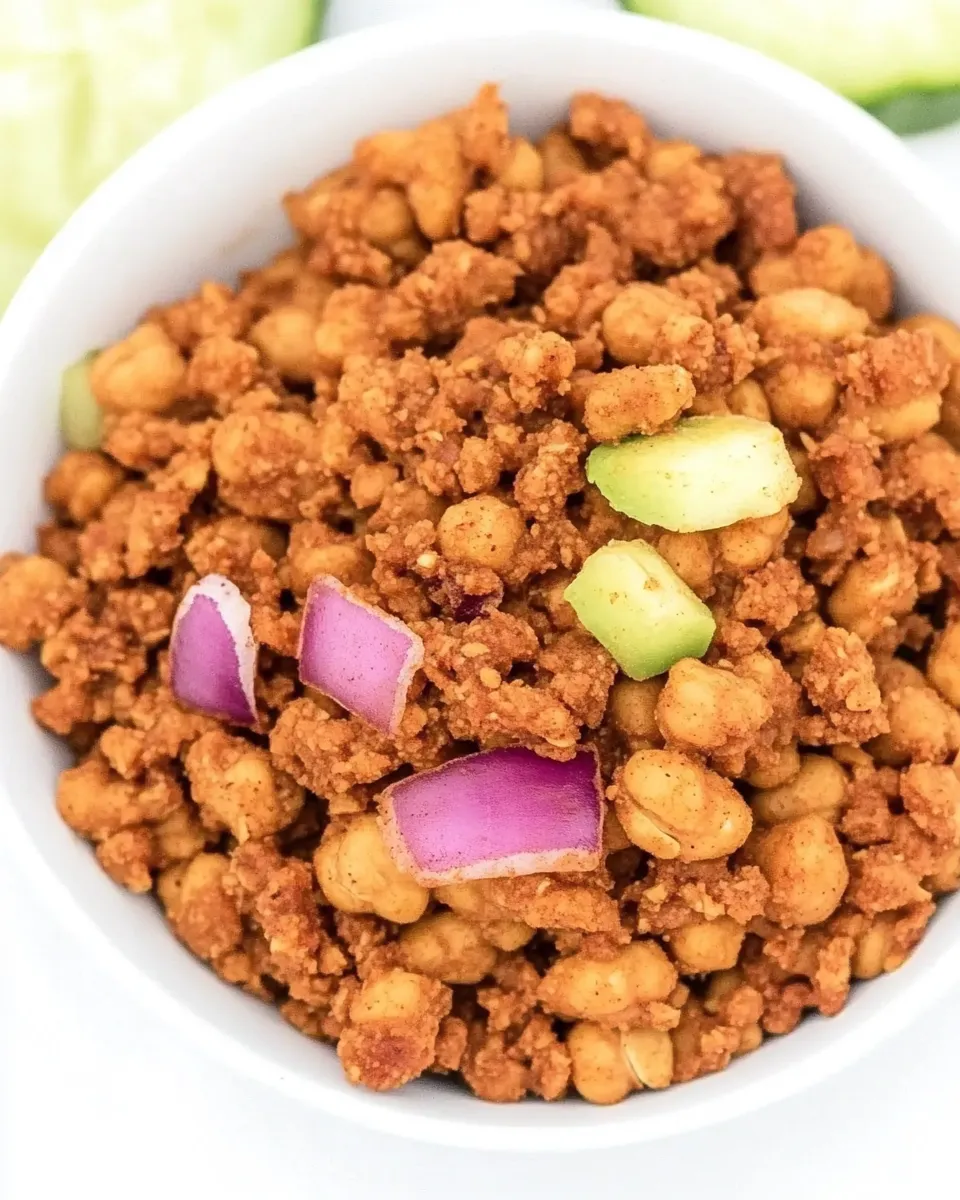
Chickpea-Walnut Taco Crumbles (30 Minute!)
These Chickpea-Walnut Taco Crumbles are my go-to when I want taco flavor fast, with a satisfying texture that holds up in bowls, tacos, and tostadas. They crisp up in the oven, take almost no hands-on time, and give you that savory, slightly nutty bite that makes a meal feel complete. I love how the walnuts add density and a hint of richness without overpowering the chickpeas.
No long marinades, no frying, no mystery ingredients. You pulse everything together, spread it on a sheet, and let the oven do the work. If you want a cheesy twist, a couple tablespoons of nutritional yeast make it sing. This recipe is easy to scale or tuck into a meal prep routine for quick weeknight dinners.
Below you’ll find the exact ingredients and step-by-step directions I use—nothing added, nothing changed—plus practical tips for swaps, storage, and troubleshooting. Read through the variations and answers after the recipe; they’ll save you time and keep the crumbles consistent every single time.
Ingredients at a Glance

- 15oz. can chickpeas — the main binder and base protein; rinse and drain to remove excess salt and canning liquid.
- 3/4 cup walnuts* — provides fat, texture, and a meaty bite; pulse with the chickpeas to create crumbles.
- 3 Tbsp. taco seasoning — the concentrated flavor; pick your favorite blend for heat level and saltiness.
- 1 Tbsp. water — helps the mixture come together in the food processor without making it wet.
- Optional: 2-3 Tbsp. nutritional yeast for cheesy version — adds savory, cheesy notes if you want a dairy-free “cheesy” profile.
Directions: Chickpea-Walnut Taco Crumbles
- Preheat the oven to 375°F (190°C).
- Open, rinse, and drain the 15 oz can of chickpeas. Pat the chickpeas dry with paper towels to remove excess moisture.
- Add the drained chickpeas, 3/4 cup walnuts, 3 Tbsp taco seasoning, and 1 Tbsp water to a food processor. If using the optional cheesy version, add 2–3 Tbsp nutritional yeast.
- Pulse the mixture in short bursts until it forms small-to-medium crumbles. Stop and scrape down the sides as needed. Do not over-process unless you want a finer texture.
- Line a baking sheet with parchment paper. Spread the crumbles in an even single layer, breaking up any large clumps.
- Bake for 10 minutes. Remove the tray, stir and break up the crumbles, then spread them evenly again.
- Return the tray to the oven and bake for an additional 10–12 minutes, or until the crumbles reach your desired level of crispiness and light browning.
- Remove from the oven and let cool a few minutes before using or storing.
Why It Deserves a Spot
This recipe earns shelf space in my collection because it hits three things I always cook for: speed, texture, and flavor. Thirty minutes from start to finish is realistic on a busy weeknight. The walnuts add a crunchy heft that mimics the chew of browned meat, while chickpeas bring protein and bulk.
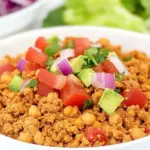
It’s also versatile. Use the crumbles as taco filling, a burrito component, a salad topping, or a hearty addition to grain bowls. The taco seasoning does most of the heavy lifting flavor-wise, so even beginners get consistent, crowd-pleasing results.
What to Use Instead

Want to tweak the base without changing method? Here are simple swaps that work without rewriting the recipe:
- Walnuts — swap for pecans for a slightly sweeter note or almonds for a firmer crunch; keep the same 3/4 cup measure.
- Chickpeas — use cooked brown or green lentils for a softer crumble (texture will be different but still tasty).
- Taco seasoning — make your own blend if you prefer less salt: cumin, chili powder, smoked paprika, garlic powder, onion powder, and a pinch of salt.
- Nutritional yeast optional — if you want dairy cheese flavor and tolerate dairy, stir in 2 Tbsp grated Parmesan after pulsing (note: this is a substitution, not in the source list).
Cook’s Kit
Minimal tools make this recipe approachable. Here’s what I reach for every time:
- Food processor — essential to get the right crumb size quickly.
- Baking sheet — a rimmed sheet works best to keep crumbles contained.
- Parchment paper — prevents sticking and makes cleanup effortless.
- Paper towels — for drying the chickpeas so they crisp in the oven.
Things That Go Wrong
Common problems are easy to fix once you know the causes.
Mixture too wet or clumpy
If the mixture turns into a paste or clumps together, it’s usually from excess moisture. Make sure you pat the chickpeas dry and only add 1 Tbsp water as directed. Pulse in short bursts and stop before it becomes smooth.
Crumbles not crisping
Two fixes: spread in a single even layer and avoid overcrowding the sheet, and make sure you give the crumbles the stir at the 10-minute mark. If they still aren’t as crisp as you like, add a few more minutes in the oven, checking every 2 minutes to avoid burning.
Too salty or too spicy
If your taco seasoning is strong, taste a small pinch of the raw crumble mixture before baking and adjust next time. For this batch, serve with neutral bases—rice, plain beans, avocado—to balance the intensity.
Holiday & Seasonal Touches
These crumbles adapt well for seasonal meals. In fall and winter, toss in a pinch of smoked paprika and a little orange zest for warmth and brightness. For summer, mix the finished crumbles into a cold corn and tomato salad with lime and cilantro to make a light, fresh filling for tacos.
Make a thanksgiving-friendly platter by serving the crumbles alongside roasted sweet potatoes, cranberry salsa, and butter lettuce leaves for handheld bites. The nutty walnut-chickpea base stands up to bold sides and festive sauces.
Flavor Logic
This recipe is built on contrast: mild chickpeas, rich walnuts, and concentrated taco seasoning. The walnuts supply fat and toasted flavor that mimics the mouthfeel of browned meat. Chickpeas bring a neutral canvas—once pulsed with seasoning they carry those flavors well.
Water is included deliberately to help the ingredients bind slightly so the mixture forms crumbles instead of leaving separate bits of nuts and beans. The short baking time dries and lightly browns the pieces for crunch without turning them hard.
Shelf Life & Storage
Store cooled crumbles in an airtight container in the refrigerator for up to 4 days. Reheat in a skillet over medium heat (no oil necessary) or in a 350°F (175°C) oven for 5–8 minutes to re-crisp.
For longer storage, freeze in a freezer-safe container for up to 2 months. Thaw in the refrigerator overnight and reheat in a skillet or oven. Note that freezing can soften the texture slightly; re-crisping in a hot skillet helps recover some crunch.
Top Questions & Answers
- Q: Can I make this without a food processor? — A: You can roughly mash the chickpeas and finely chop the walnuts by hand, but the texture will be less uniform. A food processor gives the best, quickest crumble.
- Q: Is the nutritional yeast necessary? — A: No. It’s optional for a cheesy, savory boost. The base recipe is flavorful without it thanks to the taco seasoning.
- Q: Can I bake these at a different temperature? — A: The recipe is calibrated for 375°F (190°C). Lower temps will take longer and may not crisp as well; higher temps risk burning the walnuts before the interior dries.
- Q: Will canned chickpeas always work? — A: Yes—just rinse and pat dry. If you use freshly cooked chickpeas, make sure they’re well dried or the mixture will be too moist.
- Q: How spicy will these be? — A: That depends on your taco seasoning. If you prefer milder, use a mild blend or reduce the seasoning slightly and add salt to taste after baking.
Save & Share
If this recipe becomes one of your weeknight staples, bookmark it and save a note about which taco seasoning you used. Share it with friends who like a plant-forward swap for taco night—these crumbles hold up in wraps and bowls and are easy to make in batches for meal prep.
I’d love to know: how did you serve yours? Leave a comment with your favorite toppings or a tweak that worked for you. Simple recipes like this get better every time someone makes them and shares what they learned.
Chickpea-Walnut Taco Crumbles (30 Minute!)
Ingredients
Ingredients
- 15 oz.can chickpeas
- 3/4 cupwalnuts*
- 3 Tbsp.taco seasoning
- 1 Tbsp.water
- Optional: 2-3 Tbsp. nutritional yeast for cheesy version
Instructions
Instructions
- Preheat the oven to 375°F (190°C).
- Open, rinse, and drain the 15 oz can of chickpeas. Pat the chickpeas dry with paper towels to remove excess moisture.
- Add the drained chickpeas, 3/4 cup walnuts, 3 Tbsp taco seasoning, and 1 Tbsp water to a food processor. If using the optional cheesy version, add 2–3 Tbsp nutritional yeast.
- Pulse the mixture in short bursts until it forms small-to-medium crumbles. Stop and scrape down the sides as needed. Do not over-process unless you want a finer texture.
- Line a baking sheet with parchment paper. Spread the crumbles in an even single layer, breaking up any large clumps.
- Bake for 10 minutes. Remove the tray, stir and break up the crumbles, then spread them evenly again.
- Return the tray to the oven and bake for an additional 10–12 minutes, or until the crumbles reach your desired level of crispiness and light browning.
- Remove from the oven and let cool a few minutes before using or storing.
Equipment
- Food Processor
- Baking Sheet
- Parchment Paper
- Paper Towels
Notes
*Walnuts:
I use raw, unsalted nuts for this recipe. But if you're using salted walnuts, you may want to reduce or omit the salt in the taco seasoning.
Yield:
Recipe makes about 2 1/4 cup crumbles.
Texture notes:
If you prefer your crumbles tiny & crispy, pulse them longer into a finer meal. Otherwise, to make them a bit "juicier" add an additional 1-2 Tbsp. water and pulse just a few times to form larger crumbles. The recipe above is a happy medium between the two, so play around to find the texture you love.
Pairing:
These are fantastic paired with
fresh pico de gallo
and/or guacamole to add juiciness & creaminess.
Leftovers:
When reheating leftovers, add a touch of water, stir, then microwave to heat through. They become dried out after refrigerating, but adding a little water re-hydrates them beautifully.
Usage:
Enjoy them in tacos, burritos/burrito bowls, nachos, quesadillas, Mexican salads, etc.