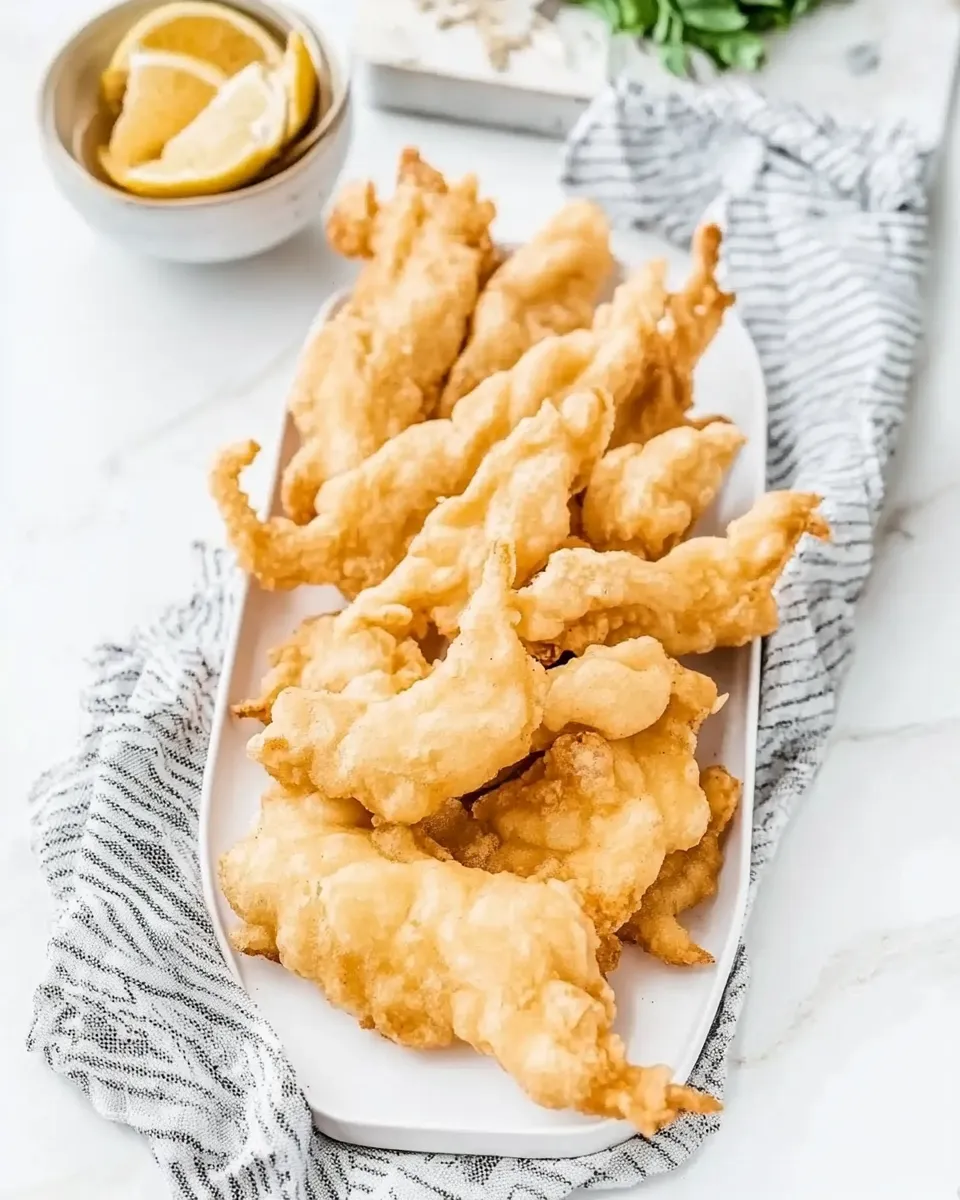
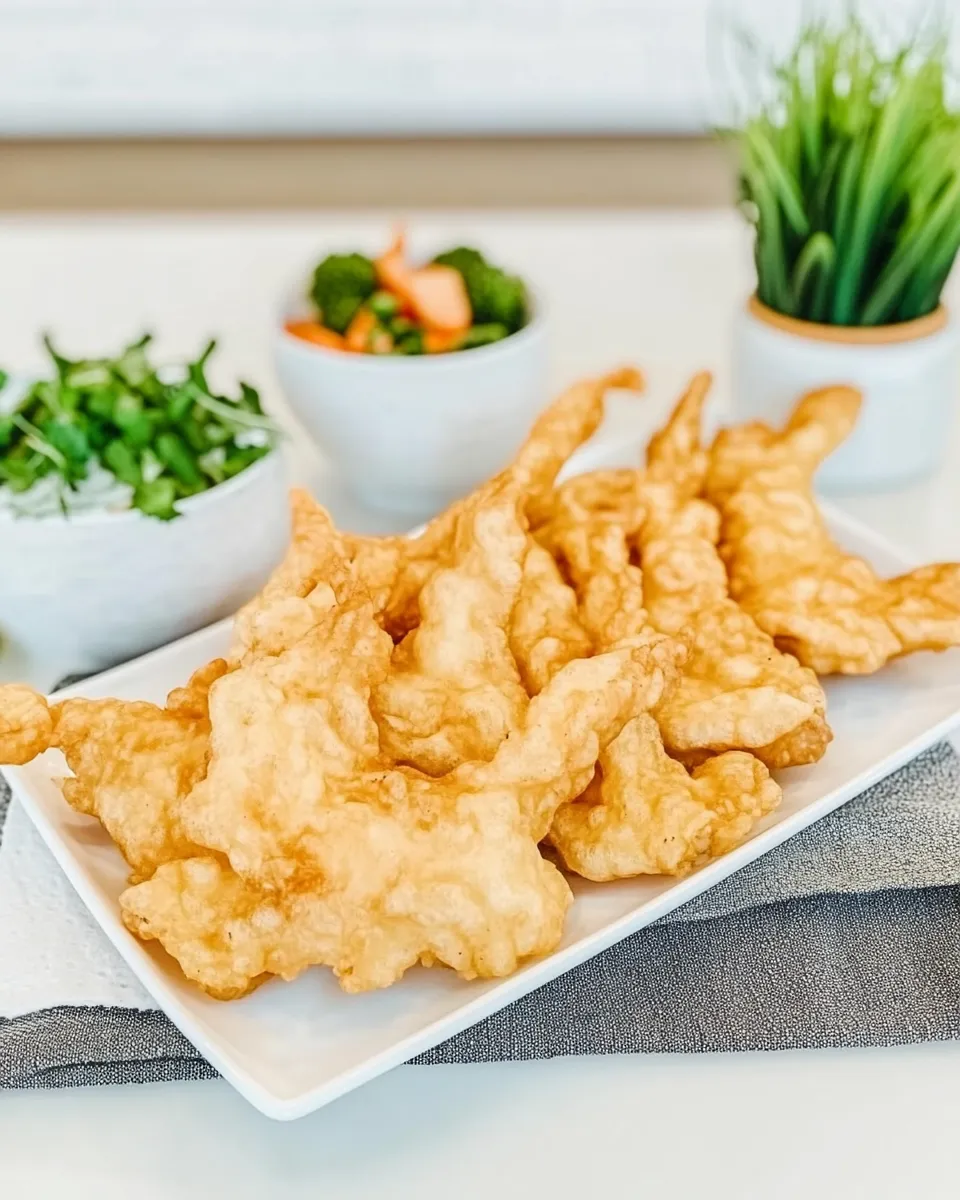
Chicken Tempura
Light, crisp, and impossibly quick to make, this chicken tempura is the kind of recipe I reach for when I want something both comforting and a little special. The batter is feather-light thanks to cold sparkling water and minimal mixing, and the quick fry keeps the chicken juicy inside while the outside turns golden and crackly. It’s a technique that rewards patience at the stove with reliably great results.
I developed this version to be straightforward for home cooks: no long brining, no complicated batter ingredients, and a short list that’s easy to keep on hand. The marinade gives a subtle savory backbone, while the cornstarch-forward batter gives that delicate, airy texture you want from tempura-style frying.
Read through the steps once, get your mise en place ready, and you’ll have a crisp, restaurant-quality snack or weeknight main in under 30 minutes from start to finish. I’ll walk you through equipment, swaps if you’re on a budget, common pitfalls, and the quickest way to get this on the table tonight.
What’s in the Bowl

Before you get your hands messy, it helps to understand what each component does. The chicken strips are lightly marinated for a touch of umami and seasoning. The dry mix leans on cornstarch and flour to create a brittle, airy crust, while the single lightly beaten egg and icy sparkling water form a lacy batter when handled gently. The whole method depends on temperature control — cold batter and hot oil — so organization is as important as technique.
Ingredients
- 1 pound chicken breasts — cut into strips; lean and cooks quickly.
- 2 1/2 tablespoons soy sauce — provides savory seasoning and a little salt.
- 1/2 teaspoon salt — boosts flavor; measure to avoid over-salting.
- 1/2 teaspoon black pepper — simple heat and aroma; fresh ground is best.
- 3/4 cup all-purpose flour — structure for the batter; use plain AP flour.
- 5 tablespoons cornstarch — key for crispness and a light texture.
- 1/4 teaspoon baking soda — subtle lift in the batter for a lighter crust.
- 1 large egg — lightly beaten; binds the batter and adds richness.
- 1 cup cold sparkling water — keeps the batter airy; use straight from the fridge.
- Vegetable oil — for frying; enough to deep-fry or to fill your pot safely.
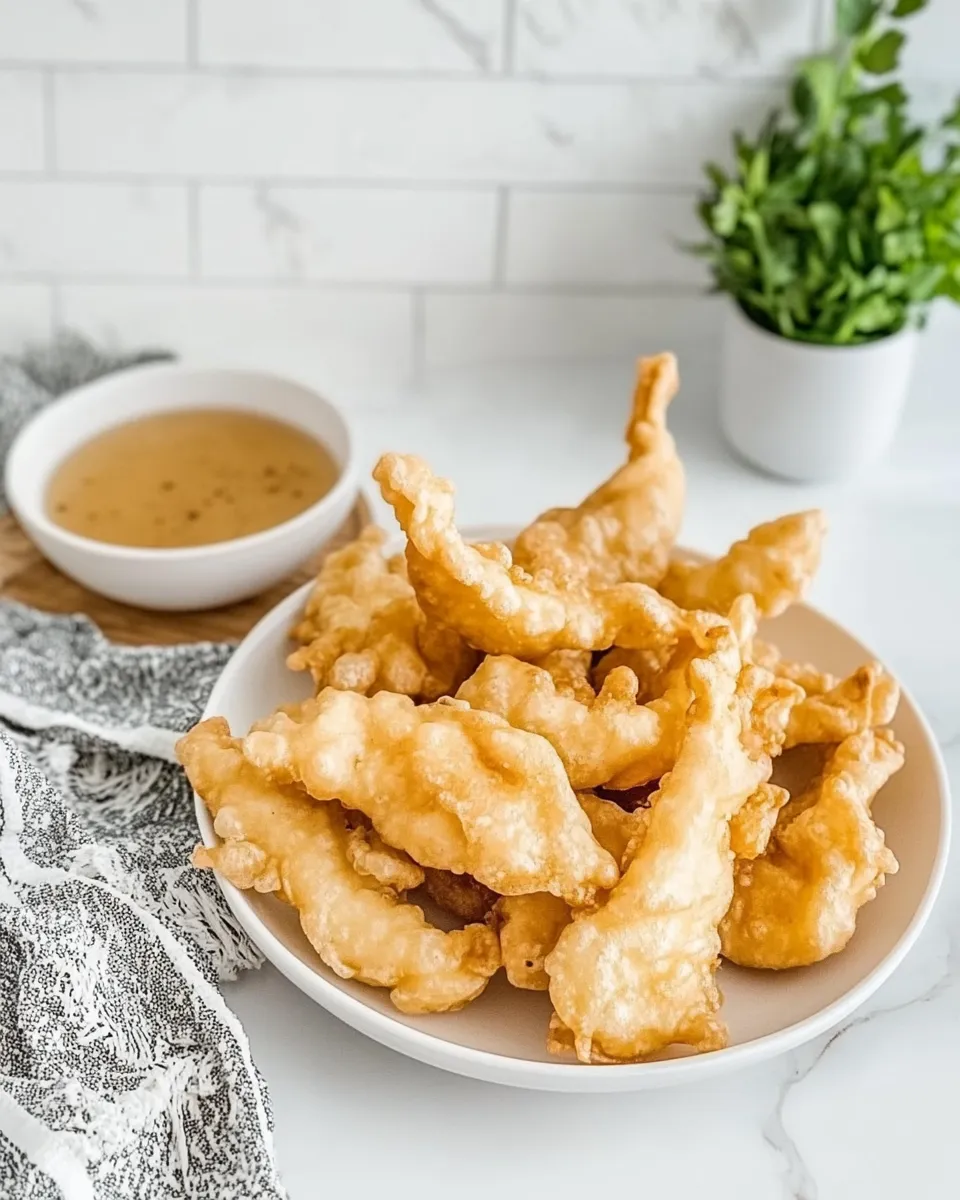
- Preferred dipping sauce — optional; soy-based, ponzu, or sweet chili all work well.
Step-by-Step: Chicken Tempura
- Cut the chicken breasts into strips and place them in a bowl. Add 2 1/2 tablespoons soy sauce, 1/2 teaspoon salt, and 1/2 teaspoon black pepper. Toss to coat evenly and set aside to marinate while you prepare the batter.
- In a separate bowl, sift (or whisk) together 3/4 cup all-purpose flour, 5 tablespoons cornstarch, and 1/4 teaspoon baking soda.
- Add 1 large lightly beaten egg and 1 cup cold sparkling water to the dry mixture. Stir gently with a fork or spatula until just combined; the batter should remain slightly lumpy. Do not overmix.
- Pour vegetable oil into a deep pan or pot and heat it to 350°F. Use a thermometer if available. Keep the oil at this temperature while frying.
- Lightly shake excess marinade off the chicken strips. Working in small batches so the oil temperature stays near 350°F, dip each piece into the batter, letting excess batter drip back into the bowl.
- Carefully add battered chicken to the hot oil and fry 2–3 minutes per side, or until the batter is crisp and the chicken is cooked through. Do not overcrowd the pan; adjust batch size as needed to maintain temperature.
- Remove the fried chicken with a slotted spoon and drain on paper towels. Repeat with remaining chicken.
- Serve immediately with your preferred dipping sauce, if desired.
What Sets This Recipe Apart
There are a few deliberate choices here that make a noticeable difference. First, sparkling water: the carbonation helps keep the batter light without adding extra leaveners or complicated steps. Second, the high ratio of cornstarch to flour gives the crust a shatteringly crisp texture rather than a dense coating. Finally, minimal mixing preserves small pockets of air, producing a lacy finish after frying.
Another point: a quick soy-based marinade for the chicken adds depth without masking the tempura’s delicate texture. It seasons the meat internally so that every bite is flavorful, even if you skip the dipping sauce.
Budget & Availability Swaps
If you’re short on an ingredient or shopping on a budget, here are effective swaps that won’t sabotage the result:
- Sparkling water — you can use club soda or seltzer; keep it cold for best results.
- Cornstarch — if you don’t have cornstarch, arrowroot can work in a pinch, though texture will differ slightly.
- All-purpose flour — plain wheat flour works fine. For a lighter result, some cooks blend a little rice flour in, but that’s optional.
- Vegetable oil — any neutral, high-smoke-point oil (canola, peanut, sunflower) will do.
- Chicken breasts — if thighs are what you have, you can use them; they’ll take a little longer to cook and will be juicier.
Equipment Breakdown
Good equipment keeps this process safe and predictable. Here’s what I use and why:
- Deep pan or pot — deep enough to hold oil without risk of overflow when food is added.
- Candy or frying thermometer — essential to maintain 350°F; accurate frying is all about temperature.
- Mixing bowls — one for the marinade, one for the dry mix, and one for the batter.
- Slotted spoon or spider skimmer — for safely lifting fried pieces.
- Paper towels or a wire rack set over a sheet pan — for draining excess oil without steaming the crust.
- Tongs or chopsticks — for easing pieces into the oil and turning them if needed.
Things That Go Wrong
Even simple recipes give trouble if one variable goes unchecked. Here are the most frequent problems and how to spot them early:
- Soggy crust — usually caused by oil that’s too cool or overcrowding the pan. If the oil dips below 325–330°F, the batter soaks up oil instead of sealing quickly.
- Thick, heavy batter — overmixing develops gluten and deflates the bubbles you want. Stir just until combined; lumps are fine.
- Undercooked chicken — frying too fast on the outside can mask raw centers if pieces are too thick. Cut strips uniformly and monitor time carefully.
- Oil spatter — wet pieces or excess marinade will cause oil to spit. Pat chicken lightly if marinade pools, and lower pieces carefully.
Health-Conscious Tweaks
If you’re watching calories or oil intake, there are adjustments that keep the spirit of tempura without sacrificing texture entirely:
- Shallow-fry instead of deep-fry — use less oil and fry in a wide skillet, spooning hot oil over pieces to mimic immersion. Expect slightly heavier crust but less oil absorption.
- Drain well — transfer fried chicken to a wire rack rather than paper towels to avoid re-soaking in pooled oil.
- Use lean cuts — chicken breast is already lean; trim visible fat and keep strips uniform to avoid overcooking.
What Could Go Wrong

This section is a quick troubleshooting checklist when the final result isn’t what you expected:
- Batter falls off: oil was not hot enough or batter too thin. Let oil return to temperature between batches and check batter consistency.
- Crust is pale and soft: oil temperature too low or fried pieces sat too long under a cover. Keep the surface exposed and serve immediately.
- Excessive oiliness: batter absorbed oil due to overcrowding or used oil at the wrong temperature. Maintain 350°F and lower batch size.
- Uneven cooking: pieces were different sizes. Aim for uniform strips for consistent timing.
Shelf Life & Storage
Tempura is best the moment it comes out of the oil. That said, if you need to store leftovers, follow these steps to preserve texture and safety:
- Short-term (refrigerator): cool briefly on a rack, then transfer to an airtight container and refrigerate up to 2 days. Reheat in a 375°F oven on a wire rack until hot and crisp, about 8–10 minutes.
- Freezing: flash-freeze pieces on a tray until firm, then transfer to a freezer bag. Freeze up to 1 month. Reheat from frozen in a hot oven or an air fryer to restore crispness.
- Do not store fried tempura in a sealed container at room temperature for long; steam will make it soggy and bacteria can grow if left too long.
Helpful Q&A
Q: Can I use cold tap water instead of sparkling water?
A: Sparkling water adds lightness through carbonation. If you don’t have it, use ice-cold water; the batter will still work but may be slightly less airy.
Q: How do I know when the chicken is cooked through?
A: Fry 2–3 minutes per side as the recipe indicates for typical strips. The best check is a thermometer — the internal temperature should reach 165°F. If you don’t have one, cut one open to ensure there’s no pink center.
Q: Can I prepare the batter ahead?
A: I don’t recommend making the batter far in advance; it will lose its texture. Mix it shortly before frying and keep it chilled until use.
Q: What dipping sauce works best?
A: A simple soy-plus-citrus (ponzu), a sweet chili sauce, or even a light mayo-based dip are all excellent. The recipe leaves this optional so you can choose what you enjoy most.
Make It Tonight
Plan for about 20–30 minutes total: 5 minutes to marinate the chicken while you whisk dry ingredients and chill the sparkling water, 5 minutes to mix the batter and heat oil, and 10–20 minutes to fry in batches. Start with your dipping sauce ready and a rack or paper towels set up for draining. Keep the oil at 350°F and work in small batches for the crispiest results.
Serve the chicken tempura hot with steamed rice, a light salad, or as finger food with several dipping sauces for variety. It’s simple, fast, and reliably satisfying — a weekday win in my book. If you try it, let me know how your batter turned out and what dipping sauce you chose. Happy frying!

Chicken Tempura
Ingredients
Ingredients
- 1 poundchicken breasts
- 2 1/2 tablespoonssoy sauce
- 1/2 teaspoonsalt
- 1/2 teaspoonblack pepper
- 3/4 cupall-purpose flour
- 5 tablespoonscornstarch
- 1/4 teaspoonbaking soda
- 1 large egglightly beaten
- 1 cupcold sparkling water
- Vegetable oilfor frying
- Preferred dipping sauceoptional
Instructions
Instructions
- Cut the chicken breasts into strips and place them in a bowl. Add 2 1/2 tablespoons soy sauce, 1/2 teaspoon salt, and 1/2 teaspoon black pepper. Toss to coat evenly and set aside to marinate while you prepare the batter.
- In a separate bowl, sift (or whisk) together 3/4 cup all-purpose flour, 5 tablespoons cornstarch, and 1/4 teaspoon baking soda.
- Add 1 large lightly beaten egg and 1 cup cold sparkling water to the dry mixture. Stir gently with a fork or spatula until just combined; the batter should remain slightly lumpy. Do not overmix.
- Pour vegetable oil into a deep pan or pot and heat it to 350°F. Use a thermometer if available. Keep the oil at this temperature while frying.
- Lightly shake excess marinade off the chicken strips. Working in small batches so the oil temperature stays near 350°F, dip each piece into the batter, letting excess batter drip back into the bowl.
- Carefully add battered chicken to the hot oil and fry 2–3 minutes per side, or until the batter is crisp and the chicken is cooked through. Do not overcrowd the pan; adjust batch size as needed to maintain temperature.
- Remove the fried chicken with a slotted spoon and drain on paper towels. Repeat with remaining chicken.
- Serve immediately with your preferred dipping sauce, if desired.
Equipment
- deep pan or pot
- Cooking thermometer
- Mixing Bowls
- Whisk or fork
- Slotted Spoon
- Paper Towels