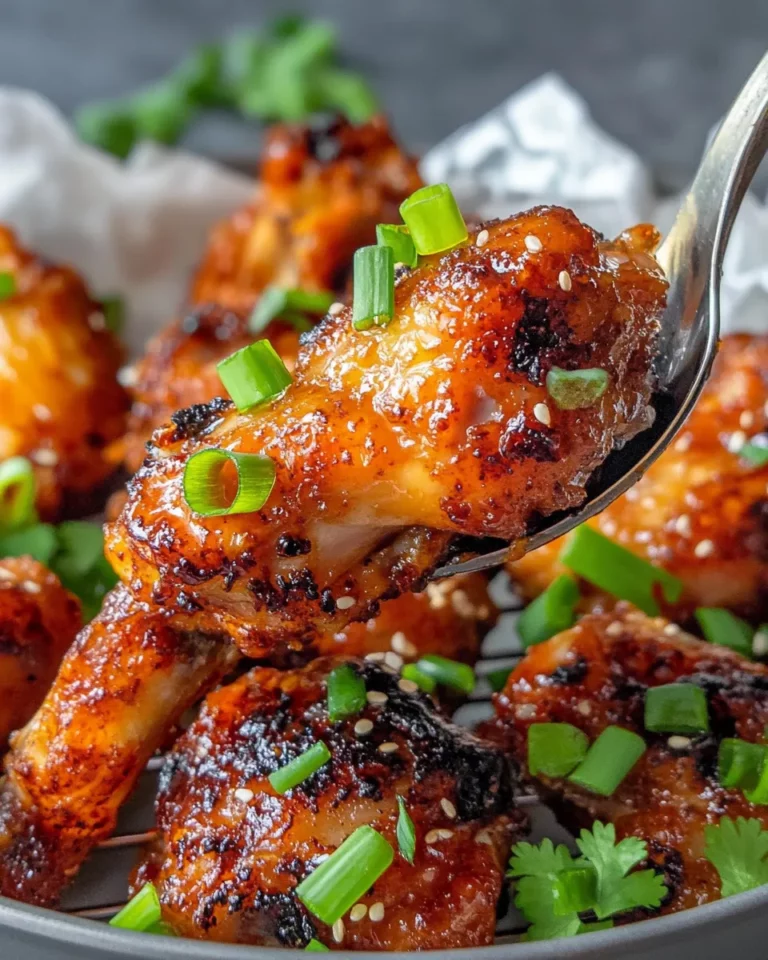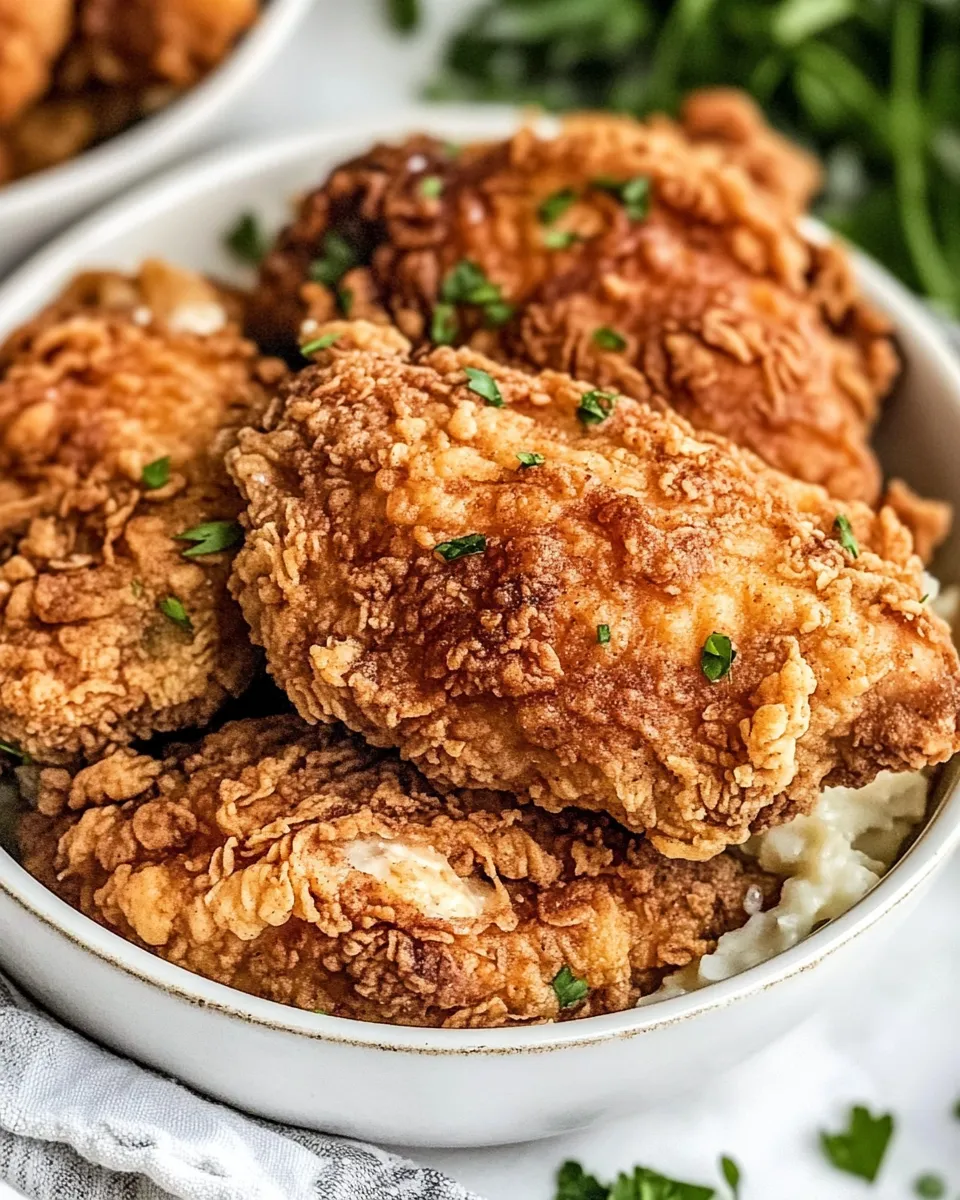
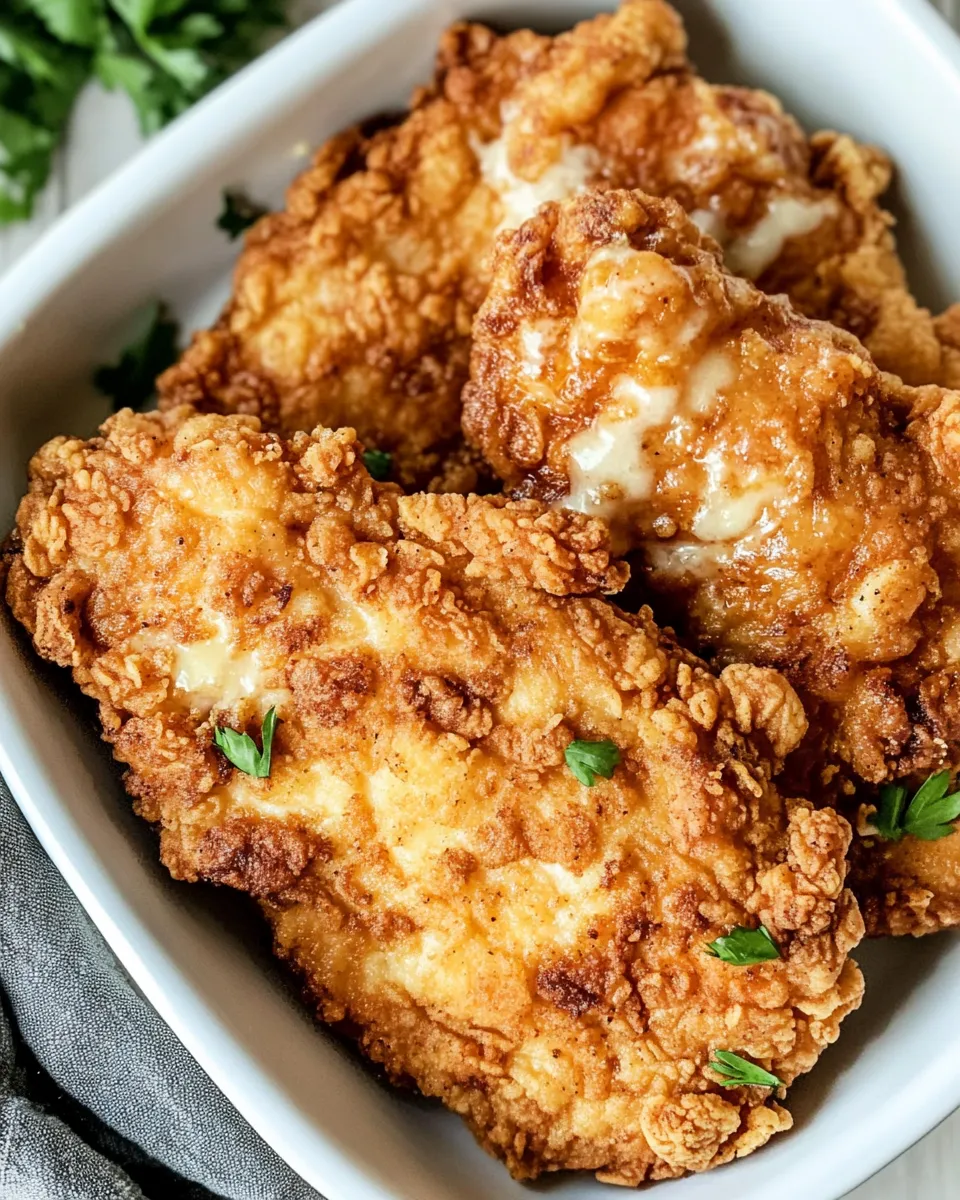
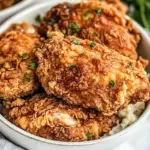
Chicken Fried Chicken
Chicken fried chicken is one of those weekday dinner heroes: comforting, reliably crispy, and fast enough to make after work. This version keeps the technique straightforward—thin cutlets dredged in a lightly seasoned flour mix, shallow-fried to a golden crust, and finished with a simple milk gravy. No complicated batter, no deep-fryer required.
I test this method because texture matters: the meat needs to be tender, the crust crisp, and the gravy smooth. The recipe uses basic pantry ingredients and a little attention to timing so the chicken stays juicy while the exterior turns beautifully brown.
Below you’ll find the ingredient list, step-by-step directions exactly as written, practical tools and troubleshooting, and small ways to vary the flavors with seasonal touches. Read through once, then follow the steps—this is a recipe that rewards straightforward execution.
What We’re Using

Simple, pantry-friendly ingredients and a short list of tools give you a classic plate of chicken fried chicken with a creamy gravy. The foundation is thin chicken cutlets, a buttermilk soak, a flour-and-cornstarch coating, and a milk-based gravy built from the pan’s flavors.
Ingredients
- 2 boneless skinless chicken breasts — will be sliced in half to make four thin cutlets; pound gently if they need thinning.
- 1 cup buttermilk — tenderizes and adds a touch of tang to the chicken before dredging.
- 1 large egg — binds the buttermilk for even coating adhesion.
- ¾ cup all-purpose flour — part of the dry coating for crispness.
- ¼ cup cornstarch — lightens the crust and helps it stay crisp.
- 1 teaspoon kosher salt — seasons the flour mix for balanced flavor.
- ½ teaspoon garlic powder — provides a subtle savory background.
- ½ teaspoon ground black pepper — classic peppery note for the coating.
- ½ teaspoon white pepper — adds a faint heat and color-neutral pepper flavor.
- vegetable oil (for frying) — neutral oil for shallow frying; you need about 1 inch depth in the skillet.
- ¼ cup unsalted butter (½ stick) — base for the gravy; gives richness without extra salt.
- ¼ cup all-purpose flour — makes the roux for the gravy; cooks briefly until golden.
- 2 cups whole milk — the liquid for the gravy; gives a creamy texture when simmered.
- kosher salt (to taste) — for seasoning the gravy and finishing the dish.
- ground black pepper (to taste) — for seasoning the gravy and final plate.
Directions: Chicken Fried Chicken
- Slice each of the 2 boneless skinless chicken breasts in half horizontally to make four thin cutlets. If needed, place each cutlet between two pieces of plastic wrap and gently pound to 1/2-inch thickness.
- In a shallow bowl, whisk together 1 cup buttermilk and 1 large egg until combined.
- In a separate shallow bowl, whisk together 3/4 cup all-purpose flour, 1/4 cup cornstarch, 1 teaspoon kosher salt, 1/2 teaspoon garlic powder, 1/2 teaspoon ground black pepper, and 1/2 teaspoon white pepper.
- Working with one cutlet at a time, dip the cutlet into the buttermilk mixture, letting excess drip off, then press both sides into the flour mixture so it is evenly coated. Place coated cutlets on a wire rack (or a plate) as you go.
- After all cutlets are coated, let them rest on the wire rack while you prepare the frying oil and the gravy.
- Pour vegetable oil into a large skillet to a depth of about 1 inch and heat over medium until the oil is shimmering (but not smoking).
- Fry the chicken in batches as needed so pieces are not crowded. Cook each cutlet 6 to 8 minutes total, turning once or twice, until golden brown on both sides. Remove fried cutlets to a paper towel–lined plate to drain.
- While the chicken drains, make the gravy: in a large saucepan over medium heat, melt 1/4 cup (1/2 stick) unsalted butter. Whisk in 1/4 cup all-purpose flour and cook, stirring, 2 to 3 minutes until the roux is golden and bubbling.
- Gradually whisk in 2 cups whole milk, then bring the mixture to a simmer. Cook, stirring frequently, 3 to 4 minutes until the gravy is slightly thickened. Season with kosher salt and ground black pepper to taste. Remove from heat.
- Serve the fried chicken hot with the gravy spooned over or on the side.
Why It’s Crowd-Pleasing
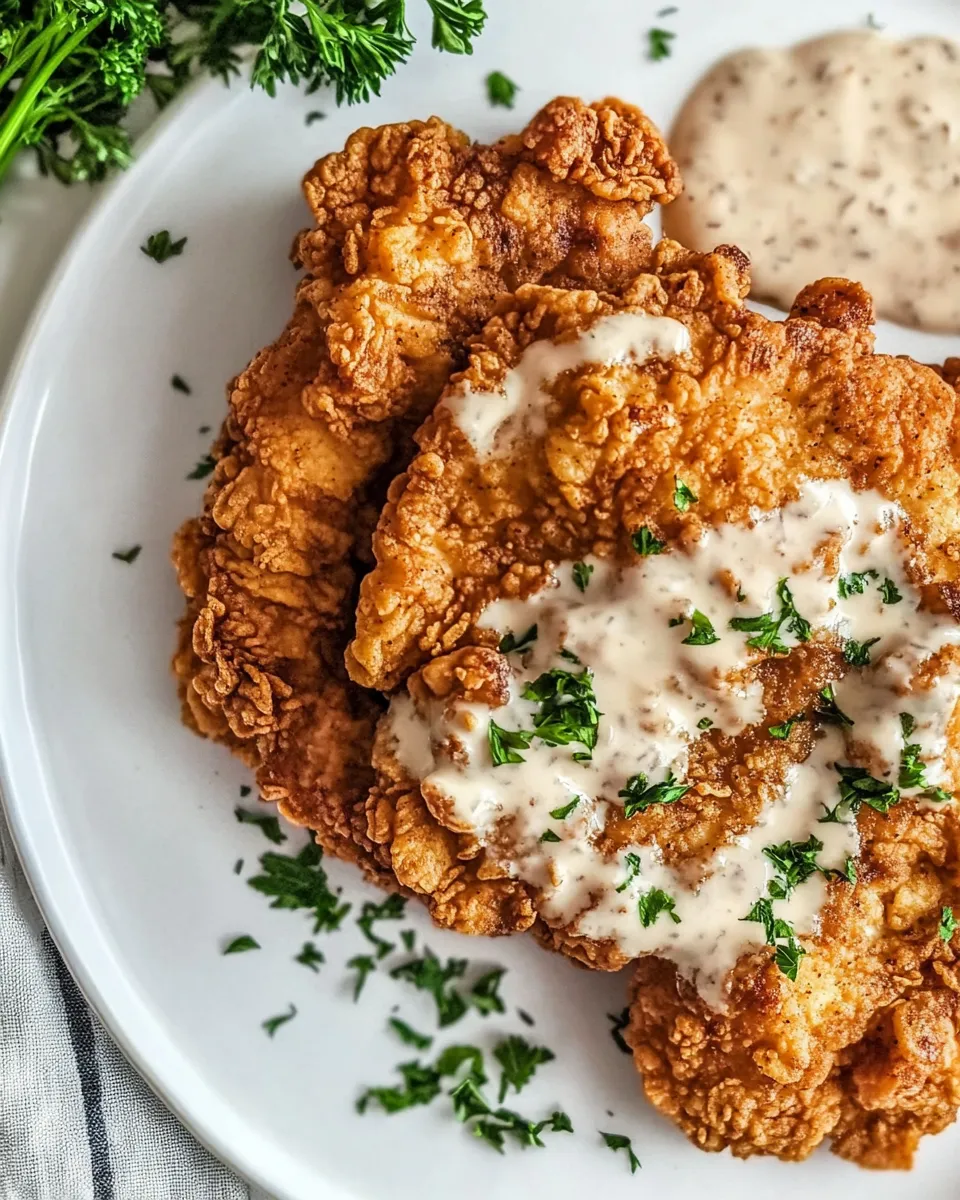
This dish hits comforting cross-sections: crispy exterior, tender interior, and a savory gravy that ties the plate together. It’s familiar and nostalgic for many people, but also reliably satisfying for anyone who likes texture contrasts. The buttermilk-egg soak helps keep the chicken moist while the cornstarch in the coating prevents a heavy, doughy crust, producing a delicate crisp instead.
It’s also flexible: serve it over mashed potatoes or spoon the gravy over rice or waffles for an indulgent twist. Portion-wise it’s easy to scale up by increasing the number of cutlets and frying in batches.
Texture-Safe Substitutions
If you need to tweak textures for dietary reasons or preference, here are safe swaps that keep the structure of the dish:
– For a lighter crust: increase the cornstarch proportionally to the flour in the dredge (no precise measurement provided here—adjust gradually) or use a mix of panko and flour for a crunchier bite.
– For a firmer but not heavy gravy: use lower-fat milk but finish with a small knob of butter off heat for richness.
– If you want a gluten-free crust, substitute a 1:1 gluten-free flour blend in both the coating and gravy roux; note that cooking times for the roux may be slightly different, so watch the color and aroma as you cook.
Toolbox for This Recipe
Having the right tools makes this straightforward:
- Large skillet (for shallow frying) — deep enough for about 1 inch of oil.
- Wire rack — lets excess oil drip off so the crust stays crisp.
- Two shallow bowls — one for the buttermilk-egg mix, one for the dry dredge.
- Thermometer (optional) — to check oil temperature; aim for shimmering, just under smoking.
- Large saucepan — for the gravy so you can whisk steadily without overflow.
- Whisk and tongs — for smooth gravy and safe turning of cutlets.
Troubles You Can Avoid
Here are the most common missteps and how to avoid them:
– Soggy crust: Don’t stack cutlets after frying. Let them rest on a wire rack to keep air circulating. Avoid turning the heat too low; the crust needs steady medium heat to crisp quickly without absorbing too much oil.
– Undercooked centers: Pound cutlets to an even 1/2-inch thickness so they cook through in the 6–8 minute window called for in the recipe. Overcrowding the skillet lowers oil temperature and increases cooking time—fry in batches.
– Lumpy gravy: When you add milk to the roux, do it gradually while whisking constantly. That prevents lumps and produces a silky sauce.
In-Season Flavor Ideas
Seasonal additions let you adapt the dish without changing technique:
– Spring: Add chopped fresh herbs (like chives or parsley) to the finished gravy for brightness. Serve with lightly dressed greens.
– Summer: Pair with a chilled corn salad or slaw for contrast and freshness.
– Fall: Stir a touch of roasted garlic into the gravy or serve with roasted root vegetables.
– Winter: A smear of Dijon in the gravy or a finishing grind of black pepper can add depth and warmth.
Behind the Recipe
Chicken fried chicken is an American adaptation of pan-fried cutlets—simple technique, big comfort. The buttermilk soak is traditional for tenderizing and flavor. Cornstarch in the coating is a modern tweak that crisps faster and lighter than flour alone. The milk gravy is a classic pan sauce made by turning butter into a roux and using whole milk for body and silky mouthfeel.
When I developed this version, my goal was repeatability: thin, even cutlets; a measured buttermilk-egg dip; and a dry mix that clings and fries into an even crust. The gravy is intentionally simple so it complements rather than competes with the chicken.
Keep-It-Fresh Plan
Leftovers refrigeration: Store cooled chicken and separate gravy in airtight containers in the refrigerator for up to 3 days. Keep them separated if you want to preserve the crust as long as possible.
Reheating: Warm the chicken in a single layer on a sheet pan in a 350°F oven for 8–12 minutes to re-crisp the exterior. Reheat the gravy gently on the stovetop over low heat, whisking occasionally; thin with a bit of milk if it becomes too thick.
Freezing: You can freeze cooked chicken (wrapped well) for up to 1 month. Reheat from frozen in a moderate oven, increasing time until heated through; texture will soften after freezing and reheating.
Frequently Asked Questions
Can I use skin-on chicken? Yes, but adjust frying time and watch for flare-ups if the skin releases extra fat. This recipe is written for skinless boneless breasts sliced into cutlets for even cooking.
Is buttermilk necessary? Buttermilk tenderizes and adds tang, but you can substitute plain yogurt thinned with a little milk in a pinch. The recipe’s measurements for buttermilk are part of the coating step, so follow the same volume if substituting.
How do I know when the oil is ready? The recipe describes heating the oil until it’s shimmering but not smoking. If you have a thermometer, aim for around 350°F. If the oil smokes, lower the heat and let it cool slightly before frying.
Can I cook this in a deep fryer or air fryer? A deep fryer set to the same temperature will work; adjust cooking time as needed. An air fryer can produce a similar crisp but will change texture and may need a light spray of oil so the coating browns evenly.
Wrap-Up
This chicken fried chicken hits the sweet spot of comfort food: crisp coating, tender meat, and a simple, creamy gravy. The method is forgiving—thin the cutlets, coat evenly, fry in manageable batches, and finish with a well-tempered roux-and-milk gravy. Read the steps through once, set up your station, and you’ll have a satisfying, crowd-pleasing dinner in under an hour.
Make it as written the first time to understand the balance, then adjust seasonings and sides to fit your family’s favorites. Serve hot, spoon the gravy where it will do the most good, and enjoy the contrast of crunch and cream.
Chicken Fried Chicken
Ingredients
Ingredients
- 2 boneless skinless chicken breasts *
- 1 cupbuttermilk
- 1 largeegg
- 3/4 cupall-purpose flour
- 1/4 cupcornstarch
- 1 teaspoonkosher salt
- 1/2 teaspoongarlic powder
- 1/2 teaspoonground black pepper
- 1/2 teaspoonwhite pepper
- vegetable oil for frying**
- 1/4 cupunsalted butter 1/2 stick
- 1/4 cupall-purpose flour
- 2 cupswhole milk
- kosher salt to taste
- ground black pepper to taste
Instructions
Instructions
- Slice each of the 2 boneless skinless chicken breasts in half horizontally to make four thin cutlets. If needed, place each cutlet between two pieces of plastic wrap and gently pound to 1/2-inch thickness.
- In a shallow bowl, whisk together 1 cup buttermilk and 1 large egg until combined.
- In a separate shallow bowl, whisk together 3/4 cup all-purpose flour, 1/4 cup cornstarch, 1 teaspoon kosher salt, 1/2 teaspoon garlic powder, 1/2 teaspoon ground black pepper, and 1/2 teaspoon white pepper.
- Working with one cutlet at a time, dip the cutlet into the buttermilk mixture, letting excess drip off, then press both sides into the flour mixture so it is evenly coated. Place coated cutlets on a wire rack (or a plate) as you go.
- After all cutlets are coated, let them rest on the wire rack while you prepare the frying oil and the gravy.
- Pour vegetable oil into a large skillet to a depth of about 1 inch and heat over medium until the oil is shimmering (but not smoking).
- Fry the chicken in batches as needed so pieces are not crowded. Cook each cutlet 6 to 8 minutes total, turning once or twice, until golden brown on both sides. Remove fried cutlets to a paper towel–lined plate to drain.
- While the chicken drains, make the gravy: in a large saucepan over medium heat, melt 1/4 cup (1/2 stick) unsalted butter. Whisk in 1/4 cup all-purpose flour and cook, stirring, 2 to 3 minutes until the roux is golden and bubbling.
- Gradually whisk in 2 cups whole milk, then bring the mixture to a simmer. Cook, stirring frequently, 3 to 4 minutes until the gravy is slightly thickened. Season with kosher salt and ground black pepper to taste. Remove from heat.
- Serve the fried chicken hot with the gravy spooned over or on the side.
Equipment
- Large Skillet
- Wire Rack
- Whisk
- Large Saucepan
- Plate
- Paper Towels
Notes
Fry chicken in batches if needed. You don’t want to overcrowd it, or the oil temperature will get too low, creating greasy fried chicken.
Speaking of thermometers, use a meat thermometer to make sure your chicken is fullycooked at 165°F.
Season the gravy with a light hand–I recommend adding salt and pepper right at the end to your taste.