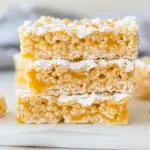
Caramel Rice Krispie Treats
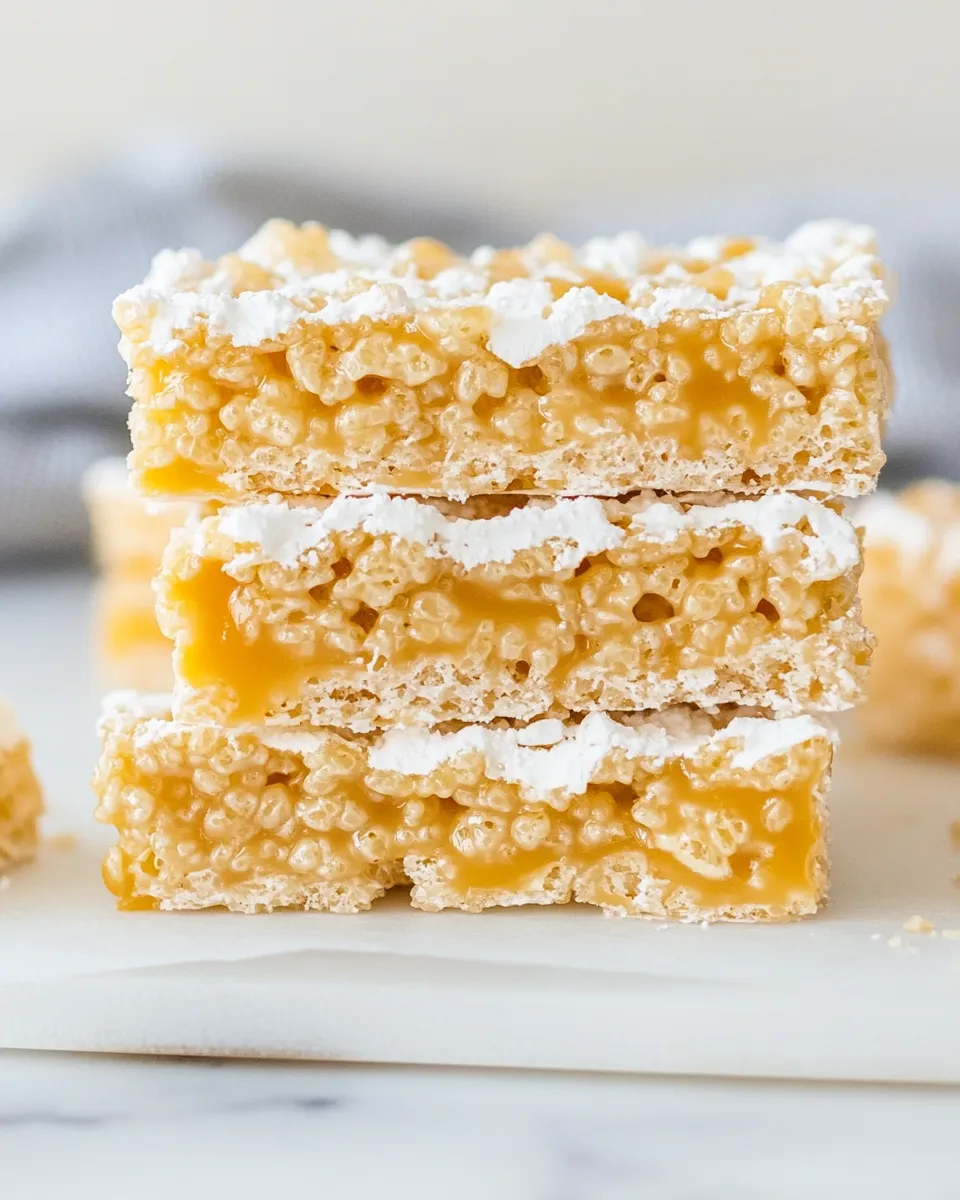
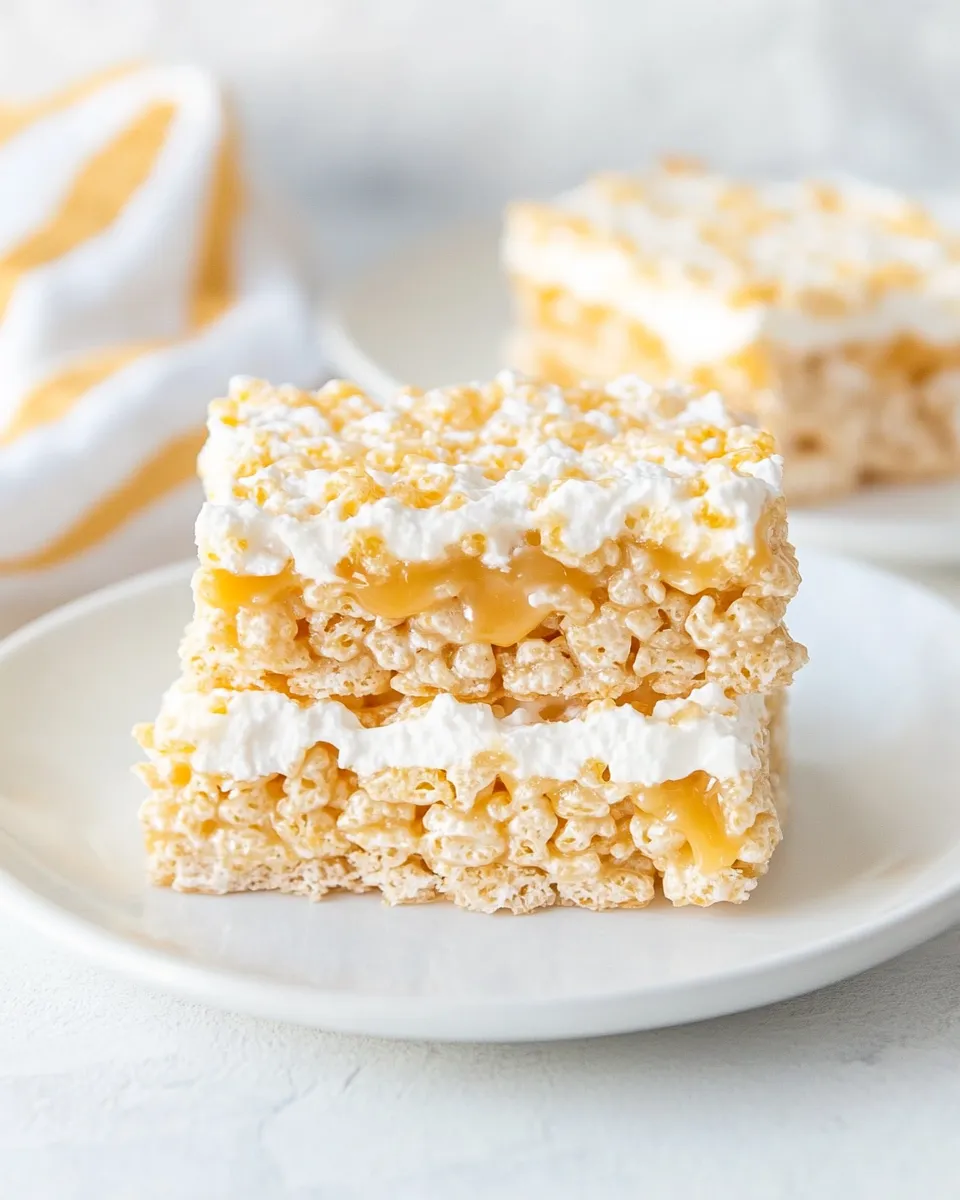
I make these layered Caramel Rice Krispie Treats whenever I want something that’s indulgent, handheld, and impossible to resist. They’re a step up from the classic cereal-and-marshmallow bar — the middle layer of homemade caramel and sweetened condensed milk turns every bite into a little chewy, sticky celebration. No fancy techniques, just a few pans, a bowl, and a short period of patience while they set.
This recipe is straightforward and forgiving. The method is two simple Rice Krispie layers with a warm caramel sandwich in the middle; you press, pour, press, chill, and slice. That sequence keeps things tidy and lets you focus on getting good coverage so every square has a caramel center.
I’ll walk you through exactly what to have on hand, what tools make life easier, and a few practical do-not-do warnings that save you cleanup and heartbreak. If you like buttery, sweet, and a little crunchy, this one will become a repeat in your rotation — holiday trays, classroom parties, or a weeknight treat for the crew.
What You’ll Need

Ingredients
- 8 cups Rice Krispies — Gives you two 4-cup layers; measure so both layers are even.
- ¾ cup butter, divided — Half melts with marshmallows for each crispy layer; keeps the bars tender and rich.
- 2 packages, 10 ounces each, miniature marshmallows — One package per Rice Krispie layer; they bind the cereal together.
- 11 ounce package caramels, unwrapped — The gooey center; unwrap before melting for an even caramel.
- 14 ounce can sweetened condensed milk — Combined with caramels and butter to make a spreadable, stable caramel layer.
Caramel Rice Krispie Treats — Do This Next
- Spray a 10″ x 15″ pan with nonstick spray and set aside.
- In a large microwave-safe bowl combine 1/4 cup butter and 1 package (10 oz) miniature marshmallows. Microwave on high 1 minute; stir until smooth. If not fully melted, microwave in additional 30-second intervals, stirring between, until melted and smooth.
- Add 4 cups Rice Krispies to the bowl and stir until evenly coated. Gently press this mixture into the bottom of the prepared pan to form an even layer.
- In a medium saucepan combine the unwrapped 11-ounce caramels, 1/4 cup butter, and the entire 14-ounce can sweetened condensed milk. Melt over medium heat, stirring frequently, until smooth and combined. Remove from heat.
- Pour the caramel evenly over the Rice Krispie layer in the pan and spread to the edges.
- In a large microwave-safe bowl combine the remaining 1/4 cup butter and the second package (10 oz) miniature marshmallows. Microwave on high 1 minute; stir until smooth. If not fully melted, microwave in additional 30-second intervals, stirring between, until melted and smooth.
- Add the remaining 4 cups Rice Krispies to the bowl and stir until evenly coated. Gently press this mixture over the caramel layer to form the top layer.
- Refrigerate at least 2 hours to set. Cut into squares and serve.
Why This Recipe is a Keeper
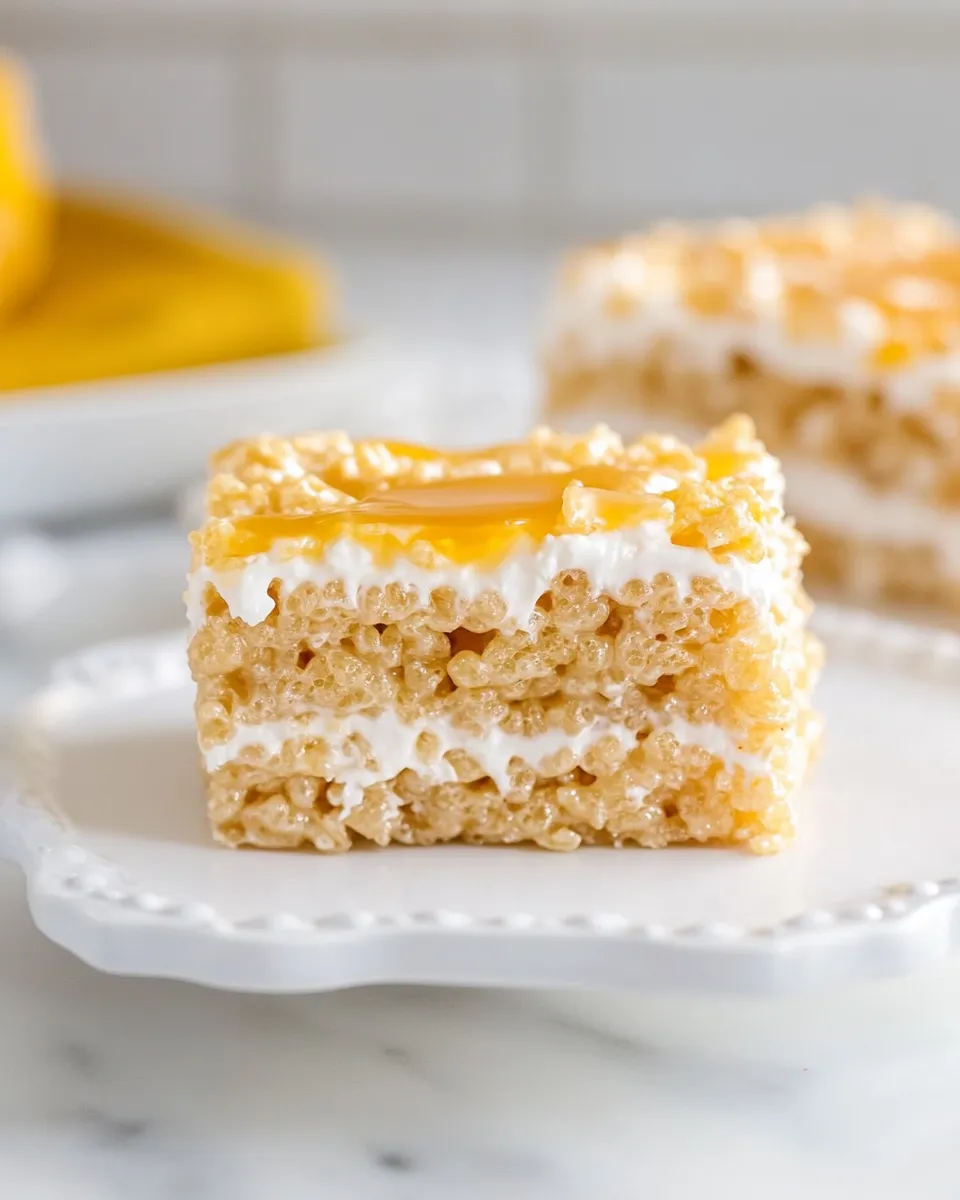
These treats hit three textures at once: the snap of toasted cereal, the soft chew of marshmallow, and a dense, slightly gooey caramel center. That contrast keeps each bite interesting. They’re also highly portable and slice neatly after chilling, so they travel well to bake sales and potlucks.
The method is repeatable and predictable. You don’t need tempering skills or a candy thermometer, and the microwave steps for the marshmallow layers are quick. The caramel layer is stabilized with sweetened condensed milk and a touch of butter so it’s spreadable and sets firm enough to slice cleanly without cracking the top layer.
Finally, it’s a flexible template. If you want to dress them up — a sprinkle of flaky salt, a drizzle of chocolate, or a handful of chopped nuts — those additions come after the caramel goes into the pan or just before serving. But even plain, they’re satisfying and crowd-pleasing.
No-Store Runs Needed
One of the best things about this recipe is that the ingredient list is pantry-friendly. Most kitchens that bake already have butter, marshmallows, and cereal. The only specialty items are the caramels and sweetened condensed milk — both shelf-stable and often found with baking ingredients.
If you’re preparing in advance, check your pantry for extra marshmallows and a can of condensed milk. Otherwise, you should be able to pull everything together without a special shopping trip if you keep a few baking basics on hand.
Recommended Tools
Essentials
- 10″ x 15″ baking pan — The recipe is sized for this pan; it gives a good thickness for slicing.
- Nonstick spray — For easy removal and clean edges.
- Large microwave-safe bowl — For melting marshmallows and combining with cereal.
- Medium saucepan — To melt caramels with condensed milk and butter safely and evenly.
- Spatula or wooden spoon — For stirring and pressing layers into the pan.
Nice-to-have
- Offset spatula — Makes spreading the caramel and pressing the top layer smoother.
- Sharp chef’s knife or bench scraper — For cleaner cuts after chilling.
- Silicone mat or parchment — Optional for easier workspace cleanup.
Don’t Do This
Don’t skip the refrigeration step. The caramel needs time to firm up. Cutting too soon leads to a runny middle and messy squares. Chill at least two hours, and if your kitchen is warm, give it more time.
Don’t skip dividing the marshmallow work into two batches. Trying to melt and mix all 20 ounces of marshmallows at once with 8 cups of cereal makes the mixture harder to handle and less likely to press evenly into thin, controlled layers.
Don’t pour hot caramel and immediately try to smooth the top layer on without a little patience. Let the caramel sit a minute to be spreadable but not so hot that it melts the top marshmallow layer and causes sinking. Work efficiently, but carefully.
Seasonal Adaptations
These bars adapt well for holidays and seasons. For the holidays, a light sprinkle of flaky sea salt over the caramel before you add the top layer gives a great sweet-salty contrast that reads festive. For fall, fold 1/2 teaspoon ground cinnamon into each marshmallow batch for a subtle warmth that complements the caramel.
In spring, fold in 1/2 cup of toasted coconut or chopped toasted pecans into one of the Rice Krispie layers for texture and a seasonal twist. For summer gatherings, top with a thin drizzle of melted dark chocolate after the bars have chilled; refrigerate briefly to set the drizzle. Keep additions modest so they don’t overwhelm the layers.
Behind the Recipe
I started making a layered version of Rice Krispie treats because straight-up cereal bars felt too one-note for holiday dessert trays. The idea of a caramel center came from wanting a more substantial bite — something that felt indulgent without becoming fragile or needing extra refrigeration. Sweetened condensed milk was the turning point: it stabilizes the caramel and gives it body without the risk of graininess that comes with overcooking sugar.
The recipe has practical roots. Using two identical Rice Krispie layers keeps prep simple and allows you to use the same steps twice. The microwave method for the marshmallows is fast and forgiving; it’s how I get reliable results in a home kitchen without standing over a pot and continually stirring. Over time I learned that pressing the first layer firmly but not aggressively helps the caramel spread evenly; too much pressure packs the cereal and creates a dense bottom that doesn’t match the top.
Keep-It-Fresh Plan
These bars store well for several days if you keep them airtight. I recommend cutting into squares after they’ve chilled, then layering them between sheets of parchment in an airtight container. They’ll keep at room temperature for 2–3 days in a cool kitchen. If your house is warm, refrigerate and bring to room temperature for 10–15 minutes before serving so the caramel softens slightly.
For longer storage, you can freeze the bars. Flash-freeze individual squares on a tray until firm, then transfer to a freezer bag with parchment between layers. Thaw overnight in the refrigerator and then sit at room temperature briefly before serving. Be aware that freezing may slightly change the texture of the caramel — it will be firmer when cold.
Questions People Ask
- Can I use regular marshmallows instead of miniature? — Yes, you can. Use the equivalent volume; the recipe calls for two 10-ounce packages of miniature marshmallows to divide between the layers. Larger marshmallows will work but may take slightly longer to melt evenly.
- What if my caramel gets grainy? — This caramel uses caramels and sweetened condensed milk, which reduces the risk of graininess compared to cooking sugar from scratch. Stir frequently while melting and use medium heat to avoid scorching.
- Can I make this smaller or in a different pan? — You can scale down, but the layer thickness will change. If using a smaller pan, expect thicker bars; adjust chilling time as needed. For best results stick with a 10″ x 15″ pan as written.
- How do I get neat squares? — Chill fully, then use a sharp knife dipped in hot water and wiped dry between cuts. Press the knife straight down without sawing for cleaner edges.
- Can I add mix-ins like chocolate chips or nuts? — Yes, but add modestly. Too many mix-ins can interfere with pressing the top layer. Sprinkle a light layer of nuts or chocolate chips on the caramel before you press the top Rice Krispie layer.
See You at the Table
If you try these, start with the recipe as written and get comfortable with the sequence: bottom layer, caramel, top layer, chill. Once you’ve made it once, the small tweaks — a pinch of salt, a dusting of cocoa, or a swap of chopped pecans — become easy. Send me a note about your favorite tweak; I’m always collecting ideas for the next batch.
These bars are practical, portable, and reliably good. They travel well, freeze in a pinch, and bring a crowd-pleasing caramel surprise to every square. Enjoy the process — and the sticky fingers that come as part of the reward.
Caramel Rice Krispie Treats
Ingredients
Ingredients
- 8 cupsRice Krispies
- 3/4 cupbutterdivided
- 2 packages10 ounces each miniature marshmallows
- 11 ouncepackage caramelsunwrapped
- 14 ouncecan sweetened condensed milk
Instructions
Instructions
- Spray a 10" x 15" pan with nonstick spray and set aside.
- In a large microwave-safe bowl combine 1/4 cup butter and 1 package (10 oz) miniature marshmallows. Microwave on high 1 minute; stir until smooth. If not fully melted, microwave in additional 30-second intervals, stirring between, until melted and smooth.
- Add 4 cups Rice Krispies to the bowl and stir until evenly coated. Gently press this mixture into the bottom of the prepared pan to form an even layer.
- In a medium saucepan combine the unwrapped 11-ounce caramels, 1/4 cup butter, and the entire 14-ounce can sweetened condensed milk. Melt over medium heat, stirring frequently, until smooth and combined. Remove from heat.
- Pour the caramel evenly over the Rice Krispie layer in the pan and spread to the edges.
- In a large microwave-safe bowl combine the remaining 1/4 cup butter and the second package (10 oz) miniature marshmallows. Microwave on high 1 minute; stir until smooth. If not fully melted, microwave in additional 30-second intervals, stirring between, until melted and smooth.
- Add the remaining 4 cups Rice Krispies to the bowl and stir until evenly coated. Gently press this mixture over the caramel layer to form the top layer.
- Refrigerate at least 2 hours to set. Cut into squares and serve.
Equipment
- 10 x 15-inch pan
- nonstick spray
- large microwave-safe bowl
- Medium Saucepan
- Mixing Spoon
- Measuring Cups
- Spatula
Notes
Don’t overcook the marshmallows. When you melt them with the butter, start with one minute in the microwave and then stir. If needed, warm them for 30 seconds more so the mixture is smooth.
Once you add the cereal to the melted marshmallow mixture, work quickly to press it into the pan before it sets.
To keep the marshmallow cereal mixture from sticking to your hands, lightly coat your hands with cooking spray before pressing the mixture into the pan.
Don’t skip the chilling step – if you don’t let the bars set up they will be too soft and fall apart when you slice them.
Be sure to store the treats in an airtight container either at room temperature or in the fridge. If they are exposed to air they will dry out and harden.
Make salted caramel rice krispie treats – just sprinkle some sea salt over the caramel filling before you add the top layer.
Love chocolate? Turn them into chocolate caramel bars and drizzle some melted chocolate over the top before you chill them. Or, sprinkle some chocolate chips over the caramel layer!