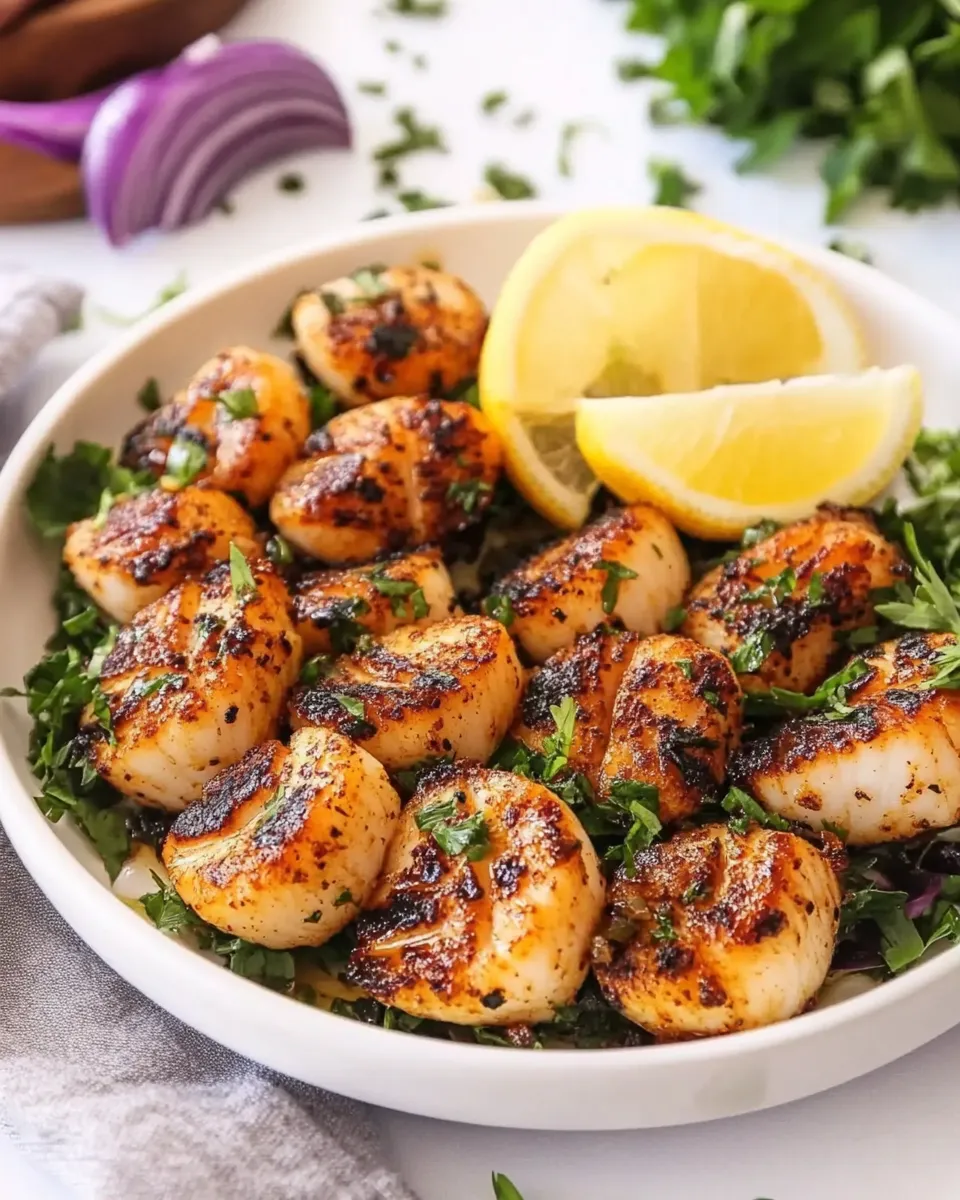
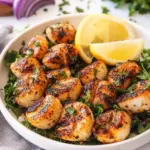
Broiled Scallops
Scallops are one of those quick, elegant proteins that make a weeknight feel special without demanding a whole evening in the kitchen. This broiled scallops recipe is straightforward: minimal prep, bold flavor from butter and Italian seasoning, and a fast finish under a hot broiler. You get a slightly caramelized top, tender interior, and bright lemon at the finish—exactly what good scallops should be.
I keep the technique direct so the natural sweetness of the scallops shines. No heavy batters or complicated sauces. A simple butter-garlic mixture, a quick toss, and five to seven minutes under the broiler. The timing is tight, so a little prep pays off: pat scallops dry, preheat the broiler, and have your lemon wedges ready.
Below you’ll find the ingredient list pulled straight from the source, a step-by-step instruction section that follows the original method exactly, plus practical tips for success, substitutions, equipment, and storage. Read through once, prep briefly, and you’ll have a restaurant-style plate in about 15 minutes.
The Ingredient Lineup

Ingredients
- 1 lb scallops — Large size, patted dry.
- 3 Tablespoons butter — melted.
- 2 garlic cloves — minced.
- 1 Tablespoon Italian seasoning — adds herbal depth.
- 1/2 teaspoon paprika — for color and gentle smokiness.
- 1/4 teaspoon salt and pepper — or to taste.
- 1 lemon — cut into wedges for serving.
How to Prepare Broiled Scallops
- Remove the scallops from their packaging, pat them dry with paper towels, and remove any side muscle if present.
- Position an oven rack about 7–8 inches (approximately 18–20 cm) below the broiler element and preheat the broiler to high.
- Line a baking sheet with aluminum foil. (Do not use parchment.)
- In a small bowl, combine 3 Tablespoons melted butter, 2 minced garlic cloves, 1 Tablespoon Italian seasoning, 1/2 teaspoon paprika, and 1/4 teaspoon salt and pepper (or to taste).
- Arrange the scallops on the prepared baking sheet in a single layer with space between them.
- Spoon or brush the butter-and-seasoning mixture evenly over the scallops and gently toss or turn them so they are coated.
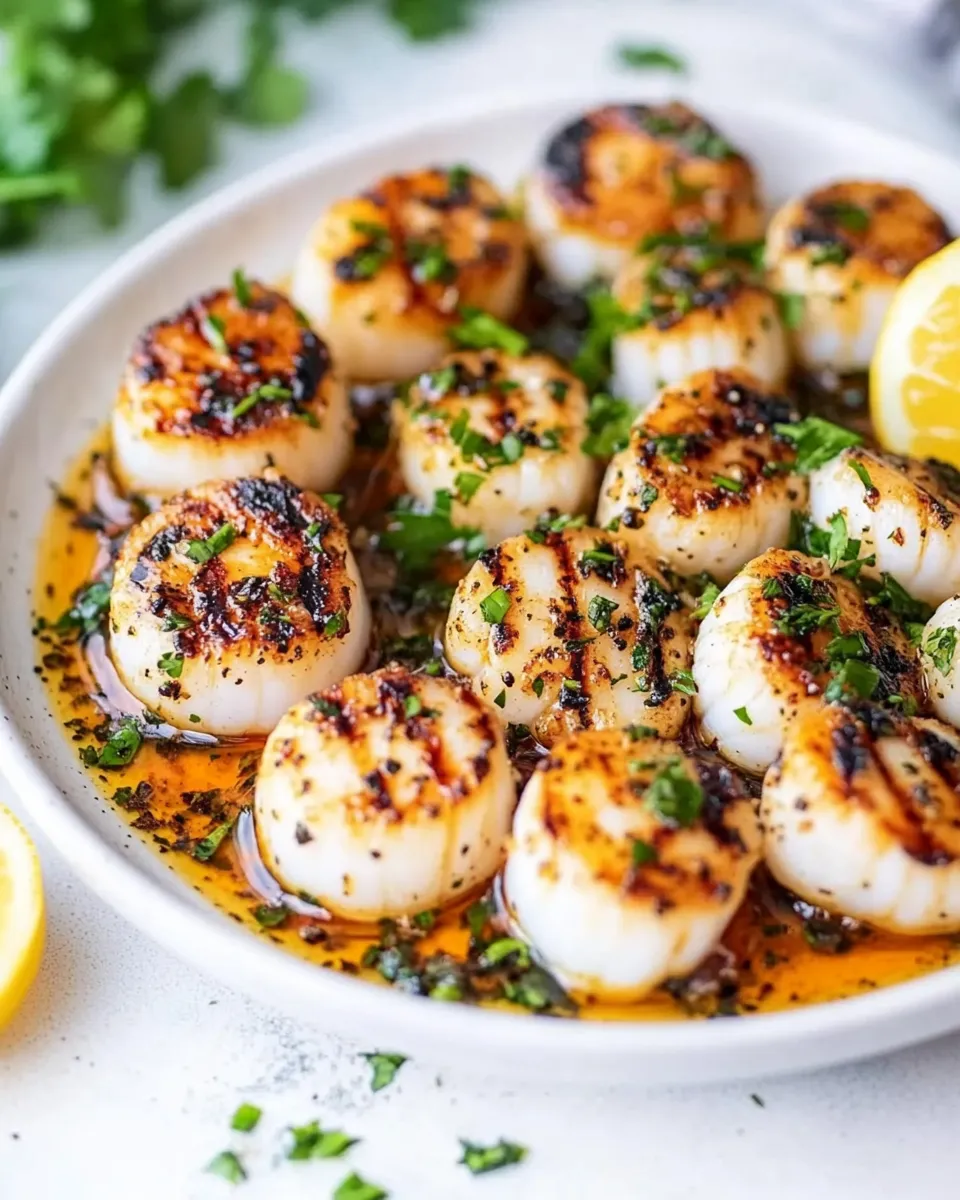
- Broil on the preheated high setting for 5–7 minutes, until the tops are golden and the scallops are just opaque in the center (do not overcook).
- Remove the scallops from the broiler, transfer to plates, and serve with lemon wedges.
Why This Recipe Works
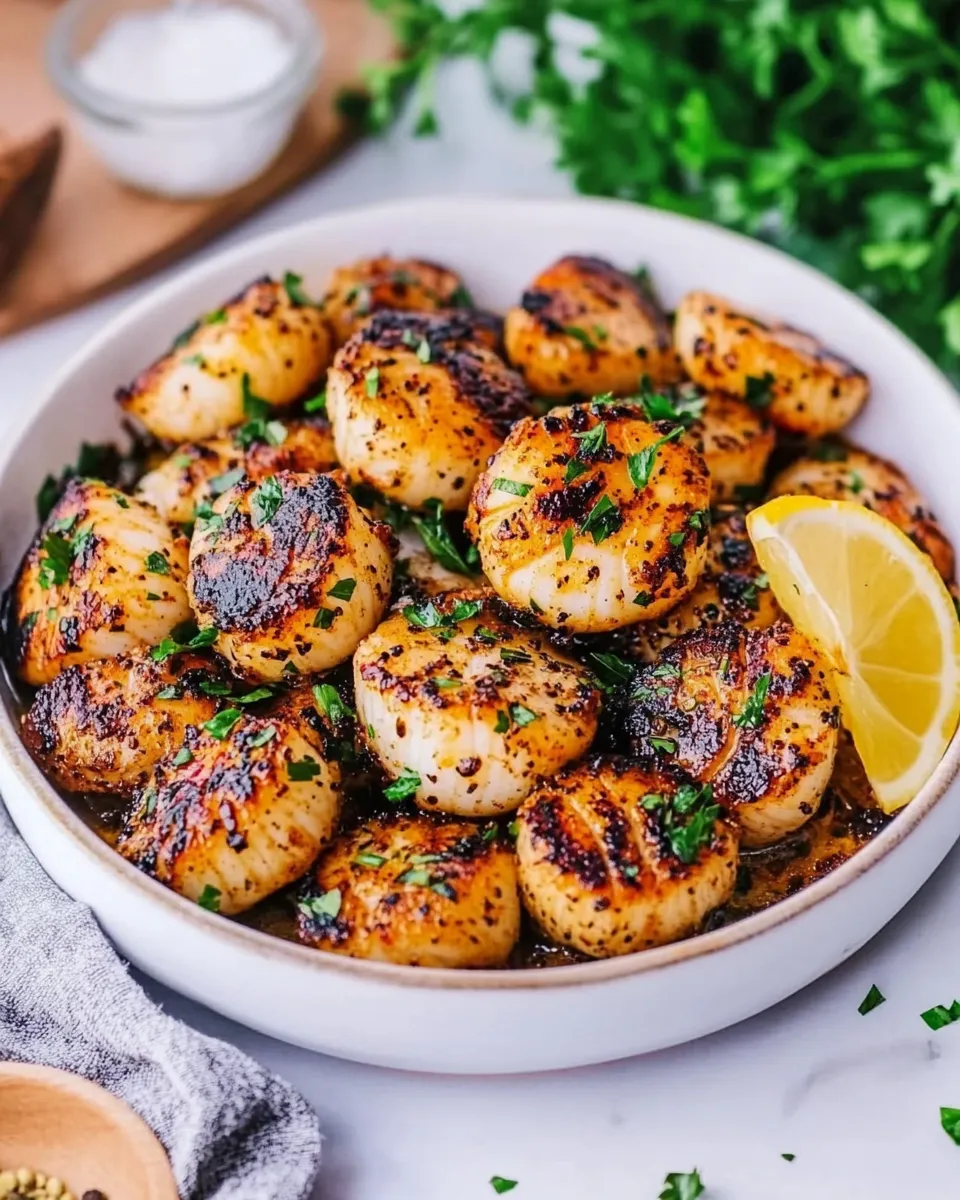
There are three simple reasons this method gives consistent, delicious results. First, broiling exposes the scallops to intense, direct heat that quickly forms a golden surface without drying out the interior. Second, the butter-garlic mixture brings both flavor and moisture; the melted butter helps transfer heat evenly and adds richness, while garlic and Italian seasoning provide aromatic depth. Third, the recipe is short and precise—scallops are delicate, and the 5–7 minute window under high heat drastically reduces the risk of overcooking when you follow the timing and spacing instructions.
Patting scallops dry and removing the side muscle achieves better searing and a uniform texture. Working with large scallops ensures a pleasant contrast: a caramelized exterior and a tender, just-opaque center. Finally, finishing with lemon wedges brightens every bite and cuts through the butter’s richness, balancing the dish perfectly.
Healthier Substitutions
- Butter — swap for extra-virgin olive oil to reduce saturated fat; brush scallops lightly so they still get color.
- Salt — use a low-sodium option or reduce the amount to taste if you’re watching sodium intake.
- Italian seasoning — replace with a smaller amount of fresh herbs (parsley, basil) added after broiling to keep sodium low and add freshness.
- Paprika — use smoked paprika sparingly or omit if you prefer no smokiness; sweet paprika works fine for color only.
Must-Have Equipment
- Broiler-equipped oven — the recipe relies on direct high heat.
- Sturdy rimmed baking sheet — prevents juices from spilling under the broiler.
- Aluminum foil — for easy cleanup and to protect the pan (do not use parchment here).
- Small mixing bowl and spoon — to combine the butter and seasonings.
- Tongs or a small spatula — for turning and transferring scallops without tearing them.
- Paper towels — for drying the scallops thoroughly before cooking.
Avoid These Mistakes
- Skipping the pat-dry step — wet scallops steam instead of sear. Pat them dry until surface moisture is removed.
- Overcrowding the pan — scallops need space so hot air can circulate and create an even golden top. Give each scallop room.
- Wrong rack position — too close to the broiler will burn; too far will under-color. Aim for about 7–8 inches (18–20 cm).
- Leaving them under the broiler without checking — broilers vary. Start checking at 5 minutes; look for golden tops and opaque centers.
- Using parchment — it will scorch under the broiler. Use aluminum foil as instructed.
Spring–Summer–Fall–Winter Ideas
Scallops adapt to seasonal sides and flavors. Here are simple pairing ideas that match produce and mood throughout the year.
- Spring — pair with lightly dressed pea shoots, blanched asparagus, or a lemon-parsley salad for a fresh finish.
- Summer — serve with grilled corn, a tomato-cucumber salad, or chilled new potatoes tossed in vinaigrette.
- Fall — think roasted root vegetables, warm farro or barley, and wilted greens like Swiss chard dressed with a splash of vinegar.
- Winter — pair with creamy polenta, mashed potatoes, or a simple cauliflower purée to soak up the buttery juices.
Pro Perspective
Timing and temperature
Broilers vary widely. I always preheat the broiler for at least 5–10 minutes before cooking so the element is genuinely hot. Position the rack about 7–8 inches below the element to balance color and cook-through. Start watching the scallops at 5 minutes—if they’re nicely golden, remove them. Use the 5–7 minute window as your guide, not a guarantee.
Handling and presentation
Use tongs or a thin spatula to move scallops; they’re delicate when hot. If you want a finishing touch, sprinkle finely chopped parsley or a tiny pinch of flaky sea salt right before serving. Serve immediately with lemon wedges so guests can add brightness at the table.
Best Ways to Store
- Refrigerate cooked scallops within two hours of cooking. Place in an airtight container and consume within 2 days for best quality.
- To reheat, warm gently in a skillet over low heat with a teaspoon of butter or olive oil—just until warmed through. Avoid microwaving, which can make them rubbery.
- Raw scallops should be used within one to two days of purchase and kept cold on the bottom shelf of the fridge. If you plan to freeze, do so immediately in a sealed bag; thaw in the refrigerator before using.
Common Questions
- How can I tell when scallops are done? They’re done when the outside is golden and the interior is just opaque—no translucent center. Overcooking makes them tough and rubbery, so err on the side of slightly underrather than overcooked.
- Can I use frozen scallops? Yes, but thaw them completely in the refrigerator and pat very dry before cooking. Excess moisture from frozen scallops increases steaming and reduces browning.
- What if my scallops are very small? Smaller scallops will cook faster. Start checking at around 3–4 minutes. Adjust the rack height if necessary to avoid burning while ensuring they cook through.
- Is it okay to skip butter? Yes—olive oil or a neutral oil works in a pinch. The flavor will be slightly different but still tasty. Butter adds a classic richness that pairs well with lemon.
- Can I add other seasonings? Absolutely. A squeeze of lemon before serving, a sprinkle of red pepper flakes for heat, or a small amount of fresh herbs after broiling all work nicely. Keep additions light so the scallops remain the star.
Make It Tonight
If you’ve got scallops on hand, this recipe is one of the quickest, most rewarding dinners you can make. Follow the steps exactly—dry the scallops, preheat the broiler, space them out, and watch the 5–7 minute window—and you’ll get a golden crust and tender center every time. Serve with a simple side like a green salad or quick polenta, squeeze lemon over the top, and enjoy a restaurant-quality plate with minimal fuss.
Gather your ingredients, preheat the broiler, and put a delicious, low-effort meal on the table tonight. You’ll be glad you did.
Broiled Scallops
Ingredients
Ingredients
- 1 lbScallopsLarge size patted dry
- 3 TablespoonsButtermelted
- 2 garlic cllovesminced
- 1 TabelspoonsItalian seasoning
- 1/2 teaspoonpaprika
- 1/4 teaspoonsalt and pepperor to taste
- 1 lemon wedges
Instructions
Instructions
- Remove the scallops from their packaging, pat them dry with paper towels, and remove any side muscle if present.
- Position an oven rack about 7–8 inches (approximately 18–20 cm) below the broiler element and preheat the broiler to high.
- Line a baking sheet with aluminum foil. (Do not use parchment.)
- In a small bowl, combine 3 Tablespoons melted butter, 2 minced garlic cloves, 1 Tablespoon Italian seasoning, 1/2 teaspoon paprika, and 1/4 teaspoon salt and pepper (or to taste).
- Arrange the scallops on the prepared baking sheet in a single layer with space between them.
- Spoon or brush the butter-and-seasoning mixture evenly over the scallops and gently toss or turn them so they are coated.
- Broil on the preheated high setting for 5–7 minutes, until the tops are golden and the scallops are just opaque in the center (do not overcook).
- Remove the scallops from the broiler, transfer to plates, and serve with lemon wedges.
Equipment
- Oven Broiler
- oven rack
- Baking Sheet
- Aluminum Foil
- Small Bowl
- spoon or brush
Notes
Pat and dry them well. This helps the marinade and seasoning stick to the scallops. Most importantly, drying the scallops helps with the browning.
You ca use any size scallops you prefer, but just add the cooking time accordingly.
Arrange the scallops in a single layer always so they cook evenly.
Broilers are a very high source of heat, so always keep an eye on the scallops. They may cook faster than you expect.
Make sure to read the full tutorial onHow to Cook Scallops. This covers everything from Seared Scallops to baked Scallops and all the tips you need!
Yes! We did so right here, but make sure you thaw them fully in the fridge overnight. And keep in mind you need to pat them completely dry before broiling.
They should be opaque in the center and lightly golden on top. A perfectly cooked scallop is slightly springy to the touch.
No flipping needed—broiling cooks from the top down. Just make sure the tops are nicely browned.
You need to use either a heavy duty cast iron skillet, or baking sheet. If using a baking sheet, make sure you line it with FOIL and never with parchment paper. The parchment can burn so quickly under the broiler. Avoid glass bakeware as it can shatter under direct broiler heat.
Broiled: Cooks under high heat from above, often slightly more hands-off. Seared:Cooks in a hot pan with direct contact, needing more active attention.
Bay scallops are smaller and cook much faster. Reduce the broiling time to 2–3 minutes. We have used them in ourAir Fryer Scallops.
Pasta.Burrata Pasta,Lobster Pasta,Pasta Primavera,Pesto Pasta with Pistachio Pesto.
Rice.MakeLobster Risotto,Cilantro Lime Rice,Coconut Rice.
Veggies.Best Mashed Potatoes Recipe,Air Fryer Asparagus,Sautéed Green Beans.
Salad.Mexican Street Corn Salad,Easy Cucumber Salad,Ahi Tuna Salad.
Breads.Ultimate Garlic Bread.