Blueberry Pie
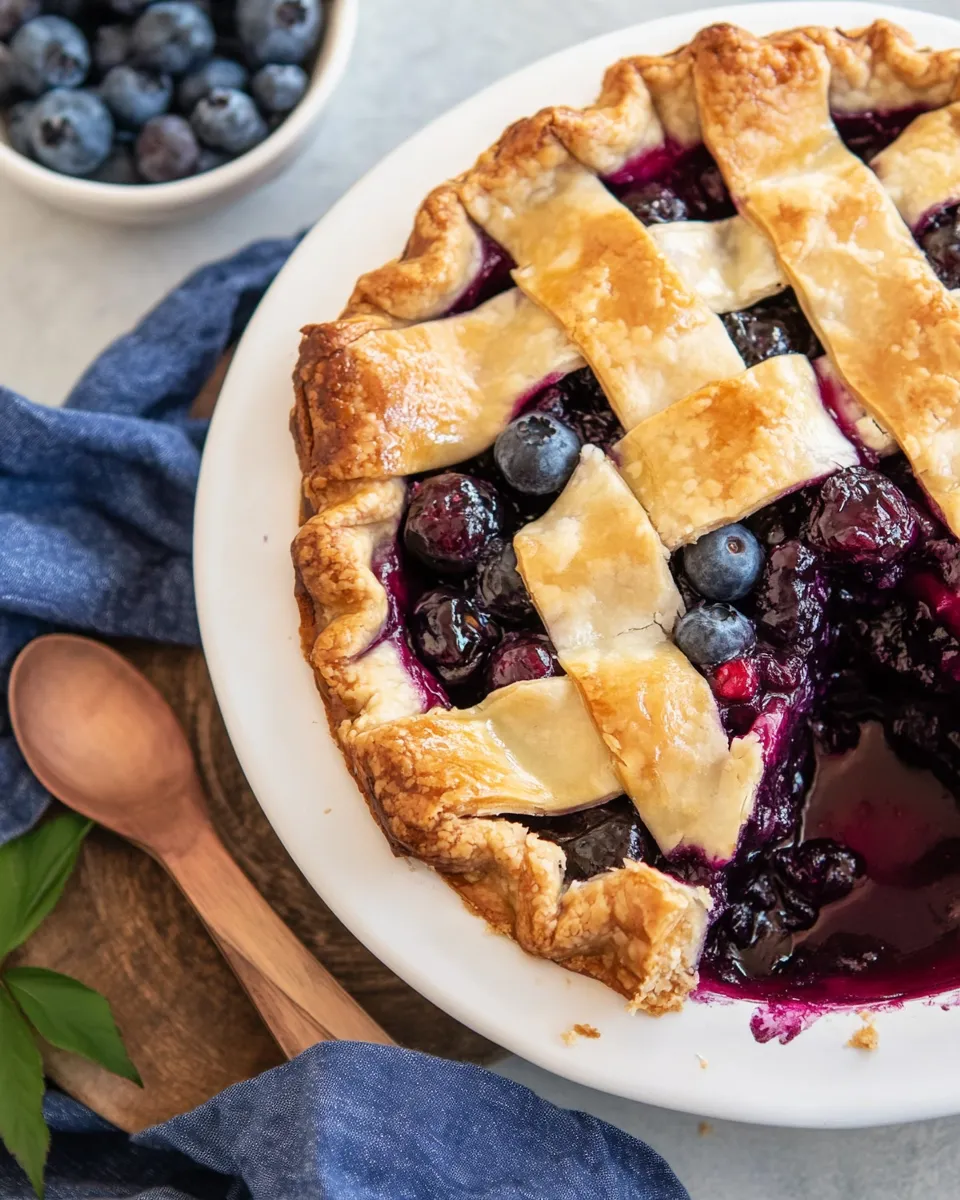
This blueberry pie is the kind of dessert that fits summer afternoons and cool evenings alike. The filling is bright with lemon and cinnamon, the crust is a balance of shortening for lift and butter for flavor, and the lattice top gives you that picture-perfect golden finish. It’s straightforward to make, and the steps below keep the technique practical so you get consistent results.
I test this version often because it reliably gives a flaky crust and a filling that sets without becoming gluey. The trick is keeping fats cold, chilling the dough, and using cornstarch to thicken the filling so the berries stay juicy but sliceable. Follow the schedule—especially the refrigeration steps—and you’ll have a pie that looks homemade in the best way.
What’s in the Bowl

- 2 ½ cups all-purpose flour — the base for the crust; provides structure and browning.
- 1 teaspoon salt — seasons the dough so the crust isn’t flat-tasting.
- ¾ cup vegetable shortening, chilled — gives lift and tenderness to the crust; keep it cold for flakiness.
- 6 tablespoons unsalted butter, chilled — adds flavor and crisp, buttery layers when combined with shortening.
- 6 tablespoons ice cold water — brings the dough together; add slowly so you don’t over-hydrate.
- 5 cups fresh blueberries — the star of the filling; use ripe berries for the best flavor and color.
- 1 tablespoon lemon zest — brightens the berries and balances sweetness.
- 3 tablespoons lemon juice — provides acidity to cut richness and boost flavor.
- ¾ teaspoon ground cinnamon — a warm undertone that complements the blueberries.
- ½ teaspoon salt — seasons the filling; small but important for depth.
- ½ cup white granulated sugar — sweetens the filling and helps extract juices from the berries.
- ¼ cup cornstarch — thickens the filling so it sets while still remaining glossy.
- 1 egg — for the egg wash to achieve a golden, glossy crust.
- 1 tablespoon water — mixed with the egg to make the wash easier to brush on.
Cooking Blueberry Pie: The Process
- In a medium bowl combine 2 ½ cups all-purpose flour and 1 teaspoon salt. Add ¾ cup chilled vegetable shortening and 6 tablespoons chilled unsalted butter cut into cubes. Using a pastry cutter (or two knives or a food processor), cut the shortening and butter into the flour until the mixture resembles coarse crumbs.
- Add 6 tablespoons ice cold water, a tablespoon at a time, mixing with a fork until the dough just holds together when pinched. Do not overwork.
- Divide the dough into two equal portions. Flatten each portion into a disk, wrap individually in plastic wrap, and refrigerate for at least 1 hour (or up to 3 days).
- Preheat the oven to 425°F (220°C).
- Remove one dough disk from the refrigerator. On a lightly floured surface, roll it out to a 13-inch circle. Transfer the rolled dough to a 9-inch pie dish, easing it into the dish without stretching. Leave about 1 inch of overhang (or trim less if you prefer a thinner edge). Return the crust to the refrigerator while you prepare the filling.
- In a medium bowl combine 5 cups fresh blueberries, 1 tablespoon lemon zest, 3 tablespoons lemon juice, ¾ teaspoon ground cinnamon, ½ teaspoon salt, ½ cup white granulated sugar, and ¼ cup cornstarch. Gently toss until the berries are evenly coated and the cornstarch is incorporated.
- Pour the blueberry filling into the prepared bottom crust and spread it evenly. Place the pie in the refrigerator while you roll and cut the top crust.
- Remove the remaining dough disk and roll it out on a lightly floured surface to a 12-inch circle. Use a knife, pastry wheel, or pizza cutter to cut the circle into 10–12 equal strips.
- Arrange the strips over the pie in a lattice pattern: lay half the strips parallel across the pie, fold back every other strip halfway, lay one perpendicular strip across, then unfold the folded strips over it. Continue weaving until the lattice is complete.
- Trim the lattice strips even with the edge of the bottom crust. You can leave about 1 inch of overhang to create a thick rim, or trim more for a thinner crust. Pinch and crimp the edges to seal the top and bottom crusts together.
- In a small bowl beat 1 egg with 1 tablespoon water to make an egg wash. Brush the egg wash over the lattice and the exposed edges.
- Place the pie on a rimmed baking sheet and bake at 425°F (220°C) for 20 minutes. Reduce the oven temperature to 375°F (190°C) and bake for an additional 30 minutes, until the crust is golden and the filling is bubbling.
- Remove the pie from the oven and cool on a wire rack for at least 2 hours before slicing and serving.
Why This Blueberry Pie Stands Out
There are a few small choices here that make a big difference. Using both vegetable shortening and chilled butter gives the crust lift and a tender, flaky texture while preserving a buttery flavor. Shortening creates steam pockets for flakiness; the butter adds aroma and that classic pie taste.
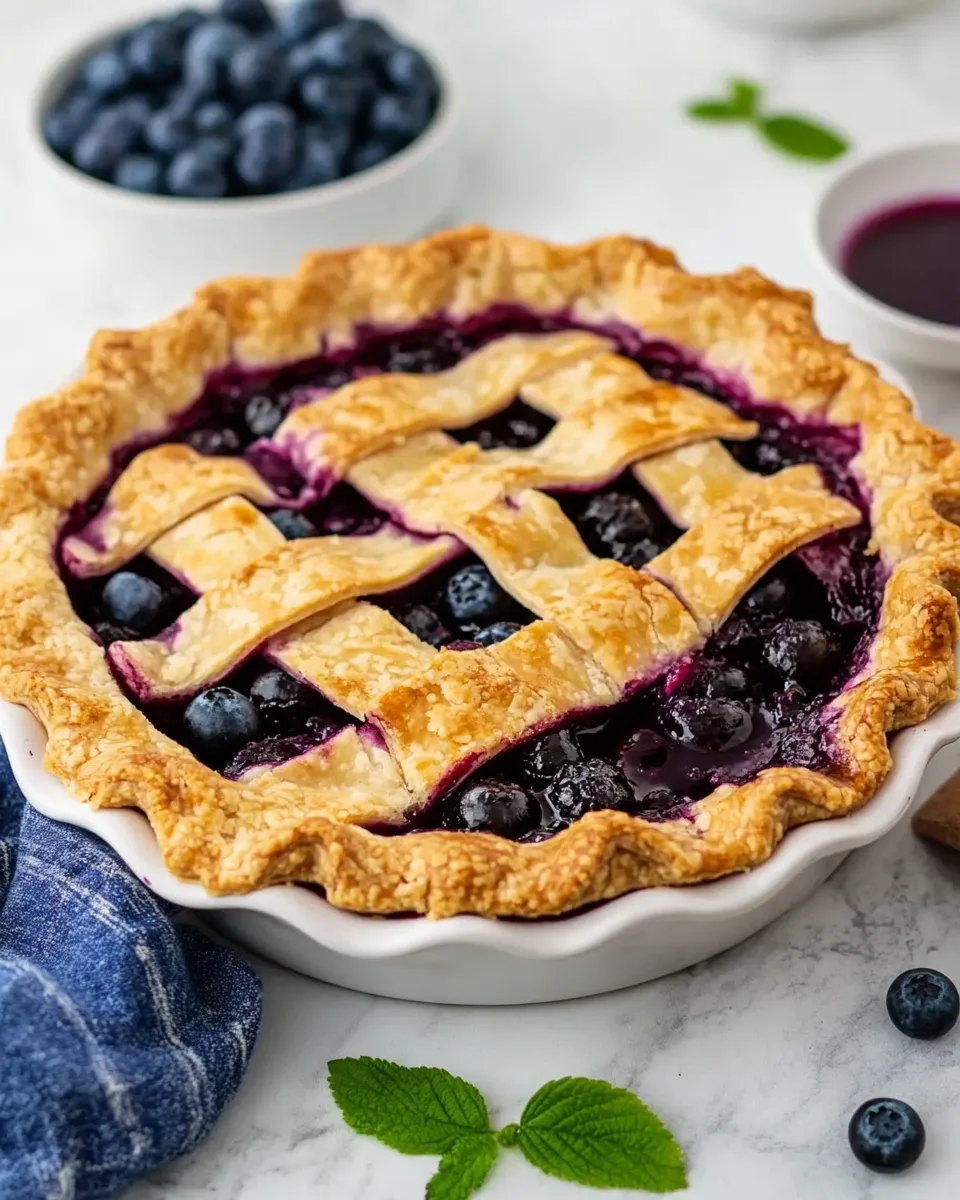
On the filling side, the lemon zest and juice brighten the fruit without overpowering it, and the cornstarch thickens the filling without making it gummy. The lattice top lets steam escape and creates exposed crust that browns beautifully under the egg wash. Finally, the two-temperature bake—hot at first, then lower—sets the crust quickly and finishes baking the filling evenly.
Low-Carb/Keto Alternatives
If you’re adapting this for low-carb or keto diets, focus on swaps that preserve texture without changing technique:
- Crust: Replace the all-purpose flour with a blend of almond flour and coconut flour—note that almond flour needs more binder (egg or melted butter) and won’t behave exactly like wheat flour. Consider a shortbread-style almond crust pressed into the dish rather than a rolled lattice.
- Fats: Keep chilled butter; you can omit shortening and rely on butter + a small amount of coconut oil to help with structure.
- Sugar: Use a 1:1 erythritol or a monk fruit/erythritol blend in place of granulated sugar. These sweeteners don’t draw juices the same way, so slightly increasing lemon or using a small amount of low-carb fruit preserves to bring juiciness can help.
- Thickener: Swap cornstarch for a small amount of xanthan gum (use very sparingly) or glucomannan to thicken the filling without carbs.
What’s in the Gear List
- Medium mixing bowls — for dough and filling.
- Pastry cutter (or two knives/food processor) — to cut fats into flour.
- Rolling pin — to roll the dough to size.
- 9-inch pie dish — the specified size for this recipe.
- Rimmed baking sheet — catches any overflow and makes handling easier.
- Wire rack — for cooling the pie properly.
- Pastry brush — for the egg wash.
- Knife, pastry wheel, or pizza cutter — to cut strips for the lattice.
- Plastic wrap — for chilling the dough disks.
- Measuring cups and spoons — for accurate quantities.
Avoid These Mistakes
Keep the following common pitfalls in mind so the pie comes out well the first time:
- Overworking the dough — this develops gluten and makes the crust tough. Mix until it just holds together.
- Not keeping fats cold — warm butter/shortening will smear into the flour and make a dense crust. Chill ingredients and dough.
- Rolling the bottom crust too thin — it can break or leak. Aim for even thickness and avoid stretching when fitting into the dish.
- Skipping the chill time — refrigerating the disks firms the fats and relaxes gluten for easier rolling and a flakier result.
- Failing to pre-chill the pie after filling — this reduces shrinkage and helps the lattice hold its shape when baked.
- Baking at a single moderate temperature — starting hot then lowering gives a better rise and color while finishing the filling without burning the crust.
Seasonal Serving Ideas
Blueberry pie is versatile across seasons. Here are easy, seasonal serving ideas that require no extra cooking:
- Summer: Serve slightly warm with a scoop of vanilla ice cream and a few fresh mint leaves for contrast.
- Autumn: Pair with a dollop of lightly spiced whipped cream (a hint of cinnamon or nutmeg) to echo the pie’s warm notes.
- Winter: Warm a slice in the microwave for 15–20 seconds and top with a drizzle of warmed berry coulis for extra richness.
- Spring: Offer thin slices with a citrus-mascarpone spread to highlight the lemon in the filling.
Behind the Recipe
This recipe is built around reliable pastry technique: cold fats, minimal handling, and controlled hydration. The combination of shortening and butter is a classic baker’s trick—shortening gives tenderness and structure, while butter contributes flavor. Chilling the disks and the assembled pie before baking reduces shrinkage and helps the lattice hold its shape. Using cornstarch rather than flour keeps the filling glossy and clear, letting the blueberries shine.
I landed on the lemon quantity and the cinnamon as a balancing act—enough lemon to brighten but not sour, and a pinch of cinnamon for warmth without dominating. The two-step bake came from testing: the initial high heat sets the crust fast; lowering the oven finishes the cook so the filling thickens and the crust doesn’t overbrown.
Shelf Life & Storage
Store leftover pie at room temperature, covered, for up to 24 hours if your kitchen is cool and dry. For longer storage, refrigerate covered for up to 4 days. The filling firms as it cools in the fridge; let slices sit at room temperature 15–30 minutes before serving to soften.
To freeze, wrap the whole cooled pie tightly in plastic wrap and foil and freeze for up to 2 months. Thaw overnight in the refrigerator. Reheat in a 350°F (175°C) oven for 12–18 minutes if you prefer it warm; cover loosely with foil if the crust is browning too quickly.
Your Questions, Answered
Can I use frozen blueberries?
Yes, but don’t thaw them before mixing with the cornstarch or they’ll bleed and potentially make the filling too watery. Increase the thickener slightly if needed and bake a few extra minutes so excess moisture cooks off.
Why both shortening and butter?
Shortening gives a tender, flaky texture and handles rolling well; butter adds flavor. Together they deliver a crust that’s both light and delicious.
My filling was runny after baking — what went wrong?
Common causes are underbaking, not enough thickener, or overly ripe/juicy berries. Make sure to mix cornstarch thoroughly and bake the pie until the filling is bubbling; that bubbling is the best indicator the cornstarch has cooked and thickened.
Can I make the crust entirely in a food processor?
Yes. Pulse the flour, salt, shortening, and butter until coarse crumbs form, then add the ice water gradually. Just be careful not to over-process; you want small pockets of fat intact for flakiness.
Time to Try It
Put the dough in the fridge now and plan to bake tomorrow if you like a relaxed schedule—chilling the dough up to three days is allowed and often improves handling. When you take it out, follow the steps in order, keep the fats cold, and watch the pie in the oven during the temperature change. It’s a satisfying project: a bit of hands-on work, followed by a golden reward that feeds a family or impresses guests.
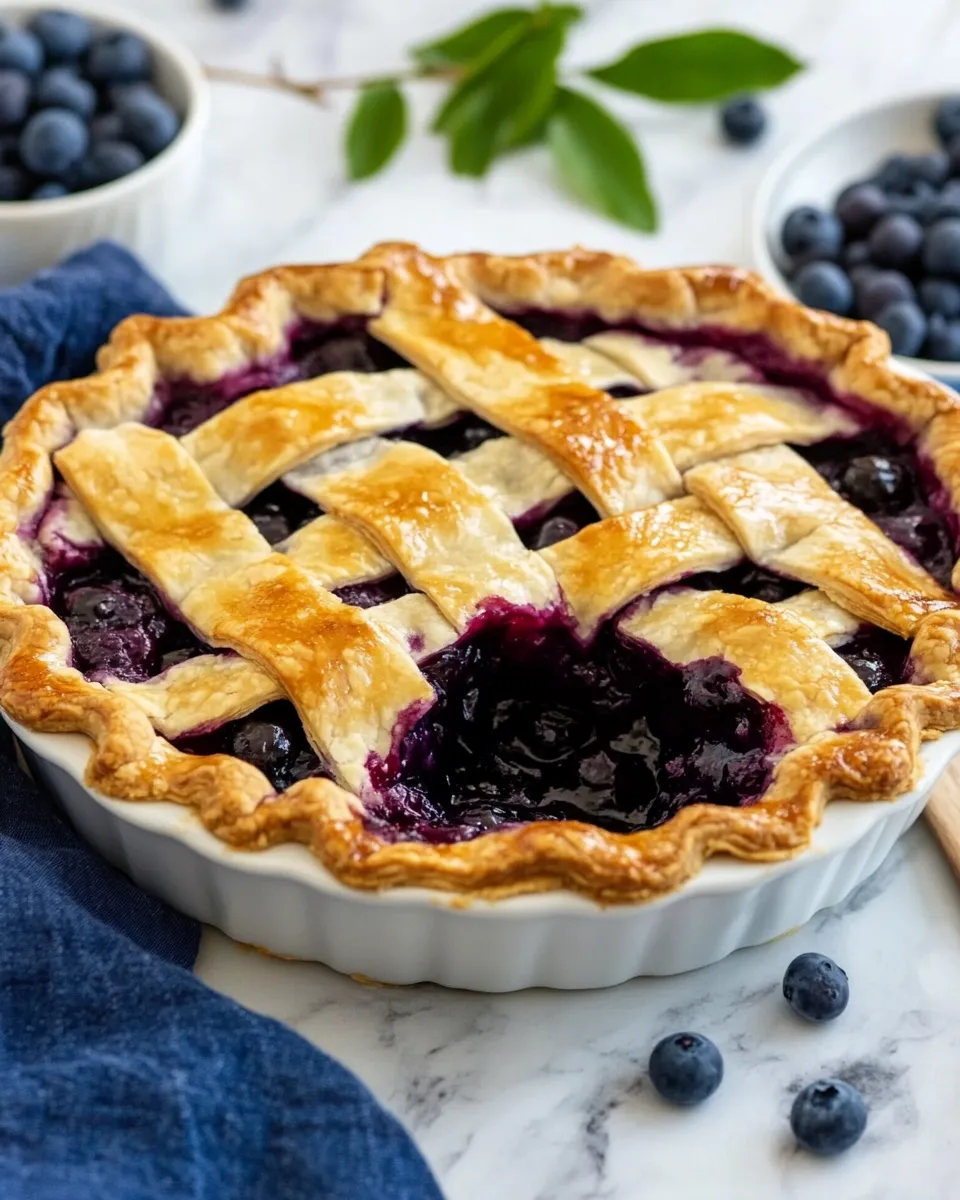
When you make it, notice how the lemon lifts the berries and how the lattice browns. If you’re sharing a picture, tag it with a short note on what you changed—those small experiments are how recipes get better. Enjoy the bake, and enjoy the pie.
Blueberry Pie
Ingredients
Ingredients
- ?2 1/2 cupsall purpose flour
- ?1 teaspoonsalt
- ?3/4 cupvegetable shorteningchilled
- ?6 tablespoonsunsalted butterchilled
- ?6 tablespoonsice cold water
- ?5 cupsfresh blueberries
- ?1 tablespoonlemon zest
- ?3 tablespoonslemon juice
- ?3/4 teaspoonground cinnamon
- ?1/2 teaspoonsalt
- ?1/2 cupwhite granulated sugar
- ?1/4 cupcornstarch
- ?1 egg
- ?1 tablespoonwater
Instructions
Instructions
- In a medium bowl combine 2 ½ cups all-purpose flour and 1 teaspoon salt. Add ¾ cup chilled vegetable shortening and 6 tablespoons chilled unsalted butter cut into cubes. Using a pastry cutter (or two knives or a food processor), cut the shortening and butter into the flour until the mixture resembles coarse crumbs.
- Add 6 tablespoons ice cold water, a tablespoon at a time, mixing with a fork until the dough just holds together when pinched. Do not overwork.
- Divide the dough into two equal portions. Flatten each portion into a disk, wrap individually in plastic wrap, and refrigerate for at least 1 hour (or up to 3 days).
- Preheat the oven to 425°F (220°C).
- Remove one dough disk from the refrigerator. On a lightly floured surface, roll it out to a 13-inch circle. Transfer the rolled dough to a 9-inch pie dish, easing it into the dish without stretching. Leave about 1 inch of overhang (or trim less if you prefer a thinner edge). Return the crust to the refrigerator while you prepare the filling.
- In a medium bowl combine 5 cups fresh blueberries, 1 tablespoon lemon zest, 3 tablespoons lemon juice, ¾ teaspoon ground cinnamon, ½ teaspoon salt, ½ cup white granulated sugar, and ¼ cup cornstarch. Gently toss until the berries are evenly coated and the cornstarch is incorporated.
- Pour the blueberry filling into the prepared bottom crust and spread it evenly. Place the pie in the refrigerator while you roll and cut the top crust.
- Remove the remaining dough disk and roll it out on a lightly floured surface to a 12-inch circle. Use a knife, pastry wheel, or pizza cutter to cut the circle into 10–12 equal strips.
- Arrange the strips over the pie in a lattice pattern: lay half the strips parallel across the pie, fold back every other strip halfway, lay one perpendicular strip across, then unfold the folded strips over it. Continue weaving until the lattice is complete.
- Trim the lattice strips even with the edge of the bottom crust. You can leave about 1 inch of overhang to create a thick rim, or trim more for a thinner crust. Pinch and crimp the edges to seal the top and bottom crusts together.
- In a small bowl beat 1 egg with 1 tablespoon water to make an egg wash. Brush the egg wash over the lattice and the exposed edges.
- Place the pie on a rimmed baking sheet and bake at 425°F (220°C) for 20 minutes. Reduce the oven temperature to 375°F (190°C) and bake for an additional 30 minutes, until the crust is golden and the filling is bubbling.
- Remove the pie from the oven and cool on a wire rack for at least 2 hours before slicing and serving.
Equipment
- Pastry Cutter
- 9-inch Pie Dish
Notes
It’s very important to chill the dough before working with it.You want the butter in the dough to be cold. This creates the flakiness that makes pie crust so yummy.
For an extra flaky dough, cut the butter into larger cubes before starting. For a more tender crust, cut the butter into smaller pieces.
I have anexcellent tutorial for how to make a lattice pie crust, but you can also do a solid top crust on this pie, or cut out shapes to cover the pie in a decorative way. Stars would be great for 4th of July.