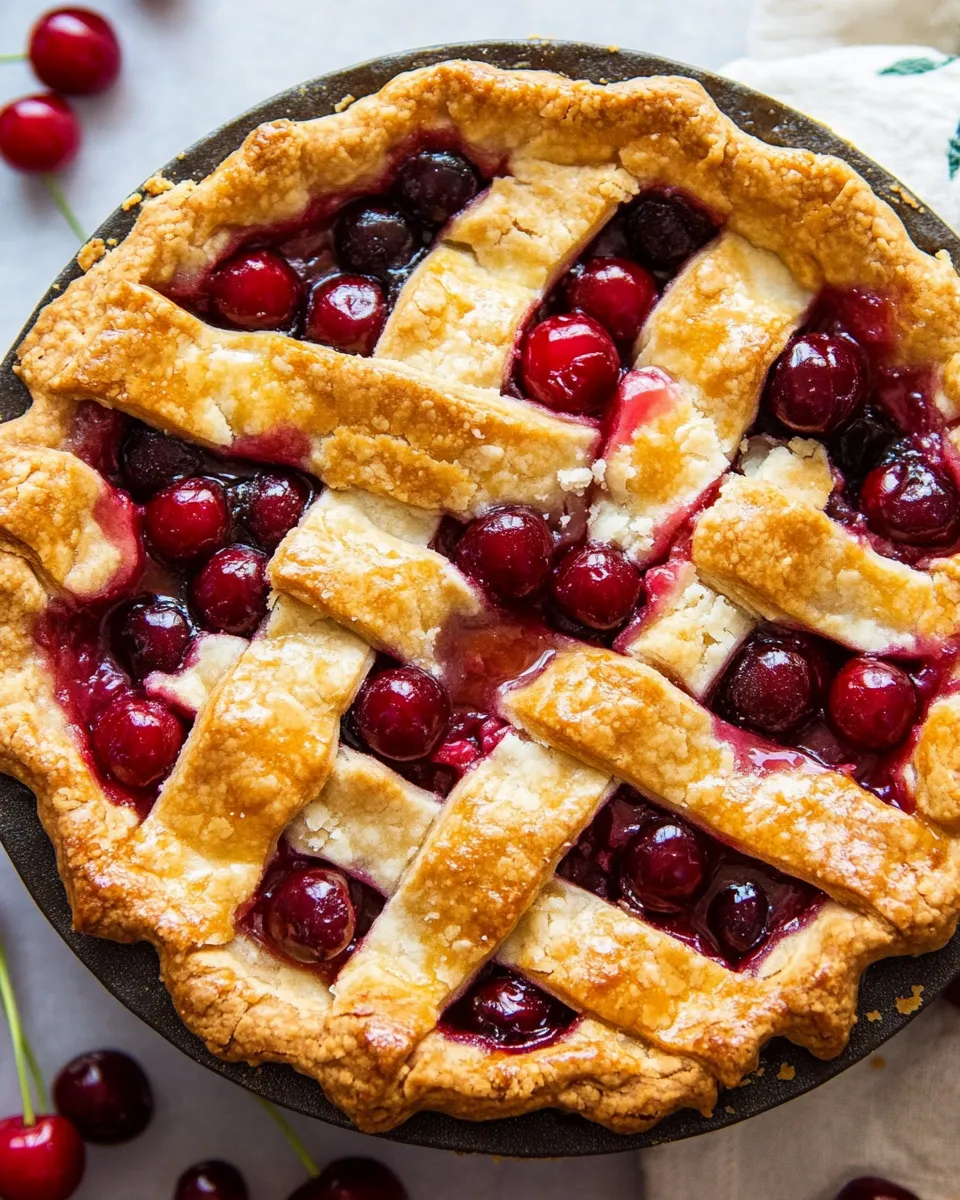
Cherry Pie
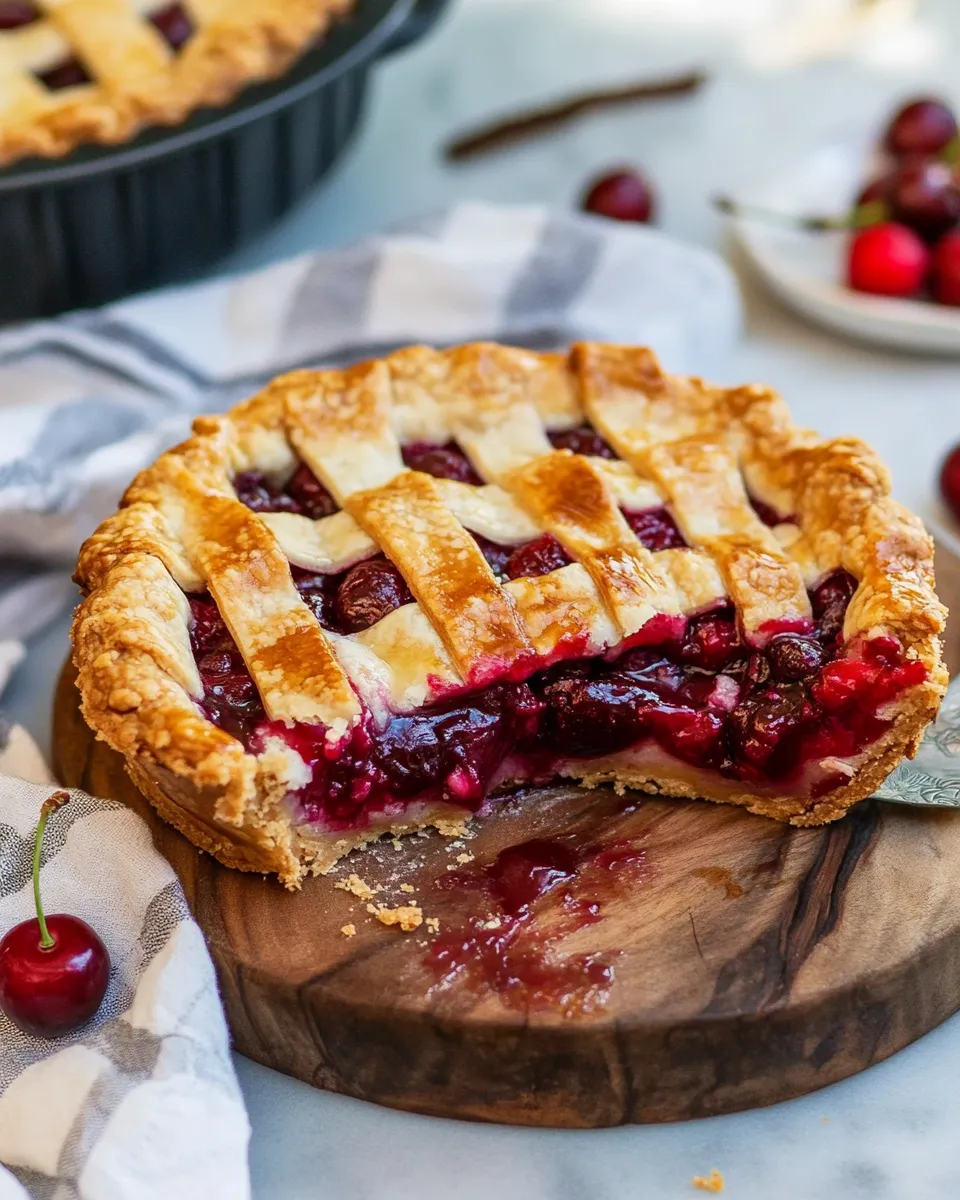
I make cherry pie year-round, but there’s something about late-summer cherries that makes this one feel like a small celebration. The filling is straightforward: just cherries, sugar, a bit of starch, and two extracts for depth. The lattice top lets the fruit steam and glaze, and the crust gives that satisfying flake and chew that makes people stop mid-bite.
This recipe is practical: simple ingredients, clear steps, and a timeline that respects cooling time so slices hold their shape. No fancy equipment required — just a roll, a weave, and a little patience while the filling sets. Follow the steps as written and you’ll have a reliable pie that slices clean and tastes like the season.
I’ll walk through the ingredient list, the exact baking steps, the tools you’ll want on hand, and the troubleshooting tricks I use when things don’t go exactly to plan. If you want variations or shortcuts, there are options below. Ready? Let’s make a pie that’s worth the wait.
Ingredient Checklist

Ingredients
- 1 double pie crust — provides the bottom shell and the lattice top; keep it chilled until you roll it out.
- 5 cups cherries — pitted and left whole; they’re the heart of the filling so pick ripe, flavorful fruit.
- ¾ cup granulated sugar — balances the cherries’ tartness and helps the filling glaze.
- ¼ cup cornstarch — thickening agent to give the filling body as it cools.
- 1 teaspoon pure vanilla extract — adds warm, rounded flavor to the fruit.
- ½ teaspoon almond extract — a little goes a long way; it brightens the cherry flavor.
- 1 tablespoon lemon juice — adds brightness and helps activate the cornstarch.
- 1 egg — beaten and mixed with 1 tablespoon water for egg wash; gives the crust a golden sheen.
Directions: Cherry Pie
- Preheat the oven to 425°F (220°C).
- Roll out one half of the double pie crust into a 12-inch circle. Fit it into a 9-inch pie dish, easing the dough into the corners and leaving a small overhang around the rim.
- In a large bowl, combine 5 cups pitted whole cherries, 3/4 cup granulated sugar, 1/4 cup cornstarch, 1 teaspoon vanilla extract, 1/2 teaspoon almond extract, and 1 tablespoon lemon juice. Toss gently until the cherries are evenly coated and any sugar has begun to dissolve; include the juices that form.
- Spoon the cherry filling into the prepared pie crust, mounding slightly in the center and spreading evenly.
- Roll out the remaining pie dough into a 12-inch circle. Use a pastry wheel or pizza cutter to cut the dough into long strips (about 3/4–1 inch wide).
- Arrange the strips over the pie to form a lattice: lay half the strips evenly across the pie, fold back every other strip, place one strip perpendicular, then unfold the folded strips over it. Repeat weaving strips until the top is covered. Trim excess dough so there is about a 1/2-inch overhang all around, then fold the overhang under and crimp or flute the edge to seal.
- Whisk together 1 beaten egg and 1 tablespoon water to make the egg wash. Brush the egg wash over the lattice and the crust edge.
- Bake at 425°F (220°C) for 20 minutes. Without opening the oven, reduce the temperature to 375°F (190°C) and continue baking for 30 minutes more, until the crust is golden and the filling is bubbling.
- Remove the pie from the oven and let it cool on a rack for at least 3 hours before slicing and serving to allow the filling to set.
What You’ll Love About This Recipe
This pie hits straightforward checkpoints: a flaky crust, a glossy, slightly jammy filling, and a lattice top that browns beautifully. The flavor profile is classic — cherries front and center, lifted by vanilla and that whisper of almond. The texture balances sweet-tart fruit with a firm, sliceable filling thanks to the cornstarch.
It’s also forgiving in pace: active work time is mostly rolling and weaving. The long cool-down is the only patience test, but it’s worth it for neat slices and a filling that won’t run all over the plate. And because you’re using whole pitted cherries, the texture stays intact; you’ll taste whole cherries in every bite.
Ingredient Swaps & Substitutions
Short on fresh cherries? Frozen pitted cherries are an easy swap — thaw and drain slightly, but keep some juices to mix with the sugar so the cornstarch can activate. If you prefer a different thickener, arrowroot or fine tapioca can work in place of cornstarch; use them sparingly and note that they may alter the clarity and set of the filling.
No almond extract? Skip it or replace with a splash more vanilla. If your cherries are very sweet, reduce the sugar a little; if they’re tart, keep the sugar as written. For an all-butter crust, use your favorite recipe for the double crust called for here; for a quicker approach, a good-quality store-bought double crust will still give great results.
Cook’s Kit
Must-haves
- 9-inch pie dish — for correct fit and even baking.
- Rolling pin — to roll your crust to about 12 inches as instructed.
- Pastry wheel or pizza cutter — to cut even lattice strips quickly.
- Mixing bowl and wooden spoon or spatula — for combining the filling gently.
- Baking rack — to cool the pie so air circulates underneath and the bottom crust stays crisp.
Nice-to-haves
- Bench scraper — helps transfer and tidy strips.
- Pie weights (if blind baking were needed) — not used here but handy for other pies.
Watch Outs & How to Fix
Filling too runny: If you cut the pie too soon, the filling may be loose. Let it cool the full 3 hours or longer; the cornstarch needs time to set. If you still have a runny filling after cooling, re-bake at 350°F (175°C) for 15–20 minutes to reduce juices, then cool again.
Top crust browning too fast: Tent the pie with foil after the first golden 20 minutes at 425°F. This prevents overbrowning while the filling finishes at 375°F.
Soggy bottom crust: Make sure your bottom crust is fitted snugly into the pie dish and that the pie dish itself isn’t so thin it overcooks the filling before the bottom sets. If you frequently get soggy bottoms, preheat a baking sheet and place the pie on that hot sheet to give the bottom a head start in crisping.
Crust cracking while rolling: Keep the dough chilled until you roll. If it cracks, press pieces back together gently with a little water, then chill for a few minutes before continuing.
Make It Your Way
Lattice styling: Want a decorative twist? Vary the strip widths or cut one wide decorative band for the center. Use leftover dough to cut shapes and press them into the crust edge or between lattice strips for personality.
Extra shine: For a deeper gloss, brush the crust with a light sugar sprinkle immediately after egg wash and before baking. Or after baking, brush cooled fruit gently with a warmed apricot jam thinned with a little water to glaze.
Flavor add-ins: If you like a background spice, a pinch (no more than 1/8 teaspoon) of cinnamon or ground ginger can complement cherries without overtaking them. Add sparingly so the cherry flavor remains primary.
Behind-the-Scenes Notes
Why the two baking temperatures? The initial high heat encourages rapid steam and helps set the crust edges and top into a crisp, golden shell. Reducing the temperature allows the filling to bubble and thicken without burning the crust. Resist opening the oven when you lower the heat — consistent oven temperature is part of what keeps the lattice intact and the filling from sinking.
The cornstarch works best when it’s well distributed among the cherries in the bowl before filling the crust. Toss gently; you want the starch to coat the fruit and any liquid that’s released so the set is uniform.
Storage & Reheat Guide
Room temperature: Store covered loosely with foil or a pie dome for up to 2 days. This keeps crust crisp without trapping too much moisture.
Refrigeration: For longer storage, chill the pie tightly wrapped for up to 4 days. Bring to room temperature before serving for the best texture, or reheat slices briefly.
Reheating: Warm individual slices in a 350°F (175°C) oven for 8–12 minutes to refresh the crust and warm the filling. Avoid the microwave for long or the crust will become soggy.
Freezing: You can freeze an unbaked assembled pie (tightly wrapped) for up to 1 month. Thaw overnight in the refrigerator before baking and add a few extra minutes to the baking time if the pie goes into the oven partially cold.
Cherry Pie FAQs
Can I use frozen cherries? Yes. Thaw and drain them slightly but reserve some juice to mix with the sugar so the cornstarch can hydrate. You may need slightly less sugar if the cherries are sweet.
Do I need to cook the filling before putting it in the crust? No. This recipe puts the filling in raw. The combination of cornstarch and the baking sequence is designed to thicken the filling in the oven and during the cooling period.
Why wait 3 hours to slice? The cornstarch needs time to cool and fully set. Cutting too early releases juices and results in sloppier slices.
Can I skip the lattice and just top with a full crust? Yes. If you use a full top crust, cut vents to let steam escape and brush with egg wash the same way. The bake time and temperatures remain the same.
Hungry for More?
If you love cherry pie, try the same approach with other firm fruits — apples, pears, or mixed berries (adjusting sugar to taste). Lattice working gives you a neat presentation with any fruit filling. Bookmark this recipe: it’s a reliable base for seasonal tarts and pies, and once you’ve mastered the roll-and-weave, you’ll find yourself making this more often than you think.
Enjoy the process, and don’t hesitate to note small tweaks that suit your oven or the fruit you find at the market. A great pie is as much about technique as it is about the ingredients — and now you have both, clearly laid out.
Cherry Pie
Ingredients
Ingredients
- ?1 double pie crustclick for recipe
- ?5 cupscherriespitted and left whole
- ?3/4 cupgranulated sugar
- ?1/4 cupcornstarch
- ?1 teaspoonpure vanilla extractor 1/2 teaspoon almond extract
- ?1 tablespoonlemon juice
- ?1 eggbeaten and mixed with 1 tablespoon water for egg wash
Instructions
Instructions
- Preheat the oven to 425°F (220°C).
- Roll out one half of the double pie crust into a 12-inch circle. Fit it into a 9-inch pie dish, easing the dough into the corners and leaving a small overhang around the rim.
- In a large bowl, combine 5 cups pitted whole cherries, 3/4 cup granulated sugar, 1/4 cup cornstarch, 1 teaspoon vanilla extract, 1/2 teaspoon almond extract, and 1 tablespoon lemon juice. Toss gently until the cherries are evenly coated and any sugar has begun to dissolve; include the juices that form.
- Spoon the cherry filling into the prepared pie crust, mounding slightly in the center and spreading evenly.
- Roll out the remaining pie dough into a 12-inch circle. Use a pastry wheel or pizza cutter to cut the dough into long strips (about 3/4–1 inch wide).
- Arrange the strips over the pie to form a lattice: lay half the strips evenly across the pie, fold back every other strip, place one strip perpendicular, then unfold the folded strips over it. Repeat weaving strips until the top is covered. Trim excess dough so there is about a 1/2-inch overhang all around, then fold the overhang under and crimp or flute the edge to seal.
- Whisk together 1 beaten egg and 1 tablespoon water to make the egg wash. Brush the egg wash over the lattice and the crust edge.
- Bake at 425°F (220°C) for 20 minutes. Without opening the oven, reduce the temperature to 375°F (190°C) and continue baking for 30 minutes more, until the crust is golden and the filling is bubbling.
- Remove the pie from the oven and let it cool on a rack for at least 3 hours before slicing and serving to allow the filling to set.
Equipment
- 9-inch Pie Dish
Notes
Canned cherries can be substituted for fresh cherries, the flavor will be a bit different and you have to make sure to drain or rinse any syrup before using.
Storing:Wrap well with plastic wrap and store in the fridge for up to 5 days, if it lasts that long.
Nutrition:Calculated per slice without ice cream. This is a rough estimate calculated using an online calculator.