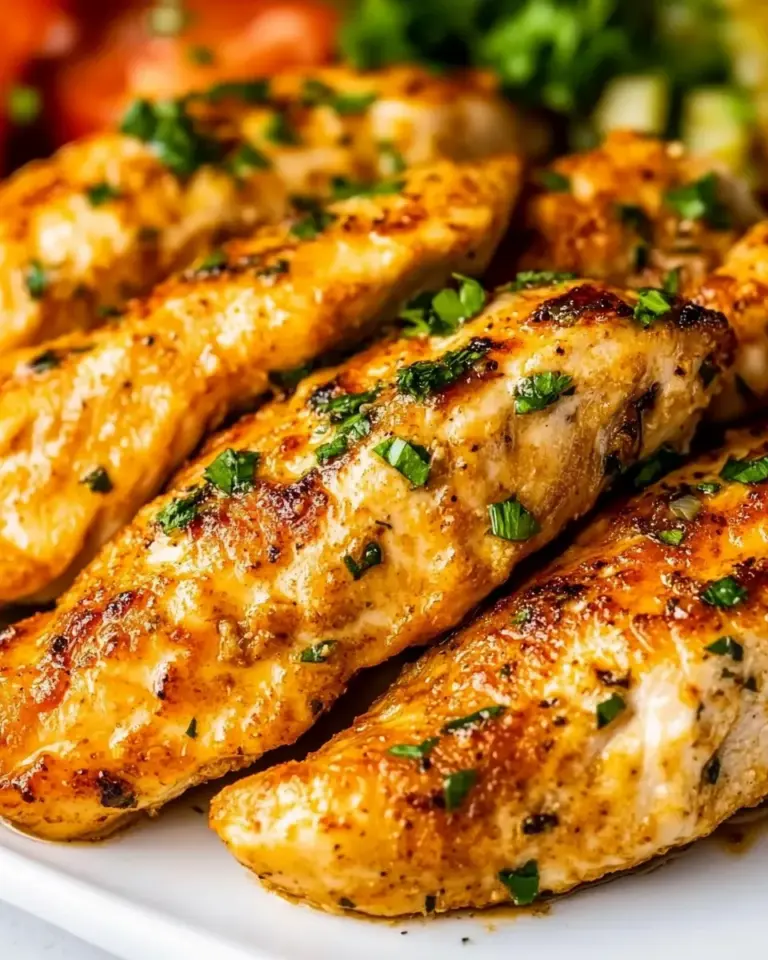
Buttermilk Fried Chicken
There’s something irresistible about a piece of perfectly crisp, golden-brown fried chicken that yields to a tender, juicy interior. This Buttermilk Fried Chicken recipe is rooted in a simple brine, a punchy herb-and-spice dredge, and a long soak in buttermilk so every bite delivers flavor and moisture. The method here is a mix of patience and straightforward techniques: brine, soak, flour, fry. I’ll walk you through it step by step so you can get reliably crunchy skin and succulent meat every time.
Why this version works

This recipe does three important things well. First, a long, savory brine seasons the meat deeply and helps it retain moisture. Second, the buttermilk soak tenderizes the fibers and creates a tangy base for the crunchy coating to cling to. Third, a seasoned flour with a touch of cayenne and paprika gives vibrant color, texture, and a gentle heat that complements the herbs from the brine. The result is a plate of fried chicken that’s balanced, aromatic, and utterly satisfying.
Ingredients
- ▢22½ to 3 pound chickens, cut into breasts, thighs, drumsticks and wings
- ▢5 lemons, halved
- ▢24 bay leaves
- ▢1 bunch, 4 ounces fresh parsley
- ▢1 bunch, 1 ounce fresh thyme
- ▢½ cup (169.5 ml) honey
- ▢1 head garlic, halved horizontally
- ▢¾ cup (0.08 g) black peppercorns
- ▢2 cups (584 g) kosher salt
- ▢2 gallons (7.57 l) water
- ▢6 cups (750 g) all-purpose flour
- ▢¼ cup (0.03 g) garlic powder
- ▢¼ cup (27.5 g) onion powder
- ▢4 teaspoons paprika
- ▢4 teaspoons cayenne
- ▢4 teaspoons kosher salt
- ▢1 teaspoon freshly ground black pepper
- ▢1 quart (0.95 l) + 6 tablespoons buttermilk, divided
- ▢2 to 3 quarts (1.9 to 2.85 l) peanut or canola oil
Equipment
- Large container or pot for the brine
- Large deep skillet or Dutch oven for frying
- Thermometer for oil (recommended)
- Baking rack set over a sheet pan
- Large bowls for dredging
- Tongs and a slotted spoon
Prep timeline
Plan 24 hours for brining and an additional few hours for the buttermilk soak. The brine time gives the greatest payoff in flavor and juiciness, and the long soak in buttermilk ensures tenderness. If you’re short on time, reduce brining to a minimum of 4 hours and the buttermilk soak to at least 2 hours, but the full timeline yields the best texture.
Flavor notes
Fresh herbs, plenty of citrus, and heady garlic from the brine infuse the chicken with subtle brightness. Honey in the brine rounds the edges, helping the skin brown beautifully without adding cloying sweetness. The dredge is savory with a warm kick from cayenne and a smoky note from paprika. Together they produce complex, layered fried chicken that’s not one-note.
Step-by-step instructions
1. Prepare the brine
- In a large container or pot, combine 2 gallons (7.57 l) water with 2 cups (584 g) kosher salt. Stir until the salt dissolves.
- Add the 5 lemons, each halved; 24 bay leaves; the 1 bunch (4 ounces) fresh parsley; the 1 bunch (1 ounce) fresh thyme; ½ cup (169.5 ml) honey; 1 head garlic, halved horizontally; and ¾ cup (0.08 g) black peppercorns to the salted water. Stir to distribute the aromatics evenly.
- Submerge the chicken pieces (22½ to 3 pound chickens, cut into breasts, thighs, drumsticks and wings) fully in the brine. If needed, weigh them down with a plate so they remain covered.
- Cover and refrigerate for 12 to 24 hours. This long brine seasons the meat deeply and helps the chicken remain juicy when fried.
2. Rinse and dry
- After brining, remove the chicken pieces from the brine and discard the brine and aromatics.
- Rinse the chicken briefly under cold water to remove excess surface salt. Pat each piece dry very well with paper towels. Removing surface moisture is crucial to getting crisp skin.
3. Buttermilk soak
- Place the rinsed and dried chicken in a large bowl or container. Pour 1 quart (0.95 l) + 6 tablespoons buttermilk over the chicken so each piece is well coated. If necessary, add a little more buttermilk to ensure full coverage.
- Cover and refrigerate for at least 2 hours, or up to overnight. The buttermilk tenderizes the meat and helps the seasoned flour stick.
4. Make the seasoned flour
- In a large bowl, combine 6 cups (750 g) all-purpose flour, ¼ cup (0.03 g) garlic powder, ¼ cup (27.5 g) onion powder, 4 teaspoons paprika, 4 teaspoons cayenne, 4 teaspoons kosher salt, and 1 teaspoon freshly ground black pepper.
- Whisk the dry ingredients thoroughly so the spices are evenly dispersed throughout the flour.
5. Dredge the chicken
- Set up a dredging station: the bowl of seasoned flour in one spot and a tray or plate for the floured pieces nearby. Keep the remaining buttermilk accessible in another shallow dish for occasional re-coating if needed.
- Remove a piece of chicken from the buttermilk, allowing excess to drip off. Press the piece into the seasoned flour, coating completely. Make sure the flour gets into all the nooks—along the skin edges and under the wings.
- Shake off any excess flour and place the coated piece on a wire rack set over a sheet pan. Repeat with all pieces. For an extra-thick crust, double-dip: return each floured piece briefly to the remaining buttermilk and then coat again in the flour.
- Let the dredged pieces rest on the rack for 15 to 30 minutes to let the coating adhere. This resting step improves adhesion during frying so the crust doesn’t fall off.
6. Heat the oil
- Pour 2 to 3 quarts (1.9 to 2.85 l) peanut or canola oil into a large, heavy-bottomed skillet or Dutch oven, filling it to no more than one-third to one-half full to allow for bubbling and safe frying.
- Heat the oil over medium heat until it registers 325°F to 350°F on a thermometer. If you don’t have a thermometer, test with a small breadcrumb—the oil should bubble steadily around it without immediately turning dark.
7. Fry the chicken
- Work in batches to avoid overcrowding the pan, which lowers the oil temperature and yields greasy chicken. Carefully place several pieces into the hot oil, skin-side down first, without splashing.
- Adjust the heat as needed to maintain the oil temperature in the 325°F to 350°F range. A slightly lower temperature will ensure the inside cooks through without burning the crust.
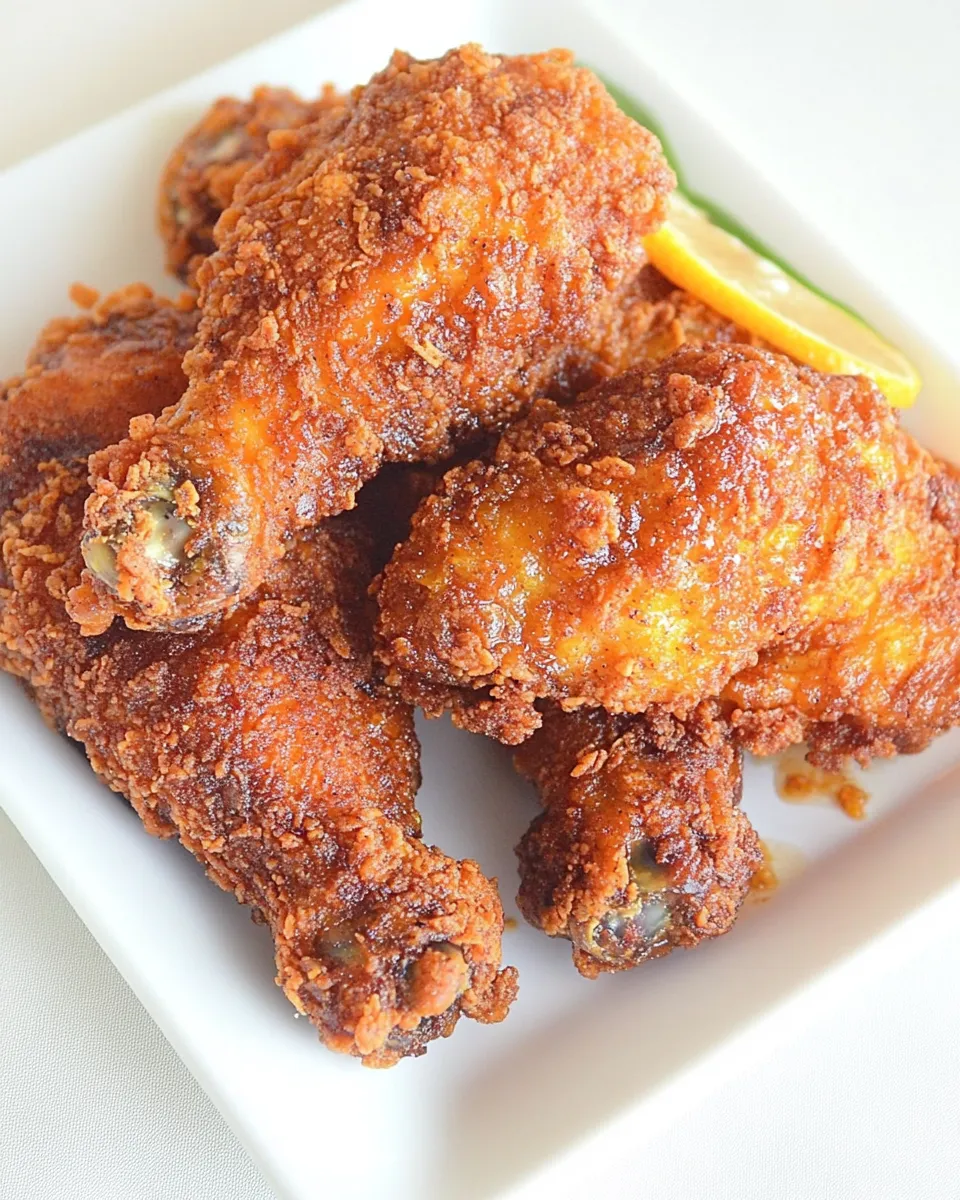
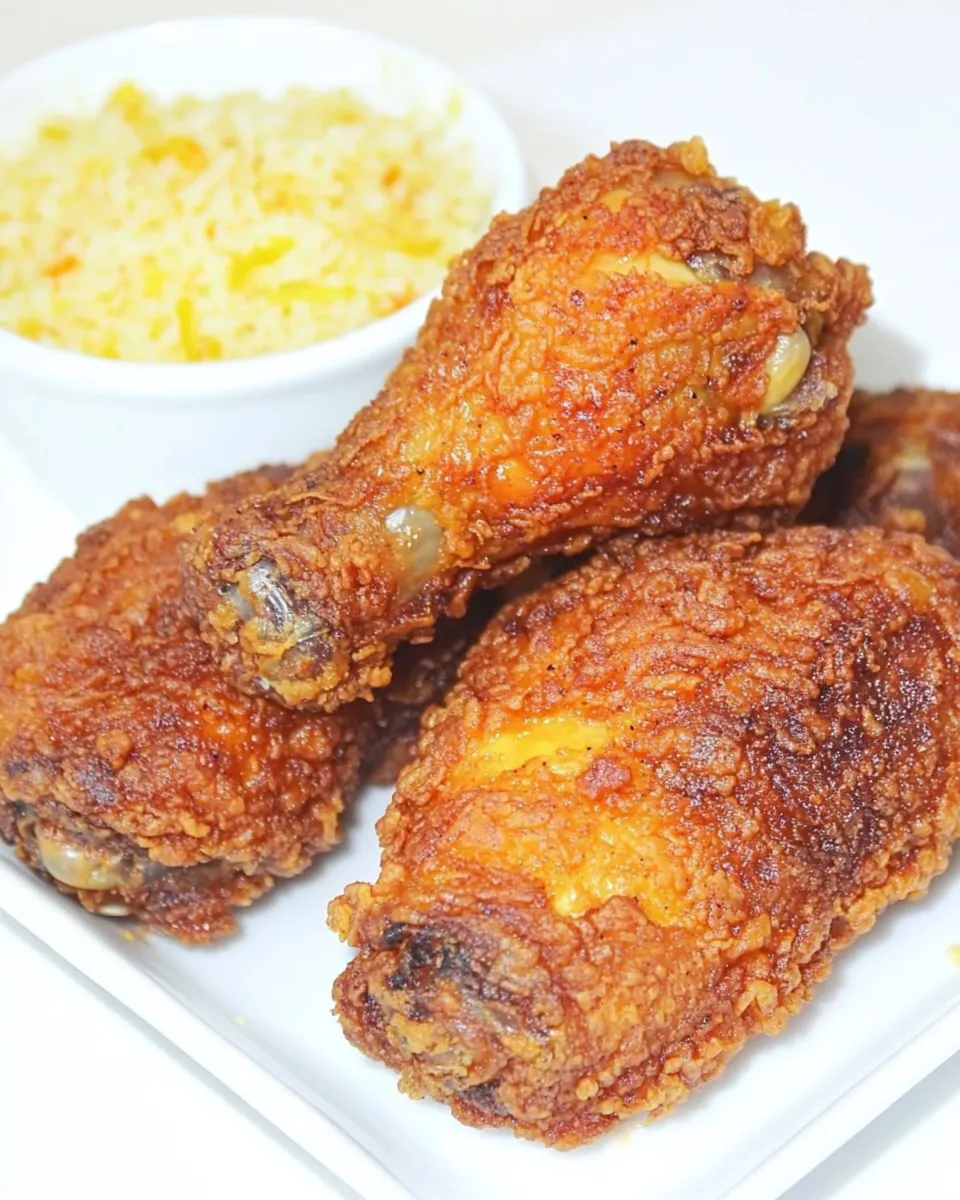
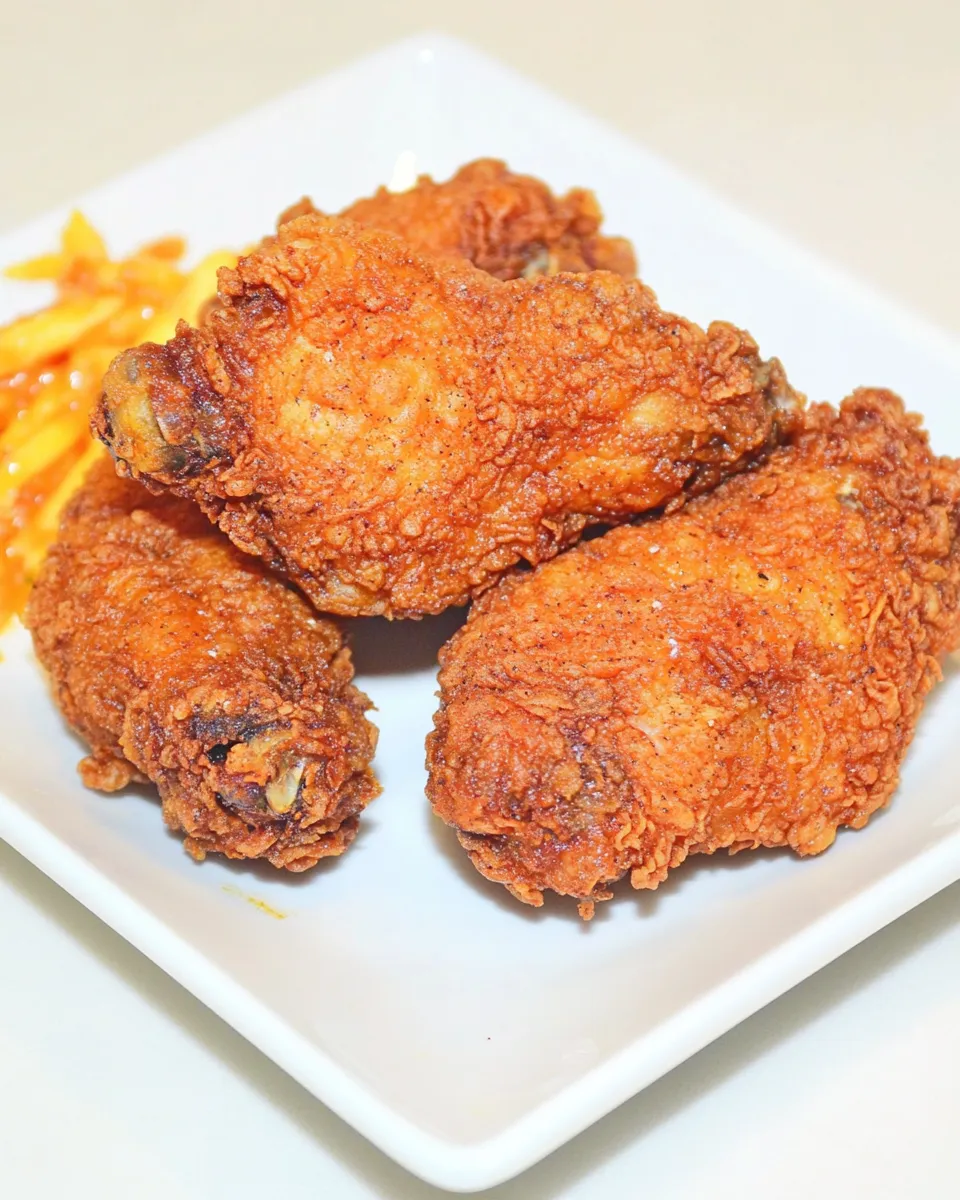
- Fry the pieces until the crust is a deep golden brown and an instant-read thermometer inserted into the thickest part of the chicken registers 165°F. Cooking time will depend on piece size: smaller pieces may take 10 to 12 minutes, while larger breasts or thighs can take 14 to 18 minutes. Turn pieces if needed for even browning.
- Use tongs and a slotted spoon to remove the cooked chicken and transfer it to a wire rack set over a sheet pan to drain and rest. This keeps the bottom from steaming and keeps the crust crisp.
- Allow the oil to return to temperature between batches before adding more chicken.
8. Finish and serve
- Once all chicken is fried and resting, let the pieces sit for a few minutes—this helps the juices redistribute and the crust settle.
- Serve warm. A squeeze of the remaining lemon halves over the chicken brightens the flavors nicely, and a drizzle of extra honey on the side makes a lovely sweet contrast to the spicy crust.
Make-ahead and storage
Fried chicken holds well for a day at room temperature if kept on a rack. To store longer, cool completely and refrigerate in an airtight container for up to 4 days. Reheat in a 375°F oven on a rack over a sheet pan until warmed through and the crust crisps again, about 10–15 minutes depending on piece size.
Troubleshooting tips
- If the crust is soggy: The oil was likely not hot enough or the pan was overcrowded. Let the oil return to temperature and fry in smaller batches next time.
- If the chicken is dry: Either it was overcooked or it didn’t brine/soak long enough. Follow the brine and buttermilk soak times closely and remove pieces when they reach 165°F.
- If the exterior burns before the inside is done: Lower the oil temperature and cook longer at a gentler heat so the interior reaches temperature without over-browning the crust.
Serving ideas
Classic sides pair beautifully with this Buttermilk Fried Chicken. Try potato salad, coleslaw, buttered corn, or simple roasted vegetables. For a casual platter, add pickles, hot sauce, and biscuits. A crisp green salad with a vinaigrette also cuts through the richness and keeps the meal balanced.
Final thoughts
This Buttermilk Fried Chicken is about technique more than bells and whistles. The brine infuses deep flavor, the buttermilk tenderizes, and the seasoned flour creates that crave-worthy crunchy exterior. With a little planning and attention to oil temperature, you’ll end up with reliably juicy, flavorful fried chicken that’s perfect for weekend dinners, gatherings, or whenever that crisp, juicy chicken craving hits.
Happy frying—and enjoy every crunchy, tender bite.

Buttermilk Fried Chicken
Ingredients
- 2½ to 3 pound whole chicken, cut into breasts, thighs, drumsticks and wings
- 5 lemons, halved
- 24 bay leaves
- 1 bunch fresh parsley (about 4 ounces)
- 1 bunch fresh thyme (about 1 ounce)
- 1/2 cup honey
- 1 head garlic, halved horizontally
- 3/4 cup black peppercorns
- 2 cups kosher salt (for brine)
- 2 gallons water (for brine)
- 6 cups all-purpose flour
- 1/4 cup garlic powder
- 1/4 cup onion powder
- 4 teaspoons paprika
- 4 teaspoons cayenne pepper
- 4 teaspoons kosher salt (for dredge)
- 1 teaspoon freshly ground black pepper
- 1 quart buttermilk plus 6 tablespoons more, divided
- 6 tablespoons buttermilk to mix into one portion of the flour for shaggy coating
- 2 to 3 quarts peanut or canola oil (for frying)
Instructions
- Make the brine: combine water, kosher salt, honey, halved lemons, bay leaves, parsley, thyme, halved garlic, and peppercorns in a large stockpot; cover and bring to a boil, stirring 1 minute to dissolve the salt, then remove from heat and cool completely. Chill the brine in the refrigerator.
- Brine the chicken: place the chicken pieces in a large container, pour the chilled brine over them, and refrigerate 8 to 12 hours (no longer to avoid over-salting).
- After brining, rinse each piece under cold water to remove brine residue, pat dry with paper towels, and let sit at room temperature about 1½ hours until no longer cold.
- Prepare the dredge station: whisk together flour, garlic powder, onion powder, paprika, cayenne, 4 teaspoons kosher salt, and 1 teaspoon black pepper; divide this dry mixture between two shallow bowls.
- Place 1 quart buttermilk in a third shallow bowl. Add 6 tablespoons buttermilk to one of the bowls of flour mixture and toss with a fork or fingers until the moisture is absorbed and the mixture is shaggy; set up station in order: raw chicken, first dry flour bowl, buttermilk bowl, shaggy flour bowl, and a parchment-lined baking sheet.
- Heat oil: pour at least 2 inches of oil into a large heavy pot and heat over medium until the oil reaches 320°F.
- Coat and start frying thighs: dip thighs in the first dry flour to coat and shake off excess, dip in buttermilk letting excess drip back, then press into the shaggy flour mixture and transfer to the prepared pan.
- Fry the thighs: carefully lower a few thighs into the hot oil, adjust heat to keep oil at 320°F, fry 2 minutes without moving, then continue frying 11 to 12 minutes more, turning as needed, until deep golden brown and 170°F internal temperature; transfer to a wire rack skin-side-up.
- Fry drumsticks: while thighs rest, fry drumsticks at 320°F about 8 minutes, turning and checking for doneness (170°F), then transfer to the rack skin-side-up.
- Increase oil temperature to 340°F. Coat breasts and wings as before, then fry breasts about 7 minutes until golden and 165°F internally, and wings about 6 minutes until golden and cooked through; transfer to rack.
- Let rest: turn off heat and let all chicken rest about 10 minutes before serving.
- Note: if you need to keep chicken warm, briefly reheat in a 400°F oven for a few minutes before serving.
Equipment
- Large Stockpot
- large container or bowl for brining
- wire cooling rack and baking sheet
- Three Shallow Bowls
- large heavy pot or Dutch oven for frying
- Instant-read thermometer
- Tongs
Notes
- If short on time, soak chicken in 1 quart buttermilk in a sealed bag overnight instead of the full brine.
- The brine can be made up to 3 days ahead and refrigerated.
- Buying pre-cut chicken saves time and cleanup.
- Use peanut or canola oil for frying.
- Check doneness with an instant-read thermometer for safety.
- Allow chicken to rest about 10 minutes before serving.