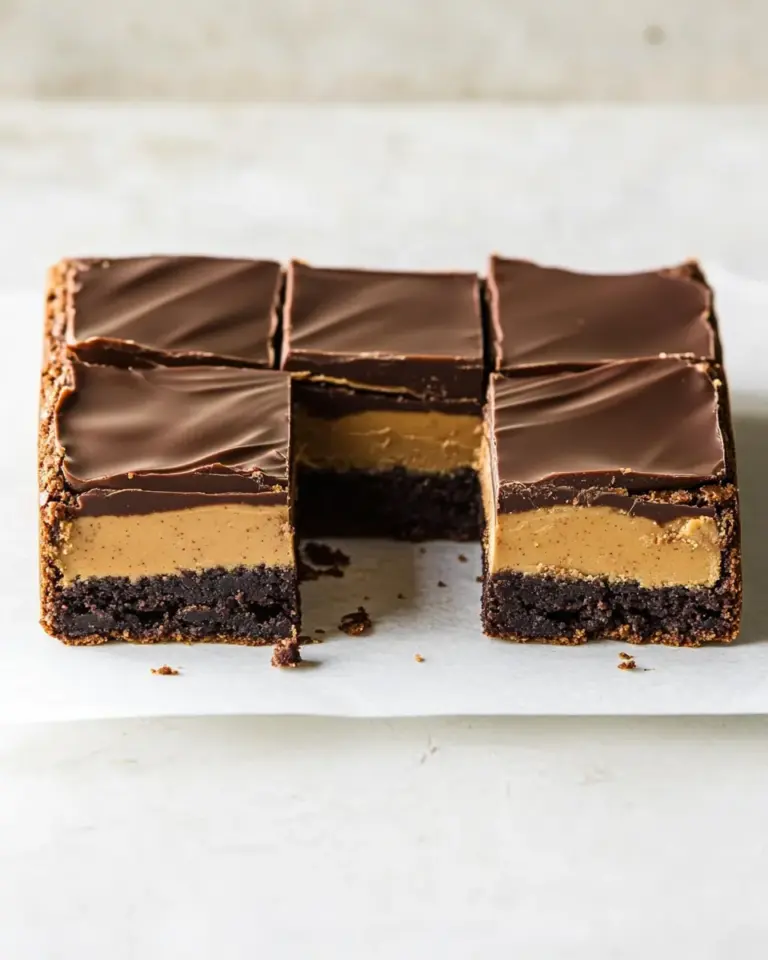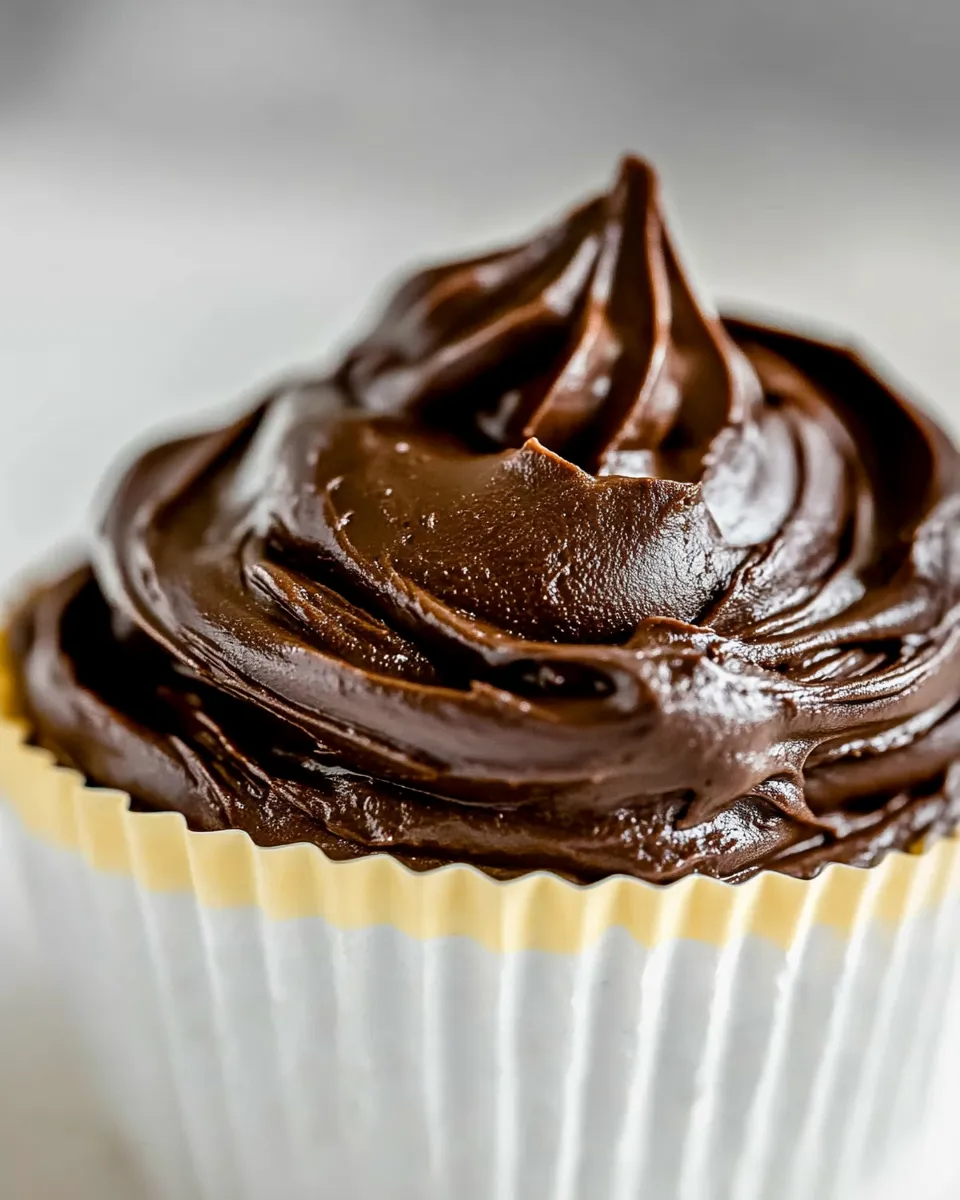
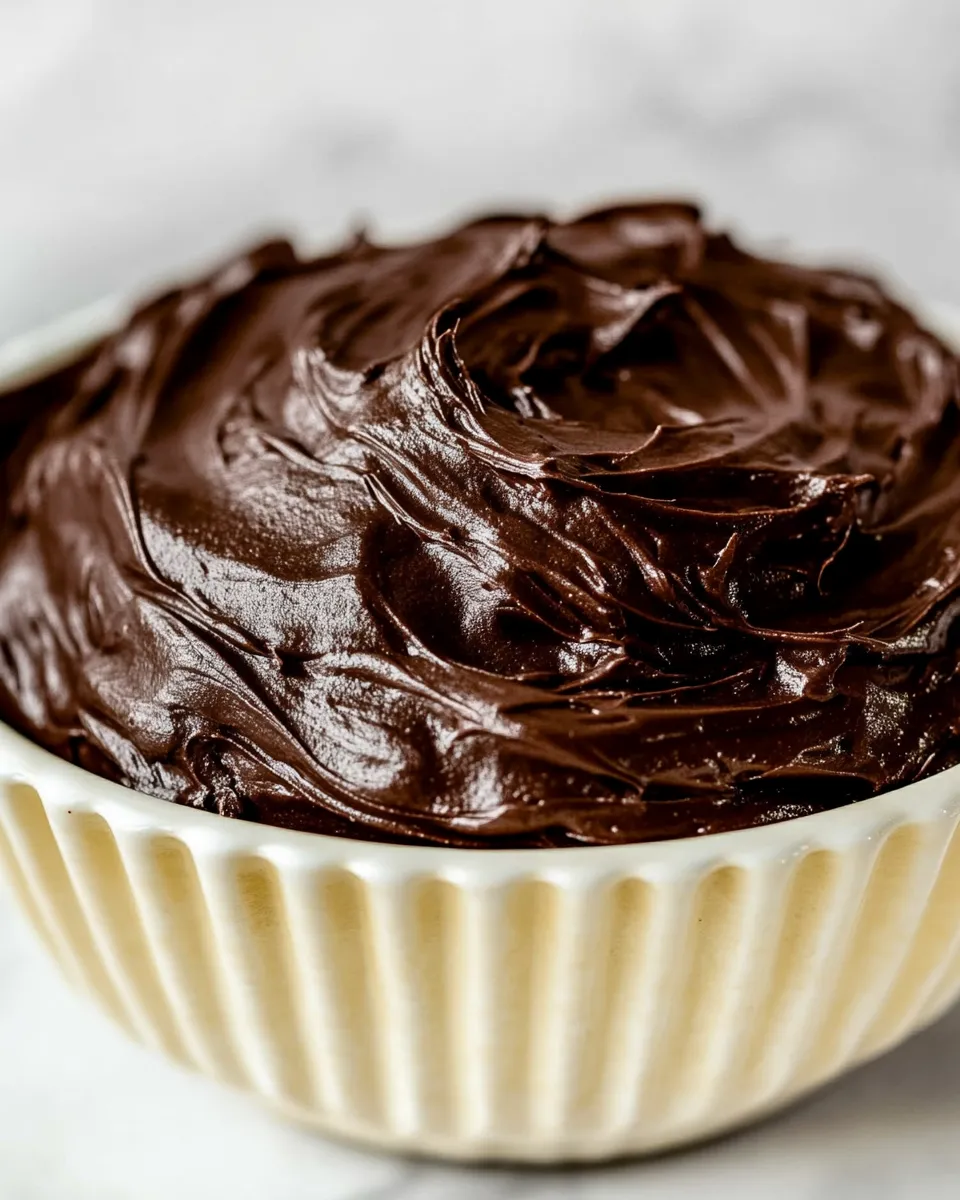
Chocolate Sour Cream Frosting
This frosting lives in the sweet spot between glossy chocolate ganache and tender, tangy buttercream. It’s rich but not overly sweet, thanks to the tang of sour cream and the silk of heavy cream. You get a spreadable, shiny finish that sets up nicely on cupcakes and holds its shape without becoming greasy.
I use this when I want a quick, reliable chocolate frosting that tastes a touch grown-up. The technique is straightforward: melt butter, stir in the dry chocolate ingredients, add a cream-and-sour-cream mix, heat gently until the sugar dissolves, then cool until spreadable. It’s forgiving and very easy to rescue if it gets too firm.
Below you’ll find the ingredient checklist, exact step-by-step method, and practical notes for substitutions, troubleshooting, and storage. Read the method through once before starting so you know what’s ahead—this frosting comes together smoothly if you keep the heat gentle and whisk steadily.
Ingredient Checklist

Ingredients
- ½ cup (113 g) unsalted butter — the fat that gives the frosting shine and richness; melt it gently.
- 1 ½ cups (300 g) granulated sugar — sweetens and helps give structure; dissolve fully for a smooth texture.
- 1 ¼ cups (100 g) unsweetened cocoa powder — provides chocolate flavor and color; sift if lumpy.
- Pinch salt — balances sweetness and enhances chocolate flavor.
- 1 ¼ cups (297 ml) heavy whipping cream — adds creaminess and thins the mixture; bring to room temperature so it mixes smoothly.
- ¼ cup (61 g) sour cream — gives tang and helps the frosting remain soft and spreadable once cooled.
- 2 teaspoons vanilla extract — rounds out the chocolate and adds depth.
- 1 teaspoon instant coffee (optional) — intensifies chocolate flavor if you choose to use it.
The Method for Chocolate Sour Cream Frosting
- Melt the ½ cup (113 g) unsalted butter in a large saucepan over medium heat.
- Add the 1 ½ cups (300 g) granulated sugar, 1 ¼ cups (100 g) unsweetened cocoa powder, and the pinch of salt to the melted butter; stir until combined. The mixture will be thick and grainy.
- In a large measuring cup, whisk together 1 ¼ cups (297 ml) heavy whipping cream, ¼ cup (61 g) sour cream, 2 teaspoons vanilla extract, and 1 teaspoon instant coffee (optional) until smooth.
- With the saucepan on low-to-medium heat, slowly pour the cream mixture into the saucepan while whisking continuously until the mixture is smooth and homogeneous.
- Cook over medium-low heat, whisking frequently, until the sugar has dissolved and the mixture is hot to the touch, about 4–8 minutes. Do not let it boil.
- Transfer the frosting to a bowl and let it cool at room temperature for 2–3 hours, until it is spreadable. To speed this, chill the bowl in the refrigerator and check periodically.
- If the frosting becomes too firm to spread after chilling, microwave it in 20-second intervals, stirring between intervals, until it reaches the desired consistency.
- Frost the tops of cupcakes with the chocolate sour cream frosting. Store any leftover frosting in the refrigerator and allow it to come to room temperature before serving.
Why You’ll Keep Making It
This frosting hits several practical notes at once: it’s quick to prepare, it doesn’t rely on a mixer, and it gives you a glossy, forgiving finish that holds up on cupcakes. The sour cream keeps the frosting from feeling heavy and adds a gentle tang that balances the sugar—especially welcome if you’re topping sweet cakes or rich cupcakes.
It also responds well to last-minute adjustments. If it firms up too much in the fridge, a few short bursts in the microwave with stirring brings it back to spreadable. If you need a slightly thinner finish, warm it just enough to loosen the texture and then work quickly. That flexibility makes it a reliable choice for batch baking or for cakes that need to sit for a while before serving.
Smart Substitutions

Substitutions can adapt this frosting to what you have on hand, while keeping the overall method and texture intact.
- Unsalted butter — If you only have salted butter, use it but taste the batter before adding any extra salt. Reduce or skip the pinch of salt.
- Granulated sugar — Superfine sugar will dissolve faster and can give a slightly smoother mouthfeel; keep the same volume.
- Unsweetened cocoa powder — Dutch-process cocoa will darken and deepen the flavor; use it in the same amount and expect a milder acidity.
- Sour cream — Full-fat sour cream gives the creamiest result. If you need a lighter option, a thick plain yogurt will behave similarly in texture (though it will alter the final tang slightly).
- Instant coffee — It’s optional for deeper chocolate notes. If you skip it, you lose a touch of complexity but not much structural effect.
Recommended Tools
- Large saucepan — wide-bottomed is best so the mixture heats evenly and you can whisk easily.
- Whisk — necessary for keeping the mixture smooth when adding the cream.
- Large measuring cup or pitcher — for combining the cream, sour cream, vanilla, and coffee before adding to the saucepan.
- Heatproof bowl — to transfer the frosting for cooling.
- Rubber spatula — useful for scraping the saucepan and spreading the frosting.
- Microwave-safe bowl (optional) — handy if you need to soften chilled frosting quickly.
Things That Go Wrong
Here are common missteps and how to avoid or fix them.
- Grainy texture from undissolved sugar — This usually means the mixture didn’t heat long enough. Keep the heat at medium-low and whisk frequently until the mixture is hot to the touch and the sugar dissolves (about 4–8 minutes).
- Mixture boiled — Boiling can cause separation or a dull finish. Maintain medium-low heat and watch closely; do not let it reach a rolling boil.
- Too thin at serving time — If it cools but stays too loose, chill it briefly to thicken. Check every 10–15 minutes so it doesn’t become too firm.
- Too firm after chilling — Reheat gently in 20-second microwave intervals, stirring between, until you reach spreadable consistency.
- Curdled or separated — This is rare with these ingredients, but aggressive high heat or sudden temperature changes can stress the emulsification. Warm gently and whisk vigorously; if it won’t come together, you can try bringing a small amount of warm liquid (cream) to the same temperature and whisking it in slowly to re-emulsify.
Seasonal Flavor Boosts
Small additions can tailor the frosting to the season without changing the base method. Use sparingly—these are accents rather than bulk ingredients.
- Winter — A pinch of ground cinnamon or a dash of high-quality vanilla paired with the 2 teaspoons already called for gives a cozy note.
- Spring — A light smear of citrus zest (orange or clementine) rubbed into the sugar before mixing adds brightness. Use very little so it doesn’t liquefy the frosting.
- Summer — For a cool, mint-chocolate vibe, stir in a couple of drops of pure peppermint extract after cooking (start small; it’s potent).
- Autumn — A touch of espresso or extra instant coffee enhances depth and pairs nicely with pumpkin or spice cake.
Insider Tips
These are practical, experience-based points that help the recipe behave predictably.
- Read all steps before starting. Heating then cooling is the core rhythm here; being prepared helps you avoid overheating or rushing the chilling phase.
- Use a wide saucepan so heat distributes evenly and the whisk can reach the edges. Narrow pots trap heat and increase the risk of localized burning.
- When adding the cream mixture, pour slowly while whisking continuously. That steady incorporation prevents lumps and encourages a silky emulsion.
- Set a timer for the 2–3 hour cooling window but check it periodically. Ambient temperature and bowl size change how quickly it becomes spreadable.
- To frost cupcakes neatly, use an offset spatula or pipe the frosting after transferring to a piping bag. If piping, ensure the frosting is soft enough to flow but firm enough to hold shape.
Freezer-Friendly Notes
You can freeze this frosting for longer storage, but texture changes are possible. Freeze in an airtight container, leaving a little headspace, for up to 2 months.
- Thawing: Move the container to the refrigerator overnight to thaw slowly. After it’s thawed, bring to room temperature and rewhisk or briefly microwave in 20-second bursts, stirring between, until smooth and spreadable.
- Do not refreeze once thawed; repeated freeze-thaw cycles degrade texture.
- If you plan to freeze cupcakes with frosting, flash-freeze them on a tray first to set the frosting, then transfer to a sealed container to avoid surface bloom or freezer odors.
Chocolate Sour Cream Frosting FAQs
Q: Can I make this ahead of time? A: Yes. You can prepare the frosting and store it in the refrigerator for up to 4–5 days. Bring it to room temperature and rewhisk before spreading.
Q: Will this hold up in warm weather? A: It’s more stable than a butter-only frosting because of the cream and sour cream, but it will soften in high heat. Keep desserts refrigerated until serving, and avoid leaving them out for extended periods.
Q: Can I use this on layer cakes? A: Yes—this works well as a top and crumb coat if you allow it to firm slightly in the fridge between layers. For smooth sides, chill and then do a final thin coat and smooth quickly.
Q: Is the instant coffee necessary? A: No. It’s optional and only added to intensify the chocolate flavor. Skip it if you prefer no coffee notes.
Q: My frosting is grainy—can it be saved? A: Often yes. Return it to a saucepan, warm gently while whisking until the sugar dissolves, then cool again to spreadable consistency.
Final Thoughts
This Chocolate Sour Cream Frosting is a reliable, everyday chocolate finish with a glossy look and approachable technique. It balances richness and tang, works well on cupcakes and cakes, and is flexible enough to be tweaked for seasonal flair. Keep your heat low, whisk steadily, and allow the cooling time; the payoff is a silky, spreadable frosting that tastes more complex than the effort suggests.
Make a double batch when you have company—leftovers keep well and reheat beautifully. Enjoy the small lift that a touch of sour cream and a careful finish can bring to your chocolate desserts.
Chocolate Sour Cream Frosting
Ingredients
Ingredients
- 1/2 cup 113 g unsalted butter
- 1 1/2 cups 300 ggranulated sugar
- 1 1/4 cups 100 gunsweetened cocoa powder
- Pinchsalt
- 1 1/4 cups 297 mlheavy whipping cream
- 1/4 cup 61 gsour cream
- 2 teaspoonsvanilla extract
- 1 teaspooninstant coffee optional, see note
Instructions
Instructions
- Melt the ½ cup (113 g) unsalted butter in a large saucepan over medium heat.
- Add the 1 ½ cups (300 g) granulated sugar, 1 ¼ cups (100 g) unsweetened cocoa powder, and the pinch of salt to the melted butter; stir until combined. The mixture will be thick and grainy.
- In a large measuring cup, whisk together 1 ¼ cups (297 ml) heavy whipping cream, ¼ cup (61 g) sour cream, 2 teaspoons vanilla extract, and 1 teaspoon instant coffee (optional) until smooth.
- With the saucepan on low-to-medium heat, slowly pour the cream mixture into the saucepan while whisking continuously until the mixture is smooth and homogeneous.
- Cook over medium-low heat, whisking frequently, until the sugar has dissolved and the mixture is hot to the touch, about 4–8 minutes. Do not let it boil.
- Transfer the frosting to a bowl and let it cool at room temperature for 2–3 hours, until it is spreadable. To speed this, chill the bowl in the refrigerator and check periodically.
- If the frosting becomes too firm to spread after chilling, microwave it in 20-second intervals, stirring between intervals, until it reaches the desired consistency.
- Frost the tops of cupcakes with the chocolate sour cream frosting. Store any leftover frosting in the refrigerator and allow it to come to room temperature before serving.
Equipment
- Saucepan
- Whisk
- Measuring cup
- Bowl
- Refrigerator
- Microwave
Notes
To cool the frosting faster you can chill it.
The frosting will set solid as if it’s chilled, so let come to room temperature or microwave on 50% power in 15 second increments to thin.
If you want to add the instant coffee, it won’t make the icing taste like mocha, instead it deepens the chocolate flavor.