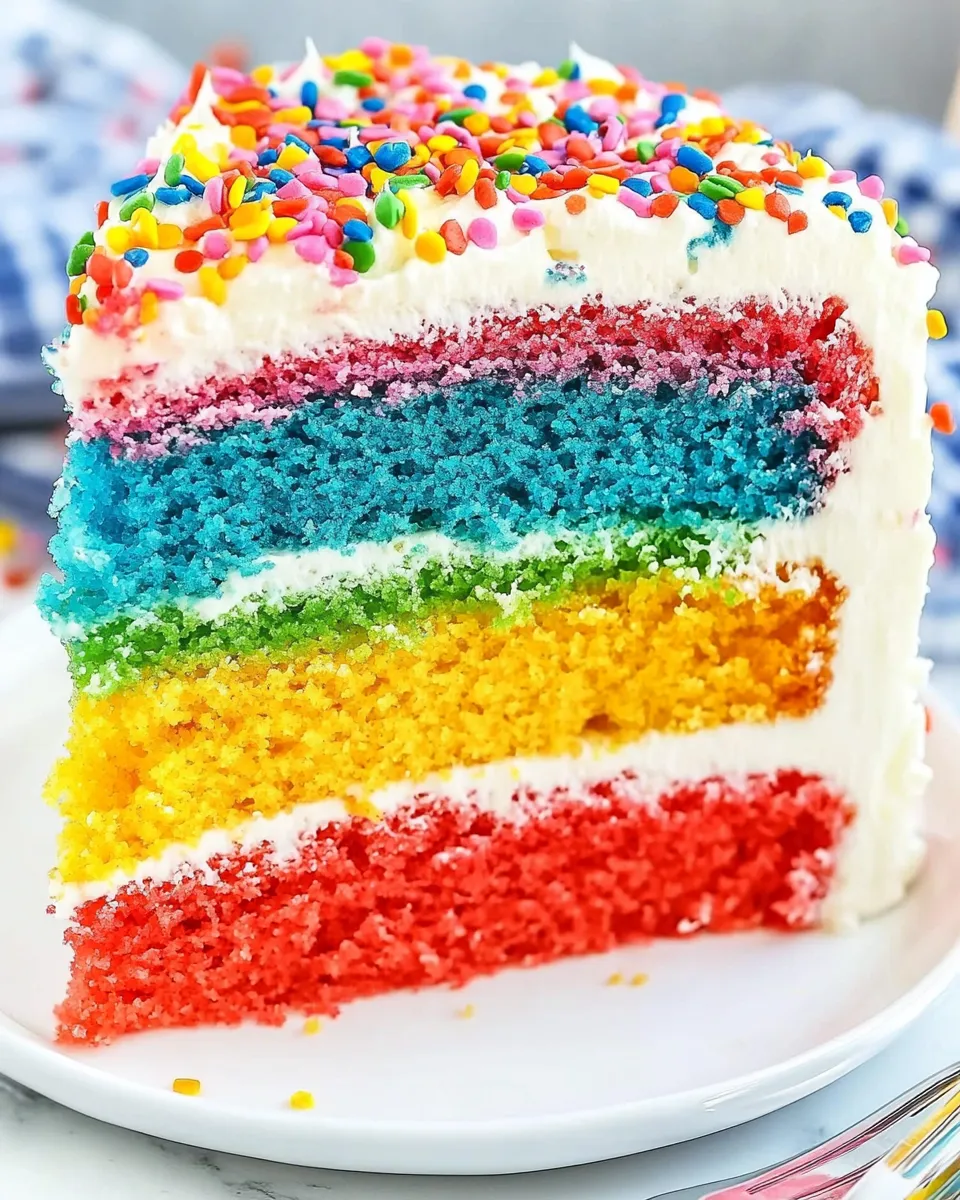
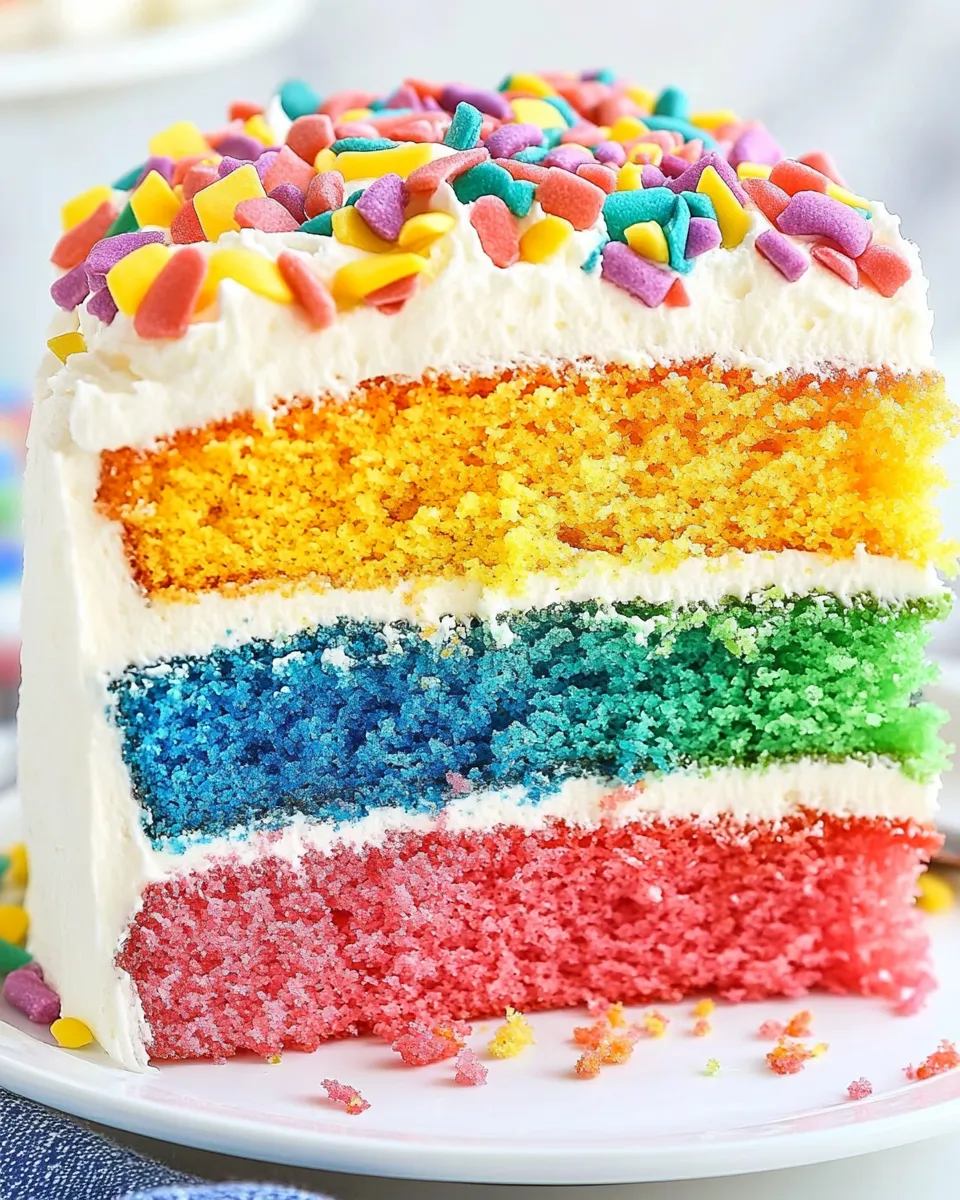
Rainbow Layer Cake
Bright, tender layers stacked with simple buttercream — that’s the whole promise of this Rainbow Layer Cake. It looks like a celebration on a plate but follows a straightforward process you can repeat with confidence. No tricks, just sensible steps and reliable timing.
I test and retest recipes so you can skip the guesswork. This one separates egg whites for a lighter texture, divides batter into five colors, and uses a classic butter-and-sugar frosting that spreads easily. The result is cheerful, not fussy.
Below you’ll find a clear ingredient checklist, step-by-step directions exactly as written for consistency, troubleshooting pointers, and sensible ideas for serving across seasons. Read the full directions once, then follow the numbered steps when you bake.
Ingredient Checklist

- 1 cup butter, softened — base fat for the cake; brings tenderness and richness.
- 2 cups sugar — sweetens and helps the cake brown and set.
- 2 teaspoons vanilla extract — flavor enhancer; use pure vanilla if you have it.
- 6 large egg whites — lighten the crumb and add structure without yolk fat.
- 3 cups all-purpose flour — main structure; measure by spooning into the cup and leveling.
- 4 teaspoons baking powder — leavening; make sure it’s fresh for good rise.
- 1 teaspoon salt — balances sweetness and enhances flavor.
- 1 cup milk — hydrates the batter and helps dissolve sugar and flour.
- Red, orange, yellow, green, and blue food coloring — what makes the layers rainbow-bright; add until the color is uniform.
- ½ cup butter, softened — butter for the frosting; room temperature for smooth creaming.
- 4 cups powdered sugar — sweetens and thickens the frosting; sift if lumpy.
- 1 teaspoon vanilla — flavor for the frosting.
- 2-3 Tablespoons milk — thins the frosting to spreadable consistency; add gradually.
- Sprinkles of your choice — optional garnish; adds playfulness and texture to the top.
Directions: Rainbow Layer Cake
- Preheat the oven to 350°F (175°C). Grease five 8-inch round cake pans with cooking spray and dust lightly with flour, tapping out the excess. If you do not have five pans, plan to bake in batches.
- In a large mixing bowl, cream 1 cup softened butter and 2 cups sugar with an electric mixer until light and fluffy, about 2–3 minutes.
- Add 2 teaspoons vanilla extract to the butter mixture, then add 6 large egg whites one at a time, beating after each addition until fully incorporated and the batter is smooth.
- In a separate bowl, whisk together 3 cups all-purpose flour, 4 teaspoons baking powder, and 1 teaspoon salt.
- With the mixer on low, add the dry ingredients to the butter mixture in three additions, alternating with 1 cup milk (start and end with the dry ingredients). Scrape the bowl sides as needed and beat just until the batter is smooth.
- Divide the batter evenly among five bowls. Add one food coloring color to each bowl (red, orange, yellow, green, blue) and stir each bowl until the color is uniform.
- Pour each colored batter into a prepared 8-inch pan and smooth the tops.
- Bake the layers for about 15 minutes, or until a toothpick inserted into the center of each layer comes out clean. If baking in batches, allow pans to cool slightly before reusing.
- Let the cakes cool in their pans for 15 minutes. Run a knife around the pan edges to loosen, invert each layer onto a wire rack, remove the pan, and allow the layers to cool completely before frosting.
- Make the frosting: In a medium bowl, beat ½ cup softened butter with 4 cups powdered sugar until combined. Add 1 teaspoon vanilla and 2 tablespoons milk and beat until smooth. If the frosting is too thick, add up to 1 more tablespoon milk (use 2–3 tablespoons total). If it is too thin, add more powdered sugar until spreadable.
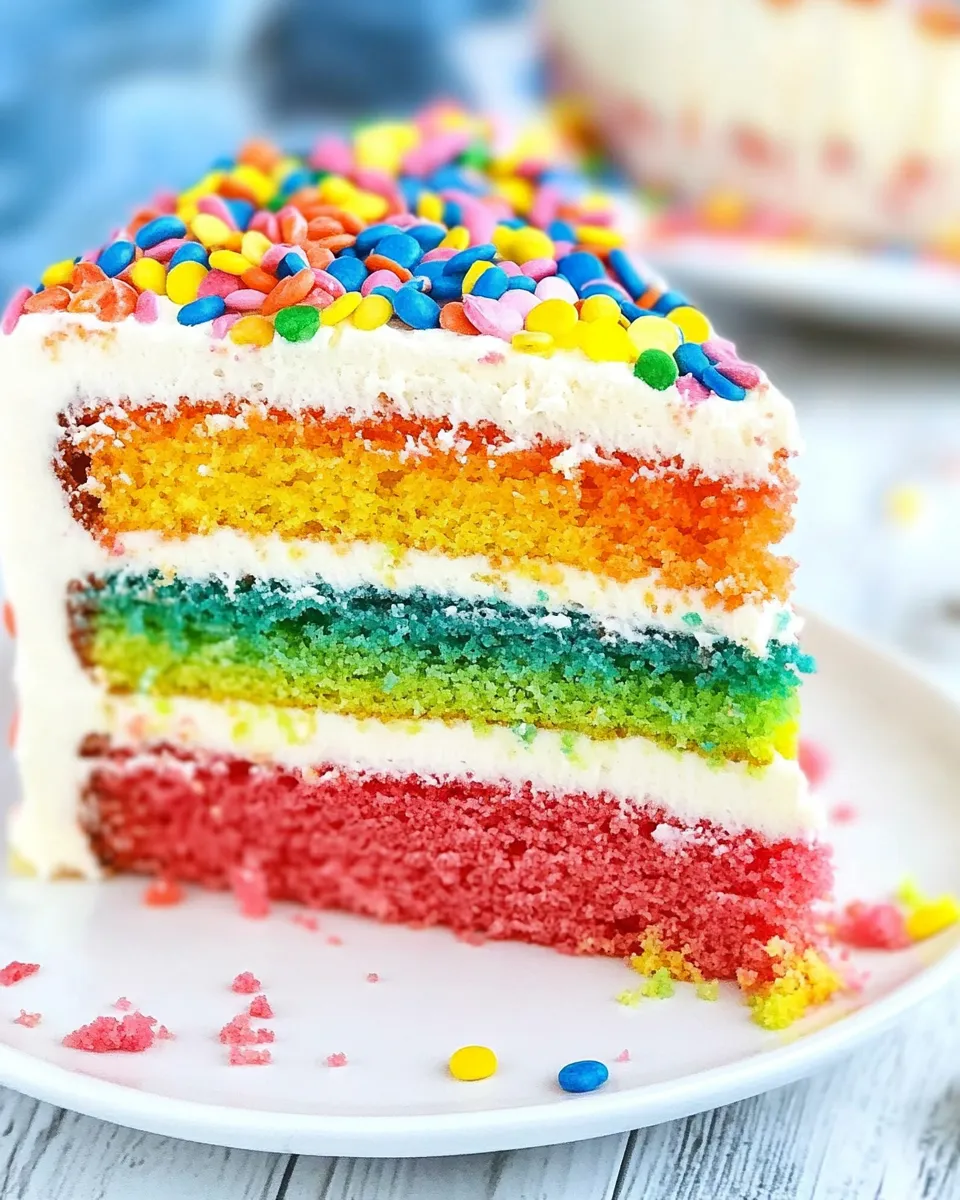
- Assemble the cake: place the blue layer on your serving plate (flat side down if you trimmed domes). Spread an even layer of frosting over the blue layer, then stack the green layer and frost, then yellow, then orange, then red, frosting between each layer. Use the remaining frosting to cover the top and sides of the stacked cake.
- Decorate the top with sprinkles of your choice. Allow the frosting to set slightly before slicing and serving.
Why You’ll Keep Making It
This cake hits three practical notes: it’s visually impressive, quick to assemble, and forgiving on timing. The batter is straightforward and holds food coloring well, so you reliably get vivid layers without extra fuss. The frosting is a simple butter-and-sugar mix that spreads smoothly and hides small imperfections in the layers.
You can scale the look up or down easily. Want a smaller crowd cake? Trim the layers and make thinner stacks. Hosting a birthday? The bright colors and sprinkles deliver instant delight. Once you nail the basic bake-and-stack rhythm, it becomes a go-to for parties and weeknight celebrations alike.
Swap Guide
Think of swaps as style choices rather than emergency fixes. Want a gentler color palette? Use softer dye amounts to create pastel layers. Prefer fewer layers? Combine adjacent colors to bake three thicker layers instead of five, then cut them horizontally if you want more height.
If you need a different frosting texture, you can adjust the milk in small increments until the consistency suits your spreading method. Also, piping decorations or a thin crumb coat before a final smooth layer will give a clean finish if presentation matters.
Essential Tools for Success
- Five 8-inch round cake pans — ideal for one-batch layering; if you have fewer, plan for batches.
- Electric mixer — speeds creaming and ensures a smooth batter and frosting.
- Rubber spatula — for scraping bowls; prevents overmixing and waste.
- Wire rack — cools layers evenly and prevents soggy bottoms.
- Offset spatula or bench scraper — helps spread frosting smoothly and stack evenly.
- Toothpicks — for quick doneness checks.
Troubles You Can Avoid
Underbaking is common when you try to speed things up. A clean toothpick is the best judge. Overbeating after adding flour can tighten the crumb; mix only until smooth. If your frosting looks greasy or separated, you may have used butter that was too warm; chill slightly and rewhip.
Stacking mistakes usually come from uneven layers. Trim any domes so each layer sits flat. Chill briefly after stacking if the cake seems to slide while you work. Keep frosting at a spreadable but firm consistency to avoid slippage.
Spring to Winter: Ideas
Spring: top the cake with fresh berries between slices for a seasonal contrast. The colors pair well with light fruit.
Summer: serve slightly chilled on warm days; the frosting firms up and slices cleanly. Add citrus zests to the frosting for brightness if you prefer a tart note.
Fall: swap sprinkles for chopped toasted nuts or edible gold flakes for a richer look. The visual surprise of the rainbow inside is a lovely contrast to autumnal decor.
Winter: keep the rainbow but change the garnish to winter-themed sprinkles or a dusting of edible glitter for holidays and celebrations.
What Could Go Wrong
Dry cake: usually from overbaking or too much flour. Measure flour by spooning it into the cup and leveling instead of packing. Slightly underbaking is safer than overbaking; the carryover heat finishes the last minute.
Pale or muddy colors: add food coloring gradually until you hit the shade you want. Gel colors are more concentrated than liquids, but if you only have drops, increase carefully. Avoid mixing too many colors together — they can dull.
Frosting runs: if your kitchen is warm or butter is too soft, chill the frosting for a bit and then re-whip before coating the cake. A slightly thicker crumb coat helps stabilize the final layer.
Storing, Freezing & Reheating
Storing
Room temp: If the cake will be eaten within 24 hours, keep it covered at room temperature to preserve the frosting’s texture and the cake’s tenderness.
Refrigerating
Refrigerate when storing longer than a day or if your kitchen is warm. Place the cake in a cake keeper or loosely cover with plastic wrap. Cold firming helps the slices hold shape but bring to room temperature for 20–30 minutes before serving for best flavor.
Freezing
Freeze assembled cake slices wrapped tightly in plastic and foil for up to one month. Thaw overnight in the refrigerator, then bring to room temperature before serving. Alternatively, freeze individual unfrosted layers wrapped well, which helps the texture stay true when thawed and frosted later.
FAQ
Can I use whole eggs instead of egg whites?
Yes. Using whole eggs will change the crumb — it will be slightly richer and denser because of the yolks. If you switch, reduce the fat slightly only if the batter seems too heavy, and watch baking time.
What if I only have three cake pans?
Bake in batches. Prepare the batter and color it, then bake three layers first. Wash and reuse the pans for the remaining two layers, allowing them to cool between uses. Slightly longer oven time per batch can occur depending on how warm your pans get.
How do I get evenly colored layers?
Divide the batter carefully by weight or use a measuring cup for consistent amounts. Stir the coloring until uniform and avoid overmixing the batter after color is added.
Can I make the frosting ahead?
Yes. Make the frosting up to two days in advance and refrigerate in an airtight container. Re-whip briefly before spreading; add a small splash of milk if it has stiffened too much.
See You at the Table
This Rainbow Layer Cake is the kind of recipe you reach for when you want a bit of theater without drama. Bright layers, reliable technique, and a forgiving frosting make it a repeatable favorite. Follow the steps, keep your pans ready, and enjoy the moment when someone slices through to reveal the colors inside.
When you make it, take a photo, slice a generous piece, and pass it around. It’s a simple way to make any gathering feel intentional and joyful. See you at the table — I can’t wait to hear which color is your crowd’s favorite.
Rainbow Layer Cake
Ingredients
Ingredients
- 1 cupbuttersoftened
- 2 cupssugar
- 2 teaspoonsvanilla extract
- 6 large egg whites
- 3 cupsall-purpose flour
- 4 teaspoonsbaking powder
- 1 teaspoonsalt
- 1 cupmilk
- Red orange, yellow, green, and blue food coloring
- 1/2 cupbuttersoftened
- 4 cupspowdered sugar
- 1 teaspoonvanilla
- 2-3 Tablespoonsmilk
- Sprinkles of your choice
Instructions
Instructions
- Preheat the oven to 350°F (175°C). Grease five 8-inch round cake pans with cooking spray and dust lightly with flour, tapping out the excess. If you do not have five pans, plan to bake in batches.
- In a large mixing bowl, cream 1 cup softened butter and 2 cups sugar with an electric mixer until light and fluffy, about 2–3 minutes.
- Add 2 teaspoons vanilla extract to the butter mixture, then add 6 large egg whites one at a time, beating after each addition until fully incorporated and the batter is smooth.
- In a separate bowl, whisk together 3 cups all-purpose flour, 4 teaspoons baking powder, and 1 teaspoon salt.
- With the mixer on low, add the dry ingredients to the butter mixture in three additions, alternating with 1 cup milk (start and end with the dry ingredients). Scrape the bowl sides as needed and beat just until the batter is smooth.
- Divide the batter evenly among five bowls. Add one food coloring color to each bowl (red, orange, yellow, green, blue) and stir each bowl until the color is uniform.
- Pour each colored batter into a prepared 8-inch pan and smooth the tops.
- Bake the layers for about 15 minutes, or until a toothpick inserted into the center of each layer comes out clean. If baking in batches, allow pans to cool slightly before reusing.
- Let the cakes cool in their pans for 15 minutes. Run a knife around the pan edges to loosen, invert each layer onto a wire rack, remove the pan, and allow the layers to cool completely before frosting.
- Make the frosting: In a medium bowl, beat ½ cup softened butter with 4 cups powdered sugar until combined. Add 1 teaspoon vanilla and 2 tablespoons milk and beat until smooth. If the frosting is too thick, add up to 1 more tablespoon milk (use 2–3 tablespoons total). If it is too thin, add more powdered sugar until spreadable.
- Assemble the cake: place the blue layer on your serving plate (flat side down if you trimmed domes). Spread an even layer of frosting over the blue layer, then stack the green layer and frost, then yellow, then orange, then red, frosting between each layer. Use the remaining frosting to cover the top and sides of the stacked cake.
- Decorate the top with sprinkles of your choice. Allow the frosting to set slightly before slicing and serving.
Equipment
- Oven
- five 8-inch round cake pans
- Cooking Spray
- Mixing Bowls
- Electric Mixer
- Whisk
- Measuring Cups and Spoons
- Wire Rack
- Knife