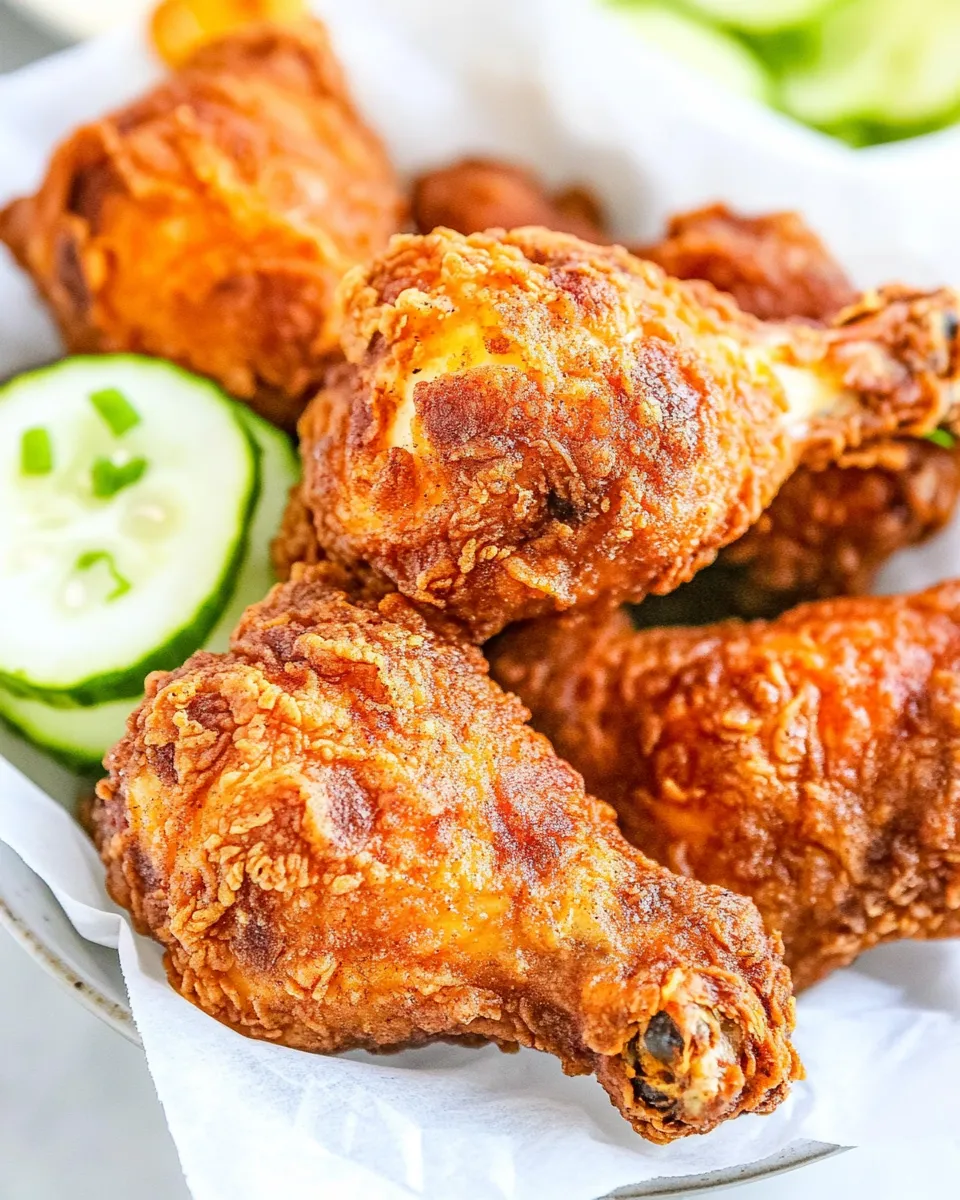
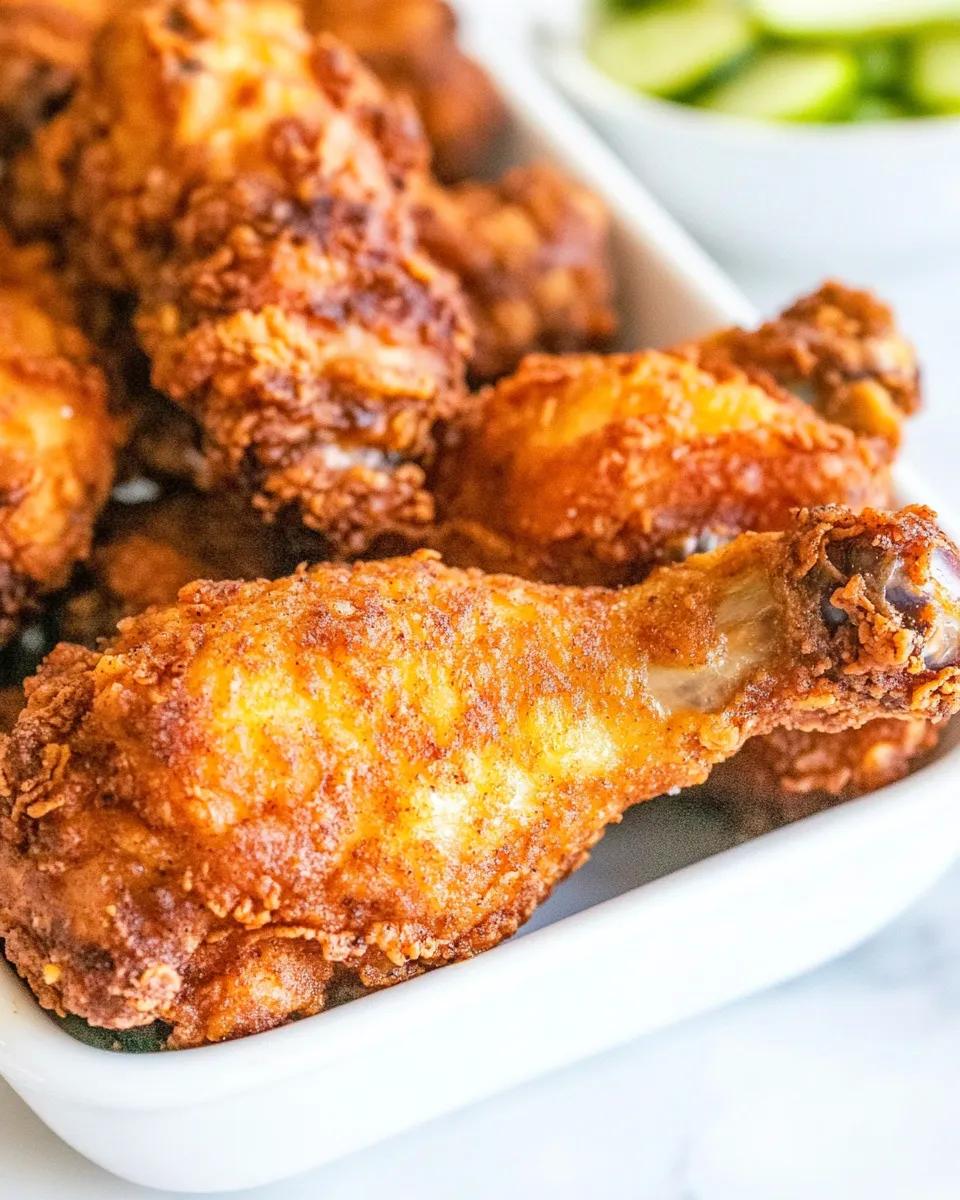
Pickle Brined Fried Chicken
I fell in love with this recipe the first time a crunchy, briny piece of chicken surprised me mid-bite. The pickle brine brightens the meat and the buttermilk keeps it tender; together they make a fried chicken that’s juicy inside and deeply flavorful outside. It’s straightforward to pull off, and the payoff is rightly show-stopping.
This post is practical and focused. I’ll walk you through what to buy, exactly how to brine and fry, and how to rescue the few things that can go sideways. No fluff—just the confidence to make a batch that will disappear fast at the table.
Plan ahead because the chicken needs time in the brine. Aside from that, the hands-on cooking moves are classic: dredge, rest, and fry. Read the whole thing once, then get comfortable—the recipe behaves well if you follow the steps.
What to Buy

Shop with purpose. You’re mainly after good-quality bone-in chicken, a jar of dill pickles (you want the juice), and basic pantry spices. Buy enough oil for deep frying so the pieces can float and cook evenly. If you don’t already own one, a reliable instant-read thermometer is worth the small investment; it takes the guesswork out of doneness.
Choose chicken cuts based on what your family likes—breasts for white meat eaters, thighs and drumsticks for dark-meat lovers. Bone-in pieces fry more evenly and stay juicier than boneless. Pick a buttermilk that’s fresh; it’s part of the brine and tenderizes the meat.
Ingredients
- 2 cups buttermilk — acid and fat that tenderize the chicken and help the flour adhere.
- 1½ cups dill pickle juice (from a jar of pickles*) — the briny backbone; adds tang and seasoning.
- 1½ tablespoons hot sauce (optional) — boosts flavor and heat if you like a gentle kick.
- 3 teaspoons kosher salt (divided) — seasons both the brine and the flour for balanced saltiness.
- 4 pounds bone-in chicken breasts, thighs, or drumsticks — the main event; bone-in keeps meat juicier.
- 2 cups all-purpose flour — provides the crispy coating; press it on for good adhesion.
- 2 teaspoons garlic powder — savory depth in the breading.
- 2 teaspoons onion powder — rounds the aromatics.
- 2 teaspoons ground paprika — adds color and mild smoky-sweet flavor.
- 1 teaspoon ground black pepper — subtle heat and bite.
- cooking oil (for frying**) — use a neutral oil with a high smoke point (see Tools & Equipment).
Step-by-Step: Pickle Brined Fried Chicken
- In a large bowl, whisk together 2 cups buttermilk, 1½ cups dill pickle juice, 1½ tablespoons hot sauce (optional), and 2 teaspoons kosher salt.
- Add 4 pounds bone-in chicken (breasts, thighs, or drumsticks) to the bowl and stir to coat. Cover the bowl with plastic wrap and refrigerate to marinate for 8–12 hours.
- When ready to cook, set a wire rack over a baking sheet. Remove the chicken from the refrigerator and use a colander to lift the pieces from the marinade, allowing excess liquid to drain. Place the drained pieces on the wire rack and let them sit at room temperature for about 20–30 minutes.
- Meanwhile, in a shallow bowl, combine 2 cups all-purpose flour, the remaining 1 teaspoon kosher salt, 2 teaspoons garlic powder, 2 teaspoons onion powder, 2 teaspoons ground paprika, and 1 teaspoon ground black pepper.
- Working one piece at a time, coat each chicken piece thoroughly in the flour mixture, pressing the flour onto the surface so it adheres. Return the breaded pieces to the wire rack and let them rest at room temperature for 30 minutes.
- Towards the end of the resting time, heat cooking oil in a deep fryer or Dutch oven to 350°F. Use enough oil so the chicken pieces can fry without crowding.
- Working in batches, carefully add breaded chicken to the hot oil and fry until golden brown, about 12–15 minutes per batch, turning once during cooking. The chicken is done when an instant-read thermometer inserted into the thickest portion reads 165°F.
- Remove cooked chicken from the oil and drain on a paper towel–lined baking sheet. Repeat frying with the remaining chicken pieces.
What Makes This Recipe Special
The brine is the star. Dill pickle juice brings a bright, salty acidity that penetrates the meat and complements the buttermilk’s tenderizing effect. That combination yields a chicken that stays moist even after a long fry. The spice mix in the flour is intentionally simple—garlic, onion, paprika, and pepper—so the pickle note still sings through.
Another key is the double resting: after draining the brine and again after breading. That rest gives the coating time to adhere and dry slightly, which produces a shatteringly crisp crust when it hits hot oil. It’s a small step with a big payoff.
Swap Guide

- Chicken cuts: If you prefer all dark meat, use thighs and drumsticks only. If you want a quicker cook time, use smaller pieces, but watch the temperature closely.
- Pickle juice: If you don’t have dill pickle juice, a mix of 1 cup water + ½ cup vinegar + 1 teaspoon sugar won’t replicate it perfectly but can stand in in a pinch. (I note this as an option, but the original juice is what makes the recipe distinctive.)
- Hot sauce: Omit it or swap for a mild chili paste if you want different heat character.
- Oil: Use peanut, canola, or vegetable oil for frying—choose any neutral oil with a high smoke point.
Tools & Equipment Needed
- Large mixing bowl — for the brine and marinating.
- Plastic wrap — to cover the marinating bowl.
- Wire rack and baking sheet — for draining, drying, and resting breaded chicken.
- Colander — to lift chicken from the marinade without excessive dripping.
- Shallow bowl or pie plate — for the flour mixture and dredging.
- Deep fryer or heavy-bottomed Dutch oven — for frying to an even temperature.
- Instant-read thermometer — essential to know the chicken has reached 165°F safely.
- Tongs and a slotted spoon or spider — to safely handle chicken in hot oil.
- Paper towels — for initial draining after frying.
Watch Outs & How to Fix
Coating won’t stick
Problem: The flour falls off during frying. Fix: Press the flour firmly onto the surface when dredging and don’t skip the 30-minute rest after dredging; that helps the coating set. Also ensure the pieces aren’t wet with excess marinade—lift them in a colander and let them drain well.
Undercooked center
Problem: Crispy outside, raw inside. Fix: Reduce frying temperature slightly so the crust doesn’t overbrown before the interior reaches 165°F. Use an instant-read thermometer to check the thickest part; continue frying in short intervals if needed, or finish larger pieces in a 350°F oven until 165°F is reached.
Soggy crust
Problem: Coating becomes limp after frying. Fix: Make sure oil is hot enough (350°F) before adding chicken and don’t overcrowd the pan; crowding drops oil temperature. Drain on a wire rack not paper towels—paper makes steam and softens the crust.
Over-browned crust
Problem: Dark outside before chicken is done. Fix: Lower the oil to 325–330°F and fry a little longer. Thicker pieces may need to finish in the oven at 350°F until the internal temp reads 165°F.
Warm & Cool Weather Spins
Warm weather: Serve this chicken at a casual outdoor gathering. Keep cooked pieces in a single layer on a wire rack in a low oven (200–225°F) for up to 45 minutes while you finish frying the rest. Pair with a crisp, chilled slaw or cold potato salad to balance the heat of the oil and the briny chicken.
Cool weather: This chicken feels cozy with heartier sides. Finish larger pieces in the oven after frying to ensure even doneness, and serve with mashed potatoes, gravy, or braised greens. The contrast of the tangy crust and warm, buttery sides is especially satisfying when it’s chilly outside.
Chef’s Rationale
I brine with pickle juice and buttermilk because each ingredient contributes something the other doesn’t. Buttermilk’s acidity breaks down proteins for tenderness, while its fat content helps carry flavor. Pickle juice brings a saline brightness that seasons into the flesh. Together they season deeply and produce juicier results than either would alone.
The resting periods are purposeful: after removing excess brine, letting the chicken warm slightly reduces the shock of cold meat hitting hot oil. After breading, the drying time helps the flour adhere and form a stable crust. These are small technique choices that make a real difference in the final texture.
Storage Pro Tips
Refrigerate leftover cooked chicken in an airtight container within two hours of cooking. It will keep for 3–4 days. For the best texture on reheating, avoid the microwave when possible. Reheat in a 375°F oven on a wire rack over a sheet pan for 10–15 minutes, or until the internal temperature reaches 165°F and the crust crisps again.
To freeze: Wrap individual pieces tightly in plastic wrap and place in a freezer bag for up to 3 months. Reheat from frozen in a 375°F oven—add time and check with an instant-read thermometer.
Quick Questions
- Can I brine for less than 8 hours? You can, but the chicken won’t be as deeply seasoned or as tender. Aim for at least 6 hours if you’re pressed for time.
- Is bone-in essential? Bone-in keeps meat juicier and can be more forgiving, but you can use boneless pieces—adjust frying time and watch the internal temp closely.
- How much oil do I need? Enough so the pieces can float and turn—typically several inches deep in a Dutch oven. The exact amount depends on the pot size.
- Why use kosher salt specifically? Kosher salt’s flake size makes it easier to control seasoning. If you use table salt, reduce the quantity (taste the brine logic applies mostly during prep, so be cautious).
Hungry for More?
If you liked this pickle-brined method, try brining other proteins with acidic, flavorful liquids—apples cider or yogurt-based brines change the character entirely. For side ideas that pair perfectly with this chicken, think bright pickled vegetables, simple green salads, or a cooling cucumber yogurt sauce.
Thanks for cooking along. This recipe rewards patience more than technical skill, and it reliably produces pieces that are juicy inside with a memorable, crispy crust. Make it for a weeknight dinner that feels celebratory or for a weekend that calls for something confidently delicious.

Pickle Brined Fried Chicken
Ingredients
Ingredients
- 2 cupsbuttermilk
- 1 1/2 cupsdill pickle juice from a jar of pickles*
- 1 1/2 tablespoonshot sauce optional
- 3 teaspoonskosher salt divided
- 4 poundsbone-in chicken breasts thighs, or drumsticks
- 2 cupsall-purpose flour
- 2 teaspoonsgarlic powder
- 2 teaspoonsonion powder
- 2 teaspoonsground paprika
- 1 teaspoonground black pepper
- cooking oil for frying**
Instructions
Instructions
- In a large bowl, whisk together 2 cups buttermilk, 1½ cups dill pickle juice, 1½ tablespoons hot sauce (optional), and 2 teaspoons kosher salt.
- Add 4 pounds bone-in chicken (breasts, thighs, or drumsticks) to the bowl and stir to coat. Cover the bowl with plastic wrap and refrigerate to marinate for 8–12 hours.
- When ready to cook, set a wire rack over a baking sheet. Remove the chicken from the refrigerator and use a colander to lift the pieces from the marinade, allowing excess liquid to drain. Place the drained pieces on the wire rack and let them sit at room temperature for about 20–30 minutes.
- Meanwhile, in a shallow bowl, combine 2 cups all-purpose flour, the remaining 1 teaspoon kosher salt, 2 teaspoons garlic powder, 2 teaspoons onion powder, 2 teaspoons ground paprika, and 1 teaspoon ground black pepper.
- Working one piece at a time, coat each chicken piece thoroughly in the flour mixture, pressing the flour onto the surface so it adheres. Return the breaded pieces to the wire rack and let them rest at room temperature for 30 minutes.
- Towards the end of the resting time, heat cooking oil in a deep fryer or Dutch oven to 350°F. Use enough oil so the chicken pieces can fry without crowding.
- Working in batches, carefully add breaded chicken to the hot oil and fry until golden brown, about 12–15 minutes per batch, turning once during cooking. The chicken is done when an instant-read thermometer inserted into the thickest portion reads 165°F.
- Remove cooked chicken from the oil and drain on a paper towel–lined baking sheet. Repeat frying with the remaining chicken pieces.
Equipment
- Baking Sheet
- wire cooling rack
- Deep Fryer or Dutch Oven
- Deep Fry Oil Thermometer
Notes
For an extra crispy crust, dip the flour-coated chicken back into the brine, then dredge again in flour before frying.
Keep the oil between 325°F and 350°F while frying. If it drops too low, the coating absorbs oil and gets greasy; too high, and the crust burns before the chicken cooks through.
Fry thighs and drumsticks for 12 minutes and breasts for 15 minutes.The chicken is done when a thermometer inserted into the thickest portion of themeat reads 165°F.
Before serving, transfer the fried chicken to a paper towel-lined plate to get rid of any excess oil.