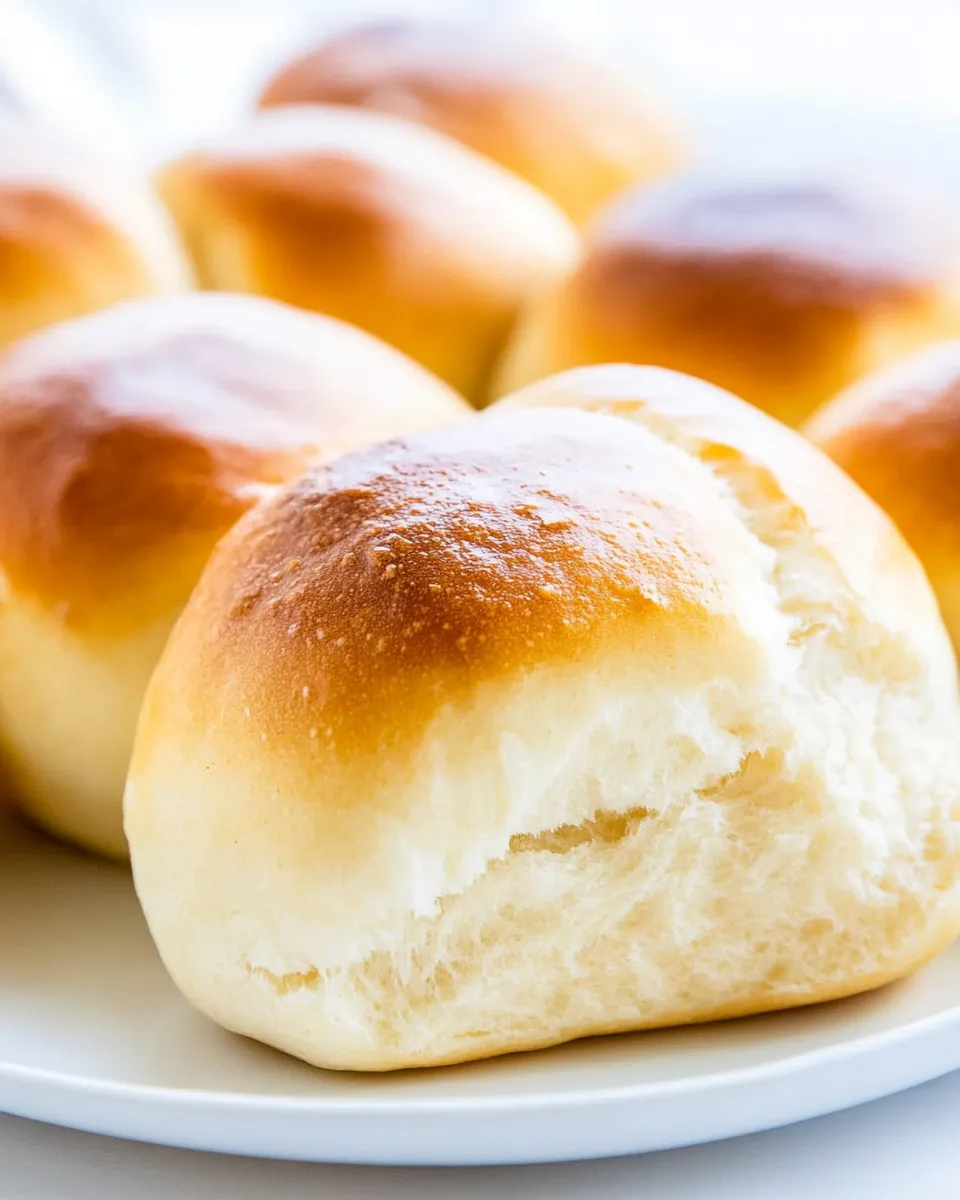
Homemade Slider Buns
These little buns are one of my favorite blank canvases in the kitchen: soft, slightly sweet, and perfectly sized for tiny sandwiches, party sliders, or a quick dinner roll. I make a batch whenever I want something that feels homemade but doesn’t demand a full day of baking. They bake fast, freeze well, and come together with pantry-stable ingredients.
I’ll be practical here — clear steps, what each ingredient does, and the troubleshooting I use when the dough behaves like it has an attitude. Follow the method below exactly for consistent results. I tested this version enough times to know when to be patient and when to push gently on the dough.
Ingredient Rundown

- 3½cupsall-purpose flour — Structure and bulk; gives the buns their tender crumb. Use regular all-purpose flour for the texture in this recipe.
- ¼teaspoonsalt — Balances sweetness and strengthens gluten slightly for better rise.
- ¾cupwater — Hydrates the dough. Temperature should be lukewarm (comfortable to the touch) for best yeast activity.
- 1tablespooninstant yeast — Leavens the dough quickly; instant yeast can be mixed directly with the dry ingredients.
- ¼cupsugar — Feeds the yeast and gives a subtle sweet note that browns nicely in the oven.
- 1egg — Adds richness, color, and helps bind the dough.
- 2tablespoonsmargarine(or melted butter) — Tenderizes the crumb; use margarine as written or melted butter for a slightly richer flavor.
- 2tablespoonsbutter(for brushing) — Brushed on top before baking for a glossy, flavorful finish; set aside as directed.
Homemade Slider Buns Made Stepwise
- Gather all ingredients and set aside the 2 tablespoons butter for brushing; add the remaining ingredients (3½ cups all-purpose flour, ¼ teaspoon salt, ¾ cup water, 1 tablespoon instant yeast, ¼ cup sugar, 1 egg, and 2 tablespoons margarine or melted butter) to the bowl of a stand mixer fitted with the dough hook.
- Mix on medium-low speed for about 3–5 minutes, until the dough is smooth, elastic, and the sides of the bowl are mostly clean. The dough should be slightly sticky but manageable; if it feels too dry, add a little water, and if it is too sticky, add a bit more flour.
- Shape the dough into a ball, cover the bowl with a clean damp kitchen towel, and let it rise in a warm draft-free place until doubled in size (about 1 hour).
- When the dough has doubled, preheat the oven to 375°F (190°C) and line a baking sheet with parchment paper.
- Lightly flour a work surface, turn the dough out onto it, and gently press or roll the dough to an even thickness of 1/3 inch.
- Using a 2-inch round cookie cutter, cut out slider buns. You should get about 25 sliders. Gather the scraps, knead gently a couple times, reroll to 1/3 inch thickness, and cut additional sliders until the dough is used.
- Place the cut sliders on the prepared baking sheet, leaving a little space between each to allow for expansion.
- Cover the baking sheet with a damp kitchen towel and let the buns rest and rise until visibly puffed and about doubled (about 30 minutes).
- While the buns are resting, melt the reserved 2 tablespoons butter (if solid). When the buns have finished their second rise, brush the tops evenly with the melted butter.
- Bake in the preheated oven for 10–12 minutes, or until the tops are golden brown.
- Remove the buns from the oven and transfer to a wire rack to cool slightly before serving.
Top Reasons to Make Homemade Slider Buns
They’re versatile. These buns work as mini burger buns, party sliders, or small dinner rolls beside soup. The 2-inch size keeps portions tidy and encourages creativity with fillings.
They’re fast. From mixing to the oven in roughly 90 minutes if your rise times are average. That makes them realistic for a weekend afternoon or a midweek dinner plan where you want fresh bread without an all-day commitment.
They freeze and reheat well. Bake a double batch and store extras in the freezer. Thaw and warm gently for nearly the same texture as fresh. That makes them great for meal prep and last-minute entertaining.
Flavor-Forward Alternatives
Small changes that make a big difference
Butter swap: Use melted butter instead of margarine for a richer taste. Brush with clarified butter for a slightly crisper top.
Seeds and toppings: Press sesame seeds, poppy seeds, or a sprinkle of flaky sea salt on top after brushing with butter and before baking. Do this sparingly — it enhances the look and flavor without overwhelming the soft roll.
Herb infusion: Fold in finely minced chives or rosemary into the dough for an herby note, or brush the tops with an herb butter after baking for a fresher finish.
Equipment Breakdown

Stand mixer with dough hook — recommended for ease and consistent kneading. You can knead by hand if you prefer, but plan for 8–10 minutes of active kneading by hand versus the 3–5 minutes in the mixer.
2-inch round cookie cutter — standard for this recipe to get about 25 sliders from the dough. A sharp knife or biscuit cutter will also work if you don’t have that exact size, but keep the pieces even for uniform baking.
Baking sheet and parchment paper — parchment keeps bottoms from over-browning and makes cleanup simple.
Wire rack — important for cooling so steam doesn’t condense on the bottom and make the buns soggy.
Problems & Prevention
Dough is too sticky or too dry
Prevention: The source recipe gives a dough that should be slightly sticky but manageable. If it feels tacky and clings to your hands in ropes, add flour a teaspoon at a time. If it seems dry and resists forming a smooth ball, add water a teaspoon at a time. Make adjustments while mixing at low speed.
Dough doesn’t rise
Prevention: Check yeast freshness and use lukewarm water — about 105–115°F (if you use a thermometer) — not hot water. Drafts can slow rise; cover the bowl and set it in a warm spot like an oven with just the light on. If your kitchen is cold, a slightly longer rise time will usually fix it.
Tops brown too quickly while interiors remain pale
Prevention: Tent foil loosely over the buns midway through baking if the tops color too fast. Also ensure oven temperature is accurate — an oven thermometer helps here.
Buns are dense
Prevention: Don’t overflour when rolling — too much additional flour tightens the dough. Also ensure you allow full rises as indicated; underproofed dough won’t expand properly in the oven.
Customize for Your Needs
Make them larger or smaller: Change the cutter size to create dinner rolls or slider minis. Remember baking time will change slightly — larger buns need a few additional minutes, smaller ones less.
Dairy-free: Use margarine in both places (the dough and the brushing butter substitute) or a dairy-free spread for brushing once baked. Keep the rest of the method the same.
Make-ahead: After cutting and placing on the sheet, flash-freeze the unbaked buns on the tray until solid, then transfer to a freeze-safe bag. Bake from frozen adding a few extra minutes to the baking time; check for golden tops and an internal temperature around 190°F for best results.
Notes from the Test Kitchen
I tested this recipe across several days and with slight variations in flour brands and margarine versus butter. The dough does best when you respect hydration: the initial mix will look tacky but becomes smooth and elastic within 3–5 minutes at medium-low speed. If you rush to add flour because it feels sticky right away, you’ll end up with denser buns.
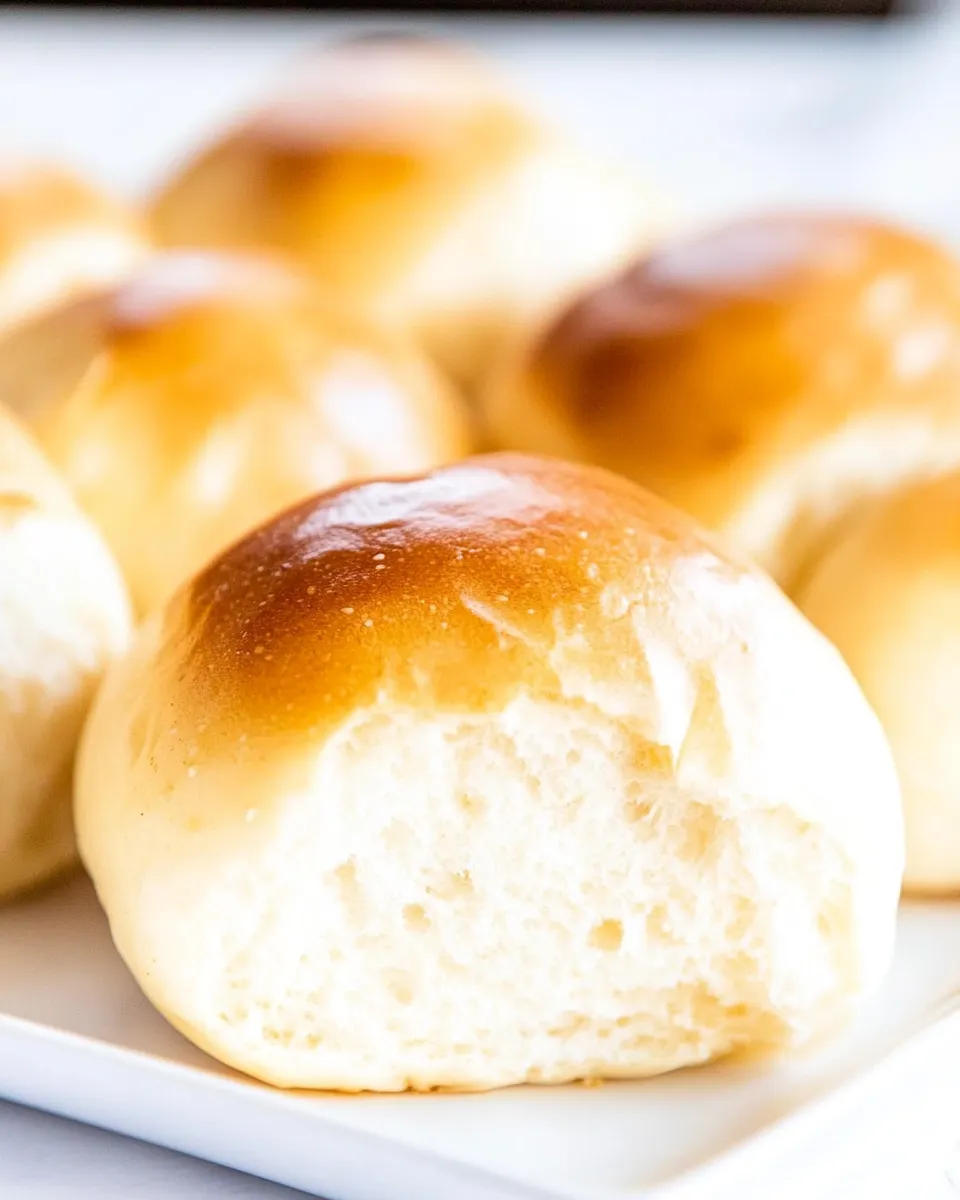
Allowing the second rise on the baking sheet is where the texture develops — the rolls puff and form those tender walls that keep sliders from getting soggy. I learned the hard way that skipping the second rise made for flat, tight buns that felt more like biscuits.
Brushing with butter right before baking gives a soft, shiny top. If you want even more sheen, brush again as soon as they come out of the oven, while still hot. That finish makes them look like they came from a bakery.
Meal Prep & Storage Notes
Short-term: Store cooled buns in an airtight container or resealable bag at room temperature for up to 2 days. Keep away from direct heat or sunlight to avoid condensation inside the container.
Long-term: Freeze cooled buns in a freezer-safe bag for up to 3 months. To reheat, thaw at room temperature for 30–60 minutes, then warm in a 325°F oven for 5–8 minutes, or microwave for 15–20 seconds for one or two buns if you’re in a rush — avoid prolonging microwave time to prevent rubberiness.
Make-ahead for parties: Bake fully, cool, and freeze. Reheat wrapped in foil in a 300–325°F oven until warmed through. Unwrap for the last few minutes to re-crisp slightly if desired.
Top Questions & Answers
Can I knead by hand?
Yes. Knead on a lightly floured surface for 8–10 minutes until the dough is smooth and springy. The times in the source directions reflect stand mixer use; increase your kneading time if you work by hand.
Will these work with instant yeast only?
The recipe uses instant yeast specifically. If you must substitute active dry yeast, proof it first in a little of the water with the sugar until foamy, then proceed, but expect slight timing adjustments.
How do I get more pronounced browning?
Brush with butter right before baking as directed. You can also use an egg wash for a deeper sheen and darker color, but that changes the finish slightly from the recipe as written.
Can I add whole grain flour?
Yes, but swap no more than 25–30% whole grain flour to maintain the light texture. You may need a touch more water because whole grain flour absorbs more liquid.
Make It Tonight
If you want fresh sliders this evening, start by gathering ingredients and warming your mixing bowl in a warm place. Mix, knead, and let the first rise for about an hour. After you shape and cut, the second rise will take another 30 minutes. With a 10–12 minute bake time, plan on roughly 2 hours from zero to table. That’s fast for fresh bread and totally worth the few steps.
Make a double batch if you have a freezer — these freeze beautifully and you’ll thank yourself at the next last-minute gathering. Keep it simple: follow the measurements and method above, watch the rises, and you’ll have tender, perfectly sized slider buns every time.
Homemade Slider Buns
Ingredients
Ingredients
- 3 1/2 cupsall-purpose flour
- 1/4 teaspoonsalt
- 3/4 cupwater
- 1 tablespooninstant yeast
- 1/4 cupsugar
- 1 egg
- 2 tablespoonsmargarine or melted butter
- 2 tablespoonsbutter for brushing
Instructions
Instructions
- Gather all ingredients and set aside the 2 tablespoons butter for brushing; add the remaining ingredients (3½ cups all-purpose flour, ¼ teaspoon salt, ¾ cup water, 1 tablespoon instant yeast, ¼ cup sugar, 1 egg, and 2 tablespoons margarine or melted butter) to the bowl of a stand mixer fitted with the dough hook.
- Mix on medium-low speed for about 3–5 minutes, until the dough is smooth, elastic, and the sides of the bowl are mostly clean. The dough should be slightly sticky but manageable; if it feels too dry, add a little water, and if it is too sticky, add a bit more flour.
- Shape the dough into a ball, cover the bowl with a clean damp kitchen towel, and let it rise in a warm draft-free place until doubled in size (about 1 hour).
- When the dough has doubled, preheat the oven to 375°F (190°C) and line a baking sheet with parchment paper.
- Lightly flour a work surface, turn the dough out onto it, and gently press or roll the dough to an even thickness of 1/3 inch.
- Using a 2-inch round cookie cutter, cut out slider buns. You should get about 25 sliders. Gather the scraps, knead gently a couple times, reroll to 1/3 inch thickness, and cut additional sliders until the dough is used.
- Place the cut sliders on the prepared baking sheet, leaving a little space between each to allow for expansion.
- Cover the baking sheet with a damp kitchen towel and let the buns rest and rise until visibly puffed and about doubled (about 30 minutes).
- While the buns are resting, melt the reserved 2 tablespoons butter (if solid). When the buns have finished their second rise, brush the tops evenly with the melted butter.
- Bake in the preheated oven for 10–12 minutes, or until the tops are golden brown.
- Remove the buns from the oven and transfer to a wire rack to cool slightly before serving.
Equipment
- 2-inch Cookie Cutter
- Parchment Paper
- Classic Wooden Rolling Pin
- Basting and Pastry Brush
- Aluminum Baking Sheet (2 pack)