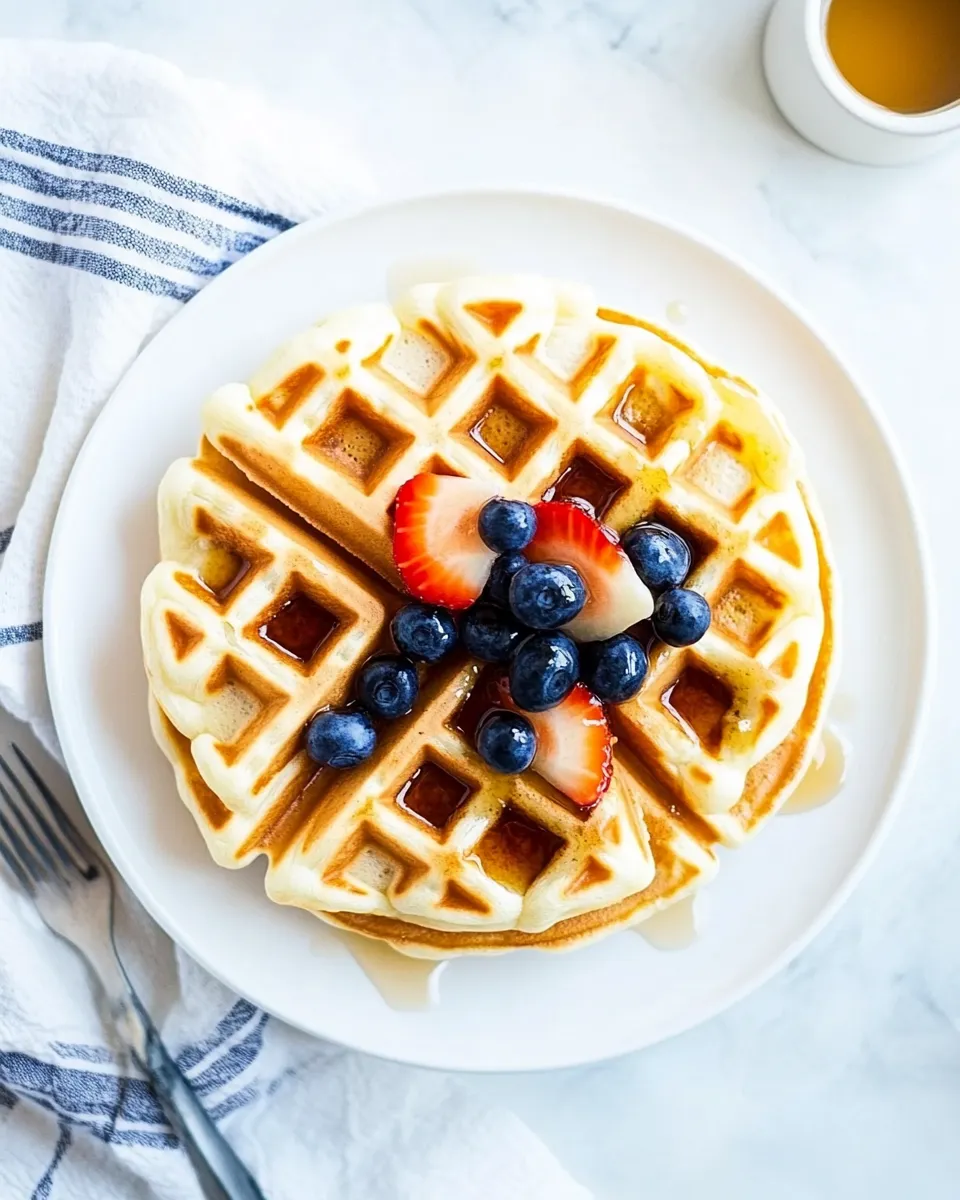
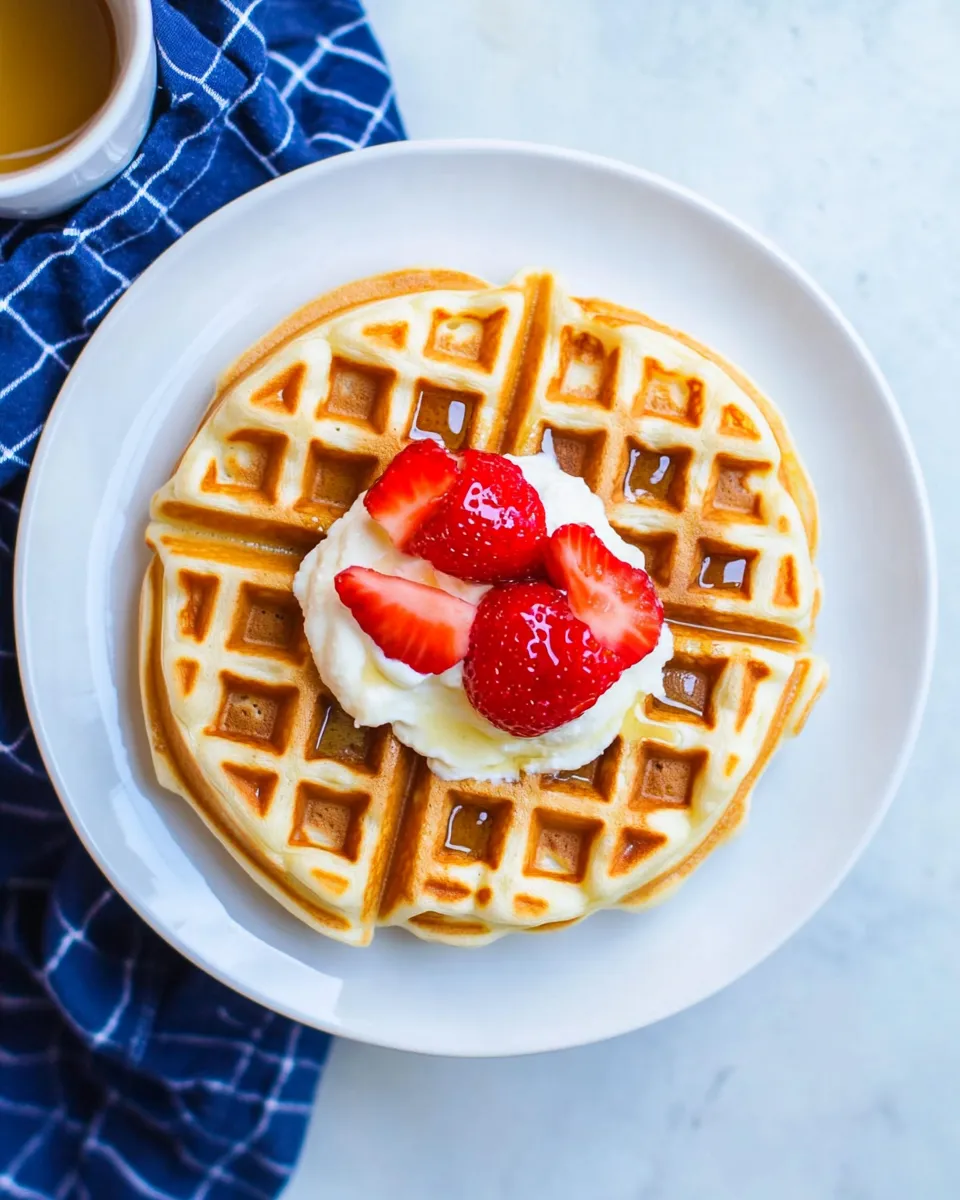
Buttermilk Waffles
These buttermilk waffles are exactly the kind I make when I want breakfast to feel like a small celebration without the fuss. They crisp up on the outside, stay tender inside, and have that faint tang that only buttermilk can give. The recipe is straightforward, predictable, and forgiving—perfect for a slow weekend morning or an afternoon brunch.
I like recipes that do most of the thinking up front so I can focus on what matters: getting the iron hot, flipping the music on, and deciding between maple syrup or berries. This one uses pantry-staple ingredients and a short rest for the batter that improves texture without extra steps. Follow it closely for consistent results.
Below you’ll find a shopping checklist, the ingredients laid out with quick notes, the exact step-by-step instructions, and practical tips I learned while testing. Read the Troubleshooting section before you cook if you want to avoid the usual pitfalls. Let’s make waffles that are crisp, golden, and worth waiting for.
What to Buy

Buy the basics and a couple of small extras if you don’t already have them. For this recipe you’ll need all-purpose flour, cornstarch, baking soda, baking powder, kosher salt, canola oil, buttermilk, an egg, sugar, and vanilla extract. If you don’t use kosher salt at home, regular table salt will work but use slightly less.
If you’re shopping for equipment, check that your waffle iron is clean and that you have a pastry brush or neutral oil spray if your iron recommends greasing. A small wire rack is invaluable for keeping waffles crisp after they come off the iron.
Ingredients
- 3/4 cup all-purpose flour — the structure for the waffle; gives body without being heavy.
- 1/4 cup cornstarch — lightens the texture and helps create a crisp exterior.
- 1/2 tsp baking soda — reacts with the buttermilk to add a bit of lift and tenderness.
- 1 tsp baking powder — provides extra lift for fluffiness.
- 1 tsp kosher salt — balances sweetness and enhances flavor; adjust if using table salt.
- 1/4 cup canola oil — keeps waffles tender and helps with browning; neutral flavor.
- 3/4 cup buttermilk — adds tang, moisture, and reacts with baking soda for rise.
- 1 egg — binds and helps with structure; also adds some richness.
- 1 tbsp sugar — a touch of sweetness that aids browning.
- 1 tsp vanilla extract — rounds the flavor and lifts the batter.
Buttermilk Waffles: Step-by-Step Guide
- Preheat your waffle iron according to the manufacturer’s instructions so it will be ready when the batter has rested.
- In a medium bowl, whisk together the dry ingredients: 3/4 cup all-purpose flour, 1/4 cup cornstarch, 1/2 tsp baking soda, 1 tsp baking powder, and 1 tsp kosher salt until evenly combined.
- In a separate bowl, whisk together the wet ingredients: 3/4 cup buttermilk, 1/4 cup canola oil, 1 egg, 1 tbsp sugar, and 1 tsp vanilla extract until smooth.
- Pour the dry ingredients into the wet ingredients and gently stir with a spatula or whisk until just combined and no dry streaks remain. A few small lumps are fine—do not overmix.
- Let the batter rest at room temperature for 15 minutes.
- When the waffle iron is preheated, grease it if your manufacturer recommends (use the method your iron’s manual specifies). Add the amount of batter your waffle iron requires without overfilling and close the iron.
- Cook until the waffle iron indicates the waffles are done and the waffles are golden and crisp—about 2–3 minutes, though time will vary by iron.
- Transfer cooked waffles to a wire rack or a baking sheet in a single layer to keep them crisp. If needed, keep finished waffles warm in a 250°F oven until ready to serve.
Why Buttermilk Waffles is Worth Your Time

There are lots of waffle recipes, but this one hits the sweet spot between speed and results. The combination of cornstarch with flour produces a delicate crumb and a reliably crisp exterior. Buttermilk adds flavor and chemically interacts with the baking soda for a light lift—no eggs-whipping or complicated technique required.
It’s also flexible. The batter rests only 15 minutes, but you’ll notice the difference: a slightly more relaxed batter, a better rise, and a more cohesive structure when it hits the iron. And because the recipe uses neutral-flavored canola oil instead of melted butter, the waffles brown evenly without burning, which is helpful when you’re learning your iron’s quirks.
Low-Carb/Keto Alternatives
If you’re cutting carbs, you’ll need to swap multiple ingredients and expect different results. Almond flour and coconut flour behave very differently than all-purpose flour and cornstarch. A practical approach is to use a commercially prepared low-carb waffle mix designed for electric waffle irons—those blends usually include binders and leaveners tuned for the texture you want.
For a homemade tweak: replace the all-purpose flour with a blend of almond flour and a small amount of coconut flour (start with a 3:1 almond-to-coconut ratio) and replace the cornstarch with xanthan gum in tiny amounts (1/8–1/4 tsp) to help with structure. Use a sugar substitute that measures like sugar and thin the batter with a bit more buttermilk or unsweetened nut milk. Expect a denser, more fragile waffle than the original.
Tools & Equipment Needed
These are the items you’ll actually use and will thank yourself for having nearby:
- Waffle iron — the star of the show; follow the manufacturer’s heat and greasing instructions.
- Medium mixing bowls — one for dry, one for wet.
- Whisk and spatula — for combining without overmixing.
- Measuring cups and spoons — for consistent results.
- Wire rack and baking sheet — to keep waffles crisp after cooking.
- Oven set to 250°F (optional) — keeps waffles warm without steaming them.
Troubles You Can Avoid
Batter too thick or thin
Small differences in flour measurement change batter thickness. Spoon flour into the measuring cup and level it rather than scooping. If batter is too thick, thin with a tablespoon or two of buttermilk; if it’s too thin, add a tablespoon of flour.
Soggy waffles
Don’t stack waffles on a plate right after cooking. Use a wire rack so steam escapes. If you must hold them, keep them single-layer in a 250°F oven—this keeps them crisp without drying them out.
Uneven browning
Different irons heat differently. If waffles stick or brown unevenly, check the iron’s manual for greasing recommendations. Some irons work best with a light brush of oil; others suggest no added oil. Also allow the iron to fully preheat and use the indicator light to time cook cycles consistently.
Seasonal Twists
Small seasonal additions make these waffles feel fresh without changing the base recipe. In spring and summer, top them with macerated berries and a dollop of yogurt. In fall, stir 1/2 tsp ground cinnamon and a pinch of ground nutmeg into the dry mix, then serve with a spoonful of apple compote. For winter, fold 1/4 cup finely chopped toasted nuts or stir in a tablespoon of cocoa powder and increase the sugar by 1 tsp for a chocolate variant.
Another easy tweak: fold in 2 tablespoons of finely grated lemon zest into the wet ingredients for bright citrus waffles that pair beautifully with ricotta and honey.
What I Learned Testing
Consistency is everything. While testing, the biggest factor that changed my results was how I measured flour and how patient I was with preheating the iron. Spoon-and-level made a noticeable difference over scooping straight from the bag. Also, letting the batter rest for the full 15 minutes is not optional in my book—the texture is more cohesive and the waffles brown more evenly.
I also discovered that a neutral oil works better than melted butter when using electric irons. Butter can burn quickly and leave dark spots before the waffle is fully cooked through. Canola oil produces even browning and a crisp surface.
Save for Later: Storage Tips
If you have leftovers, cool the waffles completely on a wire rack, then stack them with parchment between each waffle to prevent sticking. Store in an airtight container in the refrigerator for up to 3 days.
For longer storage, freeze in a single layer on a baking sheet until firm, then transfer to a labeled freezer bag. Frozen waffles keep well for up to 2 months. Reheat straight from frozen in a toaster or toaster oven on medium heat for 3–5 minutes until hot and crisp. If using a conventional oven, place on a baking sheet and bake at 375°F for 8–10 minutes.
Top Questions & Answers
Can I use milk instead of buttermilk? You can, but you’ll lose the tang and the reaction with the baking soda. If you must, stir 1 tbsp lemon juice or vinegar into 3/4 cup milk and let it sit 5–10 minutes to mimic buttermilk.
Can I make the batter ahead of time? I don’t recommend making this batter more than an hour ahead. The leaveners do some work during the rest period; a long wait can reduce lift. If you need to prep ahead, mix dry ingredients and keep wet ingredients refrigerated separately, then combine just before the 15-minute rest.
Why does the recipe include cornstarch? Cornstarch helps achieve a lighter, crispier texture by reducing gluten development and absorbing some of the batter’s moisture. It’s a simple trick that improves the exterior crunch.
How do I know when the waffles are done? Most irons have an indicator light or beep; you’re also looking for a deep golden color and a crisp edge. Expect roughly 2–3 minutes as a guideline, but check your iron’s typical cook time and adjust.
Before You Go
These Buttermilk Waffles strike a balance between simplicity and reliably great results. They’re forgiving, quick to make, and adaptable—exactly what I want in a weekend recipe. Keep your measuring consistent, preheat the iron, and resist the urge to overmix. The rest—15 minutes and a hot iron—does the heavy lifting.
One final note: make a double batch if you’re serving more people. Waffles reheat beautifully and can be kept warm in the oven while you finish cooking. Share them with friends or save extras for an easy weekday breakfast that feels a little special.

Buttermilk Waffles
Ingredients
Ingredients
- 3/4 cupall purpose flour
- 1/4 cupcornstarch
- 1/2 tspbaking soda
- 1 tspbaking powder
- 1 tspkosher salt
- 1/4 cupcanola oil
- 3/4 cupbuttermilk
- 1 egg
- 1 tbspsugar
- 1 tspvanilla extract
Instructions
Instructions
- Preheat your waffle iron according to the manufacturer’s instructions so it will be ready when the batter has rested.
- In a medium bowl, whisk together the dry ingredients: 3/4 cup all-purpose flour, 1/4 cup cornstarch, 1/2 tsp baking soda, 1 tsp baking powder, and 1 tsp kosher salt until evenly combined.
- In a separate bowl, whisk together the wet ingredients: 3/4 cup buttermilk, 1/4 cup canola oil, 1 egg, 1 tbsp sugar, and 1 tsp vanilla extract until smooth.
- Pour the dry ingredients into the wet ingredients and gently stir with a spatula or whisk until just combined and no dry streaks remain. A few small lumps are fine—do not overmix.
- Let the batter rest at room temperature for 15 minutes.
- When the waffle iron is preheated, grease it if your manufacturer recommends (use the method your iron’s manual specifies). Add the amount of batter your waffle iron requires without overfilling and close the iron.
- Cook until the waffle iron indicates the waffles are done and the waffles are golden and crisp—about 2–3 minutes, though time will vary by iron.
- Transfer cooked waffles to a wire rack or a baking sheet in a single layer to keep them crisp. If needed, keep finished waffles warm in a 250°F oven until ready to serve.
Equipment
- Waffle Iron
- Mixing Bowls
- Whisk
- Spatula
- Wire Rack
- Oven
Notes
To freeze, allow waffles to cool completely, then wrap individually in plastic wrap and place in a freezer bag. Freeze for up to 3 months. To reheat, microwave for 30-60 seconds.
Adapted from
Aretha Frankenstein Waffles of Insane Greatness