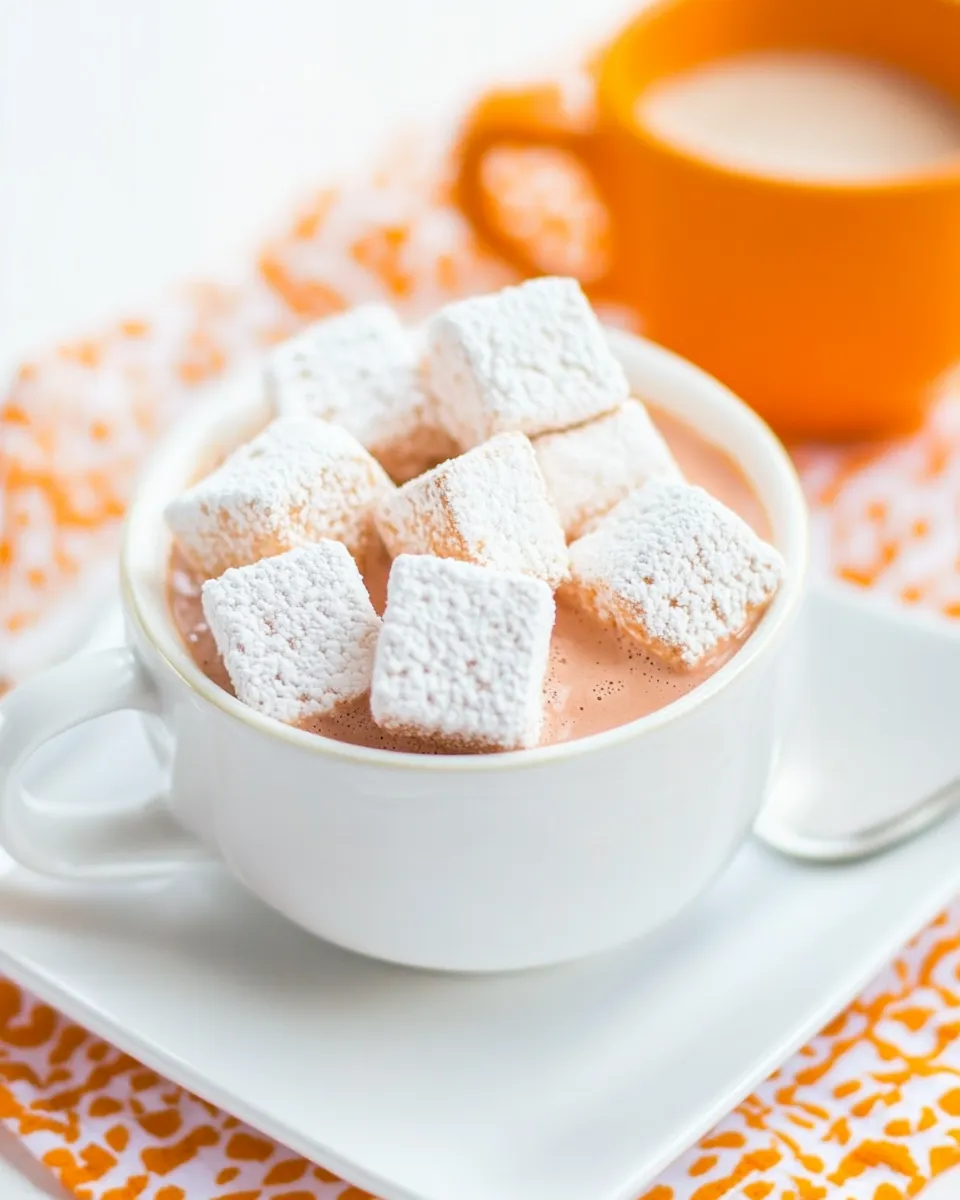
Espresso Marshmallows
I make marshmallows at home because they taste like nothing you can buy in a bag. These espresso marshmallows are soft, pillowy, and carry a concentrated coffee note that stands up to hot chocolate, s’mores with dark chocolate, or just snacking straight from the jar. They take a little attention while you work, but the payoff is worth the minutes at the stovetop.
The method is straightforward: bloom gelatin, boil a sugar syrup to the soft‑ball stage, then whip the hot syrup into the gelatin until glossy and thick. The espresso goes into the bloomed gelatin, giving an even, bright coffee flavor instead of a flat or gritty finish.
I’ll walk you through the exact steps, flag the common mistakes, suggest sensible swaps, and list the tools that make the process easier. If you bake with a stand mixer and a candy thermometer, this is totally do‑able on a weekday evening.
Ingredient List

- 2 packets unflavored gelatin — provides structure and the classic marshmallow chew; bloom it first.
- 1/3 cup plus 1/4 cup cold water, divided — one portion dissolves the espresso and blooms the gelatin, the other joins the sugar for the syrup.
- 1 tablespoon instant espresso powder — the concentrated coffee flavor; dissolves quickly in cold water for an even taste.
- 1 1/2 cups granulated sugar — the main sweetener and body; cook to the correct temperature for set texture.
- 1/2 cup corn syrup — prevents sugar crystallization and keeps the marshmallows soft and tender.
- pinch salt — balances sweetness and lifts flavor.
- 1 teaspoon vanilla — a small finish‑note added after whipping for roundness.
- powdered sugar, for dusting — keeps pieces from sticking and makes cutting cleaner.
Espresso Marshmallows Made Stepwise
- Line an 8×8 or 9×9 square baking pan with parchment paper so the sides and corners are covered. Dust the parchment generously with powdered sugar, making sure the bottom and sides are coated; set the pan aside.
- In the bowl of a stand mixer, dissolve the instant espresso powder in 1/3 cup cold water. Sprinkle the 2 packets of unflavored gelatin evenly over the espresso water and let sit for at least 5 minutes to soften (bloom).
- In a heavy saucepan, combine the remaining 1/4 cup cold water, 1 1/2 cups granulated sugar, 1/2 cup corn syrup, and a pinch of salt. Stir over medium heat until the sugar dissolves.
- Bring the sugar mixture to a boil. Cover the pan and let it steam for 2 minutes, then remove the cover and continue boiling, without stirring, until the mixture reaches 238°F on a candy thermometer (about 7–8 minutes after removing the cover).
- Fit the stand mixer with the whisk attachment and start the mixer on low speed. Very carefully and slowly pour the hot sugar syrup down the inside of the mixer bowl into the gelatin mixture, taking care to avoid splattering.
- Increase the mixer speed to medium-high and whip the mixture for 12–15 minutes, or until it becomes thick, glossy, and lukewarm to the touch. Add 1 teaspoon vanilla and beat briefly to incorporate.
- Immediately pour or scrape the marshmallow mixture into the prepared pan (the mixture is very sticky). Smooth the top as needed (dampen a spatula with powdered sugar if it sticks).
- Let the marshmallows sit uncovered at room temperature for at least 3 hours, or until fully set.
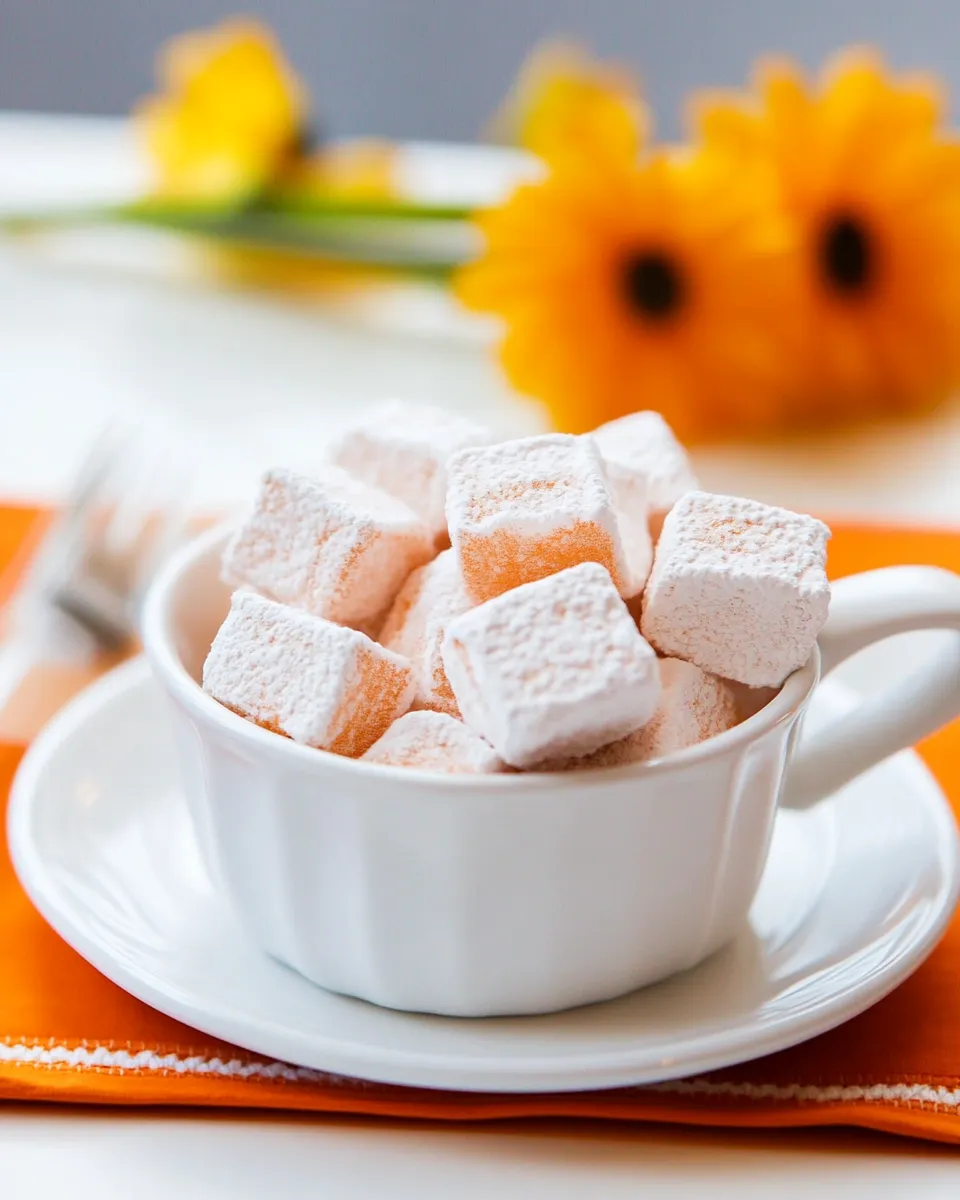
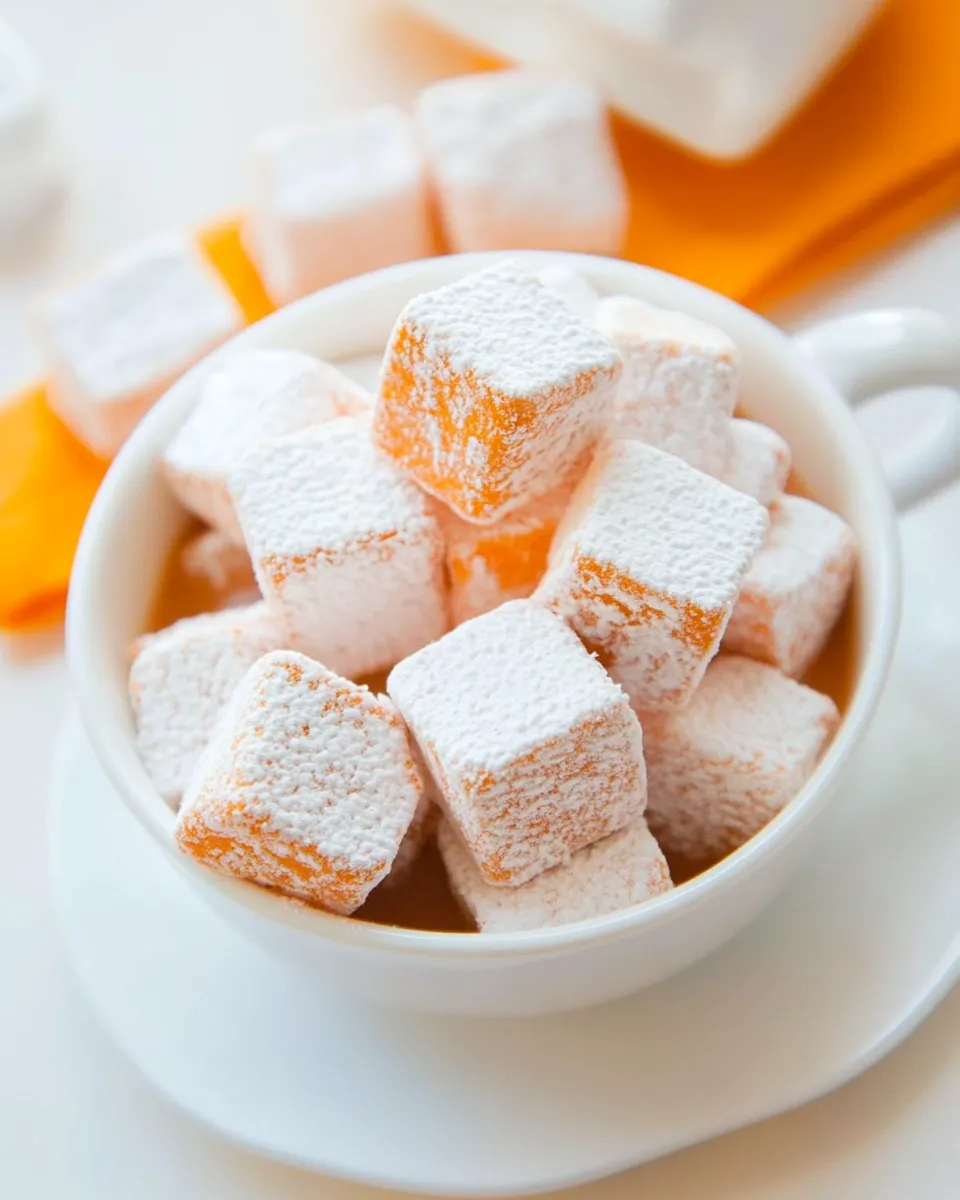
- Lift the set marshmallow slab from the pan using the parchment. Dust a knife or bench scraper with powdered sugar, cut the marshmallows into squares, and dust all cut surfaces liberally with additional powdered sugar so pieces don’t stick together.
- Store the marshmallows in an airtight container for up to 5 days.
What You’ll Love About This Recipe
The flavor is concentrated and clean: you get real espresso presence without any grittiness because the instant powder is fully dissolved before it touches heat. The texture is the soft, slightly springy chew you want from good marshmallows—light, airy, and not tooth‑achingly sweet.
These are versatile. Serve them on hot chocolate, fold them into a dessert, toast them briefly with a torch, or give them away as homemade treats. They’re also egg‑free, which means they’re more forgiving to make for beginners and store well for several days when kept dry and airtight.
Easy Ingredient Swaps
- Skip the espresso: Omit the instant espresso powder to make a classic vanilla marshmallow if you want a neutral sweet bite.
- Stronger or softer coffee: Adjust how much instant espresso you dissolve in the bloom water to taste. Start conservatively; it’s easy to add more next batch than to fix an overly coffee‑forward one.
- Different extract: If you prefer, swap the vanilla for another extract from your pantry (almond, coconut, etc.)—add it at the end as directed.
- Note on corn syrup: The syrup helps prevent sugar crystallization; if you choose another liquid sweetener the texture and setting behavior can change. Expect slightly different chew and possibly more stickiness.
Recommended Tools
- Stand mixer with whisk attachment — makes whipping the hot syrup into meringue‑like marshmallow easy and hands‑off.
- Candy thermometer — necessary to reliably hit 238°F (soft‑ball stage) for proper set.
- Heavy saucepan — distributes heat evenly so the syrup doesn’t burn.
- 8×8 or 9×9 square pan — the recipe is scaled for this size for an even slab thickness.
- Parchment paper and fine sieve for powdered sugar — for lining and dusting.
- Spatula and a sharp knife or bench scraper — the spatula helps scrape sticky batter; powder the blade before cutting.
Errors to Dodge
During prep and cooking
- Don’t skip blooming gelatin: If gelatin isn’t soft and hydrated, it won’t set properly and your marshmallows will be gummy or runny.
- Temperature matters: Stop at 238°F. Underheat and the marshmallows won’t set; overheat and they’ll be dry or grainy. Use a candy thermometer and watch closely after the cover comes off.
- Avoid stirring after covering the sugar: Stirring while it reaches temperature can encourage crystallization. Cover briefly, then let it boil undisturbed.
After whipping and setting
- Pour immediately: The mixture sets quickly as it cools. If you dawdle, it becomes harder to smooth and more likely to trap air pockets.
- Let them fully set before cutting: Cutting too early makes ragged edges and sticky pieces. Give the full resting time at room temperature.
- Watch humidity: High humidity makes marshmallows sticky and shortens their shelf life. Store them airtight with powdered sugar between layers.
Seasonal Spins
These marshmallows take light flavor additions well. In colder months, a pinch of cinnamon or a touch of cardamom can warm the coffee notes; in summer, a citrus zest paired with coffee creates an interesting bright contrast. For a chocolate pairing, dip half the square in melted dark chocolate and let it set before serving. Keep additions minimal so they don’t overpower the espresso.
Behind-the-Scenes Notes
Gelatin needs time to hydrate; that’s the “bloom.” It’s what lets a syrup turn into a stable, bouncy foam instead of running sugar. The sugar syrup cooked to about 238°F is the soft‑ball stage—hot enough to evaporate water and concentrate sugars so they’ll set but not so hot that the mixture becomes brittle.
Corn syrup is there to discourage sugar crystals from forming while the syrup boils. If crystals form, your final marshmallows will be grainy. Whipping incorporates air and cools the mixture; as it cools the gelatin sets the air into a stable foam, creating the familiar marshmallow texture.
Store, Freeze & Reheat
Store the marshmallows in an airtight container at room temperature for up to 5 days, keeping pieces separated with powdered sugar so they don’t stick. If you live in humid weather, add a piece of folded paper towel in the container (not touching the marshmallows) to help absorb excess moisture.
To freeze, wrap pieces individually or layer them separated with parchment and keep them in a sealed container. Thaw at room temperature before using. Avoid reheating in the microwave for long periods; quick gentle warming (a few seconds) can soften a frozen piece for immediate use.
Ask & Learn
- Can I use gelatin sheets instead of powder? Yes—rehydrate according to the package instructions and use the equivalent bloom weight. The method otherwise stays the same.
- Why did my marshmallows collapse? Most likely the syrup temperature was too low or the gelatin didn’t bloom fully. Also, whipping too briefly or cooling too quickly before full whip can prevent proper set.
- Is a stand mixer required? It’s strongly recommended. Hand‑mixing hot syrup into bloomed gelatin is exhausting and unlikely to reach the necessary volume and glossy texture.
- How do I cut clean squares? Dust the knife with powdered sugar and warm the blade briefly under hot water, dry, and dust again between cuts for smoother edges.
Ready to Cook?
Make time for a focused hour at the stove and mixer and you’ll have marshmallows you’ll actually look forward to using. Follow the steps in order, trust the thermometer, and don’t rush the set time. Once you have a slab of glossy, coffee‑streaked marshmallow in the pan, the rest is simple: cut, dust, and enjoy.
When you try this recipe, leave a note about what you paired them with—hot chocolate, s’mores, or straight up—and any tiny tweaks you made. Small adjustments make big differences with homemade marshmallows, and I love hearing what works in your kitchen.

Espresso Marshmallows
Ingredients
Ingredients
- 2 packets unflavored gelatin
- 1/3 cup plus 1/4 cup cold water divided
- 1 tablespoon instant espresso powder
- 1 1/2 cups granulated sugar
- 1/2 cup corn syrup
- pinch salt
- 1 teaspoon vanilla
- powdered sugar for dusting
Instructions
Instructions
- Line an 8x8 or 9x9 square baking pan with parchment paper so the sides and corners are covered. Dust the parchment generously with powdered sugar, making sure the bottom and sides are coated; set the pan aside.
- In the bowl of a stand mixer, dissolve the instant espresso powder in 1/3 cup cold water. Sprinkle the 2 packets of unflavored gelatin evenly over the espresso water and let sit for at least 5 minutes to soften (bloom).
- In a heavy saucepan, combine the remaining 1/4 cup cold water, 1 1/2 cups granulated sugar, 1/2 cup corn syrup, and a pinch of salt. Stir over medium heat until the sugar dissolves.
- Bring the sugar mixture to a boil. Cover the pan and let it steam for 2 minutes, then remove the cover and continue boiling, without stirring, until the mixture reaches 238°F on a candy thermometer (about 7–8 minutes after removing the cover).
- Fit the stand mixer with the whisk attachment and start the mixer on low speed. Very carefully and slowly pour the hot sugar syrup down the inside of the mixer bowl into the gelatin mixture, taking care to avoid splattering.
- Increase the mixer speed to medium-high and whip the mixture for 12–15 minutes, or until it becomes thick, glossy, and lukewarm to the touch. Add 1 teaspoon vanilla and beat briefly to incorporate.
- Immediately pour or scrape the marshmallow mixture into the prepared pan (the mixture is very sticky). Smooth the top as needed (dampen a spatula with powdered sugar if it sticks).
- Let the marshmallows sit uncovered at room temperature for at least 3 hours, or until fully set.
- Lift the set marshmallow slab from the pan using the parchment. Dust a knife or bench scraper with powdered sugar, cut the marshmallows into squares, and dust all cut surfaces liberally with additional powdered sugar so pieces don’t stick together.
- Store the marshmallows in an airtight container for up to 5 days.
Equipment
- Stand mixer
- whisk attachment
- 8x8 or 9x9 square baking pan
- Parchment Paper
- heavy saucepan
- Candy thermometer
- Spatula
- Knife or bench scraper