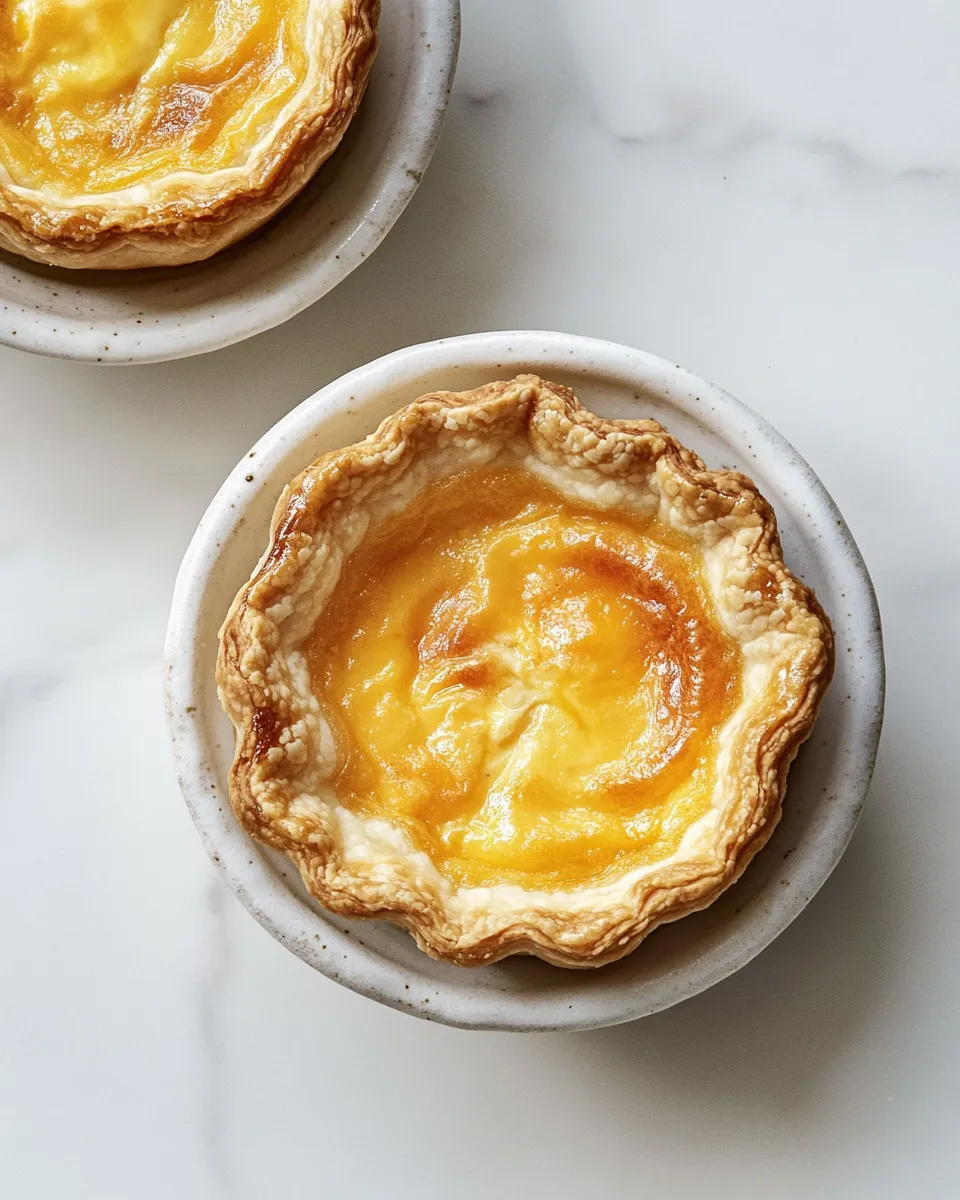
Egg Tart
Egg tarts are deceptively simple little pastries: a crisp, flaky shell holding a silk-smooth, gently sweet custard. I make them when I want something that feels special but doesn’t demand an all-day commitment. The formula below balances a tender, layered shortcrust with a bright, egg-rich filling that bakes up glossy and set.
I like that they work for breakfast, an elegant dessert, or a picnic treat. The technique borrows a few lamination ideas without the fuss of full puff pastry, so you get lovely layers and lift with a minimal schedule. Read through the steps once, prep your station, and you’ll be surprised how reliably these come out.
Below you’ll find a clear ingredient breakdown, the step-by-step method exactly as written, and practical guidance on tools, common pitfalls, and sensible swaps. I’ll point out what matters at each stage so you can avoid the usual hiccups and get a beautiful batch every time.
Ingredient Breakdown

Ingredients
- 1 1/4 cups all-purpose flour — the structure for the tart shell; choose a routine AP flour you trust.
- 3 1/2 teaspoons powdered sugar — a touch of sweetness in the dough that keeps it tender.
- 1/4 teaspoon salt — balances the sweetness and enhances flavor; don’t skip it.
- 11 tablespoons unsalted butter, cold and cubed — provides flakiness and richness; cold cubes help create layers.
- 3 1/2 ounces sour cream (plus additional if needed) — binds the dough and adds a subtle tang; add the extra only if the dough feels dry.
- 4 egg yolks — the base of the custard; yolks make the filling silky and set firmly.
- 1/2 cup evaporated milk — contributes creaminess without thinning the custard too much.
- 1/4 cup condensed milk — adds sweetness and a rounded dairy flavor; it also helps with a smooth, glossy finish.
- 3/4 teaspoon vanilla extract — lifts and rounds the custard; pure vanilla works best.
From Start to Finish: Egg Tart
- In a food processor combine the 1 1/4 cups all-purpose flour, 3 1/2 teaspoons powdered sugar, 1/4 teaspoon salt, and the 11 tablespoons cold, cubed unsalted butter. Pulse until the mixture is crumbly and the butter pieces are slightly larger than peas.
- Transfer the crumb mixture to a bowl. Add the 3 1/2 ounces sour cream (plus additional sour cream, 1 tablespoon at a time, only if the dough seems too dry). Gently fold by hand until the dough just comes together; use your hands to bring it into a loose ball without overworking.
- Wrap or cover the dough and refrigerate for 10 minutes to firm.
- Place the chilled dough between two pieces of parchment paper. Roll it into a square about 1/4 to 1/2 inch thick.
- Fold the dough into thirds: fold the left third over the center, then fold the right third over the left (like a letter). Cover and freeze for 10 minutes.
- Remove the dough, turn it so the long side is facing you, and roll it again into a 1/4 to 1/2 inch thick square. Fold into thirds the same way, then return the dough to the freezer for 15 minutes.
- Grease a standard metal muffin pan (or use silicone molds). Roll the dough one final time to about 1/4-inch thickness between parchment sheets. Use a round cookie cutter to cut circles sized to fit your muffin wells, then press each circle into a well to form a tart shell. Pierce the bottom of each shell several times with a fork.
- In a bowl whisk together the 4 egg yolks, 1/2 cup evaporated milk, 1/4 cup condensed milk, and 3/4 teaspoon vanilla extract until smooth. Strain the mixture through a fine-mesh sieve into a clean bowl to remove any lumps.
- Preheat the oven to 400°F. Pour the strained custard into the prepared tart shells, filling each about 3/4 full.
- Bake at 400°F for 10 minutes. Without removing the pan from the oven, reduce the oven temperature to 350°F and bake an additional 5–10 minutes, until the custard is set in the center and the edges are golden brown.
- Let the tarts cool in the pan for a few minutes, then unmold them and place on a rack to cool at room temperature for 1–2 hours before serving.
Why It Deserves a Spot
These egg tarts hit a sweet spot between fuss and finesse. The crust is flaky but approachable; you get the layered texture of laminated dough without the long series of folds and rests. The custard is rich without being cloying thanks to the evaporated milk and restrained use of condensed milk.
They present beautifully — glossy custard, golden edges — so they work for guests and weekday treats alike. Once you get comfortable with the folding and chilling rhythm, the process becomes quick and reliably successful.
If You’re Out Of…

- Unsalted butter: You can use salted butter; reduce or omit the 1/4 teaspoon salt in the dough.
- Sour cream: Plain Greek yogurt can stand in briefly, but if using yogurt, taste for tang and skip additional sour cream unless the dough is dry.
- Evaporated milk: A mix of whole milk plus a spoon of powdered milk will work in a pinch, though texture will be slightly different.
- Condensed milk: If you don’t have it, increase evaporated milk slightly and add granulated sugar to taste — but be cautious: the texture and sweetness will change.
Equipment & Tools
Practical tools make this recipe straightforward. You don’t need professional gear, but the right items save time and improve consistency.
- Food processor: Speeds up cutting the butter into the flour and gives even crumbs.
- Rolling pin and parchment paper: For rolling without sticking and for easy cleanup.
- Standard metal muffin pan or silicone molds: Metal gives a crisper base; silicone unmolds more easily.
- Round cookie cutter: Sized to the muffin wells for neat shells.
- Fine-mesh sieve: To strain the custard for a silky, lump-free filling.
- Wire rack: For cooling the tarts evenly.
Pitfalls & How to Prevent Them
- Overworking the dough: Handling the dough too much warms the butter and develops gluten. Fold gently and stop when the dough just comes together.
- Butter too warm: If your butter melts into the flour, you lose layers. Keep it cold and pulse to pea-sized pieces.
- Thin or uneven shells: Roll between parchment and keep thickness consistent (about 1/4 inch final). Press gently into wells; don’t stretch the dough to fit.
- Custard with bubbles or lumps: Whisk until smooth and always strain the custard before pouring to catch any coagulated bits.
- Overbaked custard: The filling should be set in the center but still have the slightest jiggle. Carry-over heat will finish it while the tarts cool.
Better Choices & Swaps
When you want to tweak flavor or texture, small changes go a long way. These are choices that preserve the spirit of the recipe while tailoring it to different palates.
- Butter quality: Use European-style butter for a richer, slightly tangy base. It enhances flavor without altering method.
- Sour cream alternatives: Full-fat Greek yogurt provides similar tang and body but may yield a slightly denser crust.
- Sweetener in custard: If you prefer a less sweet tart, reduce the condensed milk slightly and taste the custard before baking.
- Flavor additions: A small pinch of cinnamon or a strip of lemon zest in the custard can add interest — keep it light so the egg flavor still shines.
Pro Perspective
Timing and temperature matter
Pros keep the dough cold and the oven hot at the start. The initial 400°F blast helps set the shell and give the custard a smooth surface. Lowering the temperature finishes the custard gently so it doesn’t crack or curdle.
Layering without fuss
The letter folds and short freezes mimic lamination and build thin butter layers that turn flaky when baked. Don’t skip the chill between folds — it’s the step that makes a big difference in lift and texture.
Finishing touches
Let the tarts cool fully before slicing into them. The custard firms as it chills, and that glossy top keeps its look if handled gently. For a glazed finish, brush with a thin apricot jam diluted with water right after baking, but it’s purely optional.
Save It for Later
Store cooled tarts in an airtight container in the refrigerator for up to 3 days. The shell will soften a bit overnight; to refresh, pop the tarts in a 325°F oven for 5–7 minutes to restore some crispness. You can freeze unfilled tart shells tightly wrapped for up to a month. Thaw, then fill and bake as directed.
Reader Questions
- Can I make the dough ahead? Yes. The dough can be wrapped and refrigerated for up to 24 hours or frozen for longer. Thaw in the fridge before rolling and continue with the folding steps.
- Why did my custard crack? Most often it’s overbaked or the oven temperature was uneven. Reduce baking time slightly and check for a slight wobble in the center before pulling them out.
- Can I use whole eggs instead of yolks? The recipe relies on yolks for a dense, silky custard. Using whole eggs will change texture and set; it can work, but expect a lighter, less creamy filling.
- How do I prevent soggy bottoms? Use a metal pan and preheat the oven fully. Avoid overfilling the shells and bake at the high initial temperature to set the base quickly.
Bring It Home
Egg tarts are a rewarding bake: they look elegant, taste delicate, and teach you useful pastry skills. Follow the chilled folding rhythm and respect the oven temperatures, and you’ll get consistent results. Make a batch for weekend brunch or package a few as a simple homemade gift — they travel well once cooled.
If you try them, take note of what you liked and what you’d tweak for next time — was your shell flakier than you expected? Did the custard set too quickly? Those small observations are what turn a good recipe into your signature one. Happy baking.

Egg Tart
Ingredients
Ingredients
- 1 1/4 cupsall-purpose flour
- 3 1/2 teaspoonspowdered sugar
- 1/4 teaspoonsalt
- 11 tablespoonsunsalted buttercold and cubed
- 3 1/2 ouncessour creamplus additional if needed
- 4 egg yolks
- 1/2 cupevaporated milk
- 1/4 cupcondensed milk
- 3/4 teaspoonvanilla extract
Instructions
Instructions
- In a food processor combine the 1 1/4 cups all-purpose flour, 3 1/2 teaspoons powdered sugar, 1/4 teaspoon salt, and the 11 tablespoons cold, cubed unsalted butter. Pulse until the mixture is crumbly and the butter pieces are slightly larger than peas.
- Transfer the crumb mixture to a bowl. Add the 3 1/2 ounces sour cream (plus additional sour cream, 1 tablespoon at a time, only if the dough seems too dry). Gently fold by hand until the dough just comes together; use your hands to bring it into a loose ball without overworking.
- Wrap or cover the dough and refrigerate for 10 minutes to firm.
- Place the chilled dough between two pieces of parchment paper. Roll it into a square about 1/4 to 1/2 inch thick.
- Fold the dough into thirds: fold the left third over the center, then fold the right third over the left (like a letter). Cover and freeze for 10 minutes.
- Remove the dough, turn it so the long side is facing you, and roll it again into a 1/4 to 1/2 inch thick square. Fold into thirds the same way, then return the dough to the freezer for 15 minutes.
- Grease a standard metal muffin pan (or use silicone molds). Roll the dough one final time to about 1/4-inch thickness between parchment sheets. Use a round cookie cutter to cut circles sized to fit your muffin wells, then press each circle into a well to form a tart shell. Pierce the bottom of each shell several times with a fork.
- In a bowl whisk together the 4 egg yolks, 1/2 cup evaporated milk, 1/4 cup condensed milk, and 3/4 teaspoon vanilla extract until smooth. Strain the mixture through a fine-mesh sieve into a clean bowl to remove any lumps.
- Preheat the oven to 400°F. Pour the strained custard into the prepared tart shells, filling each about 3/4 full.
- Bake at 400°F for 10 minutes. Without removing the pan from the oven, reduce the oven temperature to 350°F and bake an additional 5–10 minutes, until the custard is set in the center and the edges are golden brown.
- Let the tarts cool in the pan for a few minutes, then unmold them and place on a rack to cool at room temperature for 1–2 hours before serving.
Equipment
- Food Processor
- Mixing Bowl
- Parchment Paper
- Rolling Pin
- freezer
- muffin pan
- Fork
- Fine Mesh Sieve
- Oven
- rack