Buttermilk Fried Chicken Recipe
This is my go-to buttermilk fried chicken: a brined, double-dredged bird with a crisp, well-seasoned crust and juicy meat underneath. It takes a little planning — the brine and the oil temperature matter — but the process is straightforward and repeatable. If you follow the steps, you’ll get dependable results every time.
I like to prep in stages: brine the chicken ahead, set up a tidy dredge station, and monitor oil temperature with a reliable thermometer. The recipe below includes clear timings and temperatures and a couple of small tricks I use to keep the crust crisp and the inside tender.
You’ll find ingredient notes, tool suggestions, troubleshooting tips, holiday-friendly variations, storage instructions, and a short FAQ. Read the whole post before you start frying, then roll up your sleeves and enjoy the sound of that oil singing.
What You’ll Gather

Ingredients
- 8 cups cold water — base for the brine; cold to stop partially cooking the chicken.
- ½ cup kosher salt — the brine’s primary seasoning and tenderizer.
- 1 lemon — grated zest & sliced; adds bright citrus notes to the brine.
- 6 bay leaves — aromatic support in the brine.
- 1 tablespoon black peppercorns — whole peppercorns give subtle background spice to the brine.
- ¼ cup Flat Leaf Parsley — Italian parsley; herbal lift in the brine.
- 2 sprigs rosemary — woody herb for the brine and later crisping.
- 4 sprigs thyme — delicate herb flavor in the brine and for crisping.
- 3 tablespoons honey — balances the salt and adds a touch of sweetness to the brine.
- 1 head garlic — skin left on and cloves smashed; doesn’t overpower, it seasons gently in the brine.
- 10 pieces chicken — skin-on and bone-in (whole breasts cut in-half); the recipe is set for 10 pieces.
- 2 cups all-purpose flour — the seasoned flour base for the dredge (divided into two bowls).
- 1½ tablespoons garlic powder — adds savory depth to the coating.
- 1½ tablespoons onion powder — rounds the savory profile in the flour.
- 1½ teaspoons sweet paprika — color and mild sweetness.
- 1½ teaspoons cayenne pepper — brings heat; adjust in your head if you’re sensitive, but keep amounts as written when following the recipe exactly.
- 1 teaspoon kosher salt — seasoning in the flour mix.
- ½ teaspoon freshly ground black pepper — bright pepper notes in the crust.
- 1 quart buttermilk — for the soak between flour dredges; tenderizes and helps the crust cling.
- 10 cups Peanut Oil — neutral high-smoke oil for frying; enough to maintain a stable frying temperature in a Dutch oven.
Cook Buttermilk Fried Chicken Like This
- Combine the brine: in a large pot, add 8 cups cold water, ½ cup kosher salt, grated lemon zest and sliced lemon, 6 bay leaves, 1 tablespoon black peppercorns, ¼ cup flat leaf parsley, 2 sprigs rosemary, 4 sprigs thyme, 3 tablespoons honey, and 1 head garlic (skin left on, cloves smashed). Bring to a boil, boil 1 minute or until the salt dissolves, then remove from heat and chill the brine completely (ice bath speeds this).
- Brine the chicken: when the brine is fully chilled, submerge the 10 pieces chicken (skin-on, bone-in; whole breasts cut in half if using) in the brine. Refrigerate and brine for up to 8 hours. Do NOT brine more than 8 hours.
- Remove and dry: after 8 hours, remove the chicken from the brine, place pieces on paper towels, and pat completely dry. Arrange on a paper towel–lined plate and let sit at room temperature for 1 hour while you prepare the coating and heat the oil.
- Make the seasoned flour: in a bowl combine 2 cups all-purpose flour, 1½ tablespoons garlic powder, 1½ tablespoons onion powder, 1½ teaspoons sweet paprika, 1½ teaspoons cayenne pepper, 1 teaspoon kosher salt, and ½ teaspoon freshly ground black pepper. Mix thoroughly, then divide this flour mixture evenly into two shallow bowls.
- Prepare the buttermilk: pour 1 quart buttermilk into a third shallow bowl and set it between the two bowls with the divided flour mixtures.
- Heat the oil: in a large Dutch oven add 10 cups peanut oil and heat to 330°F. Use a thermometer to monitor temperature.
- Dredge each piece: working one piece at a time and keeping your work area tidy, dredge the chicken in the first flour bowl, shake off excess, dip fully into the buttermilk, then dredge in the second flour bowl and shake off excess. Place dredged pieces on a tray while you fry.
- Fry in batches, dark meat first: fry only 3–4 pieces at a time (do not overcrowd). Start with the thicker, dark meat pieces (legs and thighs if present). Lower the chicken carefully into the oil and fry until golden and an internal temperature of 175–180°F is reached, about 10–13 minutes depending on piece size. Adjust heat as needed to keep the oil around 325°F during frying.
- Drain and salt: when a batch is done, transfer pieces skin-side up to a cooling rack set over a baking sheet. Sprinkle lightly with kosher salt. Allow the oil to return to temperature before adding the next batch.
- Fry wings and breasts: repeat steps 7–9 for the wings and breasts (white meat). Fry until an internal temperature of 170°F is reached; time will vary with size (approximately 7 minutes for typical pieces).
- Crisp the herbs: while the chicken rests on the rack, remove the rosemary and thyme sprigs (and any parsley you reserved) from the brine and pat dry. Carefully add the dried herb sprigs to the hot oil and fry until crisp (a few seconds to a minute). Remove with a slotted spoon and drain on paper towels.
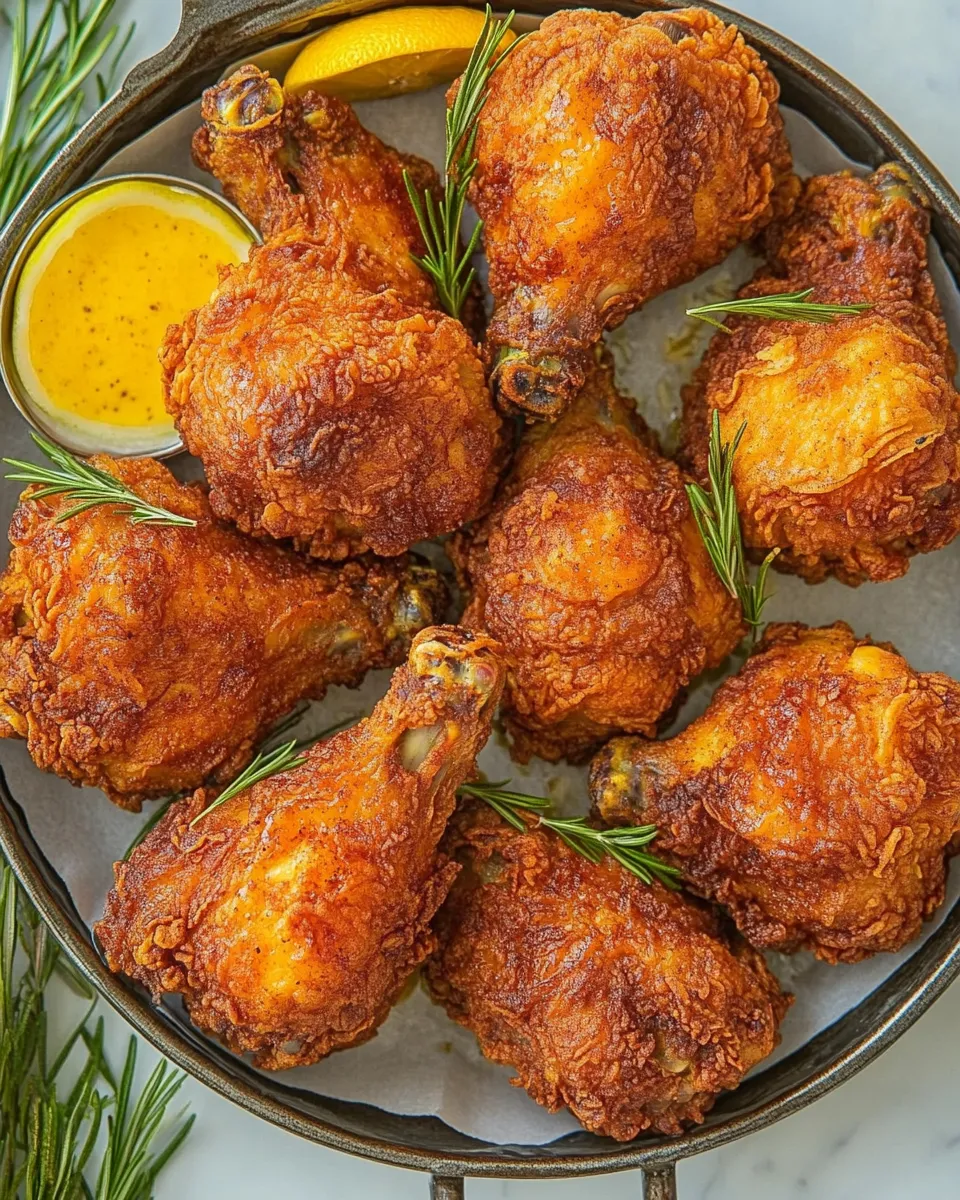
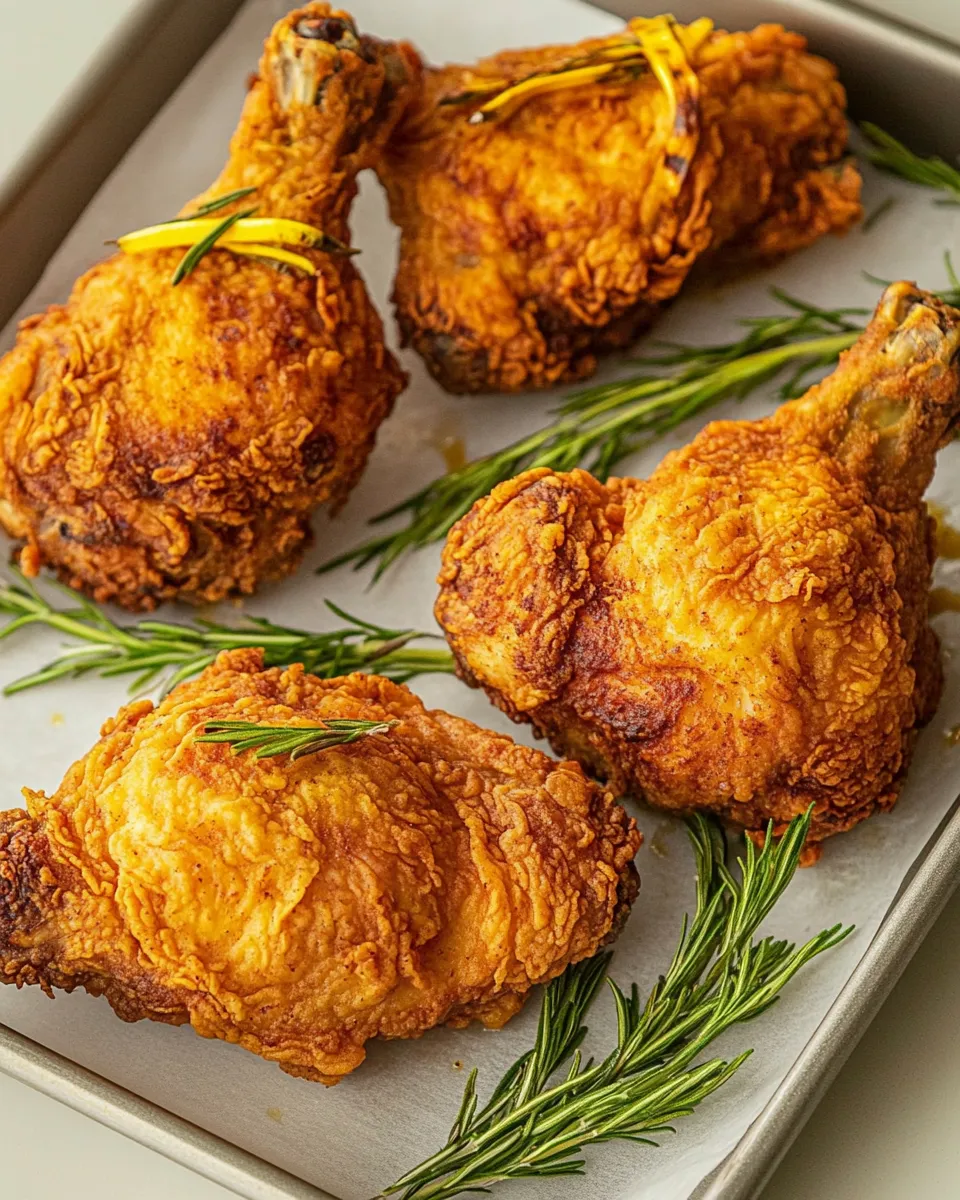
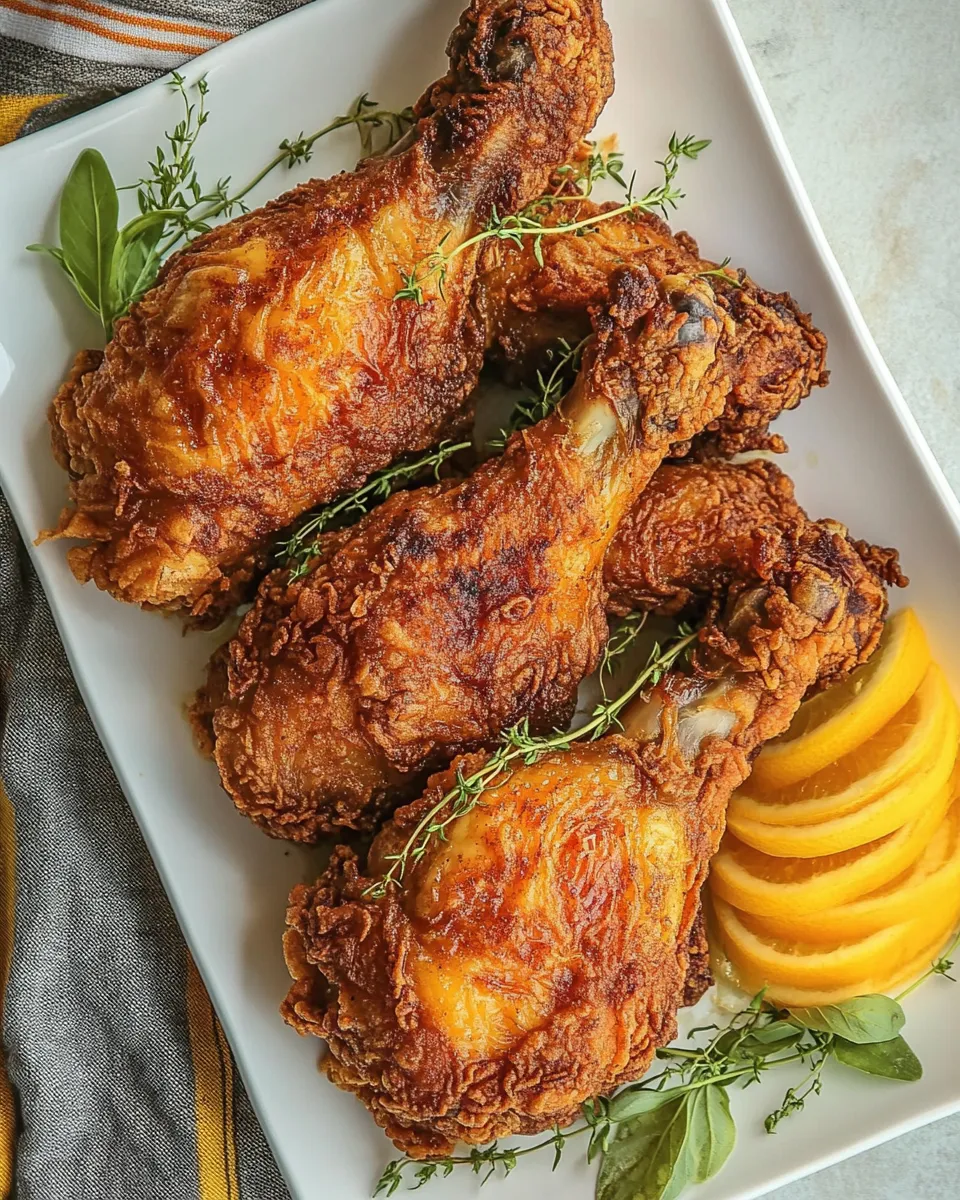
- Finish and serve: arrange the fried chicken on a large tray, garnish with the crisped herb sprigs (and parsley if used), and serve.
Why This Buttermilk Fried Chicken Stands Out
There are a few small decisions here that make a big difference. First, the brine is aromatic and balances salt with lemon, honey, and herbs; it seasons the meat through and keeps the chicken juicy even after frying. Second, the double dredge (flour → buttermilk → flour) builds a thick, well-adhering crust that crisps reliably in hot oil.
Temperature control is written into the method. Heating the oil to 330°F and aiming for roughly 325°F during frying keeps the crust from burning while allowing the interior to reach safe temperatures without drying out. Finally, crisping the aromatic herbs in the oil at the end gives you a bright, crunchy garnish that smells incredible and signals that the dish was finished with care.
International Equivalents
Fried chicken shows up around the world, but styles differ. This is classic Southern-style fried chicken with a buttermilk soak and a seasoned flour crust. In Korea, fried chicken is usually double-fried to an ultra-crisp finish and often coated with sticky sauces. Japanese karaage uses small, bite-size pieces marinated in soy and ginger, lightly floured or coated in potato starch, then fried at a higher temperature for a lighter crust. In the U.K., variations often lean toward a spiced breadcrumb or tempura-style batter. Each tradition has useful techniques — double frying, different coatings, or marinades — that you can borrow to tweak texture and flavor.
Prep & Cook Tools
- Large pot for the brine — big enough to hold 8 cups water and aromatics.
- Large Dutch oven — deep and heavy for stable frying with 10 cups oil.
- Deep-fry thermometer — essential to hold 330°F and maintain ~325°F while frying.
- Three shallow bowls — for first flour, buttermilk, second flour.
- Baking sheet and cooling rack — for draining and keeping crust crisp.
- Slotted spoon or spider — to remove chicken and herbs safely from oil.
- Paper towels — for initial drying and for draining herb crisps.
- Instant-read thermometer — to check internal temperature of thighs/breasts.
Watch Outs & How to Fix
- Oil too hot? If the crust browns instantly and the interior is underdone, lower the heat and finish in shorter batches at a slightly lower temp (target oil around 325°F). Let the oil recover between batches.
- Soggy crust? Don’t overcrowd the pot — that drops oil temperature and steams the coating. Drain on a rack not paper towels so steam escapes instead of soggying the bottom.
- Over-salted? The brine plus flour has salt; if you taste it as too salty, next time reduce the brine salt slightly. For a batch that’s already too salty, serve with a neutral-sided starch (plain mashed potatoes or rice) and a cooling slaw to balance the salt.
- Uneven cooking? Start with the dark meat (thicker pieces) as directed, and use an instant-read thermometer to confirm internal temps: 175–180°F for dark meat; 170°F for breasts/wings.
- Crust falling off? Pat the pieces dry before dredging and follow the sequence: flour → buttermilk → flour. Shake off excess flour before frying so the flour doesn’t clump and fall away.
Holiday-Friendly Variations
Make this recipe for a crowd by using larger batches and keeping cooked chicken warm in a low oven (200–225°F) on a rack; add a tray of water underneath the baking sheet to avoid drying if you’ll hold it for a while. For a festive spice profile, add 1 teaspoon smoked paprika and a pinch more cayenne to the flour. For a herb-forward holiday plate, double the parsley in the brine and fry a few extra thyme sprigs for garnish.
If you want a saucier approach for guests, serve with a honey-lemon glaze on the side (honey warmed with a squeeze of lemon) so people can brush as they like. That keeps the chicken crisp until guests choose to glaze individual pieces.
Author’s Commentary
I test fried chicken obsessively at home because it’s one of those dishes where a small technique change alters the result dramatically. Brining for up to 8 hours gives consistent juiciness, but I never go past that limit — the meat can begin to change texture if left too long. I also prefer peanut oil for its neutral flavor and high smoke point; if you have peanut allergies, swap to a neutral high-smoke oil like refined sunflower or canola.
My favorite moment is the first rack of fried pieces coming out golden, sprinkled with salt, and arranged on the tray. The crust should be crunchy, the skin well-seasoned, and the meat beneath tender and moist. Serve it with simple sides: coleslaw, pickles, mashed potatoes, and a thin gravy or hot honey on the side. No one complains about extra napkins.
Store, Freeze & Reheat
Store: Cool completely, then refrigerate in an airtight container for up to 3 days. Keep the chicken on a wire rack inside the container if possible to limit condensation.
Freeze: Flash-freeze single pieces on a tray until solid, then transfer to a freezer bag for up to 2 months. Freeze without sauce or glaze.
Reheat: The oven method preserves crispness best. Preheat to 375°F, place chicken on a wire rack set over a baking sheet, and bake for 15–20 minutes (longer for larger pieces) until heated through. For a super-crisp finish, blast under the broiler for a minute at the end while watching closely. Avoid the microwave; it makes crust soggy.
Buttermilk Fried Chicken FAQs
Q: Can I make this without brining?
A: You can, but the brine adds both seasoning and moisture retention. If you skip it, increase resting time after seasoning to let flavors adhere and consider a longer buttermilk soak to compensate.
Q: Can I use skinless chicken?
A: The recipe calls for skin-on for flavor and to help the crust adhere. Skinless pieces will work but the end result will be different: less crisp fat and a thinner crust.
Q: Can I use a different oil?
A: Yes. Use a neutral high-smoke-point oil like refined sunflower, canola, or peanut oil. Avoid olive oil for frying; it smokes at these temperatures.
Q: How do I know when the chicken is done?
A: Use an instant-read thermometer. Dark meat: 175–180°F. White meat: 170°F. Color alone isn’t a reliable indicator.
Q: Why crisp the herbs in the oil?
A: Frying rosemary and thyme briefly crisps them and concentrates their aroma; they become a fragrant, crunchy garnish that elevates the presentation and offers a flavor bridge to the brine.
Wrap-Up
This Buttermilk Fried Chicken is about attention to sequence and temperature: a flavorful brine, a wet-dry-wet dredge, careful oil management, and a resting step that preserves crispness. It’s a little work, yes — but it’s straightforward and forgiving if you follow the key rules. Make the brine the night before, set up your station, and enjoy the process. You’ll have golden, juicy fried chicken that’s worth the effort.
Buttermilk Fried Chicken Recipe
Ingredients
Ingredients
- 8 cupscold water
- 1/2 cupkosher salt
- 1 lemongrated zest & sliced
- 6 bay leaves
- 1 tablespoonblack peppercorns
- 1/4 cupFlat Leaf ParsleyItalian parsley
- 2 sprigsrosemary
- 4 sprigsthyme
- 3 tablespoonshoney
- 1 headgarlicskin left on and cloves smashed
- 10 pieceschickenskin-on and bone-in whole breast cut in-half
- 2 cupsall-purpose flour
- 1 1/2 tablespoonsgarlic powder
- 1 1/2 tablespoonsonion powder
- 1 1/2 teaspoonssweet paprika
- 1 1/2 teaspoonscayenne pepper
- 1 teaspoonkosher salt
- 1/2 teaspoonfreshly ground black pepper
- 1 quartbuttermilk
- 10 cupsPeanut Oil
Instructions
Instructions
- Combine the brine: in a large pot, add 8 cups cold water, ½ cup kosher salt, grated lemon zest and sliced lemon, 6 bay leaves, 1 tablespoon black peppercorns, ¼ cup flat leaf parsley, 2 sprigs rosemary, 4 sprigs thyme, 3 tablespoons honey, and 1 head garlic (skin left on, cloves smashed). Bring to a boil, boil 1 minute or until the salt dissolves, then remove from heat and chill the brine completely (ice bath speeds this).
- Brine the chicken: when the brine is fully chilled, submerge the 10 pieces chicken (skin-on, bone-in; whole breasts cut in half if using) in the brine. Refrigerate and brine for up to 8 hours. Do NOT brine more than 8 hours.
- Remove and dry: after 8 hours, remove the chicken from the brine, place pieces on paper towels, and pat completely dry. Arrange on a paper towel–lined plate and let sit at room temperature for 1 hour while you prepare the coating and heat the oil.
- Make the seasoned flour: in a bowl combine 2 cups all-purpose flour, 1½ tablespoons garlic powder, 1½ tablespoons onion powder, 1½ teaspoons sweet paprika, 1½ teaspoons cayenne pepper, 1 teaspoon kosher salt, and ½ teaspoon freshly ground black pepper. Mix thoroughly, then divide this flour mixture evenly into two shallow bowls.
- Prepare the buttermilk: pour 1 quart buttermilk into a third shallow bowl and set it between the two bowls with the divided flour mixtures.
- Heat the oil: in a large Dutch oven add 10 cups peanut oil and heat to 330°F. Use a thermometer to monitor temperature.
- Dredge each piece: working one piece at a time and keeping your work area tidy, dredge the chicken in the first flour bowl, shake off excess, dip fully into the buttermilk, then dredge in the second flour bowl and shake off excess. Place dredged pieces on a tray while you fry.
- Fry in batches, dark meat first: fry only 3–4 pieces at a time (do not overcrowd). Start with the thicker, dark meat pieces (legs and thighs if present). Lower the chicken carefully into the oil and fry until golden and an internal temperature of 175–180°F is reached, about 10–13 minutes depending on piece size. Adjust heat as needed to keep the oil around 325°F during frying.
- Drain and salt: when a batch is done, transfer pieces skin-side up to a cooling rack set over a baking sheet. Sprinkle lightly with kosher salt. Allow the oil to return to temperature before adding the next batch.
- Fry wings and breasts: repeat steps 7–9 for the wings and breasts (white meat). Fry until an internal temperature of 170°F is reached; time will vary with size (approximately 7 minutes for typical pieces).
- Crisp the herbs: while the chicken rests on the rack, remove the rosemary and thyme sprigs (and any parsley you reserved) from the brine and pat dry. Carefully add the dried herb sprigs to the hot oil and fry until crisp (a few seconds to a minute). Remove with a slotted spoon and drain on paper towels.
- Finish and serve: arrange the fried chicken on a large tray, garnish with the crisped herb sprigs (and parsley if used), and serve.
Equipment
- Large Pot
- Shallow bowls
- large Dutch oven
- Thermometer
- Cooling Rack
- Baking Sheet
- Slotted Spoon
- Paper Towels
- tray
Notes
*NOTE: For best result, if buying a whole fryer chicken, buy one smaller than 4 lbs to ensure the pieces don’t get too brown before cooking through.