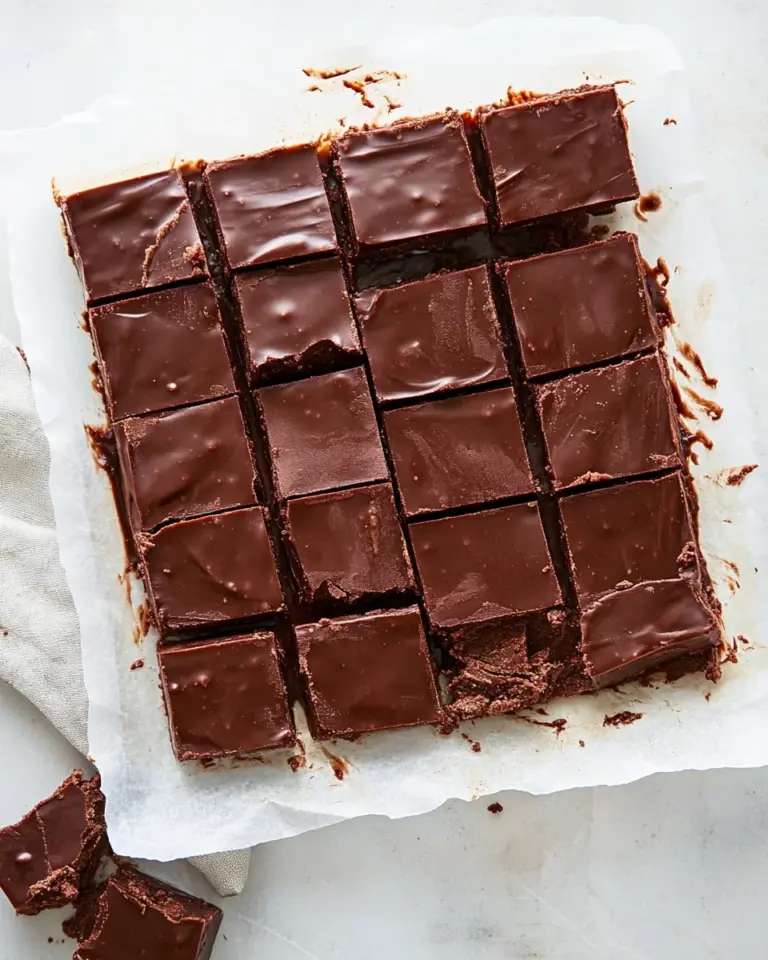
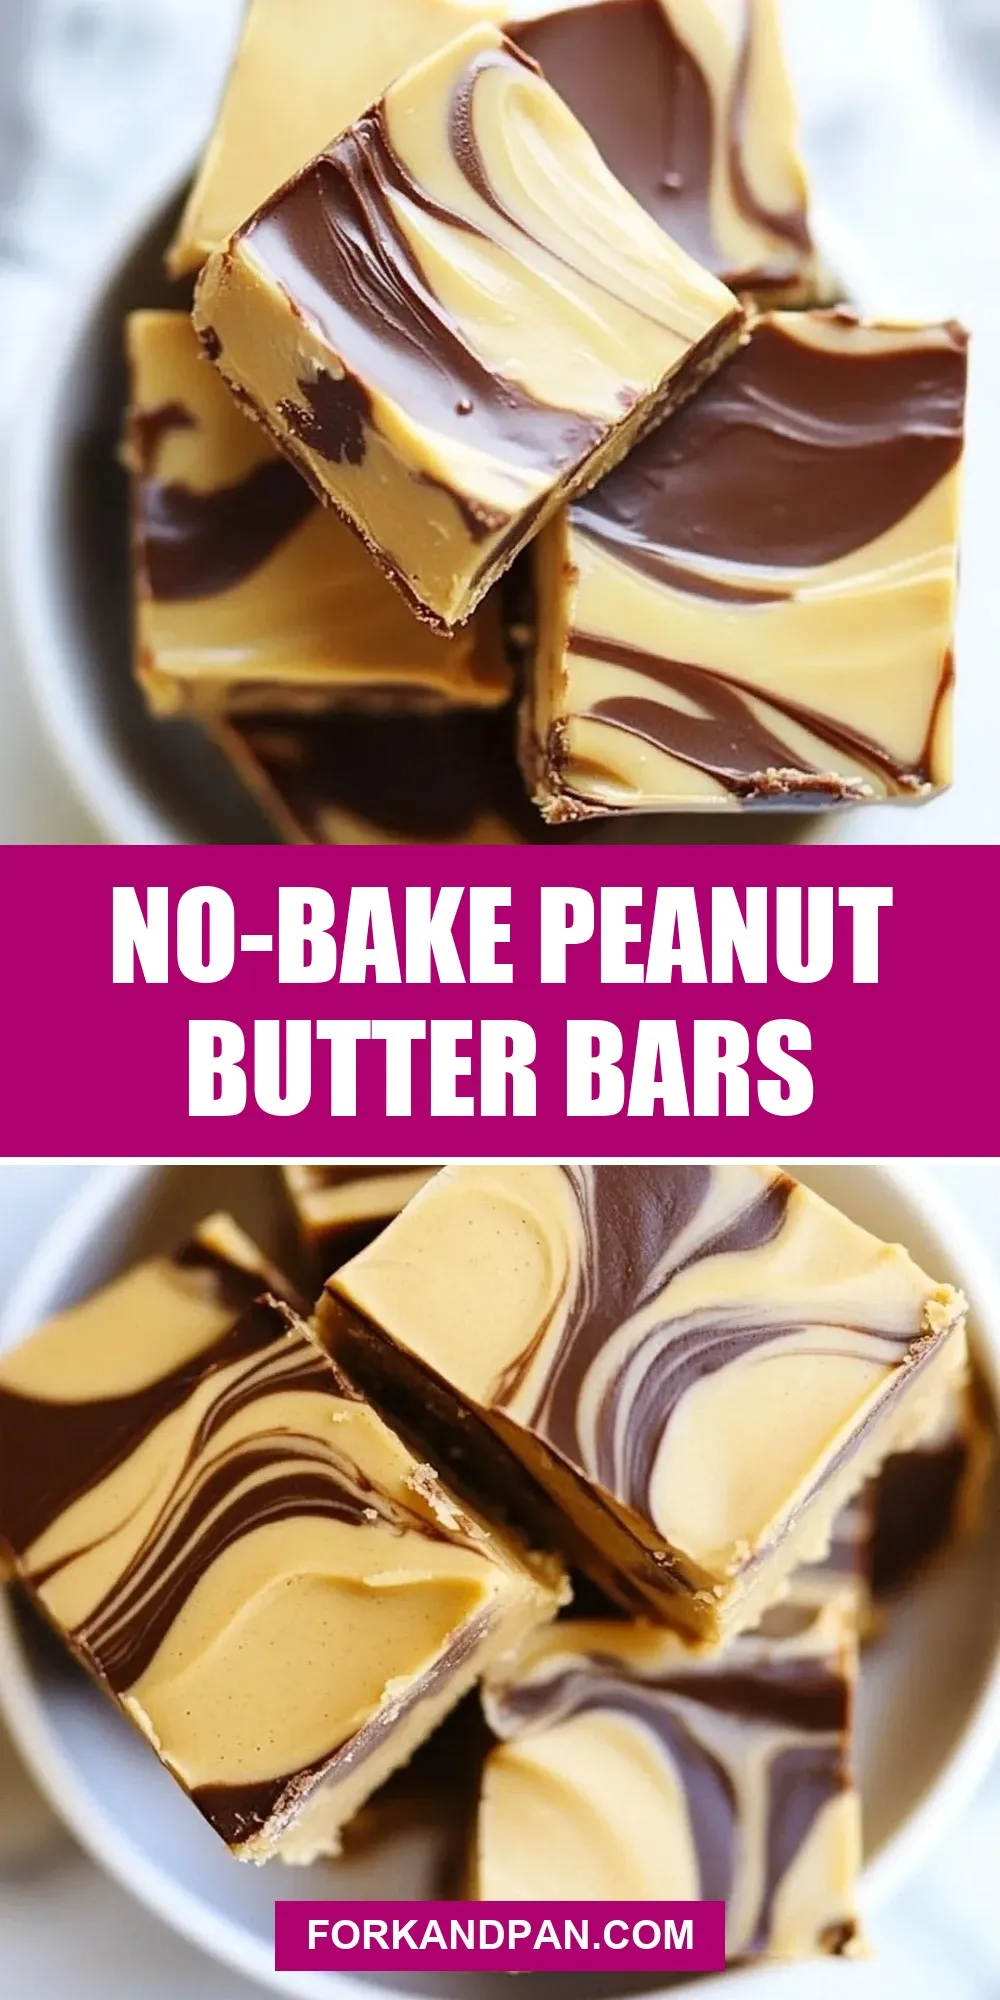
No-Bake Peanut Butter Bars
These No-Bake Peanut Butter Bars are the kind of recipe I turn to when I want a reliable, crowd-pleasing sweet without turning on the oven. They come together in minutes, set in the fridge, and slice into tidy bars with a glossy chocolate top and a peanut-buttery base. No special equipment is required beyond a microwave and a few basic tools.
I test this recipe with busy weeknights, bake sales, and last-minute dessert emergencies. The ratios are forgiving but specific where it matters: the butter-to-cookie base for structure, a small chocolate layer for balance, and a final peanut butter drizzle for that pretty marbling. If you follow the steps, you get consistent results every time.
Below you’ll find a clear ingredient rundown, the step-by-step method (copied from the recipe source so measurements are exact), tools, common mistakes, and ways to adapt these bars seasonally. Read the troubleshooting Q&A if something goes sideways—I’ve included fixes that actually work.
Ingredient Rundown

- 1/2 cup salted butter, melted — provides fat to bind the base and adds flavor; salted is specified for seasoning.
- 3/4 cup powdered sugar — sweetens and helps the base hold together; sift if it’s lumpy.
- 1/4 cup brown sugar — adds moisture and a hint of caramel depth to the base.
- 1 cup crushed graham crackers — the structure and crunch of the base; crush to fine crumbs for an even texture.
- 1 cup creamy peanut butter — main flavor and binding agent in the base; smooth gives a uniform texture.
- 3/4 cup semi-sweet chocolate chips — creates the chocolate layer; semi-sweet balances the peanut butter.
- 1/4 cup creamy peanut butter, plus 2 tablespoons — the 2 tablespoons are stirred with the chocolate chips to improve spreadability; the 1/4 cup is warmed and drizzled for the marbled top.
No-Bake Peanut Butter Bars: Step-by-Step Guide
- Line an 8″ x 8″ (20 cm x 20 cm) baking pan with aluminum foil or parchment paper, leaving an overhang for easy removal; spray the lining lightly with non-stick cooking spray.
- In a medium microwave-safe bowl, melt 1/2 cup salted butter in the microwave until fully melted (about 30–45 seconds, depending on your microwave).
- Add 3/4 cup powdered sugar and 1/4 cup brown sugar to the melted butter. Stir with a rubber spatula until combined and no dry pockets of sugar remain.
- Stir in 1 cup crushed graham crackers until evenly mixed, then stir in 1 cup creamy peanut butter until the mixture is smooth and uniform.
- Transfer the peanut butter-graham mixture to the prepared pan. Use an offset spatula or the back of a spoon to press it into an even layer across the bottom of the pan.
- In a separate microwave-safe bowl, combine 3/4 cup semi-sweet chocolate chips and 2 tablespoons creamy peanut butter. Microwave in 20–30 second increments, stirring after each increment, until the chocolate is fully melted and smooth.
- Spread the melted chocolate mixture evenly over the peanut butter layer in the pan.
- Place 1/4 cup creamy peanut butter in a small microwave-safe bowl and heat for 20–30 seconds, or until soft and pourable. Stir to smooth.
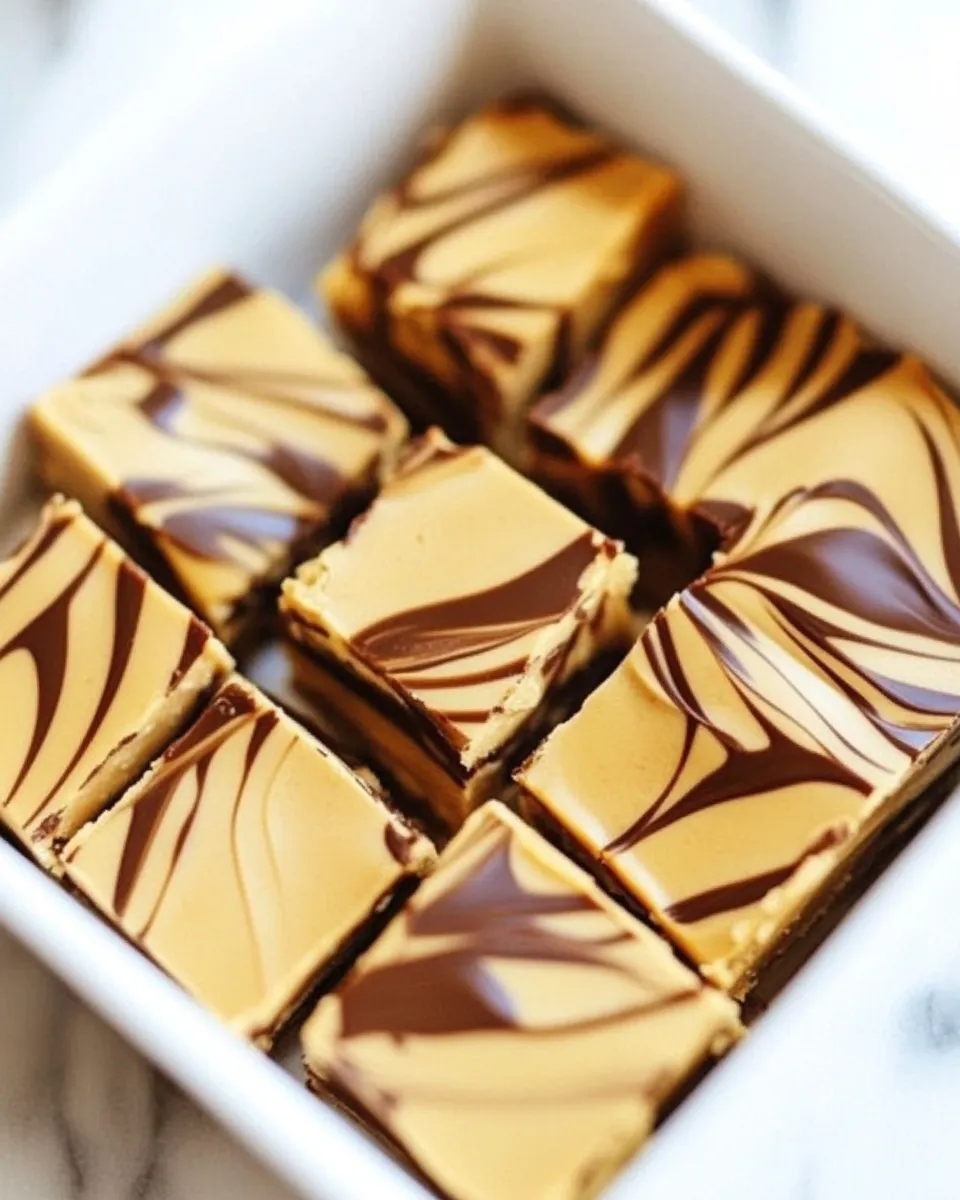
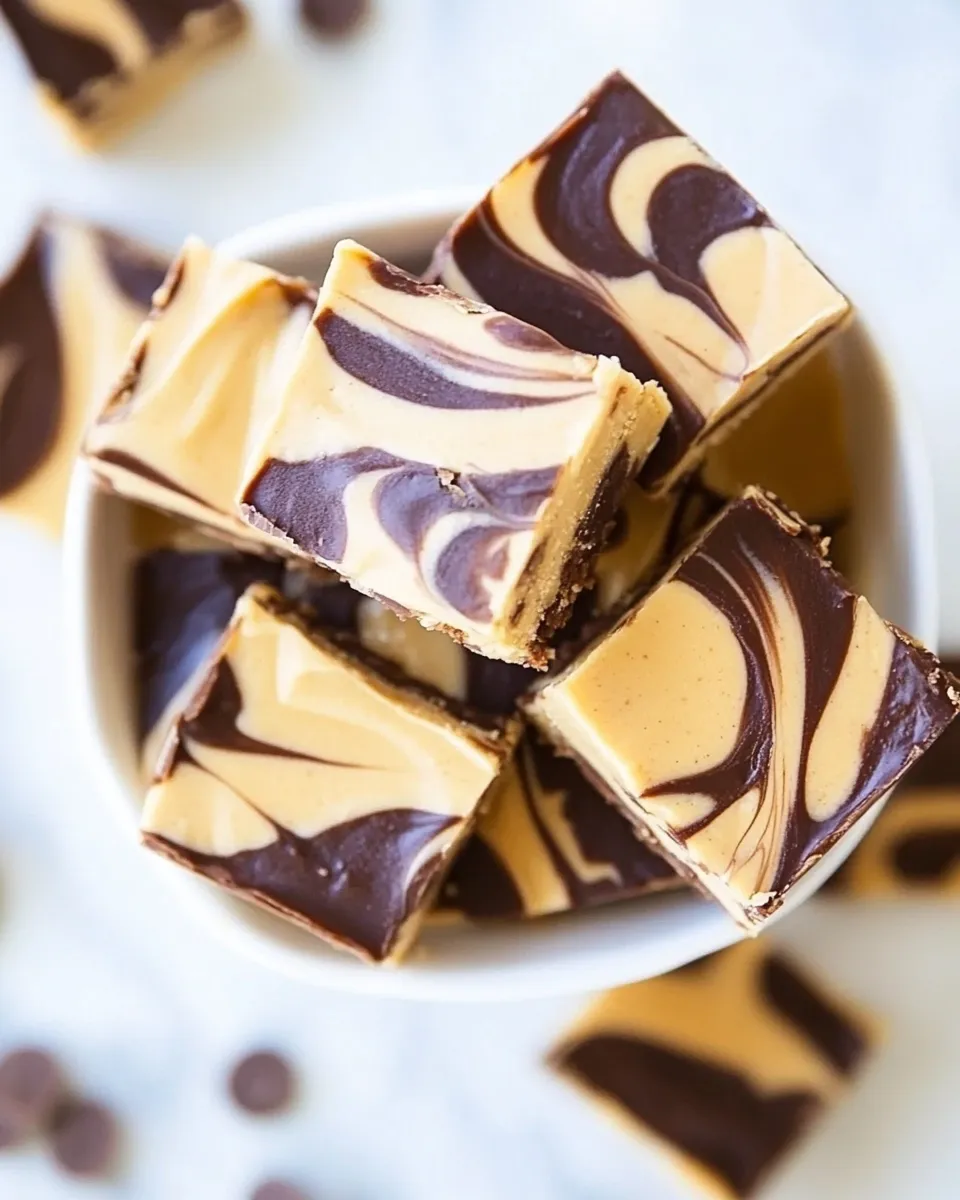
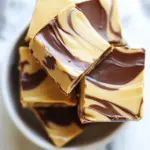
- Drizzle the warmed 1/4 cup peanut butter in 5–6 parallel lines across the chocolate layer. Rotate the pan 90 degrees. Using a toothpick, drag it through the lines once in one direction and then once in the opposite direction to create a marbled pattern.
- Cover the pan with plastic wrap and refrigerate for at least 2 hours, or until the bars are firm.
- Use the foil or parchment overhang to lift the set bars from the pan. Transfer to a cutting board and cut into bars with a sharp knife (wipe the knife clean between cuts for neater edges).
Why This Recipe Is Reliable
The formula is straightforward and built around texture contrast: a slightly dense, buttery peanut-butter base and a firm chocolate cap. The melted butter binds the graham crumbs and sugars into a stable crust that doesn’t require baking. Using powdered sugar gives a smooth, fine crumb that holds together better than granulated sugar would in no-bake bases.
Measurements matter where texture is concerned. Too much butter and the bars will be greasy and soft. Too little and the base becomes crumbly. The chocolate layer uses a small amount of extra peanut butter so it sets glossy and spreads easily—this is a small, deliberate tweak that keeps the bars neat when you cut them.
Finally, the refrigeration step is essential. Two hours is a safe minimum; the bars firm up progressively, and overnight refrigeration gives the cleanest slices. This recipe’s microwave method keeps the process fast and repeatable across different kitchens.
If You’re Out Of…
- Salted butter — use unsalted butter and add a pinch of salt to the melted butter to match the seasoning.
- Powdered sugar — confectioners’ sugar is the same; don’t substitute with granulated sugar for the base.
- Brown sugar — if you only have granulated sugar, mix 1/4 cup granulated with 1 teaspoon molasses (if available) for a similar effect; otherwise the bars will be slightly less moist and less caramel-like.
- Graham crackers — plain digestive biscuits or similar tea cookies work; pulse to a fine crumb so the base holds evenly.
- Creamy peanut butter — crunchy peanut butter will change the texture and add crunch; you can use it if you like that contrast.
- Semi-sweet chocolate chips — milk or dark chocolate works; adjust to taste. If you use dark chocolate, consider a touch less chocolate for sweetness balance.
Prep & Cook Tools
- 8″ x 8″ (20 cm x 20 cm) baking pan
- Aluminum foil or parchment paper (with an overhang)
- Non-stick cooking spray
- Microwave-safe bowls (two or three)
- Rubber spatula and offset spatula (or the back of a spoon)
- Measuring cups
- Toothpick for marbling
- Plastic wrap
- Sharp knife and cutting board
Mistakes That Ruin No-Bake Peanut Butter Bars
- Not lining the pan with an overhang — if you forget, removing the set bars becomes messy and fragile.
- Using cold peanut butter straight from the fridge — it won’t incorporate smoothly into the base or the chocolate and can make the layers uneven.
- Microwaving chocolate too long at once — chocolate can seize; heat in short bursts and stir frequently.
- Skipping the refrigeration time — cutting too soon gives you crumbly, soft bars. Wait at least two hours.
- Pressing the base unevenly — thicker spots under the chocolate layer create an unbalanced bite and messy slices. Press it flat and even.
- Not wiping the knife between cuts — this makes ragged edges and chocolate smears on the slices.
Season-by-Season Upgrades
- Spring: Add 1–2 tablespoons of finely chopped freeze-dried strawberries to the base for a bright note (fold in gently so the base stays even).
- Summer: Top the chocolate with a few flaky sea salt crystals just before chilling for a sweet-salty finish that pairs well with iced coffee.
- Autumn: Stir 1/2 teaspoon ground cinnamon into the base for warmth; consider swapping graham crackers for gingersnaps for extra spice.
- Winter: Sprinkle the chocolate with crushed peppermint candy after spreading, then refrigerate for a holiday twist.
Cook’s Commentary
I keep this recipe in my back pocket because it scales well and takes the pressure off when time’s tight. The method is intentionally simple: melt, mix, press, melt again, swirl, chill. The darker the chocolate you choose, the more the peanut butter flavor sings. For family trays I double the recipe and use a 9×13 pan, though I then increase chilling time to ensure a clean cut.
One small trick I use for prettier bars: chill the chocolate layer for about 10–15 minutes before the peanut butter drizzle. It slows the blending and gives a sharper marbled contrast when you drag the toothpick. Also, warm your knife under hot water and dry it between cuts for professional-looking slices.
Storage & Reheat Guide
- Refrigerator: Store in an airtight container for up to 1 week. Layer parchment between pieces to prevent sticking.
- Freezer: Wrap bars individually in plastic wrap and store in a freezer-safe container for up to 2 months. Thaw in the refrigerator for several hours before serving.
- Serving from fridge: Remove 10–15 minutes before serving to take the chill off and let flavors soften slightly.
- Do not attempt to reheat in microwave—these are meant to be served chilled or at room temperature to maintain texture.
Troubleshooting Q&A
- Q: My base is crumbly and falls apart.
A: You likely didn’t press it firmly enough into the pan or the butter ratio was off. Warm the mixture slightly, press very firmly into the pan, and refrigerate until set. - Q: The chocolate seized while melting.
A: Stop heating immediately. If it’s still salvageable, stir in a teaspoon or two of warm neutral oil or the 2 tablespoons of peanut butter called for in the recipe to smooth it out. Heat in short bursts and stir between each. - Q: The peanut butter drizzle sank into the chocolate.
A: If the chocolate was too warm, the peanut butter can sink. Let the chocolate cool for 10–15 minutes before drizzling, or chill briefly so the top firms up slightly first. - Q: Bars are too soft after refrigeration.
A: Increase chill time. If they remain soft after 4 hours, return them to refrigeration or freeze briefly before slicing. - Q: Edges are messy when I cut them.
A: Use a very sharp knife and wipe it clean between cuts. Warm the blade under hot water, dry it, and cut in a single smooth motion for best results.
Wrap-Up
No-Bake Peanut Butter Bars are a fast, dependable treat that delivers a familiar peanut-chocolate pairing with minimal effort. Follow the steps exactly for best texture, use the small tricks to neaten the finish, and feel free to seasonally adapt the bars for variety. Keep this recipe handy for quick potlucks, last-minute guests, or when you want a classic dessert without heating the house.
No-Bake Peanut Butter Bars
Ingredients
Ingredients
- 1/2 cupsalted butter melted
- 3/4 cuppowdered sugar
- 1/4 cupbrown sugar
- 1 cupcrushed graham crackers
- 1 cupcreamy peanut butter
- 3/4 cupsemi-sweet chocolate chips
- 1/4 cupcreamy peanut butter plus 2 tablespoons
Instructions
Instructions
- Line an 8" x 8" (20 cm x 20 cm) baking pan with aluminum foil or parchment paper, leaving an overhang for easy removal; spray the lining lightly with non-stick cooking spray.
- In a medium microwave-safe bowl, melt 1/2 cup salted butter in the microwave until fully melted (about 30–45 seconds, depending on your microwave).
- Add 3/4 cup powdered sugar and 1/4 cup brown sugar to the melted butter. Stir with a rubber spatula until combined and no dry pockets of sugar remain.
- Stir in 1 cup crushed graham crackers until evenly mixed, then stir in 1 cup creamy peanut butter until the mixture is smooth and uniform.
- Transfer the peanut butter-graham mixture to the prepared pan. Use an offset spatula or the back of a spoon to press it into an even layer across the bottom of the pan.
- In a separate microwave-safe bowl, combine 3/4 cup semi-sweet chocolate chips and 2 tablespoons creamy peanut butter. Microwave in 20–30 second increments, stirring after each increment, until the chocolate is fully melted and smooth.
- Spread the melted chocolate mixture evenly over the peanut butter layer in the pan.
- Place 1/4 cup creamy peanut butter in a small microwave-safe bowl and heat for 20–30 seconds, or until soft and pourable. Stir to smooth.
- Drizzle the warmed 1/4 cup peanut butter in 5–6 parallel lines across the chocolate layer. Rotate the pan 90 degrees. Using a toothpick, drag it through the lines once in one direction and then once in the opposite direction to create a marbled pattern.
- Cover the pan with plastic wrap and refrigerate for at least 2 hours, or until the bars are firm.
- Use the foil or parchment overhang to lift the set bars from the pan. Transfer to a cutting board and cut into bars with a sharp knife (wipe the knife clean between cuts for neater edges).
Equipment
- 8 x 8-inch (20 x 20 cm) baking pan
- Aluminum foil or parchment paper
- non-stick cooking spray
- microwave-safe bowls
- Rubber spatula
- offset spatula or spoon
- toothpick
- Plastic Wrap
- Cutting Board
- Sharp Knife
Notes
The bars will keep up to 2 weeks in the fridge.