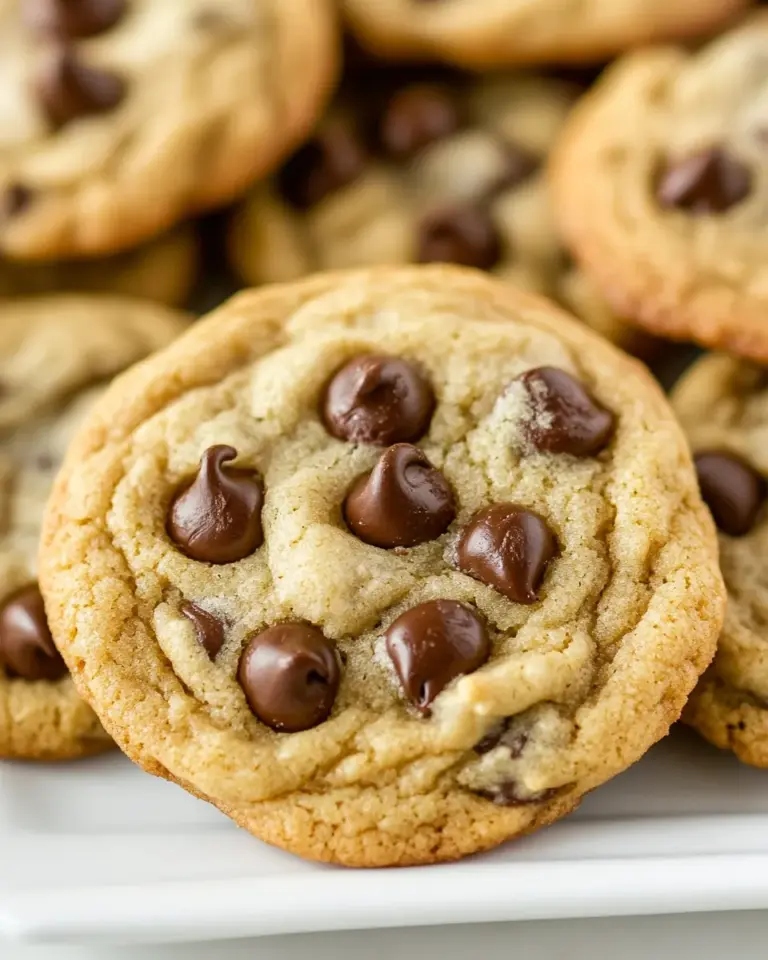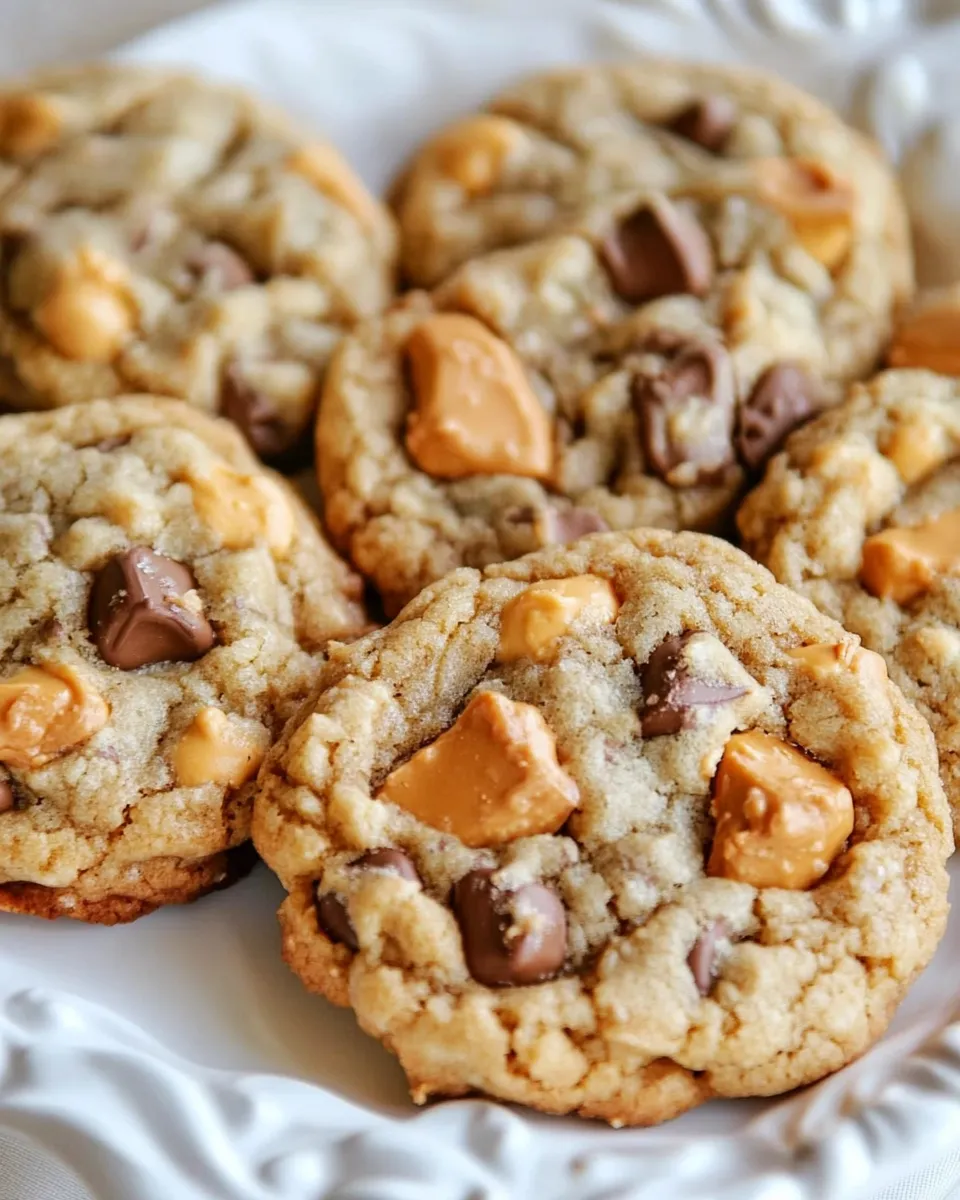
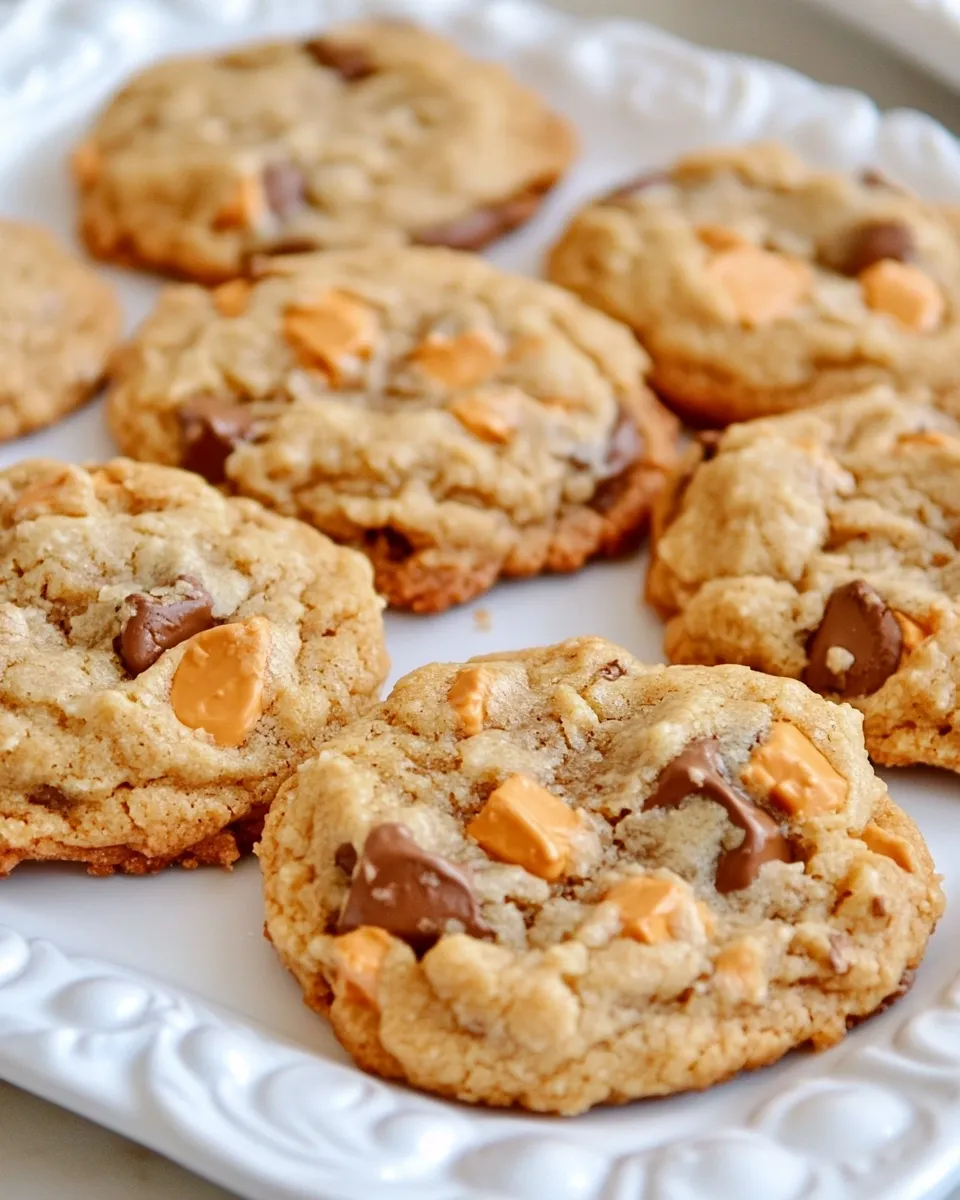
Butterfinger Butterscotch Cookies
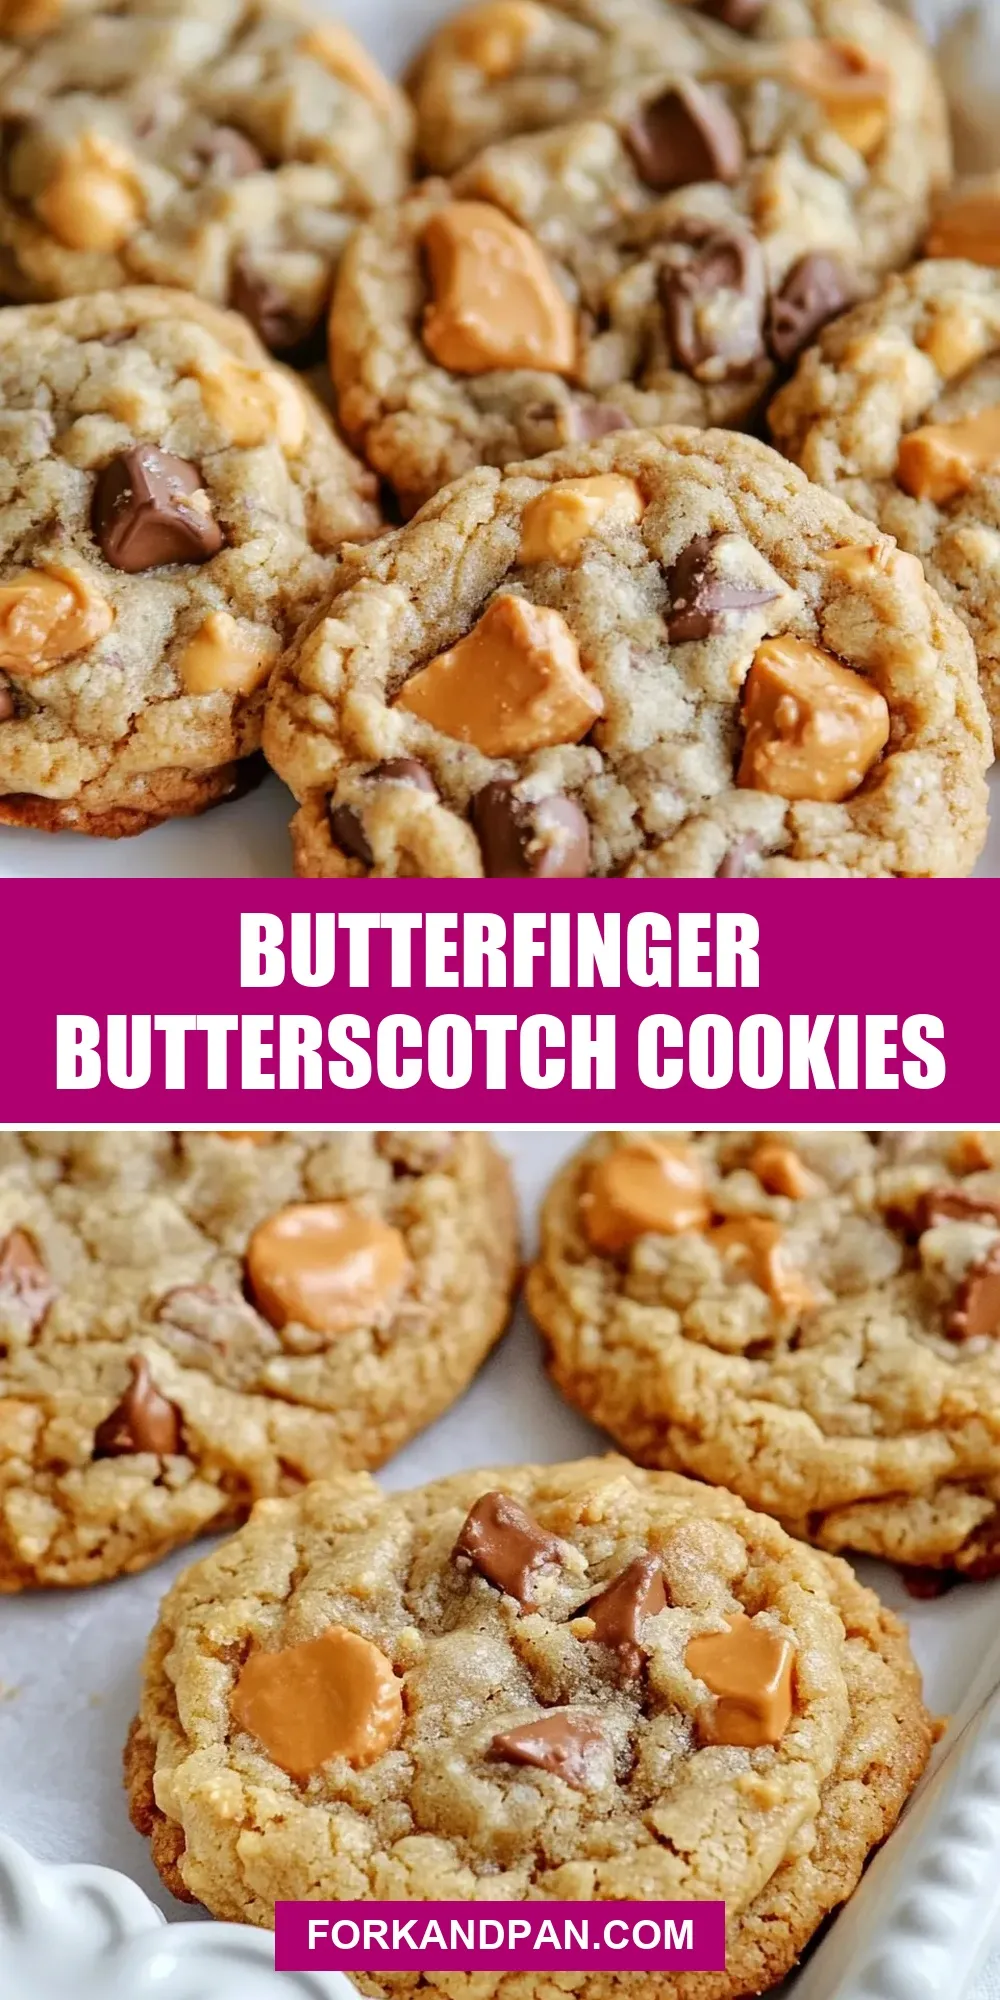
These cookies strike a balance: sturdy, chewy bodies studded with crisp Butterfinger bits and pockets of butterscotch warmth. They bake up with golden edges and tender centers, and they keep well in an airtight container—handy for a packed lunch or a last-minute party contribution.
I developed this version after wanting something that held up to a little handling but still felt homemade. The dough freezes beautifully, which means you can make a big batch, bake a few now and the rest later. That freezer step also helps the cookies spread less and keeps the centers thick and soft.
No pretension here—just reliable technique, real ingredients, and a repeatable result. Follow the steps and the timeline; the payoff is a cookie that’s better than store-bought and easy enough to make on a worknight.
Ingredients

- 1 1/2 cups all-purpose flour — Main structure; sift or fluff before measuring for accurate volume.
- 1 cup bread flour (you can use all-purpose in place if you need to) — Adds chew and a bit more gluten; swap for APF if preferred.
- 2/3 cup quick cook / instant oats — Texture and bulk; quick oats blend into the dough without making it gummy.
- 1 tsp baking powder — Gentle lift to keep the cookies from being too dense.
- 1/2 tsp baking soda — Helps browning and contributes to a slightly crisp edge.
- 1 tsp salt — Balances sweetness and amplifies flavor; use fine salt for even distribution.
- 1 cup butter, cold — Cold butter helps when you freeze dough; cut into small pieces so it creams evenly.
- 3/4 cup brown sugar — Adds moisture and caramel notes; packs lightly into the cup.
- 3/4 cup granulated sugar — For sweetness and a bit of crunch on the edges.
- 2 eggs — Bind and add richness; room temperature eggs incorporate more evenly but these work cold too.
- 2 tsp vanilla extract — Rounds and brightens the whole cookie.
- 1 cup semi-sweet, milk or dark chocolate chips — Use your favorite chocolate; semi-sweet is a safe, balanced choice.
- 1 cup butterscotch chips (you could also use peanut butter chips) — Adds the butterscotch flavor and pockets of soft sweetness.
- 1 to 1 1/2 cups Butterfinger Bits — Crunch and signature flavor; use more if you want a pronounced candy-to-cookie ratio.
Shopping List
- Flours: all-purpose and bread flour (or extra APF)
- Quick-cook/instant oats
- Baking powder, baking soda, salt
- Cold butter, brown sugar, granulated sugar
- Eggs, vanilla extract
- Semi-sweet/milk/dark chocolate chips
- Butterscotch chips (or peanut butter chips)
- Butterfinger Bits (1–1½ cups)
- Silicone or parchment for lining baking sheets
Cook Butterfinger Butterscotch Cookies Like This
- Cut the cold butter into small pieces and place in the bowl of an electric mixer. Beat the butter until light and creamy.
- Add the brown sugar and granulated sugar to the butter and beat until the mixture is light and fluffy.
- Add the eggs one at a time, beating after each addition until incorporated. Add the vanilla extract and mix until combined.
- In a separate bowl, combine the all-purpose flour, bread flour, quick-cook/instant oats, baking powder, baking soda, and salt. Stir to combine.
- Gradually add the dry ingredients to the wet ingredients and stir or beat on low until just combined. Do not over-mix.
- Fold in the chocolate chips, butterscotch chips, and Butterfinger Bits until evenly distributed.
- Use a large cookie scoop or ice cream scoop to portion dough onto a baking sheet lined with silicone or parchment. These dough balls can be placed close together on this sheet because it will go into the freezer.
- Freeze the cookie dough on the baking sheet for 1 hour.
- When ready to bake, preheat the oven to 375°F and place an oven rack in the center position.
- Remove six frozen dough balls and place them on a separate baking sheet lined with silicone or parchment, spacing them about 2 inches apart.
- Bake the cookies for 15–18 minutes, or until the edges begin to turn golden brown.
- Remove the baking sheet from the oven and place it on a wire rack to cool. Allow the cookies to cool completely on the rack before removing from the sheet.
- Repeat steps 10–12 with the remaining frozen dough balls. Store cooled cookies in an airtight container.
Why This Recipe Belongs in Your Rotation

It’s dependable. The blend of all-purpose and bread flour gives a chewy interior with defined edges, and the oats add bite without dominating texture. The Butterfinger Bits and chips provide varied textural interest: crisp candy, soft butterscotch, and melty chocolate inside every bite.
Make-ahead is another major plus. You can scoop and freeze a tray of dough in an hour, then bake whenever you need fresh cookies. That makes this recipe practical for weekday snacks, school volunteer days, or bringing to gatherings without last-minute rushes.
Ingredient Swaps & Substitutions
- Bread flour: Replace with equal parts all-purpose flour if you don’t have bread flour. The cookies will be slightly less chewy but still excellent.
- Butterscotch chips: Swap for peanut butter chips for a nuttier profile. Keep the same amount.
- Butterfinger Bits: Use chopped chopped peanut brittle or chopped toffee if you can’t find Butterfinger Bits, keeping quantities similar.
- Sugars: If you only have dark brown sugar, it will add a deeper molasses note. Keep the total sugar amounts the same.
- Oats: Use quick cook/instant as called for; old-fashioned oats will work but change the texture making it a bit heartier.
Prep & Cook Tools
- Electric mixer (stand or hand)
- Mixing bowls — at least two
- Measuring cups and spoons
- Large cookie scoop or ice cream scoop
- Baking sheets (2+ so you can bake while one cools)
- Silicone mats or parchment paper
- Wire cooling rack
- Freezer-safe tray or sheet for freezing dough
Errors to Dodge
Do not skip the freeze. Freezing the dough for an hour is not optional if you want the same spread and texture described. The frozen dough gives a controlled spread and keeps centers thick.
Don’t over-mix once you add the dry ingredients. Overworking develops gluten and yields tough cookies. Mix on low and stop when just combined.
Avoid placing frozen dough balls too close on the baking sheet when you bake. Space them about 2 inches apart so heat circulates and edges brown properly.
Year-Round Variations
Summer: Bake a batch and serve slightly warm with a scoop of vanilla ice cream for an easy dessert. The chocolate and butterscotch melt into the ice cream in a way that feels seasonal and indulgent.
Fall: Add 1/2 tsp cinnamon and swap half a cup of chocolate chips for chopped toasted pecans. The spices and nuts lean into fall flavors and pair well with the Butterfinger crunch.
Winter holidays: Press a few extra Butterfinger Bits on top of each dough ball before freezing for a candy-crowned cookie. Package cooled cookies in festive tins to give as gifts.
What I Learned Testing
Freezing the scooped dough makes the whole project more forgiving. During testing, batches where I skipped the freeze spread thin and lost their chew. I also found that cutting the cold butter into small pieces and beating it until light—rather than leaving larger chunks—helps the dough come together faster and produces a more uniform texture.
Another small but meaningful point: cooling the cookies completely on a wire rack before storing prevents condensation from making the bottoms soggy. It only takes a few extra minutes, but it preserves edge crispness.
Freezer-Friendly Notes
This recipe is intentionally freezer-friendly. Scoop dough onto a lined sheet and freeze the balls for 1 hour as instructed. After they firm up, transfer the dough balls to a freezer-safe container or zip-top bag. They’ll keep well for up to 3 months.
When you want fresh cookies, bake from frozen: place six frozen dough balls on a lined sheet (about 2 inches apart) and bake 15–18 minutes at 375°F. No need to thaw. If baking straight from the freezer, add an extra 1–2 minutes if you prefer a darker edge.
Ask & Learn
Have a question about texture, timing, or ingredient swaps? Ask away. Tell me whether you prefer cakier or chewier cookies, and I’ll suggest simple tweaks—more oats and a touch less butter for chew, or a slightly longer bake for crisper edges. I’ll also help troubleshoot if your cookies spread too much or not at all.
Hungry for More?
- Try a chocolate chip cookie base with chopped toffee for a similar crunchy-sweet finish.
- Swap the Butterfinger Bits for M&M’s for a colorful, kid-friendly cookie.
- For a sandwich cookie, spread a thin layer of chocolate ganache between two cooled cookies for an elevated treat.

Butterfinger Butterscotch Cookies
Ingredients
Ingredients
- 1 1/2 cupsall-purpose flour
- 1 cupsbread flour you can use all-purpose in place if you need to
- 2/3 cupquick cook / instant oats
- 1 tspbaking powder
- 1/2 tspbaking soda
- 1 tspsalt
- 1 cupbutter cold
- 3/4 cupbrown sugar
- 3/4 cupgranulated sugar
- 2 eggs
- 2 tspvanilla extract
- 1 cupsemi-sweet milk or dark chocolate chips
- 1 cupbutterscotch chips you could also use peanut butter chips
- 1 to 1 1/2 cups Butterfinger Bits
Instructions
Instructions
- Cut the cold butter into small pieces and place in the bowl of an electric mixer. Beat the butter until light and creamy.
- Add the brown sugar and granulated sugar to the butter and beat until the mixture is light and fluffy.
- Add the eggs one at a time, beating after each addition until incorporated. Add the vanilla extract and mix until combined.
- In a separate bowl, combine the all-purpose flour, bread flour, quick-cook/instant oats, baking powder, baking soda, and salt. Stir to combine.
- Gradually add the dry ingredients to the wet ingredients and stir or beat on low until just combined. Do not over-mix.
- Fold in the chocolate chips, butterscotch chips, and Butterfinger Bits until evenly distributed.
- Use a large cookie scoop or ice cream scoop to portion dough onto a baking sheet lined with silicone or parchment. These dough balls can be placed close together on this sheet because it will go into the freezer.
- Freeze the cookie dough on the baking sheet for 1 hour.
- When ready to bake, preheat the oven to 375°F and place an oven rack in the center position.
- Remove six frozen dough balls and place them on a separate baking sheet lined with silicone or parchment, spacing them about 2 inches apart.
- Bake the cookies for 15–18 minutes, or until the edges begin to turn golden brown.
- Remove the baking sheet from the oven and place it on a wire rack to cool. Allow the cookies to cool completely on the rack before removing from the sheet.
- Repeat steps 10–12 with the remaining frozen dough balls. Store cooled cookies in an airtight container.
Equipment
- Electric Mixer
- Mixing Bowls
- Baking Sheet
- silicone or parchment
- freezer
- Oven
- Wire Rack
- cookie scoop or ice cream scoop
Notes
Makes approximately 16 large cookies. Recipe adapted from Food Network.