7-Layer Dip
Seven layers. Minimal effort. Maximum party payoff. This 7-Layer Dip is the kind of recipe I reach for when guests text “dropping by in 20” or when we need a reliable snack for game night. It’s bright, creamy, salty, and entirely customizable without ever losing the anchor flavors that make this dish irresistible.
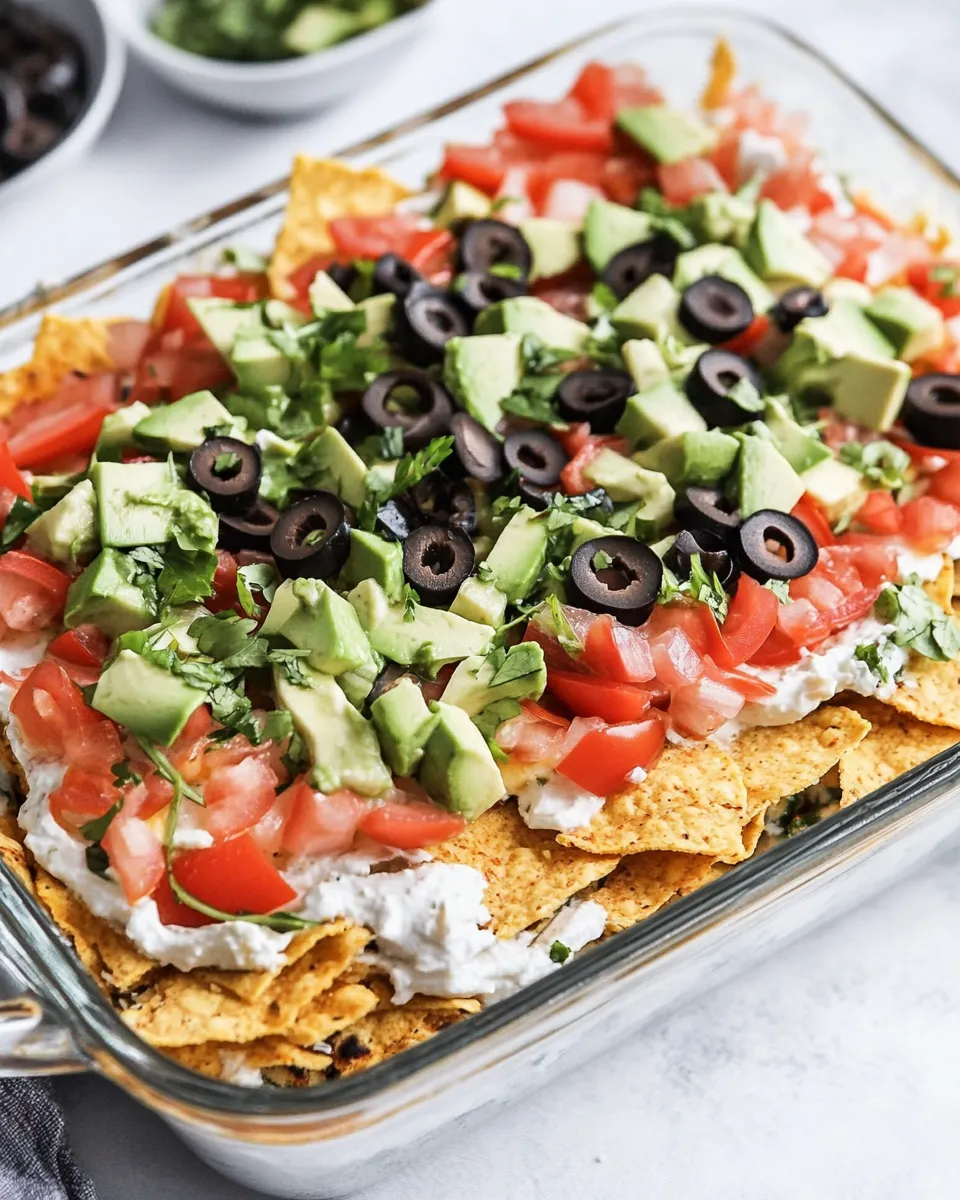
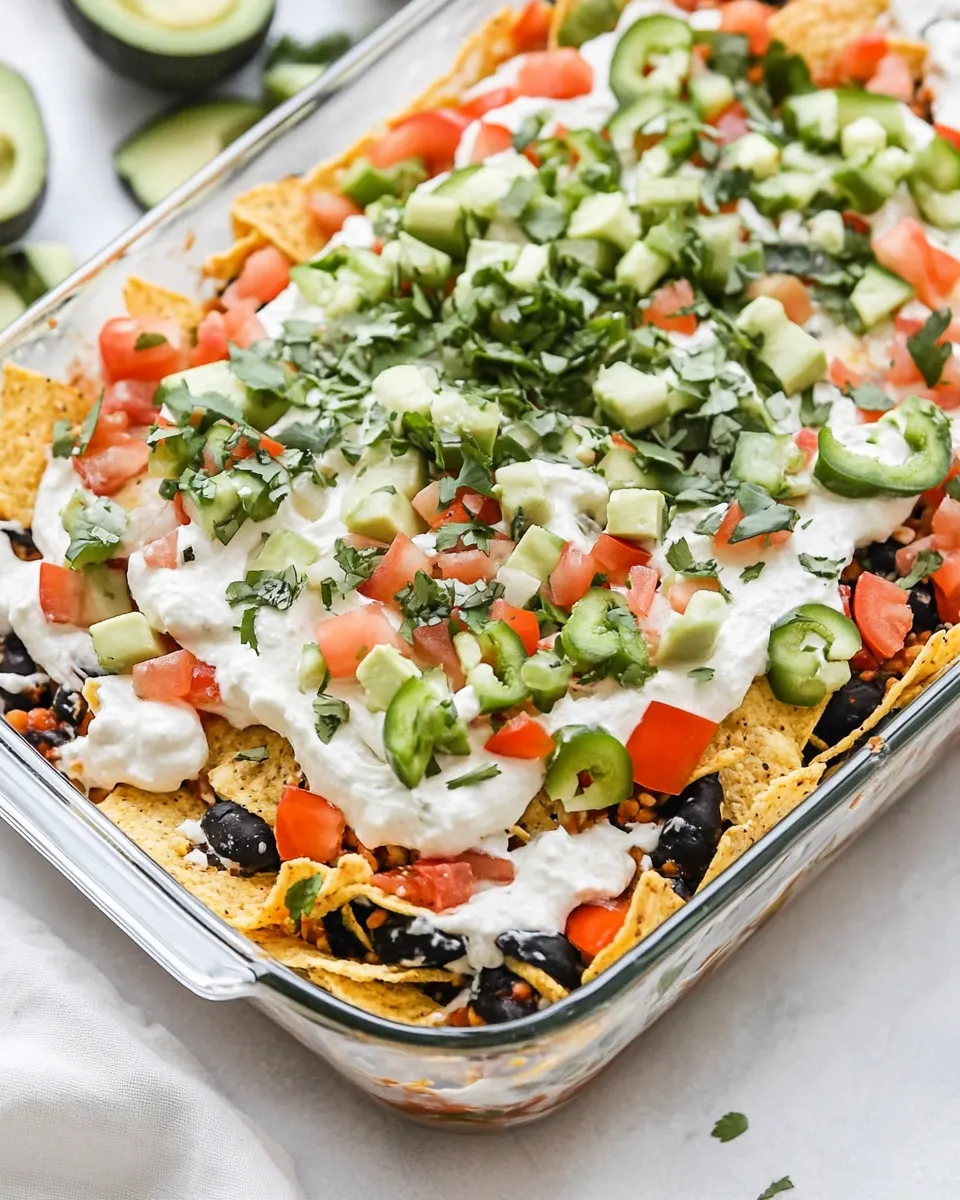
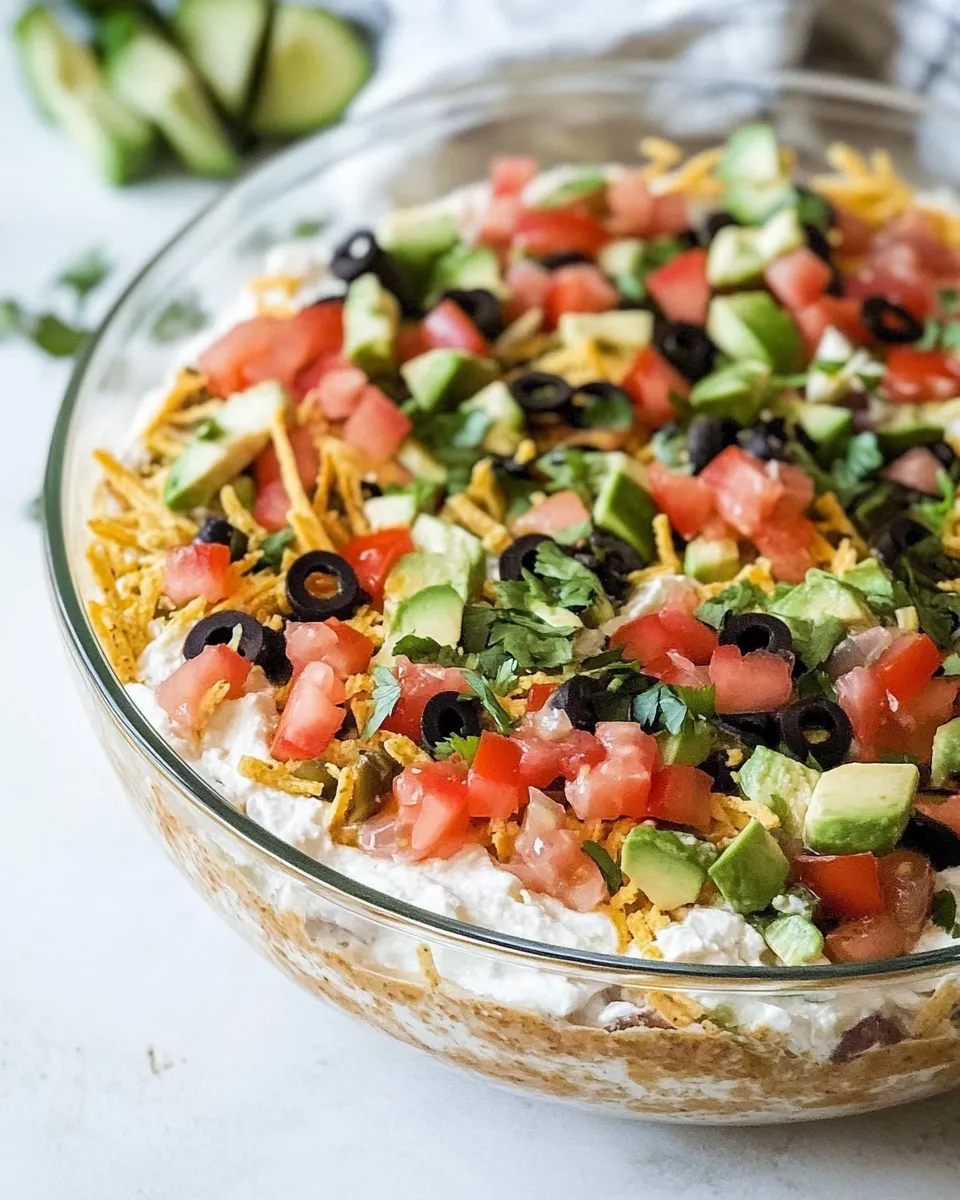
I like to assemble mine in a 9×13-inch pan because it feeds a crowd and presents beautifully, but a large shallow serving plate works just as well if you’re after the classic scoop-with-a-chip experience. The layers build on one another: seasoned refried beans, smooth avocado, and cool sour cream, topped with salsa, melty cheese, olives, scallions, and a fresh tomato if you want that last-minute pop of color.
Below I’ll walk you through the exact ingredients and the step-by-step directions straight from the recipe, then share practical tips on timing, gear, and common fixes so your dip comes out perfect every time. No fluff—just straightforward guidance so you can get to the best part: scooping and sharing.
The Ingredient Lineup

Ingredients
- 2 cans refried beans (black or pinto) — the hearty base that holds the layers together; use your preferred variety for flavor preference.
- 2 teaspoons chili powder — brings warm, mild heat and depth to the beans.
- 1 teaspoon ground cumin — adds an earthy, smoky note that complements the chili powder.
- 1/2 teaspoon garlic powder — boosts savory flavor without the texture of fresh garlic.
- 3 avocados, peeled and seeded — make the guacamole layer creamy; choose ripe but not overripe avocados.
- 1 Tablespoon lime juice (or lemon juice) — brightens the avocado and helps prevent browning.
- 8 oz sour cream — provides a cool, tangy middle layer; full-fat gives the best texture.
- 3/4 cup salsa — for a saucy burst; chunky or smooth works depending on how you like the texture.
- 1 1/2 cups shredded Mexican blend cheese, cheddar or Monterrey Jack — melts into the salsa layer and adds richness.
- 6 ounces sliced black olives — salty, briny contrast; scatter evenly for balance.
- 2 green onions, chopped — fresh bite and color; slice thin so they distribute well.
- 1 roma tomato, diced, for garnish (optional) — a fresh finish that brightens the top (optional but pretty).
- Tortilla chips, for serving — choose sturdy chips for scooping through all seven layers.
Build 7-Layer Dip Step by Step
- In a mixing bowl, combine 2 cans refried beans, 2 teaspoons chili powder, 1 teaspoon ground cumin, and 1/2 teaspoon garlic powder. Stir until smooth and taste; add more of those seasonings if desired.
- Spread the seasoned beans into a single even layer in a large serving plate or a 9×13-inch pan.
- In a separate bowl, mash 3 avocados with 1 tablespoon lime juice (or lemon juice) until mostly smooth. Spread the mashed avocado evenly over the beans.
- Spread 8 ounces sour cream in an even layer over the avocado.
- Dollop 3/4 cup salsa in small spoonfuls evenly over the sour cream (or gently spread the salsa if you prefer).
- Evenly sprinkle 1 1/2 cups shredded Mexican blend cheese (or cheddar/Monterrey Jack) over the salsa.
- Scatter 6 ounces sliced black olives and 2 chopped green onions evenly over the cheese.
- If using, sprinkle 1 diced roma tomato on top as a garnish.
- Cover and refrigerate until ready to serve (can be made up to a day in advance). Serve with tortilla chips.
Quick assembly tips
Work on a flat surface and use a rubber spatula to get even layers without disturbing the ones below. If your salsa is particularly watery, spoon it onto the sour cream rather than spreading to avoid moisture seeping into the avocado layer. Make the dip up to 24 hours ahead and keep tightly covered to let flavors meld.
Why 7-Layer Dip is Worth Your Time
This dip checks a lot of boxes: it’s fast, forgiving, and it travels well from kitchen to couch. You don’t need to cook anything, and the ingredients are pantry-friendly. The layers create contrasts in texture and temperature — cool sour cream and avocado against warm-seeming, spiced beans — which makes every bite interesting.
It’s also inherently social food. People can scoop however much they want and customize with extras like hot sauce, pickled jalapeños, or chopped cilantro. For potlucks and casual gatherings it’s a low-stress showstopper: attractive on the table and reliably eaten down to the bottom.
Finally, it’s versatile. The recipe is a template: tweak the cheese, switch the olives for pickled peppers, choose black beans or pinto, and you still end up with the same layered satisfaction. That flexibility is why I keep it in regular rotation.
No-Store Runs Needed
This recipe is kind to a half-stocked fridge. If you’ve got a few cans of beans and some basic dairy and produce, you’re set. Here are practical swaps that avoid last-minute shopping:
- Refried beans: If you only have whole beans, mash a cup or two with a bit of the bean liquid and the listed seasonings to mimic texture.
- Avocado: If avocados are unavailable, you can substitute a thin layer of guacamole from a tub or even a mild hummus in a pinch.
- Sour cream: Plain Greek yogurt is a fine stand-in and adds tang plus extra protein.
- Salsa: Use pico de gallo or even a jarred tomato-based salsa—just drain any excess liquid before adding.
Kitchen Gear Checklist
- Mixing bowls — at least two, one for beans and one for avocado.
- Rubber spatula — for even spreading.
- 9×13-inch pan or a large serving plate — for layering and serving.
- Fork or potato masher — to mash the avocados.
- Knife and cutting board — for tomatoes and green onions.
- Plastic wrap or an airtight lid — to refrigerate without drying out.
Missteps & Fixes
Even a simple dish can go sideways. Here are the common problems and clear fixes I use.
Too watery
If your salsa or tomatoes are watery, spoon the salsa on top in small dollops rather than spreading; excess moisture can be drained off or patted with paper towel before adding. For avocado that seems watery (rare), blot with a paper towel and hold off on salsa until serving.
Avocado browning
Lime or lemon juice reduces browning. If you’ve made the dip early and notice slight discoloration, press plastic wrap directly onto the surface before refrigerating to minimize air contact. A little browning on top is cosmetic—flavor remains fine.
Bean layer too thick or thin
If the refried-bean layer feels too dense, stir in a tablespoon of water or a bit of olive oil and re-level. If it’s too thin, mix in a few tablespoons of dry pantry refried beans or reduce the pan size so the layer is compact.
Flavors flat
Taste the seasoned beans before assembling. If they’re bland, a pinch more chili powder or cumin will help; a touch of salt can brighten the whole dip. Likewise, adding a splash more lime to the avocado lifts the whole profile.
Warm & Cool Weather Spins
This dip is wonderfully adaptable to seasons.
Warm weather
Lean on bright, fresh ingredients: use pico de gallo instead of jarred salsa, add chopped cilantro and a squeeze of lime at the end, and consider thinly sliced radishes for crunch. Serve with sturdy tortilla chips or thick-cut veggies like jicama and cucumber for a lighter spread.
Cool weather
In cooler months, I like to add a layer of warm, seasoned black beans (heat the refried beans with a little cumin and chipotle powder) and top with shredded cheddar that melts slightly under a quick broil for 30–60 seconds—watch closely. This gives you a warm contrast to the cool layers.
Recipe Notes & Chef’s Commentary
I assemble this dip with the goal of balance. The bean layer should be seasoned enough to carry flavor through the rest of the ingredients. The avocado layer should be mostly smooth so chips don’t get caught on large chunks. The sour cream acts as a cooling buffer between the avocado and salsa, which keeps everything from becoming too tomato-wet.
When choosing cheese, a Mexican blend melts nicely and offers variety; cheddar gives sharpness while Monterrey Jack keeps it creamy. Olives and green onions add texture and a savory lift—don’t skip them unless someone truly dislikes either. The roma tomato is optional but adds freshness and color.
Makes a fantastic make-ahead dish: assembled and covered, it’s better after a few hours in the fridge because the flavors settle. If you plan to make it more than a day ahead, skip the tomato and add it at the last minute.
Store, Freeze & Reheat
Storage: Keep covered in the refrigerator for up to 24 hours. After that the avocado may brown and textures shift, but it’s still safe to eat for up to 48 hours if kept cold.
Freezing: This dip doesn’t freeze well because the avocado and sour cream separate and change texture when thawed. I don’t recommend freezing the assembled dip.
Reheat: If you want a warm version, spoon layers into an ovenproof dish, cover with foil, and heat at 325°F (160°C) until warmed through—about 15–20 minutes depending on depth. Add fresh toppings (green onions, tomato) after heating.
7-Layer Dip FAQs
Q: Can I use whole beans instead of refried? A: Yes. Mash them slightly and cook briefly with the seasonings so they bind and hold shape.
Q: How can I make it vegan? A: Use a dairy-free sour cream and a vegan cheese alternative. Check the refried beans, as some contain lard—use vegan-certified or make your own from mashed whole beans.
Q: Can I make individual servings? A: Absolutely. Layer ingredients in small jars or bowls for portable portions—great for picnics.
Q: Is it okay to assemble the dip the night before? A: Yes; cover it tightly and add the diced tomato just before serving if you used one.
Q: My avocado turned brown on top. Is it ruined? A: Mostly cosmetic. Scrape off the top layer and the lower layers will be fine. Prevent browning next time with direct-contact plastic wrap and lime juice.
The Takeaway
7-Layer Dip is reliable, crowd-pleasing, and forgiving. It’s fast to assemble, feeds a crowd, and opens up plenty of room for small tweaks based on what you have on hand. Follow the simple steps above, season the beans to taste, and plan for a short rest in the fridge if you can—the flavors marry beautifully. Serve with sturdy chips and watch it disappear.

7-Layer Dip
Ingredients
Ingredients
- 2 cansrefried beans black or pinto
- 2 teaspoonschili powder
- 1 teaspoonground cumin
- 1/2 teaspoongarlic powder
- 3 avocados peeled and seeded
- 1 Tablespoonlime juice or lemon juice
- 8 ozsour cream
- 3/4 cupsalsa
- 1 1/2 cupsshredded Mexican blend cheese cheddar or Monterrey Jack
- 6 ouncessliced black olives
- 2 green onions chopped
- 1 roma tomatodiced for garnish (optional)
- tortilla chips for serving
Instructions
Instructions
- In a mixing bowl, combine 2 cans refried beans, 2 teaspoons chili powder, 1 teaspoon ground cumin, and 1/2 teaspoon garlic powder. Stir until smooth and taste; add more of those seasonings if desired.
- Spread the seasoned beans into a single even layer in a large serving plate or a 9×13-inch pan.
- In a separate bowl, mash 3 avocados with 1 tablespoon lime juice (or lemon juice) until mostly smooth. Spread the mashed avocado evenly over the beans.
- Spread 8 ounces sour cream in an even layer over the avocado.
- Dollop 3/4 cup salsa in small spoonfuls evenly over the sour cream (or gently spread the salsa if you prefer).
- Evenly sprinkle 1 1/2 cups shredded Mexican blend cheese (or cheddar/Monterrey Jack) over the salsa.
- Scatter 6 ounces sliced black olives and 2 chopped green onions evenly over the cheese.
- If using, sprinkle 1 diced roma tomato on top as a garnish.
- Cover and refrigerate until ready to serve (can be made up to a day in advance). Serve with tortilla chips.
Equipment
- Mixing Bowl
- bowl for mashing
- Spoon or Spatula
- serving plate or 9x13-inch pan
- Knife
Notes
Make-Ahead Instructions:
7-layer dip can be made 1 day ahead of time, covered tightly with plastic wrap and stored in the refrigerator.