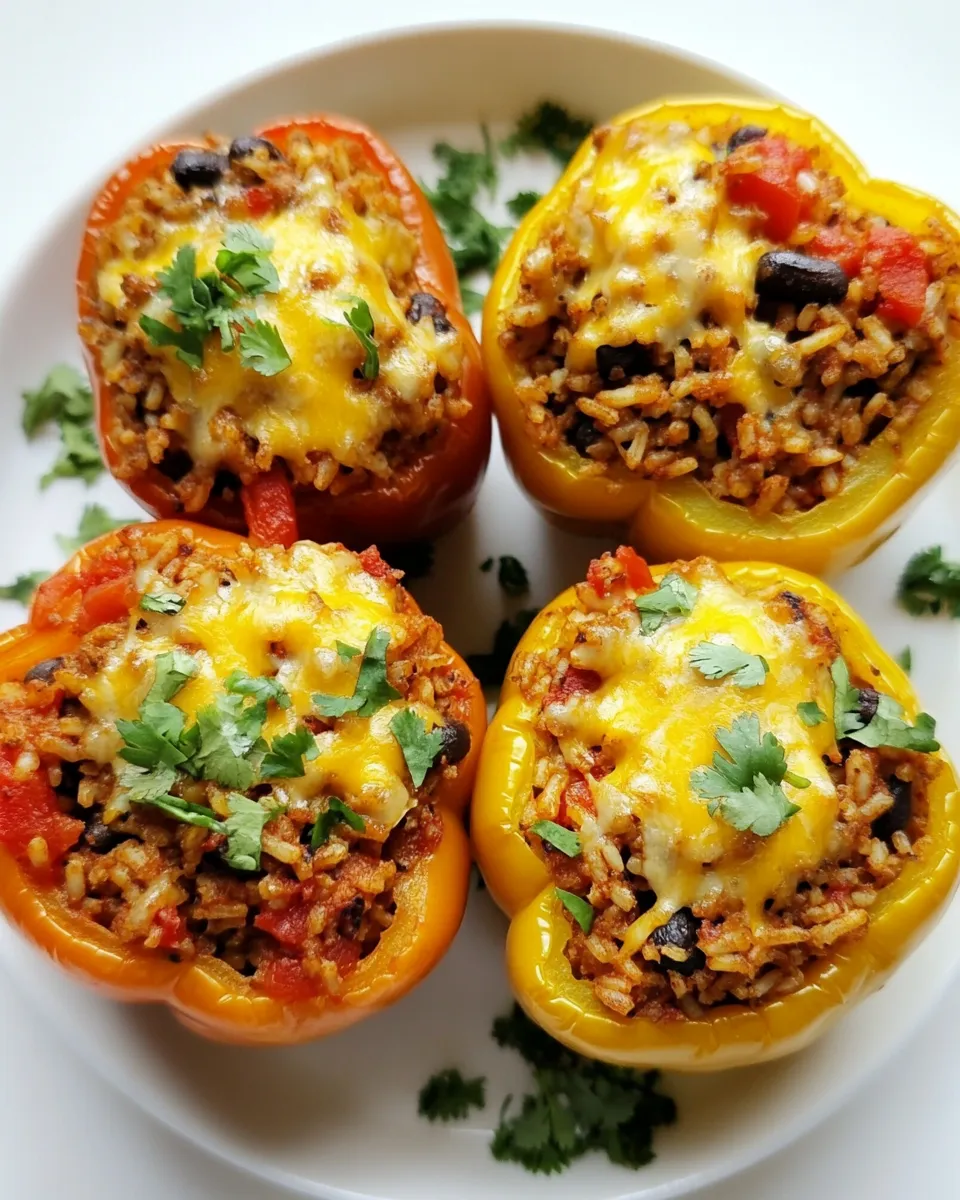
Stuffed Bell Peppers with Mexican Rice
I make these Stuffed Bell Peppers with Mexican Rice on busy weeknights and when friends drop by unexpectedly. They’re comforting, colorful, and forgiving — the kind of dish that lets you cook confidently without hovering over a stove the whole time. The rice cooks inside the pan with flavorful vegetables, beans, and tomatoes, and then gets scooped into bell peppers for an easy-to-serve presentation.
This version uses pantry-friendly cans and brown rice so it feels wholesome and keeps well. The technique is straightforward: build the filling on the stove, finish the peppers in the oven, melt a little cheese on top, and let them rest before serving. You get vibrant peppers with tender, well-seasoned rice inside.
Below I walk you through a clear shopping list, step-by-step directions from start to finish, and practical tips to avoid common mistakes. There are also sensible substitutions, storage notes, and simple seasonal variations so you can adapt the recipe any time of year.
Ingredients

- 1 tablespoon olive oil — for sautéing the aromatics and softening vegetables; use extra-virgin for flavor or a neutral oil if you prefer.
- 1 yellow onion, chopped — builds savory depth and a sweet base for the filling.
- 2 garlic cloves, minced — adds bright garlic flavor; add at the right time so it doesn’t burn.
- 1 green chili pepper, chopped (optional) — brings heat and freshness if you want a spicier profile; omit for mild flavor.
- 1 zucchini, diced — gives body, moisture, and a tender bite to the rice mixture.
- 1 teaspoon ground cumin — warms the filling with earthy, slightly smoky notes.
- 1 teaspoon paprika — adds color and a subtle sweetness; smoked paprika works well if you like smokiness.
- 1/2 teaspoon garlic powder — reinforces garlic flavor without extra moisture.
- 1/2 teaspoon salt — seasons the filling; adjust to taste, especially if your canned ingredients are salty.
- 1/2 teaspoon ground black pepper — balances the spices with mild heat and aromatics.
- 1 cup brown rice, dry — the main starch; cooks with the tomatoes and broth for a well-flavored grain.
- 13.5 ounces canned black beans, drained and rinsed — adds protein and a creamy texture; rinse to remove excess sodium.
- 13.5 ounces canned diced tomatoes — provides acidity, moisture, and flavor; include the juices.
- 2 tablespoons tomato paste — concentrates tomato flavor and helps bind the filling.
- 3 cups low sodium vegetable broth, divided — liquid for cooking the rice; part is reserved for baking so note the “divided”.
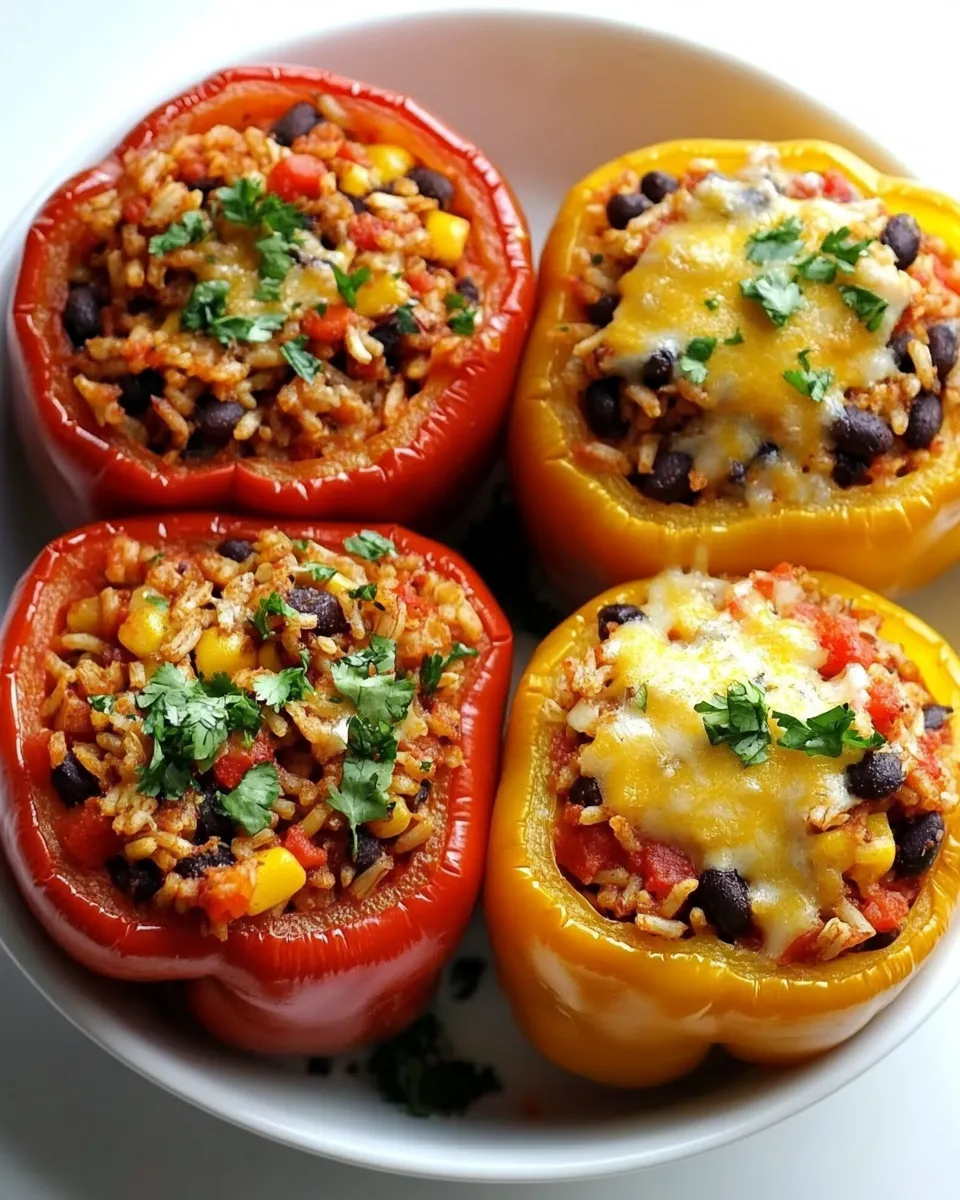
- 4 bell peppers, tops and seeds removed — vessels for the filling; choose assorted colors for a pretty plate.
- 1 cup shredded cheddar cheese, divided — 3/4 cup goes into the rice for creaminess, 1/4 cup finishes the tops; use sharp or mild to your preference.
Your Shopping Guide
When you shop for this recipe, prioritize fresh peppers and a decent quality brown rice. Bell peppers should feel firm and heavy for their size; soft spots mean they’re past their prime. Brown rice varies by brand—some need a little longer to cook—so check the package for expected cook time (this recipe allows 35–45 minutes).
Low sodium vegetable broth is important here because canned tomatoes and beans can add salt. Buying low sodium gives you control and prevents an overly salty final dish. If you only have regular broth, reduce the added salt in the recipe or rinse the beans extra well.
For cheese, pre-shredded works in a pinch, but fresh-shredded melts better because it hasn’t been anti-caked. If you want a dairy-free version, substitute a firm plant-based cheese at the same volume and expect a slightly different melt.
Stuffed Bell Peppers with Mexican Rice Made Stepwise
- Preheat the oven to 400°F (200°C). Cut the tops off the 4 bell peppers and remove the seeds and membranes; place the peppers upright in a baking dish.
- Heat 1 tablespoon olive oil in a medium saucepan over medium-high heat.
- Add the chopped yellow onion and sauté, stirring occasionally, for 3–4 minutes until softened and translucent.
- Add the 2 minced garlic cloves, chopped green chili pepper (if using), and diced zucchini. Stir in 1 teaspoon ground cumin, 1 teaspoon paprika, 1/2 teaspoon garlic powder, 1/2 teaspoon salt, and 1/2 teaspoon ground black pepper. Cook, stirring, for 5–6 minutes until the vegetables soften.
- Add 1 cup dry brown rice, the drained and rinsed 13.5-ounce can of black beans, the 13.5-ounce can of diced tomatoes (with juices), 2 tablespoons tomato paste, and 2 cups of the low sodium vegetable broth. Stir to combine.
- Bring the mixture to a gentle boil, then reduce the heat to low, cover, and simmer until the rice is tender and the liquid is absorbed (about 35–45 minutes).
- While the rice cooks, keep the prepared bell peppers in the baking dish and reserve 1 cup of the low sodium vegetable broth for baking.
- When the rice is done, remove the saucepan from the heat and stir in 3/4 cup of the shredded cheddar cheese until melted and evenly distributed.
- Spoon the rice mixture evenly into the prepared bell peppers.
- Pour the reserved 1 cup vegetable broth into the bottom of the baking dish around the peppers (not inside them). Cover the dish tightly with foil.
- Bake the covered peppers in the preheated 400°F oven for 20 minutes.
- Remove the foil, sprinkle the tops of the peppers with the remaining 1/4 cup shredded cheddar cheese, and bake uncovered for an additional 5 minutes, until the cheese is melted and the peppers are tender when pierced with a fork.
- Remove from the oven and let the peppers rest for a few minutes before serving.
Top Reasons to Make Stuffed Bell Peppers with Mexican Rice
These stuffed peppers are a complete meal that hits protein, fiber, and vegetables in one package. The black beans and brown rice give staying power without making the dish heavy. You get bold flavor from pantry staples—cumin, paprika, tomato paste—without needing a long list of fresh herbs.
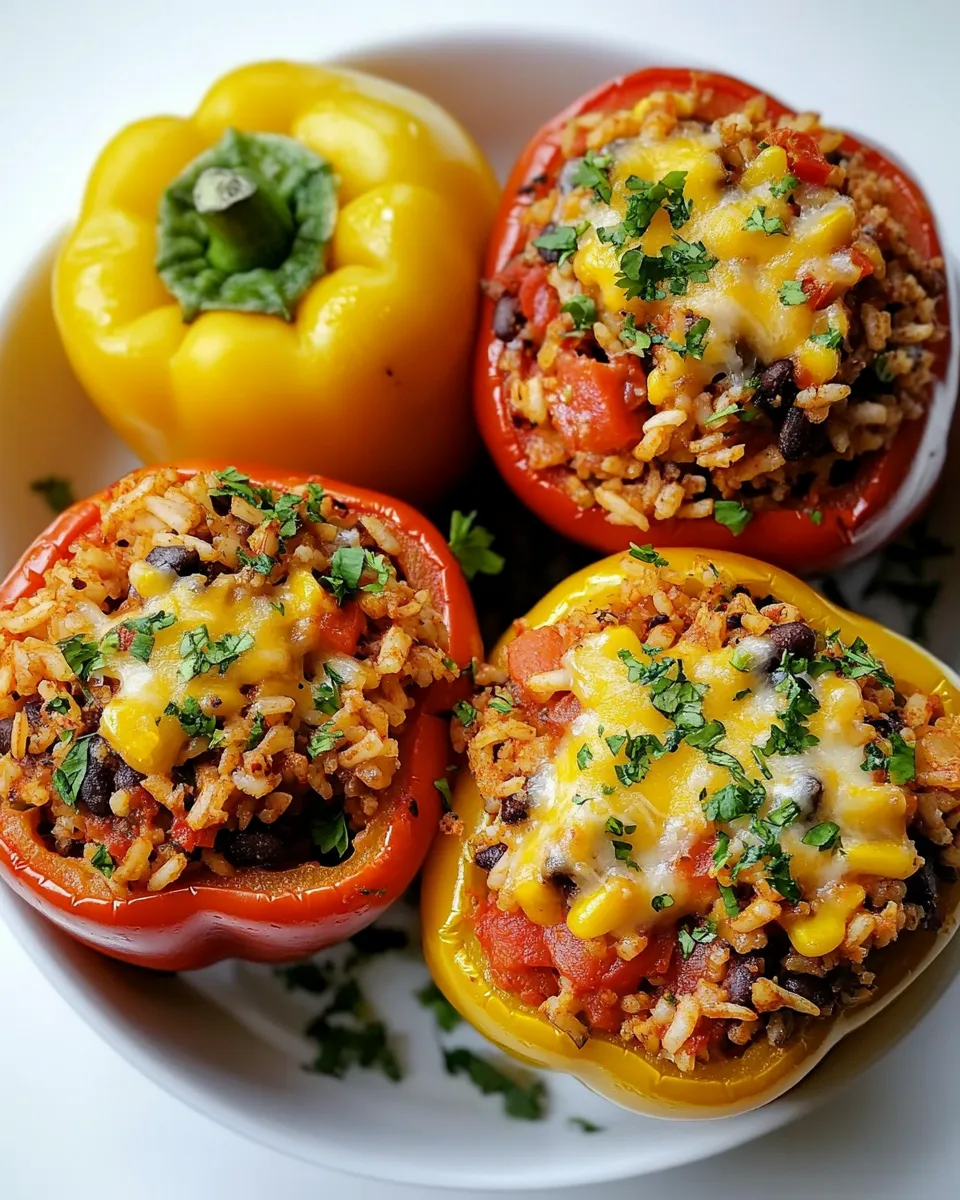
They’re also visually appealing. Bright peppers filled with a tomato-scented rice look like effort but require simple prep. They’re great for guests because you can prep most of the filling ahead, then finish in the oven right before serving.
Finally, they’re adaptable. Want to add meat, switch beans, or make them vegan? The core method works every time. That flexibility makes them a reliable recipe to return to week after week.
Healthier Substitutions
- Use extra veggies: Add finely chopped carrots or bell pepper pieces to increase fiber without changing technique.
- Lower the cheese: Use 1/2 cup shredded cheddar instead of a full cup, or swap in reduced-fat cheddar for fewer calories.
- Make it gluten-free: This recipe is naturally gluten-free as written—just double-check canned ingredient labels.
- Reduce sodium: Use no-salt-added canned tomatoes and beans, and keep the low sodium broth; taste before adding the 1/2 teaspoon salt.
Equipment Breakdown
You don’t need special gear for these peppers. A medium saucepan with a tight-fitting lid cooks the rice mixture evenly. Use a baking dish deep enough to hold four peppers upright; a 9×13-inch pan or similar works well. Tin foil is required to cover the dish during the oven step so the peppers steam and get tender.
Optional but helpful
- A mixing spoon with a flat edge helps scrape the pan while combining the rice and beans.
- An oven thermometer ensures your oven really reaches 400°F; many home ovens are off by 25°F or more.
Avoid These Mistakes
Don’t skip reserving the 1 cup of broth for the baking step. That steam around the peppers keeps them moist and prevents shrinking or over-browning. Also, avoid adding the final cheese too early. Adding 3/4 cup to the rice is right on time when the rice is off the heat; the 1/4 cup on top needs only a few minutes under heat to melt.
Another common error is undercooking the rice mixture before stuffing. Brown rice needs the full 35–45 minutes; stuffing with undercooked rice will extend oven time or leave the filling chewy. Finally, keep the pepper cavities reasonably sized—cut a little higher on the top if your peppers are very narrow so you can scoop in enough filling.
Variations by Season
Spring/Summer: Use fresh tomatoes instead of canned if they’re ripe—about 2 cups diced—reduce added broth slightly. Add corn kernels or grilled zucchini for a summery texture.
Fall/Winter: Stir in roasted sweet potato or chopped kale for heartier comfort. Use smoked paprika and a splash of chipotle in adobo for deeper, warming flavor.
Anytime: Swap black beans for pinto or kidney beans. Stir in a handful of chopped cilantro at the end for fresh brightness when it’s available.
Pro Tips & Notes
- Make it ahead: Prepare the rice filling a day ahead and refrigerate. When ready to serve, refill the peppers, add the reserved broth to the pan, and bake as directed (you may need an extra 5–10 minutes if filling is chilled).
- Check pepper doneness: Pierce with a fork; it should go through with gentle resistance. If you like a softer pepper, add 5–10 minutes to the covered baking time.
- Even stuffing: Use an ice-cream scoop or measuring cup to divide the filling evenly so each pepper cooks the same.
- Control spice: The green chili is optional. Start with half and taste the filling before stuffing if you’re unsure about the heat level.
Meal Prep & Storage Notes
Store cooled stuffed peppers in an airtight container for up to 3–4 days in the refrigerator. Reheat in a 350°F oven for 15–20 minutes, covered, until warmed through. You can also microwave individual peppers for 1–2 minutes on high, depending on your microwave’s power.
For longer storage, freeze fully cooled stuffed peppers in a freezer-safe container for up to 2 months. Thaw overnight in the fridge and reheat in a 350°F oven covered until hot. Note: texture of the pepper softens after freezing, but the filling holds up well.
Reader Questions
Q: Can I use white rice instead of brown rice?
A: Yes. White rice cooks faster, so adjust the simmer time and watch the liquid absorption closely. Use about 18–20 minutes simmer time for many long-grain white rices, but always check the package instructions and keep the same liquid ratios as a starting point.
Q: Can I add ground meat?
A: You can. Brown about 1 pound of ground beef or turkey after the onions and before adding the garlic, drain any excess fat, then continue with the recipe. Keep the same rice and broth amounts.
Q: What if my peppers tip over in the baking dish?
A: Trim a very small slice off the bottom to create a flat base, or nestle crumpled foil under the peppers to support them during baking.
Time to Try It
These Stuffed Bell Peppers with Mexican Rice are dependable, flavorful, and adaptable. Follow the steps above, respect the rice’s cooking time, and don’t skip that reserved cup of broth for steaming in the oven. You’ll have a hearty, attractive meal with straightforward prep and sensible leftovers for lunches.
Give it a go this week. Start by prepping the filling while the oven heats, and you’ll have dinner on the table without last-minute stress. Tag a friend who needs a reliable weeknight dinner idea and enjoy the cozy payoff.

Stuffed Bell Peppers with Mexican Rice
Ingredients
Ingredients
- 1 tablespoonolive oil
- 1 yellow onionchopped
- 2 garlic clovesminced
- 1 green chili pepperchopped optional
- 1 zucchinidiced
- 1 teaspoonground cumin
- 1 teaspoonpaprika
- 1/2 teaspoongarlic powder
- 1/2 teaspoonsalt
- 1/2 teaspoonground black pepper
- 1 cupbrown ricedry
- 13.5 ouncescanned black beansdrained and rinsed
- 13.5 ouncescanned diced tomatoes
- 2 tablespoonstomato paste
- 3 cupslow sodium vegetable brothdivided
- 4 bell pepperstops and seeds removed
- 1 cupshredded cheddar cheesedivided
Instructions
Instructions
- Preheat the oven to 400°F (200°C). Cut the tops off the 4 bell peppers and remove the seeds and membranes; place the peppers upright in a baking dish.
- Heat 1 tablespoon olive oil in a medium saucepan over medium-high heat.
- Add the chopped yellow onion and sauté, stirring occasionally, for 3–4 minutes until softened and translucent.
- Add the 2 minced garlic cloves, chopped green chili pepper (if using), and diced zucchini. Stir in 1 teaspoon ground cumin, 1 teaspoon paprika, 1/2 teaspoon garlic powder, 1/2 teaspoon salt, and 1/2 teaspoon ground black pepper. Cook, stirring, for 5–6 minutes until the vegetables soften.
- Add 1 cup dry brown rice, the drained and rinsed 13.5-ounce can of black beans, the 13.5-ounce can of diced tomatoes (with juices), 2 tablespoons tomato paste, and 2 cups of the low sodium vegetable broth. Stir to combine.
- Bring the mixture to a gentle boil, then reduce the heat to low, cover, and simmer until the rice is tender and the liquid is absorbed (about 35–45 minutes).
- While the rice cooks, keep the prepared bell peppers in the baking dish and reserve 1 cup of the low sodium vegetable broth for baking.
- When the rice is done, remove the saucepan from the heat and stir in 3/4 cup of the shredded cheddar cheese until melted and evenly distributed.
- Spoon the rice mixture evenly into the prepared bell peppers.
- Pour the reserved 1 cup vegetable broth into the bottom of the baking dish around the peppers (not inside them). Cover the dish tightly with foil.
- Bake the covered peppers in the preheated 400°F oven for 20 minutes.
- Remove the foil, sprinkle the tops of the peppers with the remaining 1/4 cup shredded cheddar cheese, and bake uncovered for an additional 5 minutes, until the cheese is melted and the peppers are tender when pierced with a fork.
- Remove from the oven and let the peppers rest for a few minutes before serving.
Equipment
- Oven
- Saucepan
- Baking Dish
- Foil
- Spoon