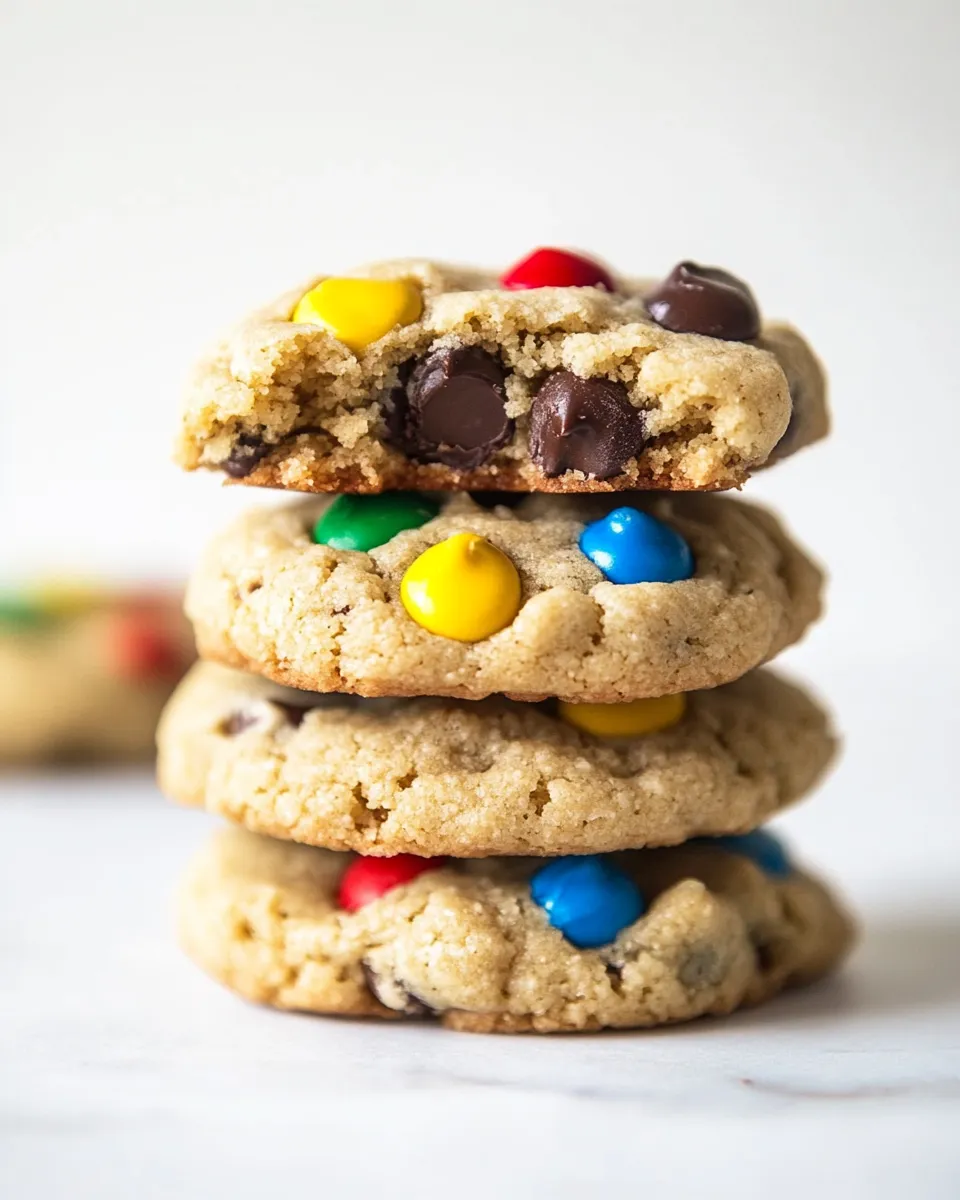
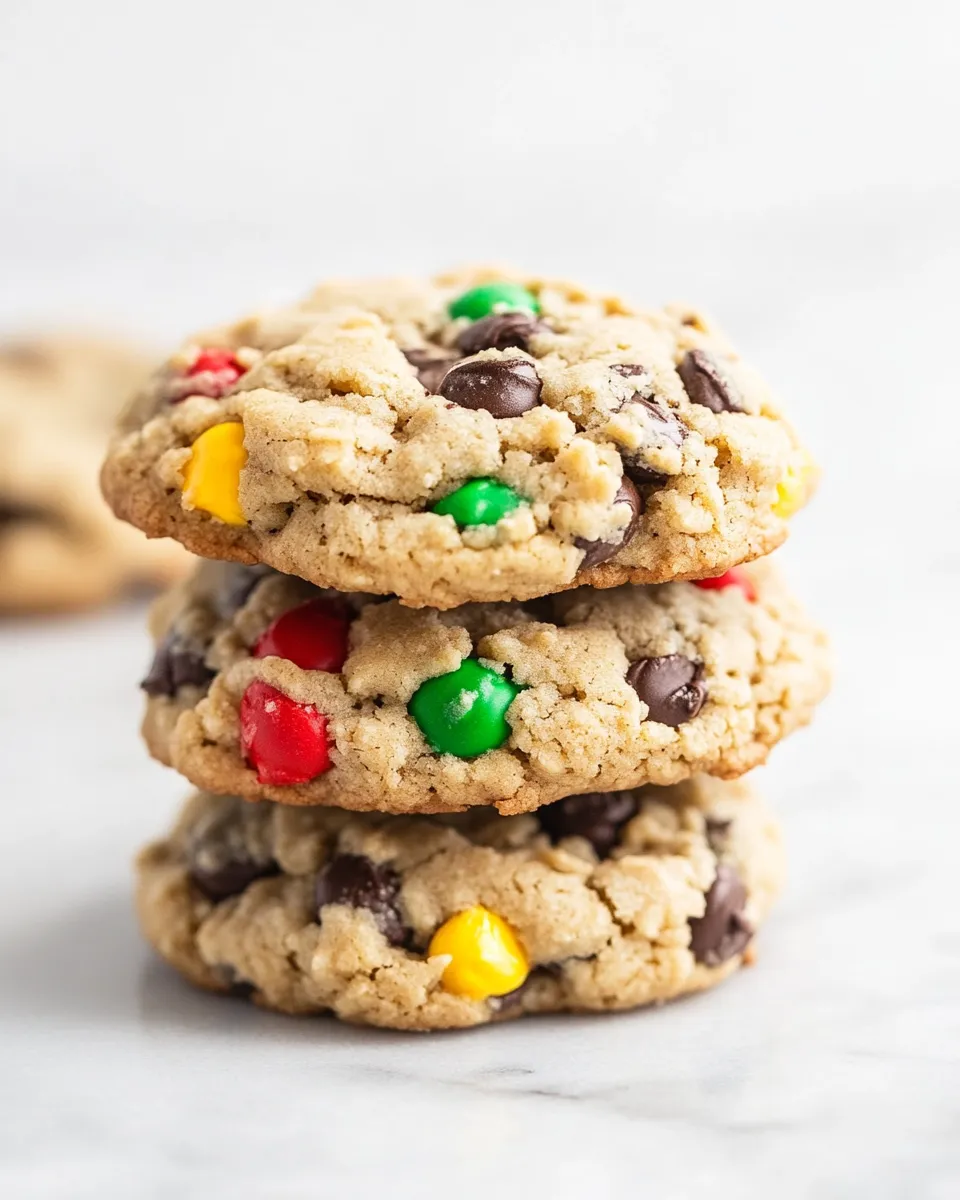
Soft Monster Cookies
These are the kind of cookies that disappear fast at a party and quietly reappear on the counter the next morning. They’re dense but tender, studded with oats, M&Ms, and chocolate chips where the peanut butter and brown sugar do heavy lifting for flavor. I make them when I want a crowd-pleaser that travels well and keeps a soft center for days.
I’ll be practical here: temperatures, timings, and a few clear technique notes that actually change results. No fluff—just what to buy, how to mix, and how to rescue the batch if something goes sideways. The goal: consistent, soft cookies with bright candy pieces and a subtle peanut-butter backbone.
Read through the ingredient notes before you start. A tiny habit—room-temperature butter and eggs, a light hand when you add flour—makes a big difference. Follow the baking time closely; these are best pulled when edges set but centers are still a touch underbaked.
Ingredients

- ½ cup unsalted butter at room temperature — Provides structure and richness; room temp helps it cream evenly with the sugars.
- ½ cup light brown sugar, lightly packed — Adds moisture and a caramel note that keeps the cookies soft.
- ¼ cup granulated sugar — Balances sweetness and helps with spread.
- 1 large egg at room temperature — Binds the dough and contributes to the cookie’s tender crumb.
- ⅔ cup creamy peanut butter (not natural-style) — Main flavor; creamy prevents textural separation while baking.
- 1 teaspoon pure vanilla extract — Lifts other flavors and rounds the sweetness.
- 1 and ¼ cups all-purpose flour — The primary dry structure; measure accurately to avoid dry cookies.
- ½ teaspoon baking soda — Leavening that gives slight lift without making them cakey.
- ½ cup old-fashioned whole rolled oats — Adds chew and texture; do not swap for quick oats if you want the same bite.
- ½ cup M&Ms — Color and crunch; fold in gently to keep the candy shells intact.
- ½ cup semi-sweet chocolate chips (optional) — Extra pockets of chocolate; optional for those who want more chocolate density.
What to Buy
Buy quality where it matters: unsalted butter, a creamy peanut butter labeled “not natural-style,” and fresh M&Ms. The difference between stale and fresh chocolate or old oats shows up in texture and taste. If you don’t have a stand mixer, a good hand mixer will do, so check that your mixer is functioning before you start.
Get parchment or silicone baking mats so cookies don’t stick and you don’t need extra oil. Scoop or measure the cookie dough with a medium cookie scoop for consistent sizes and even baking. If baking for a crowd, buy a few extra bags of mix-ins—you’ll want enough to stud the tops if you like that look.
Cooking (Soft Monster Cookies): The Process
- Preheat the oven to 400°F (200°C). Line two large baking sheets with parchment paper or silicone baking mats and set them aside.
- In a stand mixer fitted with the paddle attachment or in a large bowl using a hand mixer, beat the butter with both sugars on medium speed until light and fluffy, about 2 minutes. Scrape down the bowl as needed.
- Increase the mixer to high speed and add the egg, the peanut butter, and the vanilla extract. Mix until combined and smooth, about 2 minutes. Scrape the bowl once more.
- Reduce the mixer speed to low and add the all-purpose flour and the baking soda. Mix just until no dry streaks of flour remain; do not overmix.
- Fold in the old-fashioned rolled oats, the M&Ms, and the semi-sweet chocolate chips (if using) until evenly distributed.
- Using a medium cookie scoop, portion the dough onto the prepared baking sheets, leaving about 2 inches between each cookie to allow for spreading.
- Bake for 8–10 minutes, until the edges are set and the centers still look soft and slightly underbaked.
- Remove the baking sheets from the oven and let the cookies cool on the baking sheets for 5 minutes.
- Transfer the cookies to a wire rack to cool completely.
Why It Deserves a Spot
These Soft Monster Cookies hit multiple needs at once: they’re portable, child-friendly, and forgiving. The peanut butter keeps them moist for longer than a standard chocolate chip cookie. Oats add chew and a bit of rustic texture that makes each bite interesting.
They’re versatile: serve warm for gooey centers, pack them for lunches, or leave them on a dessert tray. The M&Ms give a festive look without adding effort. If you want a reliable batch that still feels homemade, this recipe earns a regular place in the rotation.
Ingredient Swaps & Substitutions

If you have dietary constraints or pantry gaps, think in terms of function rather than exact replacements. The butter is your fat and structure. If you need a different fat, use one that behaves similarly in creaming and melting at room temperature. For the peanut butter, swapping changes the flavor profile and moisture—natural, runnier nut butters will thin the dough and need adjustments, so I don’t recommend them without experience.
Sugars control moisture and chew. Brown sugar keeps these soft; if you must alter the ratio, understand the chew will change. Rolled oats provide chew; quick oats will produce a softer, less defined texture. M&Ms and chips are mix-ins—if you shift ratios, keep the total mix-in volume similar so the dough holds together the same way.
Equipment Breakdown
Stand mixer with paddle attachment — ideal for quick, consistent creaming. If you don’t have one, a hand mixer works; beat the butter and sugars until light and fluffy, taking a minute or two longer.
Medium cookie scoop — ensures even cookies and consistent bake times. If you don’t have a scoop, use two spoons and try to keep sizes uniform.
Baking sheets lined with parchment or silicone mats — critical for even bottoms and easy cleanup. A wire rack for cooling prevents lingering steam and soggy bottoms.
Troubles You Can Avoid
Cookies spread too much
Causes: oven too hot or dough too warm. Solution: chill scooped dough for 10–15 minutes before baking or ensure the butter was properly creamed, not melted. Double-check your oven temperature with a thermometer—some run hot.
Cookies too dense or dry
Causes: overmeasuring flour or overmixing after adding flour. Solution: spoon flour into the measuring cup and level it off; mix only until no dry streaks remain.
Centers are hard after cooling
Causes: overbaked. Solution: remove cookies when edges are set but centers still look slightly underbaked; they’ll firm as they cool. Bake on middle rack for the most even heat.
Better Choices & Swaps
Small tweaks make a big difference. Use light brown sugar rather than dark if you want a milder molasses note. Choose creamy, commercial peanut butter for even texture—natural varieties separate and often need stabilizers to work the same in cookie dough.
For a prettier finish, press a few extra M&Ms into the tops of the cookies immediately after removing from the oven. That gives a glossy, colorful top and signals a handmade cookie that was worth the effort.
Little Things that Matter
Scrape the bowl between each major step. It sounds small, but scraped dough mixes evenly and avoids pockets of flour or butter. When folding in mix-ins, do it gently. Smash-free M&Ms and intact chips look better and balance texture.
Measure temperature-sensitive ingredients properly: room-temperature butter and egg blend more predictably. Finally, let cookies rest on the sheet for the recommended 5 minutes to finish gently rather than shock-cooling them and losing softness.
Refrigerate, Freeze, Reheat
Refrigerate: Store cooled cookies in an airtight container at room temperature up to 3 days; they’ll stay soft. If your kitchen is very warm, refrigerate for up to 5 days but allow to come to room temperature before serving.
Freeze: Scoop and freeze raw dough on a sheet until firm, then transfer to a freezer bag for up to 3 months. Bake from frozen; add a minute or two to the bake time. You can also freeze fully baked cookies in an airtight container for up to 2 months; thaw at room temperature.
Reheat: Warm a cookie for 8–10 seconds in the microwave to revive the soft center, or 3–4 minutes in a 325°F oven if you’re reheating a tray. Watch closely; you want warmth without drying out the edges.
Reader Q&A
Q: How do I keep the centers soft without underbaking? A: Bake until edges are set and centers look slightly underbaked. They’ll finish cooking on the hot sheet for the five-minute rest. This is the single most reliable way to keep the centers tender.
Q: Can I skip the chocolate chips? A: Yes. They’re optional in the ingredient list. Expect a slightly different balance—more peanut-butter-forward. Consider pressing a few extra M&Ms on top for visual appeal.
Q: Why use old-fashioned oats? A: Old-fashioned rolled oats give chew and hold up to baking. Quick oats will break down more and create a softer, less textured cookie.
Hungry for More?
If you liked these, try variations in your next batch—change the ratio of mix-ins, or experiment with pressing a topping onto warm cookies. Bookmark this recipe for a reliable go-to when you need a soft, chewy cookie that travels well and makes people happy. If you want, leave a note about what adjustments you made and how they turned out—I read every comment and love practical tweaks from home bakers.
Now preheat the oven and scoop your first dozen. You’ll know you did it right when you bite into the first warm cookie and it still feels soft in the middle.

Soft Monster Cookies
Ingredients
Ingredients
- ?1/2 cupunsalted butterat room temperature
- ?1/2 cuplightbrown sugarlightly packed
- ?1/4 cupgranulated sugar
- ?1 largeeggat room temperature
- ??cupcreamypeanut butter not natural-style
- ?1 teaspoonpure vanilla extract
- ?1 and 1/4 all-purpose flour
- ?1/2 teaspoonbaking soda
- ?1/2 cupold-fashioned whole rolledoats
- ?1/2 cupM&Ms
- ?1/2 cupsemi-sweet chocolate chipsoptional
Instructions
Instructions
- Preheat the oven to 400°F (200°C). Line two large baking sheets with parchment paper or silicone baking mats and set them aside.
- In a stand mixer fitted with the paddle attachment or in a large bowl using a hand mixer, beat the butter with both sugars on medium speed until light and fluffy, about 2 minutes. Scrape down the bowl as needed.
- Increase the mixer to high speed and add the egg, the peanut butter, and the vanilla extract. Mix until combined and smooth, about 2 minutes. Scrape the bowl once more.
- Reduce the mixer speed to low and add the all-purpose flour and the baking soda. Mix just until no dry streaks of flour remain; do not overmix.
- Fold in the old-fashioned rolled oats, the M&Ms, and the semi-sweet chocolate chips (if using) until evenly distributed.
- Using a medium cookie scoop, portion the dough onto the prepared baking sheets, leaving about 2 inches between each cookie to allow for spreading.
- Bake for 8–10 minutes, until the edges are set and the centers still look soft and slightly underbaked.
- Remove the baking sheets from the oven and let the cookies cool on the baking sheets for 5 minutes.
- Transfer the cookies to a wire rack to cool completely.
Equipment
- Stand mixer or hand mixer
- Baking Sheets
- Parchment paper or silicone baking mats
- Medium Cookie Scoop
- Wire Rack
Notes
I recommend using mini M&Ms so you get more of them in each bite, but regular M&Ms work in this recipe too. If you only have larger M&Ms, such as peanut M&Ms or peanut butter M&Ms, I recommend chopping them into smaller pieces.
Use an electric beater to cream the butter with the sugar.
The butter MUST be softened to room temperature, and the egg must be at room temperature as well. Remember that butter at room temperature is imperative in the creaming butter with sugar step.
Feel free to add butterscotch morsels, white chocolate chips, or peanut butter chips to the cookie dough.
Peanut butter can be substituted with Sun Butter (sunflower butter) for a nut-free alternative.
Use a cookie scoop to create the cookie balls, it’s easier and your cookies will be the same size.
The cookies can be kept in a sealed container at room temperature for up to 5 days, in the fridge for up to 7 days, or in the freezer for up to 2 months.