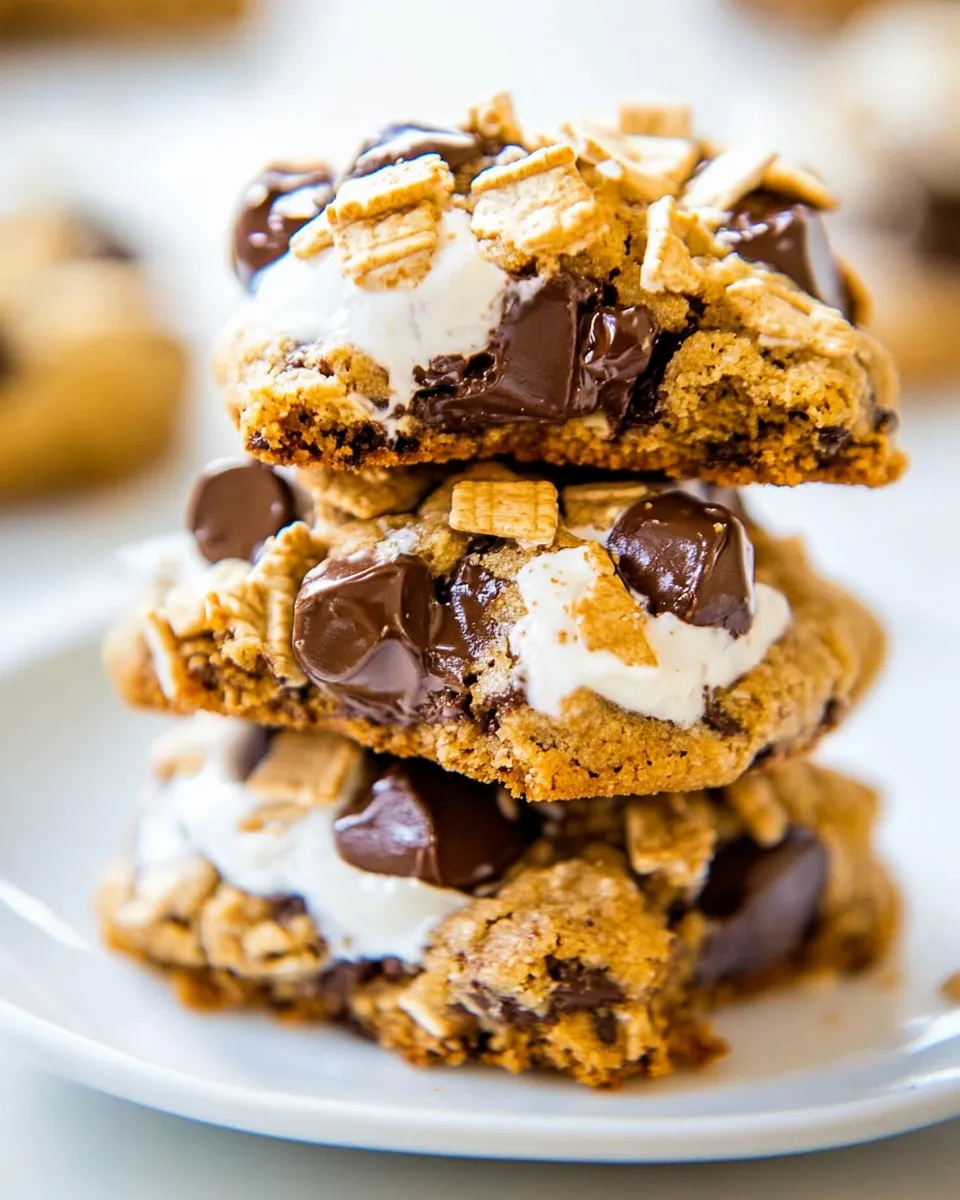
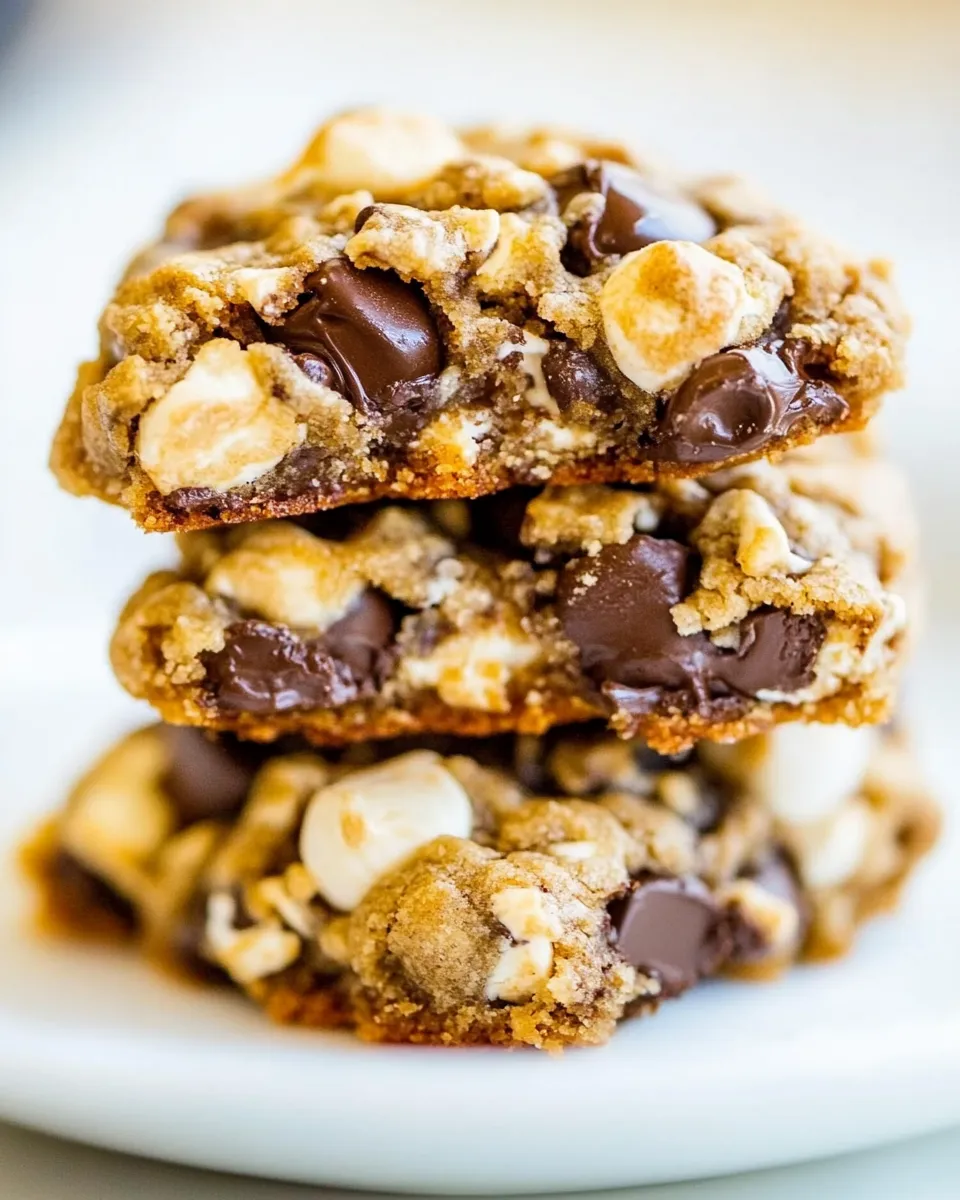
Soft and Chewy Smores Cookies
These cookies are exactly what you want when you crave a campfire s’more but need something faster and less fussy. They balance tender, chewy cookie texture with pockets of melted chocolate, crunchy graham bits, and little marshmallow explosions. No skewers, no fire—just a mixer, a sheet pan, and patience while the dough chills.
I test recipes the way most of us live: practical and time-conscious. This one gives you predictable results if you follow a few simple rules—cream the butter and sugars until fluffy, don’t overwork the dough, chill before baking, and pull them at the right moment so the centers stay soft. The method is short but intentional.
If you’re making these for kids, parties, or a late-night snack attack, they scale nicely and hold up well for a couple of days. Read the ingredient notes, follow the step-by-step, and you’ll have bakery-style, gooey-centered Smores cookies from your own oven.
Ingredient Checklist

Ingredients
- ¾ cup unsalted butter, softened — Provides fat and structure; soften to room temperature so it creams easily with the sugars.
- ¾ cup light brown sugar, packed — Adds moisture and chew; packing it removes air pockets for consistent sweetness.
- ¼ cup granulated sugar — Balances texture and helps with spread; keeps edges from getting too soft.
- 1 large egg — Binds the dough and adds lift; bring to room temperature for even mixing.
- 2 teaspoons vanilla extract — Flavor enhancer; use pure vanilla if you have it.
- 1 ¾ cups all-purpose flour — The base for the cookie; measure by spooning into the cup and leveling for accuracy.
- 2 teaspoons cornstarch — Keeps the crumb soft and tender; a small addition but noticeable in texture.
- 1 teaspoon baking soda — Leavening agent; helps create a light rise and slight spread.
- pinch salt, optional and to taste — Enhances all flavors; use if your butter is unsalted and you want contrast.
- 1 cup coarsely chopped graham crackers, about 4 full-size cracker sheets — Adds crunch and the classic s’mores flavor; chop coarsely so you get texture without large shards.
- 2 cups semi-sweet chocolate chips (12 ounce bag) — Melty chocolate pockets; semi-sweet balances the marshmallow and graham flavors.
- 1 ¼ cup marshmallow bits — Tiny marshmallow pieces give gooey hits without melting into oblivion; they retain some shape while getting soft.
Build Soft and Chewy Smores Cookies Step by Step
- Fit a stand mixer with the paddle attachment (or use a large bowl and a hand mixer). Add the softened butter, light brown sugar, and granulated sugar to the bowl.
- Beat on medium-high speed until the mixture is light and fluffy, about 3–4 minutes. Add the egg and vanilla extract, then continue beating on medium-high until fully incorporated and the mixture is uniform and fluffy, about 1–2 more minutes (about 5 minutes total with a stand mixer; if using a hand mixer, beat at least 7 minutes total).
- Stop the mixer and scrape down the sides and bottom of the bowl with a spatula.
- Add the all-purpose flour, cornstarch, baking soda, and the pinch of salt (if using). Mix on low speed (or stir by hand) until the dry ingredients are just combined and no streaks of flour remain, about 1 minute. Do not overmix.
- Add the coarsely chopped graham crackers, semi-sweet chocolate chips, and marshmallow bits. Fold in by hand with a spatula until evenly distributed, or beat on low speed for just a few seconds to incorporate. Do not overwork the dough.
- Using a medium (2-inch) cookie scoop, portion the dough into heaping 2-tablespoon mounds. Place the mounds on a large plate or tray in a single layer. Slightly flatten each mound with your palm.
- Cover the dough mounds tightly with plastic wrap and refrigerate for at least 2 hours, or up to 5 days. Do not bake while the dough is warm; chilled dough prevents excessive spreading.
- When ready to bake, preheat the oven to 350°F (175°C). Line a baking sheet with a Silpat or parchment paper, or lightly spray with cooking spray. Place chilled dough mounds on the prepared baking sheet spaced at least 2 inches apart (about 8 cookies per standard sheet).
- Bake for 8 minutes. If baking multiple trays, rotate the baking sheet between racks at the 4-minute mark for even browning. The cookies are done when the edges are set and the tops are just beginning to set (centers may still look slightly soft, pale, and glossy). For soft, gooey centers do not bake longer than 9 minutes.
- Remove the baking sheet from the oven and allow the cookies to cool on the sheet for about 5 minutes. Transfer cookies to a wire rack to finish cooling.
What You’ll Love About This Recipe
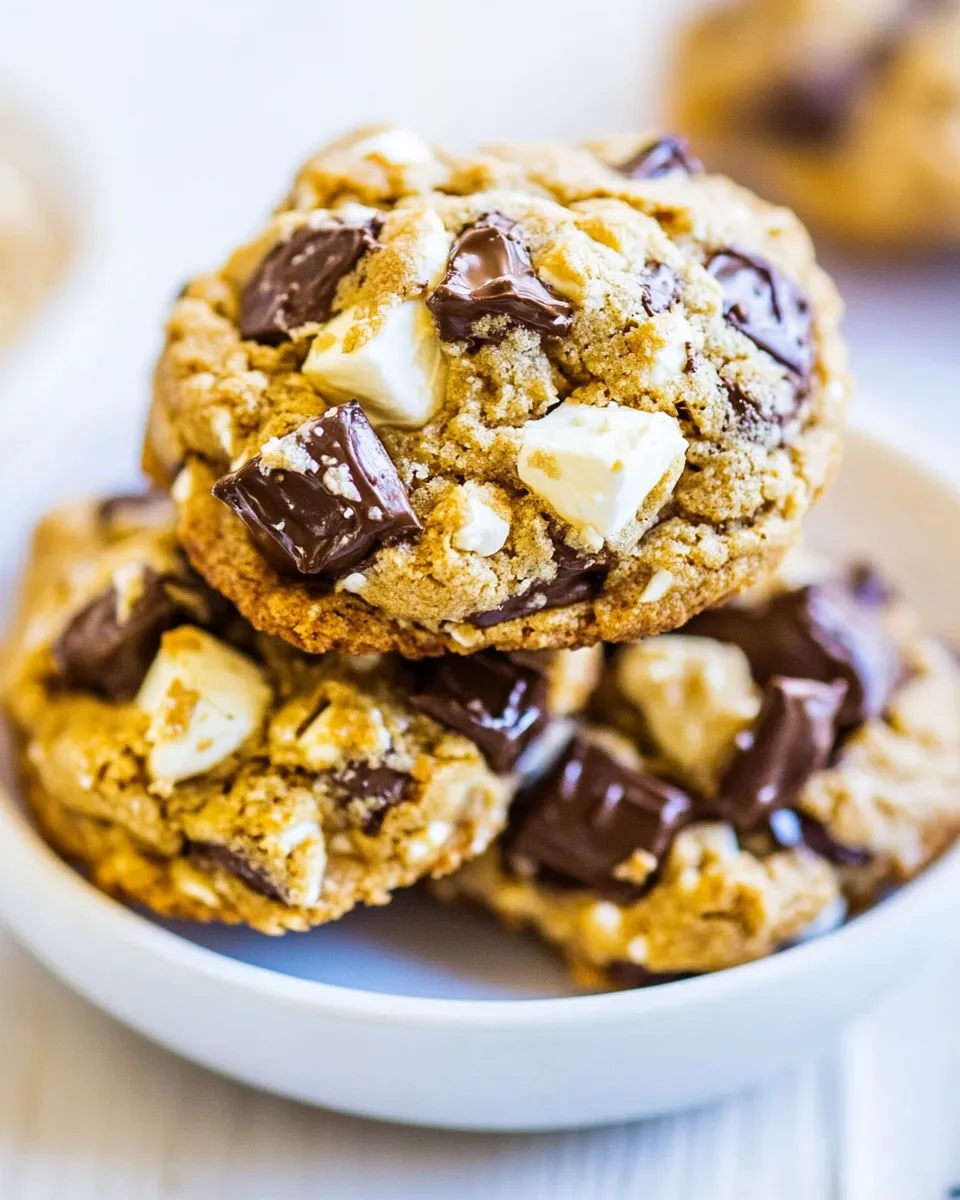
These cookies hit the familiar notes of a s’more but in cookie form: graham crunch, chocolate pockets, and marshmallow softness. They’re intentionally soft in the center and slightly crisp at the edges—exactly what a chewy cookie should be.
The recipe is forgiving in small ways: you can portion the dough ahead of time and bake a few trays across several evenings. The recipe yields consistent results, and the chilling step keeps the cookies from flattening into thin discs.
Finally, the texture contrasts are satisfying. Coarsely chopped graham crackers give intentional crunch without turning the cookie into a brittle bar, and marshmallow bits add bursts of ooze without surrendering completely.
Budget & Availability Swaps
- If semi-sweet chips are pricey, use a bit less and add chopped chocolate from a larger bar—either works, though chips melt more uniformly.
- If you don’t have marshmallow bits, mini marshmallows can be chopped roughly and used, but they may melt faster and can create stickier dough.
- If graham crackers are scarce, substitute with digestive biscuits or a similar mildly sweet, crunchy cookie—expect a slightly different flavor profile.
- Vanilla extract makes a noticeable difference, but if you only have imitation vanilla, it will still work in a pinch.
Gear Up: What to Grab
- Stand mixer with paddle attachment or a large bowl and a hand mixer
- Spatula for scraping and folding
- 2-inch cookie scoop (medium) or a tablespoon and scale for even portions
- Baking sheets and parchment paper or a Silpat
- Wire rack for cooling
- Plastic wrap for covering dough mounds during refrigeration
Easy-to-Miss Gotchas
- Butter not softened enough: if it’s still cool, you won’t get the light, fluffy creamed texture. Let it sit at room temp until easily impressionable by a finger.
- Overmixing after adding flour: that develops gluten and will make cookies tough. Mix until no streaks of flour remain and stop.
- Skipping the chill: warm dough spreads too much. Chill for at least 2 hours; this step is crucial for the right chew and thickness.
- Baking too long: for soft, gooey centers do not exceed 9 minutes. The cookies will finish setting on the pan after you remove them.
- Not spacing the cookies: leave at least 2 inches between mounds so they don’t merge into one large cookie.
In-Season Flavor Ideas
Winter: Add a pinch of cinnamon or swap half the chocolate chips for dark chocolate to deepen the flavor.
Summer: Fold in a few chopped roasted hazelnuts or a sprinkle of flaky sea salt on top before baking to highlight the chocolate.
Autumn: Use graham crackers with a hint of honey if you can find them; warm spices like a dash of nutmeg or allspice pair well with the marshmallow bits.
Cook’s Notes
Measure flour the old-fashioned way: spoon it into the cup and level with a knife. Packing flour into a cup makes dense cookies and will throw off the texture.
If you want perfectly uniform cookies, portion the dough into mounds, freeze on the tray until solid, then store in a freezer bag. Bake straight from frozen, adding a minute or two to the bake time.
The recipe’s cornstarch is a small but important detail for tenderness; don’t skip it thinking it’s optional. It makes a noticeably softer crumb.
Store, Freeze & Reheat
Storage: Keep cooled cookies in an airtight container at room temperature for up to 3 days. They stay soft and chewy that way.
Freeze: You can freeze unbaked dough mounds (on a tray until solid, then transfer to a bag) for up to 3 months. Bake from frozen; add 1–2 minutes to the bake time. Baked cookies freeze well too—layer with parchment and thaw at room temperature before serving.
Reheat: For a just-baked feel, warm a cookie for 8–12 seconds in the microwave or 3–4 minutes at 300°F (150°C) in a toaster oven. The microwave gives a gooey center fast; the oven restores chew and a little crisp edge.
Quick Questions
Q: What are marshmallow bits? A: Marshmallow bits are small, dehydrated marshmallow pieces designed for mixing into dough without melting away completely. Mini marshmallows can work if chopped, but they may melt more and make the dough stickier.
Q: Can I make the dough without chilling? A: You can, but the cookies will spread significantly more. Chilling firms the butter and solidifies the dough so you get taller, chewier cookies.
Q: My cookies look underbaked in the middle—are they ruined? A: Not if you pulled them at 8–9 minutes. The centers will look soft and glossy when done but will set as they cool on the baking sheet. Overbaking is the real risk if you leave them in too long.
Q: Can I substitute salted butter? A: Yes—reduce or skip the pinch of salt in the dry ingredients, and taste accordingly.
See You at the Table
These Soft and Chewy Smores Cookies are a small, reliable crowd-pleaser. They travel well, freeze well, and satisfy that nostalgic s’mores craving without the need for an actual campfire. Follow the method, trust the chill, and pull them at the eight-minute mark for the perfect gooey center. Send me a note if you try a swap or a seasonal update—I love hearing what readers do to make a recipe their own.

Soft and Chewy Smores Cookies
Ingredients
Ingredients
- 3/4 cupunsalted butter softened
- 3/4 cuplight brown sugar packed
- 1/4 cupgranulated sugar
- 1 large egg
- 2 teaspoonsvanilla extract
- 1 3/4 cupsall-purpose flour
- 2 teaspoonscornstarch
- 1 teaspoonbaking soda
- pinchsalt optional and to taste
- 1 cupcoarsely chopped graham crackers about 4 full-size cracker sheets
- 2 cupssemi-sweet chocolate chips (12 ounce bag)
- 1 1/4 cupsmarshmallow bits
Instructions
Instructions
- Fit a stand mixer with the paddle attachment (or use a large bowl and a hand mixer). Add the softened butter, light brown sugar, and granulated sugar to the bowl.
- Beat on medium-high speed until the mixture is light and fluffy, about 3–4 minutes. Add the egg and vanilla extract, then continue beating on medium-high until fully incorporated and the mixture is uniform and fluffy, about 1–2 more minutes (about 5 minutes total with a stand mixer; if using a hand mixer, beat at least 7 minutes total).
- Stop the mixer and scrape down the sides and bottom of the bowl with a spatula.
- Add the all-purpose flour, cornstarch, baking soda, and the pinch of salt (if using). Mix on low speed (or stir by hand) until the dry ingredients are just combined and no streaks of flour remain, about 1 minute. Do not overmix.
- Add the coarsely chopped graham crackers, semi-sweet chocolate chips, and marshmallow bits. Fold in by hand with a spatula until evenly distributed, or beat on low speed for just a few seconds to incorporate. Do not overwork the dough.
- Using a medium (2-inch) cookie scoop, portion the dough into heaping 2-tablespoon mounds. Place the mounds on a large plate or tray in a single layer. Slightly flatten each mound with your palm.
- Cover the dough mounds tightly with plastic wrap and refrigerate for at least 2 hours, or up to 5 days. Do not bake while the dough is warm; chilled dough prevents excessive spreading.
- When ready to bake, preheat the oven to 350°F (175°C). Line a baking sheet with a Silpat or parchment paper, or lightly spray with cooking spray. Place chilled dough mounds on the prepared baking sheet spaced at least 2 inches apart (about 8 cookies per standard sheet).
- Bake for 8 minutes. If baking multiple trays, rotate the baking sheet between racks at the 4-minute mark for even browning. The cookies are done when the edges are set and the tops are just beginning to set (centers may still look slightly soft, pale, and glossy). For soft, gooey centers do not bake longer than 9 minutes.
- Remove the baking sheet from the oven and allow the cookies to cool on the sheet for about 5 minutes. Transfer cookies to a wire rack to finish cooling.
Equipment
- 12-inch cookie scoop
Notes
Alternatively, unbaked cookie dough can be stored airtight in the refrigerator for up to 5 days, so consider baking only as many cookies as desired and save the remaining dough to be baked in the future when desired.
Dough base adapted fromTwix Bar Chocolate Chip Cookies,Soft and Chewy M&M’s Cookies,Soft and Chewy Snickers Chocolate Chip Cookies, andChocolate Chip and Chunk Cookies.