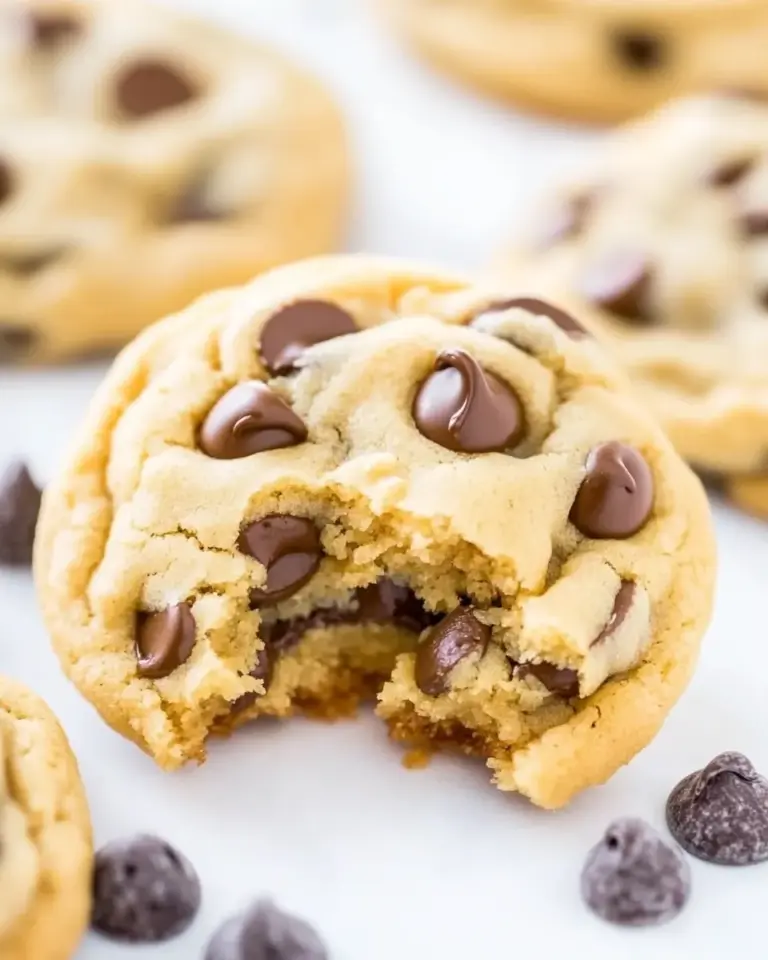
Rocky Road Cookies
Rocky Road Cookies are one of those reliably comforting treats: fudgy, chewy centers studded with chocolate and salty peanuts, finished with pillowy marshmallows that toast lightly in the oven. This version keeps the dough intentionally rich and cold, so the cookies bake up tender and slightly underbaked in the center — exactly the texture you want when you bite into a rocky-road cookie.
There’s no fluff here — clear steps, sensible timing, and a few notes from the kitchen to help you nail the results on the first try. You’ll chill the dough, portion it carefully, and add the marshmallows mid-bake so they soften and cling without burning. Small touches, like flaky sea salt or a couple extra chips pressed on warm tops, make these very good cookies into ones people ask for again.
Read through the ingredient notes, follow the chilled-dough routine, and you’ll get roughly 35 bakery-style cookies with deep chocolate flavor and a soft, fudgy crumb. Below I walk through tools, timing tips, common mistakes, and safe substitutions so you can adapt without losing the cookie’s signature texture.
Gather These Ingredients

Ingredients
- 16 tablespoons unsalted butter — at room temperature (softened but not melted); provides richness and structure.
- 1-1/2 cups light brown sugar — firmly packed; adds moisture and a caramel note that keeps cookies chewy.
- 2 large eggs — bind the dough and contribute lift.
- 2 teaspoons vanilla extract — rounds and deepens the chocolate flavor.
- 1 teaspoon cornstarch — helps with a tender, cakey chew without collapsing.
- 1 teaspoon baking soda — provides controlled rise and spread.
- 1 teaspoon salt — balances sweetness and enhances chocolate.
- 1/2 cup Dutch-process cocoa powder — not plain cocoa powder; gives deep chocolate intensity and a smooth finish.
- 1 cup cake flour — see note 2; lightens the crumb for a tender chew.
- 1-1/2 cups all-purpose flour — adds structure and keeps cookies from being too delicate.
- 2 cups milk chocolate chips — or semi-sweet; primary chocolate inclusion for pockets of melty goodness.
- 1 cup dry roasted and lightly salted peanuts — or other nut you enjoy; adds crunch and savory contrast.
- Miniature marshmallows — not full-sized ones, for topping; press them into cookies mid-bake so they soften and adhere.
- Flaky sea salt — optional, for topping; a light sprinkle brightens flavor.
Cook Rocky Road Cookies Like This
- Place the 16 tablespoons unsalted butter (room-temperature — softened but not melted) and 1-1/2 cups firmly packed light brown sugar in the bowl of a stand mixer fitted with the whisk attachment. Beat on medium speed until very creamy and fully combined, about 3–4 minutes (mixture should be thick, similar to peanut butter). Scrape the bowl as needed.
- Add the 2 large eggs and 2 teaspoons vanilla extract. Beat just until combined.
- Add 1 teaspoon cornstarch, 1 teaspoon baking soda, 1 teaspoon salt, and 1/2 cup Dutch-process cocoa powder. Beat on low speed until the dry ingredients are just incorporated, scraping the bowl with a spatula to ensure even mixing.
- Add 1 cup cake flour and 1-1/2 cups all-purpose flour. Mix on low speed just until no streaks of flour remain. Do not overmix.
- Remove the bowl from the mixer. Fold in 2 cups milk chocolate chips (or semi-sweet) and 1 cup dry roasted lightly salted peanuts with a spatula until evenly distributed.
- Cover the bowl tightly and refrigerate the dough for 45 minutes up to 2 hours. (If you refrigerate longer than 2 hours, let the dough sit at room temperature about 30 minutes before scooping so it’s scoopable.)
- After chilling, portion the dough into balls just over 2 tablespoons each (about 40 g). You should get roughly 35 dough balls. Roll each into a tall, slightly rounded ball rather than flat disks.
- Place the dough balls on a parchment- or silicone-lined sheet pan or plate and return them to the refrigerator or freezer to chill for 15 minutes.
- While the dough balls chill, preheat the oven to 325°F (162°C).
- Arrange up to six chilled dough balls on an extra-large sheet pan lined with a silicone liner or parchment, spacing them at least 2 inches (5 cm) apart. (Bake in batches as needed.)
- Bake the cookies for 10 minutes. Remove the pan from the oven and press three miniature marshmallows into the top of each cookie. Return the pan to the oven and bake 2–4 more minutes, until the edges are set and the tops are no longer glossy/very gooey. The centers should be slightly underbaked for a fudgy, chewy texture.
- If desired, immediately press a few extra chocolate chips and/or peanuts into the warm cookie tops and sprinkle with flaky sea salt. Let the cookies cool on the sheet pan for 5 minutes, then transfer to a wire rack to finish cooling and firm up. Repeat baking with remaining dough.
Why It Works Every Time

This recipe balances fat, sugar, and flour to favor a fudgy center rather than a cakey cookie. The combination of cake flour and all-purpose flour keeps the texture tender without collapsing, while the cornstarch adds subtle softness. Dutch-process cocoa gives a rounded, less acidic chocolate note that pairs well with brown sugar’s caramel tone.
Chilling the dough is essential. Cold dough limits spread so cookies keep height and a soft interior; the brief second chill on the scooped balls firms the exterior so the marshmallows can be added without sinking in. Baking in two stages — initial bake, then marshmallow press and a short finish — yields marshmallows that are soft and slightly toasted without burning and cookies that remain fudgy in the center.
Texture-Safe Substitutions

Keep the swap options tightly linked to ingredients already listed so texture stays predictable.
- Chocolate chips — use semi-sweet instead of milk chocolate chips (already noted) to reduce sweetness and keep melt pockets intact.
- Nuts — the recipe calls for dry roasted lightly salted peanuts but allows “or other nut you enjoy”; swap to a roasted almond or pecan you prefer, keeping the same volume for crunch balance.
- Marshmallows — miniature marshmallows are specified for topping; do not use full-size marshmallows, which will make a different texture and likely overhang the cookie.
- Salt — flaky sea salt is optional for finishing; use it sparingly so it doesn’t overwhelm the balance.
Recommended Tools
Tools affect consistency as much as ingredients. These are the items I use every time:
- Stand mixer with whisk attachment — for the creamed butter/sugar consistency called for.
- Spatula — to scrape the bowl and fold in chips and peanuts without deflating the dough.
- Scale or 2-tablespoon scoop — the recipe calls for portioning at just over 2 tablespoons (about 40 g) to yield even cookies.
- Parchment or silicone liners and extra-large sheet pans — for even baking and to fit six cookies comfortably.
- Wire rack — for finishing and cooling so cookies firm up properly.
- Measuring cups and spoons — precise measuring keeps texture reliable.
Learn from These Mistakes
Here are the most common slip-ups and how to avoid them:
- Skipping the chill: If you don’t chill the dough, cookies spread thin and lose the fudgy center. Plan for the 45 minutes to 2 hours chill time.
- Overmixing after flour: Mixing the flour in too long develops gluten and makes a tougher cookie. Mix only until no streaks of flour remain.
- Using full-size marshmallows: They’ll overwhelm the cookie and melt unpredictably. Use the specified miniature marshmallows for controlled topping.
- Overcrowding the pan: Placing more than six dough balls on an extra-large pan can cause uneven baking and merging cookies. Bake in batches as instructed.
- Pressing marshmallows too early or too late: Press them in after the 10-minute bake so they warm and soften without burning or sinking completely.
Fresh Seasonal Changes
You can subtly nod to seasons while keeping the recipe’s core. Use the existing ingredient choices to guide those shifts:
- Winter entertaining: Press a few extra chocolate chips on warm cookies and finish with a pinch of flaky sea salt to cut the sweetness for holiday platters.
- Summer sharing: Bake the cookies, cool fully, then pack them for picnics — the slightly underbaked centers stay pleasantly chewy even at room temperature.
- Nut-forward fall: If you prefer a different roasted nut (the ingredient list explicitly allows “or other nut you enjoy”), choose a lightly salted roasted pecan or walnut to steer the flavor profile toward fall-friendly notes.
Recipe Notes & Chef’s Commentary
Notes referenced in the ingredient list
Note 1 (butter): Butter should be softened but not melted. Too warm and the mix will be oily; too cold and you won’t get the airy, thick texture the creaming step requires.
Note 2 (cake flour): Cake flour keeps the crumb tender and helps the cookies be soft despite the fudgy intent. If you must substitute, be mindful that swapping flours will change texture; the recipe is tuned around cake flour plus all-purpose flour in these precise amounts.
Chef’s commentary: This is a dough that benefits from patience. Chilling and the double-bake method are not optional if you want consistent, bakery-style results. The marshmallow press is the trick that gives this cookie its rocky-road personality — don’t skip it.
Storing Tips & Timelines

Cookies:
- Room temperature: Store in an airtight container for up to 3 days. Place a sheet of parchment between layers to prevent sticking.
- Refrigerator: Keep in an airtight container for up to 7 days. Chilled cookies will firm up further; bring to room temperature before serving if you want softer centers.
- Freezing: Once fully cooled, freeze in a single layer until firm, then transfer to a freezer-safe container for up to 2 months. Thaw at room temperature.
Dough:
- Refrigerate shaped dough balls for up to 48 hours. If refrigerated longer than 2 hours before baking, let sit at room temperature about 30 minutes so they’re scoopable.
- Freeze scooped dough balls on a tray until solid, then transfer to a bag or container for up to 3 months. Bake from frozen; add a couple of extra minutes to the bake time and still follow the marshmallow step.
FAQ
How many cookies does this recipe make? The recipe yields roughly 35 dough balls when portioned just over 2 tablespoons (about 40 g) each.
Can I use salted butter instead of unsalted? You can, but reduce or omit the 1 teaspoon salt in the dough to avoid over-salting. The recipe is written for unsalted butter plus the 1 teaspoon salt.
What if I don’t have a stand mixer? You can cream butter and sugar by hand with a sturdy whisk or wooden spoon; it will take more time and elbow grease to reach the same very creamy consistency.
Can the cookies be baked without pressing marshmallows? Yes, but the rocky-road character is defined by those marshmallows pressed on top. If you skip them, consider pressing extra chips/peanuts into the tops at the same point to keep the surface attractive.
Why use Dutch-process cocoa? Dutch-process cocoa is alkalized and produces a smoother, less acidic chocolate flavor that pairs nicely with brown sugar; it also affects color and depth.
See You at the Table
These Rocky Road Cookies reward patience: a chilled, well-mixed dough and careful bake make all the difference. Follow the steps, keep an eye on the marshmallows, and don’t be shy about pressing a few extra chips or a sprinkle of flaky sea salt on warm tops. They’ll look rustic, taste deeply chocolatey, and keep well enough to make friends and family happy on repeat.
If you try them, take a picture, note what you adjusted (if anything), and enjoy the fudgy center and toasted marshmallow contrast. I’ll be at the table with a warm cookie and a cup of something hot — see you there.

Rocky Road Cookies
Ingredients
Ingredients
- 16 tablespoonsunsalted butterat room temperature see note 1
- 1-1/2 cupslight brown sugarfirmly packed
- 2 largeeggs
- 2 teaspoonsvanilla extract
- 1 teaspooncornstarch
- 1 teaspoonbaking soda
- 1 teaspoonsalt
- 1/2 cupDutch process cocoa powdernot plain cocoa powder
- 1 cupcake floursee note 2
- 1-1/2 cupsall-purpose flour
- 2 cupsmilk chocolate chipsor semi-sweet
- 1 cupdry roasted and lightly salted peanutsor other nut you enjoy
- Miniature marshmallowsnot full-sized ones for topping
- Flaky sea saltoptional for topping
Instructions
Instructions
- Place the 16 tablespoons unsalted butter (room-temperature — softened but not melted) and 1-1/2 cups firmly packed light brown sugar in the bowl of a stand mixer fitted with the whisk attachment. Beat on medium speed until very creamy and fully combined, about 3–4 minutes (mixture should be thick, similar to peanut butter). Scrape the bowl as needed.
- Add the 2 large eggs and 2 teaspoons vanilla extract. Beat just until combined.
- Add 1 teaspoon cornstarch, 1 teaspoon baking soda, 1 teaspoon salt, and 1/2 cup Dutch-process cocoa powder. Beat on low speed until the dry ingredients are just incorporated, scraping the bowl with a spatula to ensure even mixing.
- Add 1 cup cake flour and 1-1/2 cups all-purpose flour. Mix on low speed just until no streaks of flour remain. Do not overmix.
- Remove the bowl from the mixer. Fold in 2 cups milk chocolate chips (or semi-sweet) and 1 cup dry roasted lightly salted peanuts with a spatula until evenly distributed.
- Cover the bowl tightly and refrigerate the dough for 45 minutes up to 2 hours. (If you refrigerate longer than 2 hours, let the dough sit at room temperature about 30 minutes before scooping so it’s scoopable.)
- After chilling, portion the dough into balls just over 2 tablespoons each (about 40 g). You should get roughly 35 dough balls. Roll each into a tall, slightly rounded ball rather than flat disks.
- Place the dough balls on a parchment- or silicone-lined sheet pan or plate and return them to the refrigerator or freezer to chill for 15 minutes.
- While the dough balls chill, preheat the oven to 325°F (162°C).
- Arrange up to six chilled dough balls on an extra-large sheet pan lined with a silicone liner or parchment, spacing them at least 2 inches (5 cm) apart. (Bake in batches as needed.)
- Bake the cookies for 10 minutes. Remove the pan from the oven and press three miniature marshmallows into the top of each cookie. Return the pan to the oven and bake 2–4 more minutes, until the edges are set and the tops are no longer glossy/very gooey. The centers should be slightly underbaked for a fudgy, chewy texture.
- If desired, immediately press a few extra chocolate chips and/or peanuts into the warm cookie tops and sprinkle with flaky sea salt. Let the cookies cool on the sheet pan for 5 minutes, then transfer to a wire rack to finish cooling and firm up. Repeat baking with remaining dough.
Equipment
- Stand mixerfitted with whisk attachment
- Large sheet pan (15″ x 21″)
- Parchment Paper
- Silicone baking mator parchment paper
- Cooling Rack
Notes
Note 1:
If you touch the butter and are left with greasy fingers and a deep indent, the butter is too soft. Pop it in the fridge for a bit before using. If butter is cool to the touch and makes a slight indent when pressed with a finger, it is the perfect temperature! Softened or melted butter won’t cream properly.
Note 2:
Cake flour is usually found in the baking supplies aisle in the grocery store near other types of flour. I don’t recommend a different flour substitute or making homemade cake flour—it doesn’t work the same in this recipe.
Note 3
:
I highly recommend using the exact ingredients called for in this recipe to achieve the best results for these cookies. So wait for a grocery store run if you don’t have the right cocoa powder or flour; the wait will be worth it so you don’t end up with lackluster cookies or cookies that don’t bake properly.
Note 4
: If you press a measuring cup into a bag of flour and scoop, you will pack in way too much flour, which affects the texture of the cookies. Instead, spoon the flour into the measuring cup until it’s overfilled. Then use the back of a table knife to level the measuring cup at the top. (
Video visual here
)
Storage
: Store cooled cookies in an airtight container at room temperature. They’re best fresh but last up to a week, though texture and flavor fade after 3–4 days. For longer storage, freeze the dough: drop dough balls on a sheet pan, freeze until solid, then transfer to an airtight container or bag for up to 3 months.