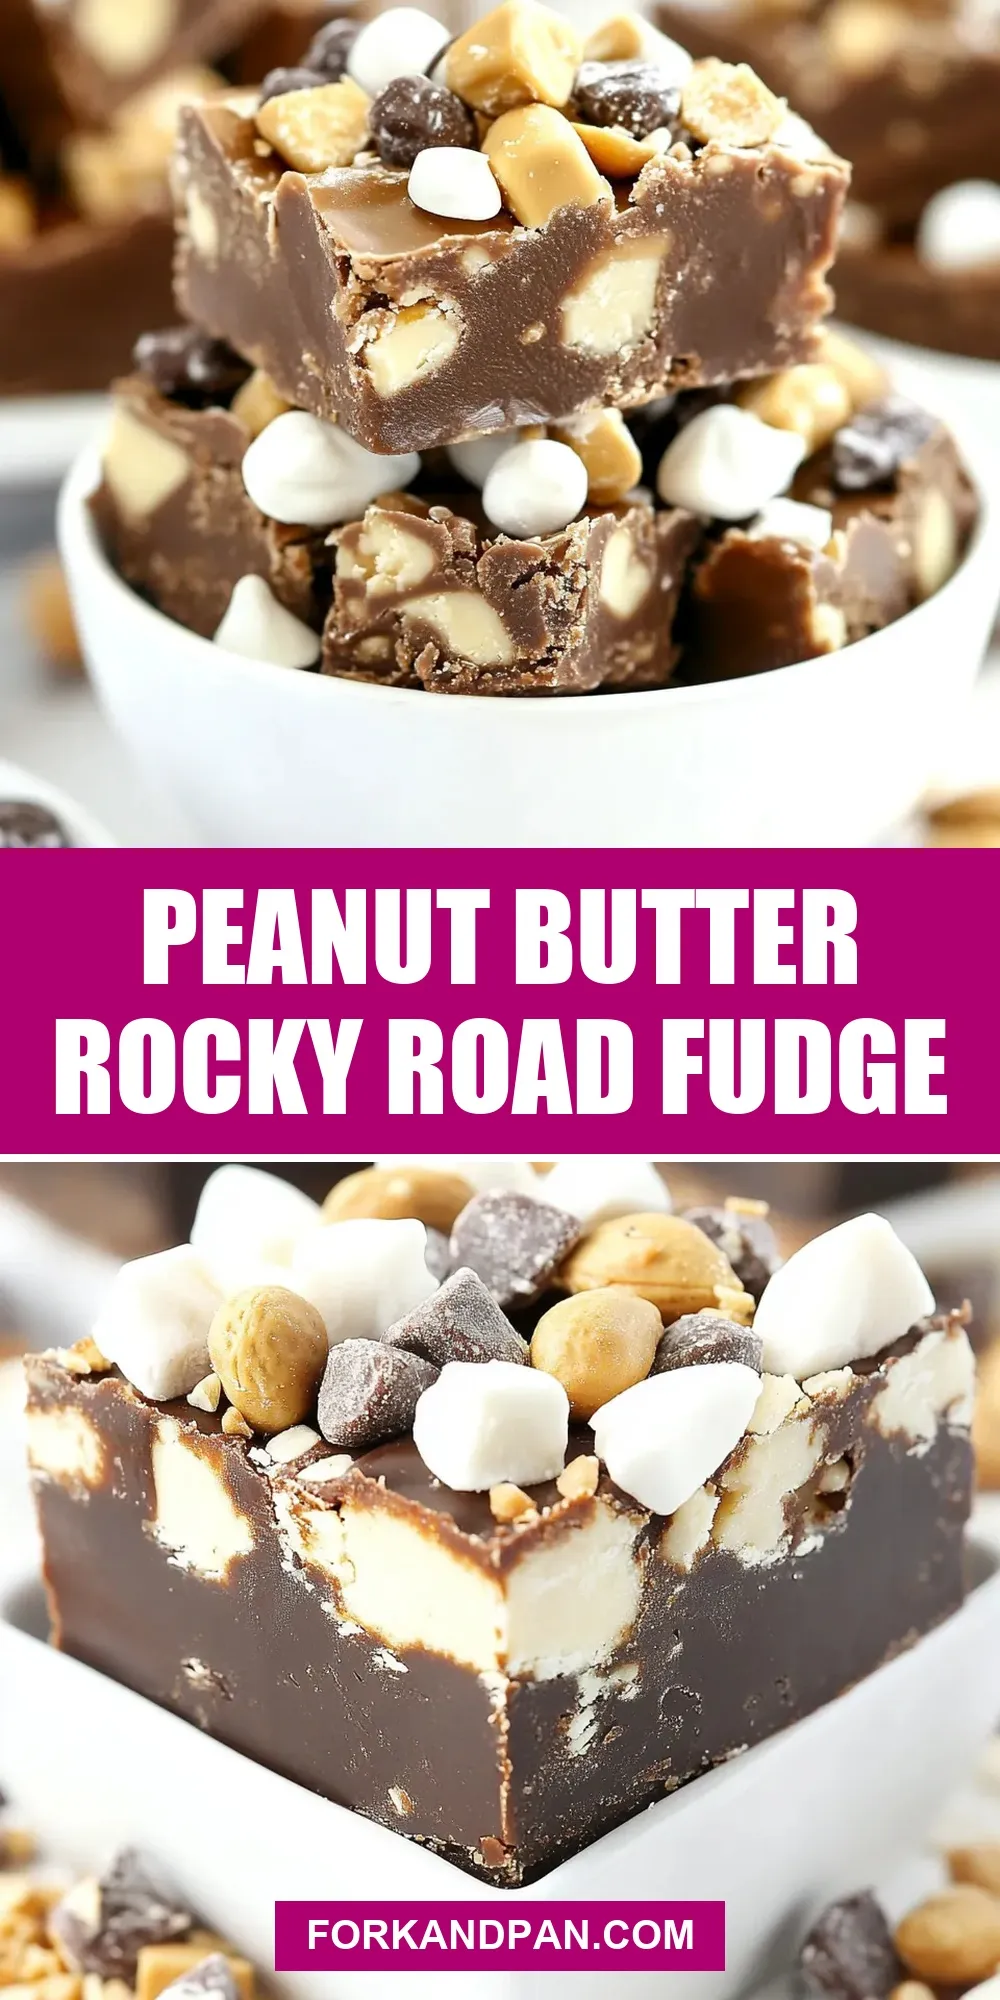
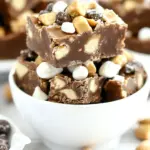
Peanut Butter Rocky Road Fudge
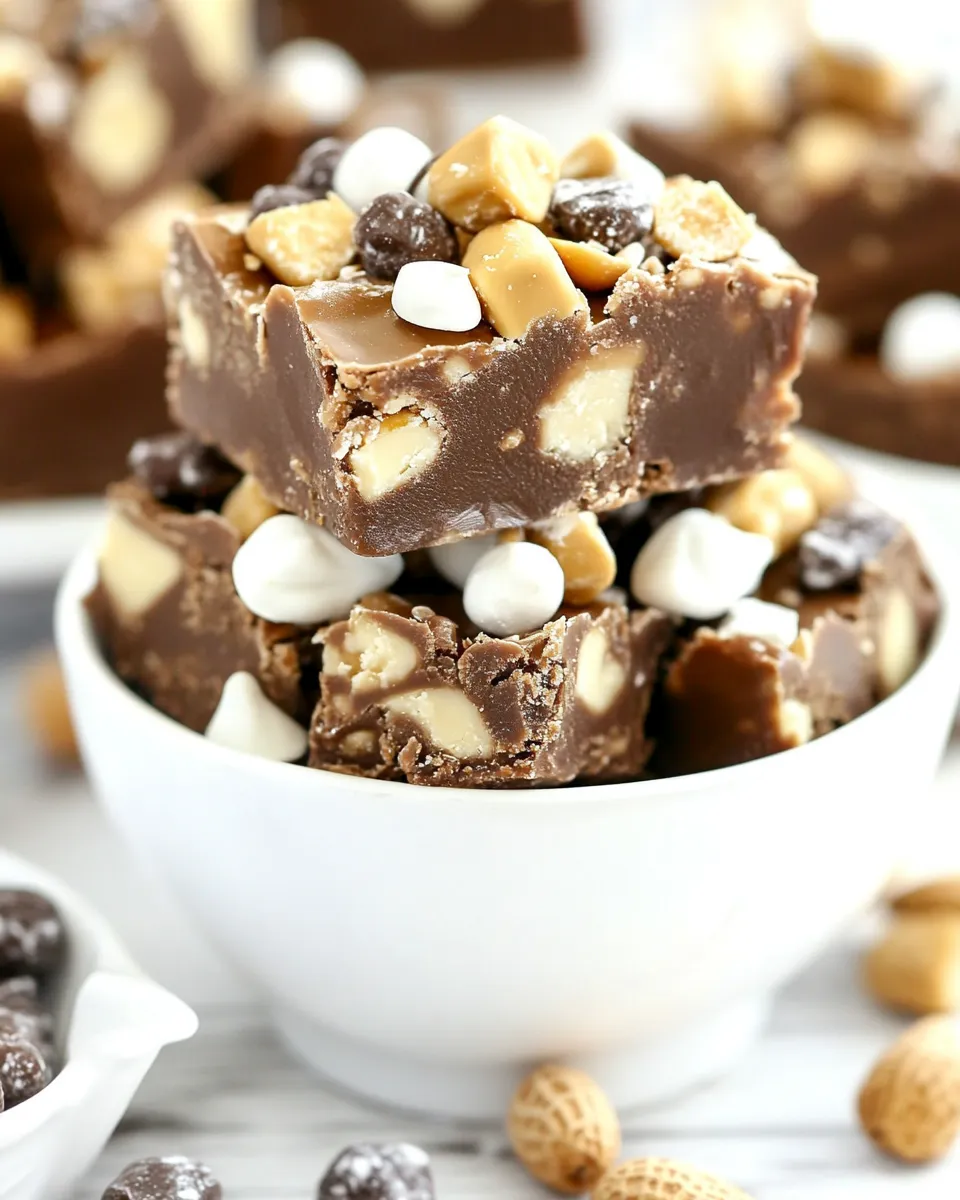
I make a lot of fudge. This one—Peanut Butter Rocky Road Fudge—has earned a permanent place in my rotation because it’s simple, fast, and reliably irresistible. It combines semi-sweet chocolate with Reese’s peanut butter chips, a splash of sweetened condensed milk, marshmallows and crunchy nuts. The result is rich, ribboned, and fun to pull apart.
There’s no candy thermometer, no long stovetop tempering, and no temperamental timing. You melt, stir, layer, chill, and cut. It’s the kind of recipe you can knock out between errands or on a quiet afternoon and still have something impressive to bring to a party.
Ingredient Breakdown

Ingredients
- 1 1/2 cups semi-sweet chocolate chips — provides the deep chocolate base and one of the two main flavor layers.
- 1 1/2 cups Reese’s peanut butter baking chips — delivers the peanut-butter ribbon and that classic peanut-chocolate pairing.
- 14 oz sweetened condensed milk, divided — adds sweetness and a creamy binding texture; split between the two melts to balance consistency.
- 2 tsp vanilla extract, divided — brings depth and rounds both chocolate and peanut-butter flavors; split as directed.
- 2 tbsp butter, divided — smooths the melted chips and gives a glossy finish; divided between the two bowls.
- 2 cups miniature marshmallows, divided — classic rocky road texture and chew; half gets stirred in early, the remainder is pressed on top.
- 1 cup roughly chopped nuts (your choice: walnuts, pecans, peanuts) — crunch and contrast; chop coarsely so pieces remain in every square.
Stepwise Method: Peanut Butter Rocky Road Fudge
- Line an 8-inch or 9-inch square pan with foil and lightly spray the foil with cooking spray; set the pan aside.
- In a microwave-safe bowl, combine 1 1/2 cups semi-sweet chocolate chips, half of the 14 oz sweetened condensed milk, and 1 tablespoon of the butter.
- In a second microwave-safe bowl, combine 1 1/2 cups Reese’s peanut butter baking chips, the remaining half of the sweetened condensed milk, and the remaining 1 tablespoon of butter.
- Microwave one bowl at a time on high for 30 seconds, stir, then continue microwaving in short intervals (stirring between each) until the mixture is fully melted and smooth and glossy. Repeat for the second bowl.
- Stir 1 teaspoon of the vanilla extract into each melted mixture (1 tsp into the chocolate mixture and 1 tsp into the peanut butter mixture).
- Spoon the chocolate and peanut butter mixtures into the prepared pan, alternating spoonfuls and spreading lightly so the two flavors form layers and ribbons rather than one solid block of a single flavor.
- Evenly sprinkle half of the miniature marshmallows and all of the roughly chopped nuts over the top of the layered mixtures.
- Use a spatula or the tip of a knife to cut through the layers several times to create a swirl and to help distribute the marshmallows and nuts through the top layer.
- Scatter the remaining miniature marshmallows on top and press them down gently so they stick into the fudge surface.
- Let the pan cool to room temperature, then transfer to the refrigerator to chill until the fudge is firm.
- Remove the chilled fudge from the pan using the foil, peel off the foil, and cut into squares.
- Store the cut squares in an airtight container.
Why This Peanut Butter Rocky Road Fudge Stands Out

It’s the contrast that makes this fudge sing: silky chocolate against nutty peanut-butter waves, chewy marshmallows, and crunchy nuts. The layered approach creates visible ribbons and pockets of flavor so every bite hits a slightly different note. It’s also wildly forgiving; the microwave melt-and-stir method removes a lot of the room-for-error that comes with stovetop candy-making.
This recipe is crowd-friendly. People who love traditional chocolate fudge get what they expect, and those who want peanut butter get that unmistakable peanut-chocolate duo. It travels well, slices cleanly when chilled, and keeps for several days in an airtight container.
Smart Substitutions

Keep substitutions focused and simple to preserve texture and set.
- Nuts: Use any of the listed options—walnuts, pecans, or peanuts—depending on what you have or prefer.
- Nut-free option: Omit the chopped nuts and add a little extra of the miniature marshmallows from the divided portion to maintain chunkiness.
- Chip brands: Swap to different brands of semi-sweet or peanut butter baking chips if needed; the amounts stay the same.
- Vanilla or butter: You can reduce the vanilla slightly if you prefer a purer chocolate/peanut taste, but keep the butter amounts to maintain gloss and mouthfeel.
What’s in the Gear List
- 8-inch or 9-inch square pan — the recipe assumes this size for thickness and setting time.
- Foil — lines the pan for easy removal and clean cutting.
- Cooking spray — prevents sticking to the foil.
- Two microwave-safe bowls — for melting the two mixtures separately.
- Spatula and knife — spatula to spread and a knife to create swirls and to cut squares.
- Measuring cups and spoons — for accurate quantities, particularly the divided ingredients.
- Refrigerator — to chill and firm the fudge before cutting.
Missteps & Fixes
Problem: Mixtures seize or become grainy after microwaving. Fix: Keep microwaving in short bursts and stir thoroughly between bursts. If texture looks grainy, add a small splash of the reserved sweetened condensed milk (if any) or a tiny bit of melted butter and stir vigorously—this can smooth it out.
Problem: Fudge is too soft after chilling. Fix: Make sure the pan was small enough (8–9 inches). If it’s still soft, chill longer. If time allows, return to the fridge overnight. For a future batch, use the exact pan size and ensure the chocolate and peanut butter melts reach a smooth, glossy consistency before layering.
Problem: Marshmallows sink or clump. Fix: Sprinkle half the marshmallows as directed and swirl quickly so the mixture holds them. Press the remaining marshmallows gently on top after swirling so they anchor into the surface.
Make It Your Way
Personalize the look and texture without changing the core recipe. For thicker, chunkier squares, use the 8-inch pan; for thinner pieces, use the 9-inch. If you like more visible swirls, spoon smaller dollops and swirl more thoroughly. Prefer fewer marshmallows? Reduce the divided amount, but keep at least some in the middle so you still get rocky road chew.
Chef’s Notes
Measure the sweetened condensed milk carefully and divide it as directed. The split keeps both melts glossy and workable. When stirring vanilla into each mixture, fold gently—overstirring once cooled can dull the sheen. Chill fully before cutting; warm fudge will smear and not hold neat squares. Cut with a sharp knife, wiping the blade between cuts for clean edges.
Freezer-Friendly Notes
To freeze, layer squares between sheets of parchment or wax paper in an airtight, freezer-safe container. Freeze for up to 3 months. Thaw in the refrigerator overnight before serving to prevent condensation and soggy marshmallows. Once thawed, bring to room temperature for 20–30 minutes before serving so flavors open up.
Your Questions, Answered
How long will this keep at room temperature? Stored in an airtight container, fudge will be fine at cool room temperature for 2–3 days. For longer storage, refrigerate.
Can I make this nut-free for school-safe treats? Yes—omit the chopped nuts and increase the miniature marshmallows slightly to keep the rocky road texture without introducing other ingredients.
Can I melt on the stovetop instead of the microwave? The recipe is written for microwave melting for speed and ease. If you prefer stovetop: use a double boiler and take the same care to achieve a smooth, glossy melt. Keep the amounts identical.
Bring It to the Table
Serve these squares on a simple platter—no garnish needed. They’re perfect with coffee, a glass of milk, or packed into treat boxes for neighbors. For a holiday spread, arrange them next to plain chocolate squares and salted nuts for contrast. They’re rich, so smaller pieces work well when serving a crowd.
Peanut Butter Rocky Road Fudge
Ingredients
Ingredients
- 1 1/2 cupssemi-sweet chocolate chips
- 1 1/2 cupsReese's peanut butter baking chips
- 14 ozsweetened condensed milkdivided
- 2 tspvanilla extractdivided
- 2 tbspbutterdivided
- 2 cupsminiature marshmallowsdivided
- 1 cuproughly chopped nutsyour choice walnuts, pecans, peanuts
Instructions
Instructions
- Line an 8-inch or 9-inch square pan with foil and lightly spray the foil with cooking spray; set the pan aside.
- In a microwave-safe bowl, combine 1 1/2 cups semi-sweet chocolate chips, half of the 14 oz sweetened condensed milk, and 1 tablespoon of the butter.
- In a second microwave-safe bowl, combine 1 1/2 cups Reese's peanut butter baking chips, the remaining half of the sweetened condensed milk, and the remaining 1 tablespoon of butter.
- Microwave one bowl at a time on high for 30 seconds, stir, then continue microwaving in short intervals (stirring between each) until the mixture is fully melted and smooth and glossy. Repeat for the second bowl.
- Stir 1 teaspoon of the vanilla extract into each melted mixture (1 tsp into the chocolate mixture and 1 tsp into the peanut butter mixture).
- Spoon the chocolate and peanut butter mixtures into the prepared pan, alternating spoonfuls and spreading lightly so the two flavors form layers and ribbons rather than one solid block of a single flavor.
- Evenly sprinkle half of the miniature marshmallows and all of the roughly chopped nuts over the top of the layered mixtures.
- Use a spatula or the tip of a knife to cut through the layers several times to create a swirl and to help distribute the marshmallows and nuts through the top layer.
- Scatter the remaining miniature marshmallows on top and press them down gently so they stick into the fudge surface.
- Let the pan cool to room temperature, then transfer to the refrigerator to chill until the fudge is firm.
- Remove the chilled fudge from the pan using the foil, peel off the foil, and cut into squares.
- Store the cut squares in an airtight container.
Equipment
- 8- or 9-inch square pan
- Aluminum Foil
- microwave-safe bowls
- Spatula
- Knife
- Microwave
- Refrigerator