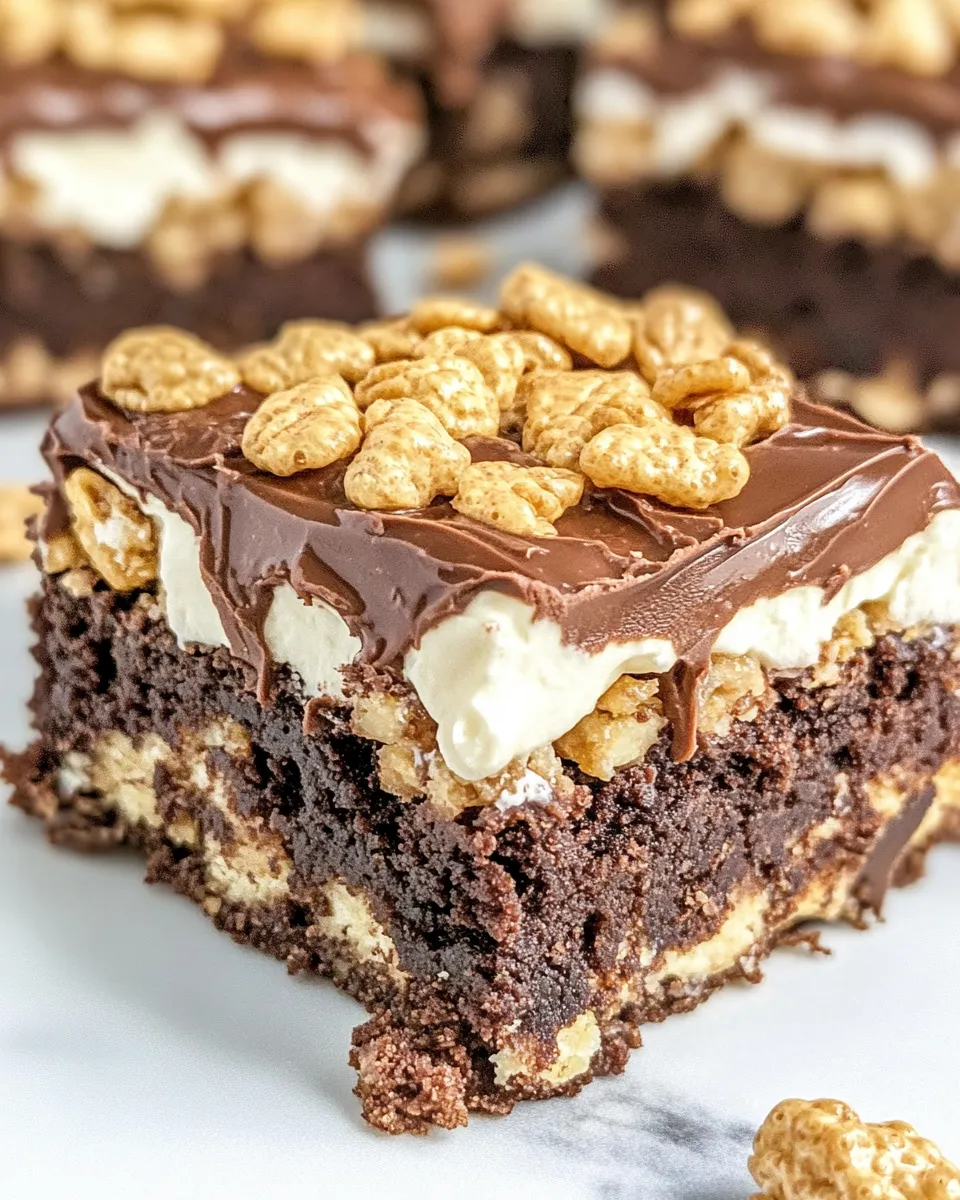
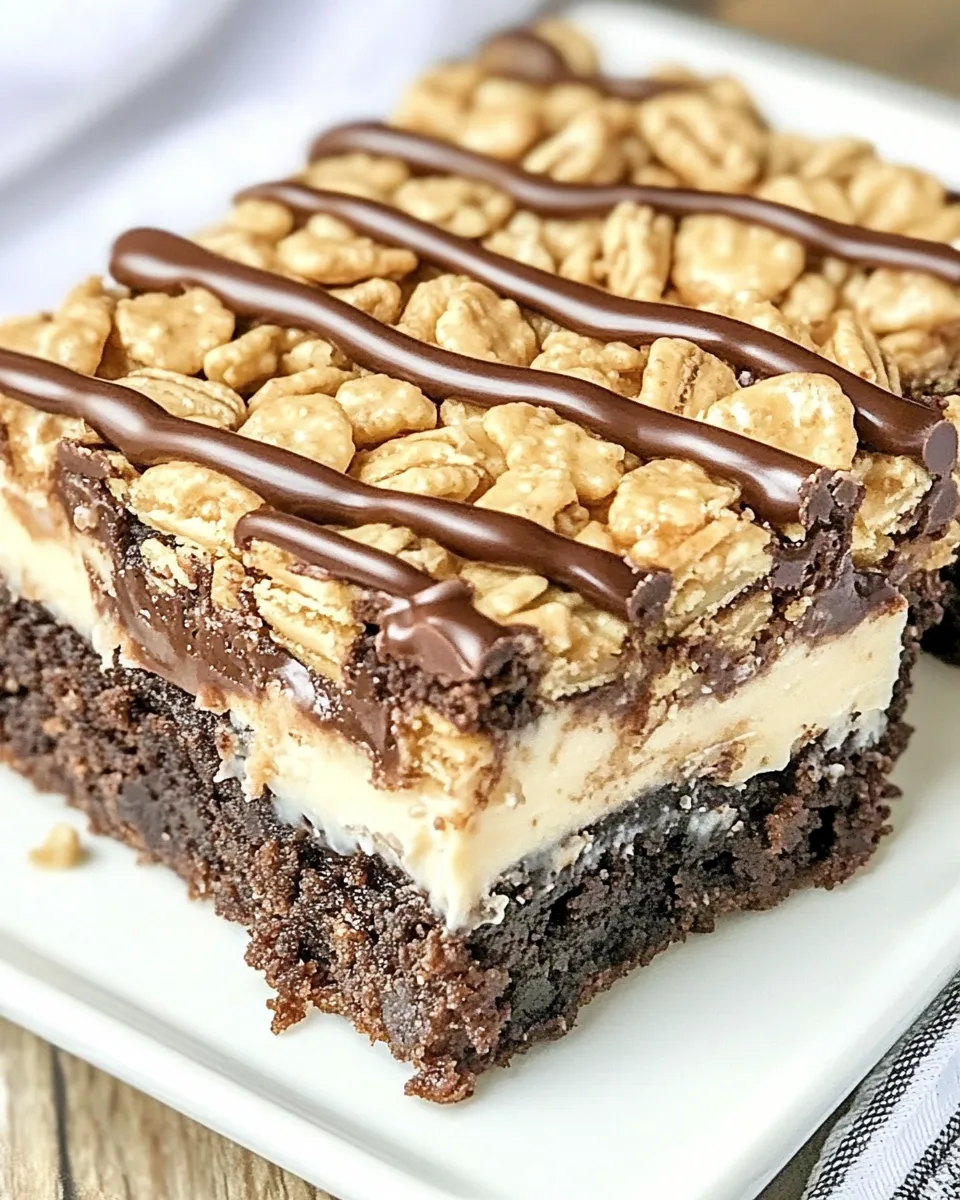
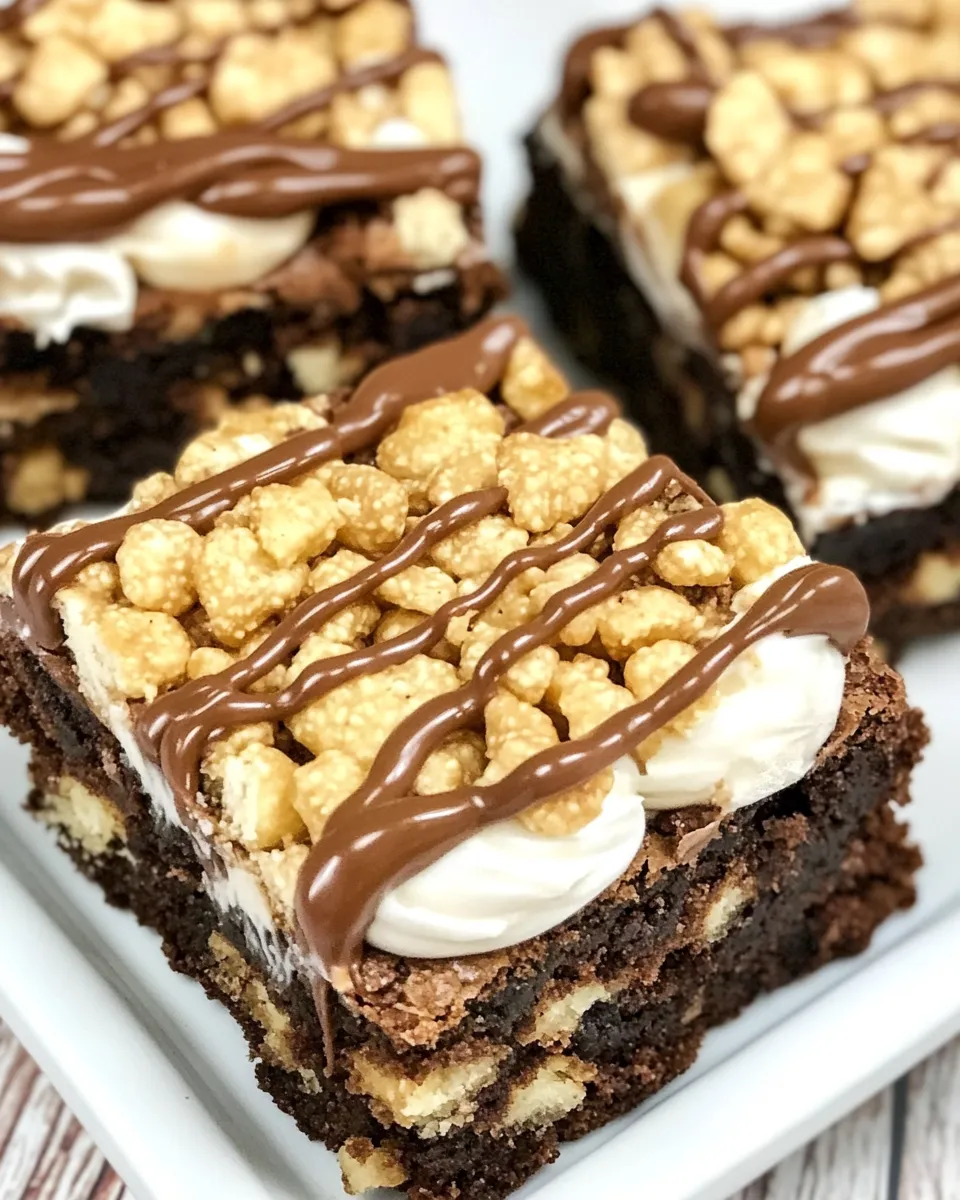
Peanut Butter Krispie Brownies
These Peanut Butter Krispie Brownies are one of those recipes that feels indulgent but stays uncomplicated. A base of cake‑style brownie mix is topped with marshmallow creme, then a warm, chocolatey peanut butter–coated Rice Krispie layer is pressed on top. The contrast — fudgy brownie, pillowy marshmallow, and crisp rice cereal — is obvious from the first bite.
I test recipes the way I live: by making them repeatedly until they withstand a weekday rush or a weekend crowd. This one barely needs tests; it’s forgiving, fast, and stores well. You can follow the package directions for the brownies and lean on a few tried techniques to get clean slices and reliable texture each time.
Below I’ll list the exact ingredients, step‑by‑step directions from the source recipe, troubleshooting tips, and a few smart swaps. If you like straightforward, pantry-driven desserts that feel special without a lot of fuss, these are for you.
What’s in the Bowl

- 1 (18-oz) package brownie mix, plus ingredients to make cake like brownies — the cake‑style base; follow the package directions called for cake‑like brownies.
- 1 (7-oz) jar marshmallow creme — creates a smooth, sticky middle layer that helps the Krispie topping adhere.
- 1 cup creamy peanut butter — gives richness and helps bind the cereal; creamy melts more smoothly than chunky.
- 1 (12-oz) package semi-sweet chocolate chips — combined with the peanut butter for a glossy, chocolate coating for the cereal.
- 4 cups Rice Krispie cereal — the crunchy element; measure lightly so the topping sets with the right crispness.
How to Prepare Peanut Butter Krispie Brownies
- Line a 9×13-inch baking pan with parchment paper, leaving a few inches of overhang on two sides. Preheat the oven according to the brownie mix package and prepare the 18‑oz brownie mix following the package directions for cake‑like brownies; pour the batter into the prepared pan and bake as directed.
- Cool the brownies completely in the pan on a wire rack.
- Spread the entire 7‑oz jar of marshmallow creme evenly over the cooled brownies, reaching to the edges.
- In a medium saucepan set over low heat, combine 1 cup creamy peanut butter and the 12‑oz package semi‑sweet chocolate chips. Stir continuously over low heat until the mixture is fully melted and smooth. Remove the pan from the heat.
- Let the melted peanut butter–chocolate mixture sit off the heat for 1–2 minutes to cool slightly, then gently stir in 4 cups Rice Krispie cereal until the cereal is evenly coated.
- Immediately spread the coated Rice Krispie mixture evenly over the marshmallow layer, pressing lightly so it adheres.
- Cover the pan and chill in the refrigerator until the top is set, at least 30 minutes. Use the parchment overhang to lift the slab from the pan and cut into squares.
Why Cooks Rave About It
Texture and contrast. You get a soft, cake‑style brownie, a sticky marshmallow bridge, and a crisp, peanut‑chocolate crunch on top. Each layer plays a role: the brownie gives depth and cocoa backbone, the marshmallow makes the top cohesive, and the Krispie layer delivers snap and nostalgia.
It’s also a project piece that comes together quickly because the brownie portion follows a packet mix. That makes this an ideal recipe for last‑minute gatherings or when you want a nostalgic dessert without starting from scratch.
The method is sturdy—melting peanut butter with chocolate over low heat produces a glossy coating that sets firm but not rock hard, so you get clean slices and a satisfying bite.
Quick Replacement Ideas
- Swap creamy peanut butter for crunchy peanut butter if you want added texture in the top layer.
- Use milk chocolate chips in place of semi‑sweet chocolate chips for a sweeter, creamier topping.
- If you don’t have Rice Krispies, puffed rice cereal works as a direct stand‑in; flakes with larger shapes will change texture slightly.
- Substitute a fudgier brownie mix if you prefer a denser base, but note the recipe’s directions call for cake‑like brownies for structure.
Gear Up: What to Grab
- 9×13‑inch baking pan — the recipe is scaled for this size for even baking and proper layer proportions.
- Parchment paper — for easy lift and cleaner slicing.
- Medium saucepan — for melting peanut butter and chocolate together gently.
- Rubber spatula and wooden spoon — a spatula for spreading and a spoon for stirring the melted mixture into cereal.
- Wire rack — to cool the brownies completely before adding layers.
- Sharp knife and bench scraper (optional) — for neat cuts and serving.
Easy-to-Miss Gotchas
- Don’t add the Krispie mixture before it cools for 1–2 minutes: too hot and it can melt the marshmallow layer or make the cereal soggy.
- Cool the brownies fully in the pan. If the marshmallow crema sits on warm brownies, it will thin and the top layer won’t adhere properly.
- Work quickly when coating the cereal. The chocolate‑peanut butter mixture sets as it cools, so have your pan ready to spread the mixture immediately.
- Press lightly only. Pressing too hard compresses the cereal and makes the top dense; a gentle press ensures pieces stay crisp.
- Cut after chilling. Warm bars will smear; chilling 30 minutes or more firms the top for cleaner squares.
Smart Substitutions
- Marshmallow alternative: if you have marshmallows instead of marshmallow creme, briefly melt them with a teaspoon of butter over very low heat to achieve a spreadable consistency.
- Nuts: if peanut butter is a concern, sunflower seed butter can replace it for a nut‑free option—expect a slight flavor shift but similar binding properties.
- Chocolate: dark chocolate works if you prefer less sweetness; increase peanut butter slightly if the chocolate is very bitter to maintain balance.
- Cereal: for a gluten‑free option, use certified gluten‑free puffed rice cereal; the method and quantities remain the same.
Chef’s Rationale
I keep this assembly straightforward for two reasons: reliability and texture control. The brownie layer, when made cake‑style, provides a stable base so the marshmallow layer seals the top and prevents the cereal from sinking into the batter. Marshmallow creme spreads evenly and makes a glue‑like surface for the Krispie topping.
Melting peanut butter with chocolate over low heat prevents scorching and creates a glossy emulsion. A brief off‑heat rest before folding in cereal ensures the chocolate hasn’t become so hot that it melts the marshmallow layer or makes the cereal soggy. Chilling sets the top quickly and gives clean cuts.
Overall, these steps protect the crispness of the cereal and the structure of the whole bar while keeping the flavor balanced—peanut butter, chocolate, and marshmallow in clear roles.
Best Ways to Store
- Refrigerator: Store bars in an airtight container layered with parchment between pieces for up to 5 days. Cold keeps the peanut‑chocolate top firm.
- Room temperature: If you plan to eat them within a day, keep them in a cool spot in an airtight container to retain some chewiness.
- Freezing: You can freeze individual squares wrapped tightly in plastic and placed in a freezer bag for up to 2 months. Thaw in the fridge to avoid sweating and sogginess.
Quick Q&A
- Can I use a homemade brownie batter? Yes. If you use homemade, aim for a batter that bakes into a cake‑like texture so the marshmallow layer doesn’t sink.
- Can I skip the marshmallow creme? You can, but the top Krispie layer won’t adhere as well; consider using a thin layer of chocolate as glue instead.
- How do I get clean slices? Chill fully, then use a sharp knife warmed briefly under hot water and wiped dry between cuts.
- Will the top stay crispy? Proper cooling and chilling keep the Krispie topping crisp. Avoid humid storage conditions.
Save & Share
If you make these, save the recipe and jot down any tweaks—every oven and pantry is slightly different. They’re great for potlucks, lunchboxes, and last‑minute guests because they look layered and festive without demanding extra time.
Share a photo, tag a friend, or pass along the recipe sheet when someone asks for that dessert they loved. A good bar like this travels well and makes a big tray that disappears fast. Happy baking—and if you have a favorite swap, I’d love to hear how you made it your own.
Peanut Butter Krispie Brownies
Ingredients
Ingredients
- 1 18-ozpackage brownie mix, ,plus ingredients to make cake like brownies
- 1 7-ozjar marshmallow creme
- 1 cupcreamy peanut butter
- 1 12-ozpackage semi-sweet chocolate chips
- 4 cupsRice Krispie cereal
Instructions
Instructions
- Line a 9×13-inch baking pan with parchment paper, leaving a few inches of overhang on two sides. Preheat the oven according to the brownie mix package and prepare the 18‑oz brownie mix following the package directions for cake‑like brownies; pour the batter into the prepared pan and bake as directed.
- Cool the brownies completely in the pan on a wire rack.
- Spread the entire 7‑oz jar of marshmallow creme evenly over the cooled brownies, reaching to the edges.
- In a medium saucepan set over low heat, combine 1 cup creamy peanut butter and the 12‑oz package semi‑sweet chocolate chips. Stir continuously over low heat until the mixture is fully melted and smooth. Remove the pan from the heat.
- Let the melted peanut butter–chocolate mixture sit off the heat for 1–2 minutes to cool slightly, then gently stir in 4 cups Rice Krispie cereal until the cereal is evenly coated.
- Immediately spread the coated Rice Krispie mixture evenly over the marshmallow layer, pressing lightly so it adheres.
- Cover the pan and chill in the refrigerator until the top is set, at least 30 minutes. Use the parchment overhang to lift the slab from the pan and cut into squares.
Equipment
- 9×13-inch Cake Pan
- Parchment Paper
Notes
Here is our favorite recipe for homemade brownies:https://www.plainchicken.com/bisquick-brownies/
You will need to double our homemade recipe and bake in a 9×13-inch pan.
I leave out the walnuts or pecans when I use this homemade brownie recipe in this dessert.
I use Jif smooth peanut butter. You can use any brand of peanut butter that you enjoy. Smooth or crunchy works just fine.
I used semi-sweet chocolate chips. Milk chocolate or dark chocolate chips would also work great.
I melted the peanut butter and chocolate on the stovetop, but you can also melt them in the microwave.
How do I know if my brownies are done? Bake the brownies until a toothpick inserted into the center of the brownies comes out clean or with only crumbs, no batter on it.
My biggest tip for making these brownies is to line your pan with parchment paper or aluminum foil before baking the brownies.You want the parchment paper to hang over the edges a bit. This will help you when you go to get the brownies out of the pan. I run a knife around the sides of the pan before lifting them out of the pan.
You want the parchment paper to hang over the edges a bit. This will help you when you go to get the brownies out of the pan. I run a knife around the sides of the pan before lifting them out of the pan.
You can cut the recipe in half and make the recipe in an 8-inch or 9-inch square pan.
How to store brownies? Store the brownies in an airtight container on the countertop.
How long do brownies keep? The brownies will keep for 3 to 4 days in an air-tight container.