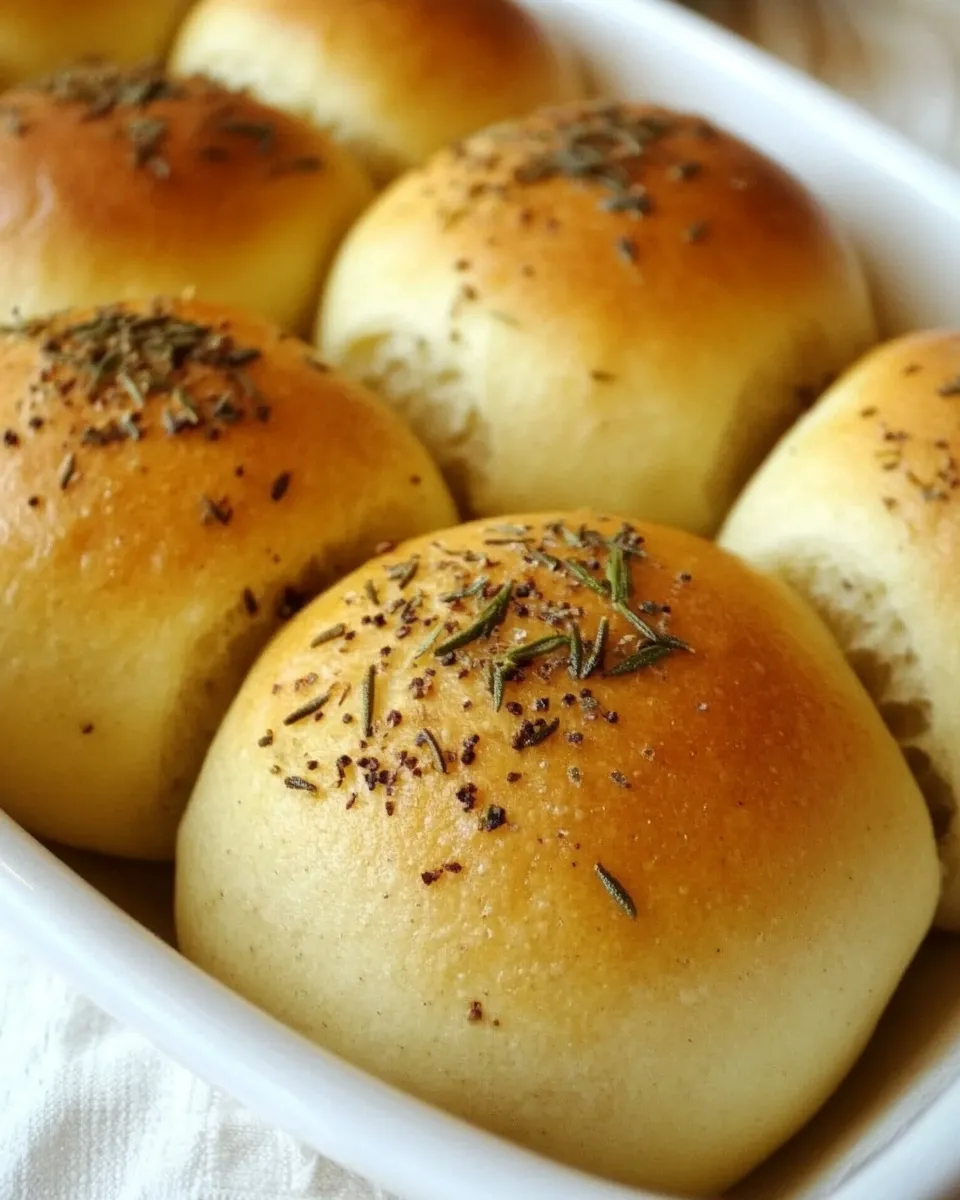
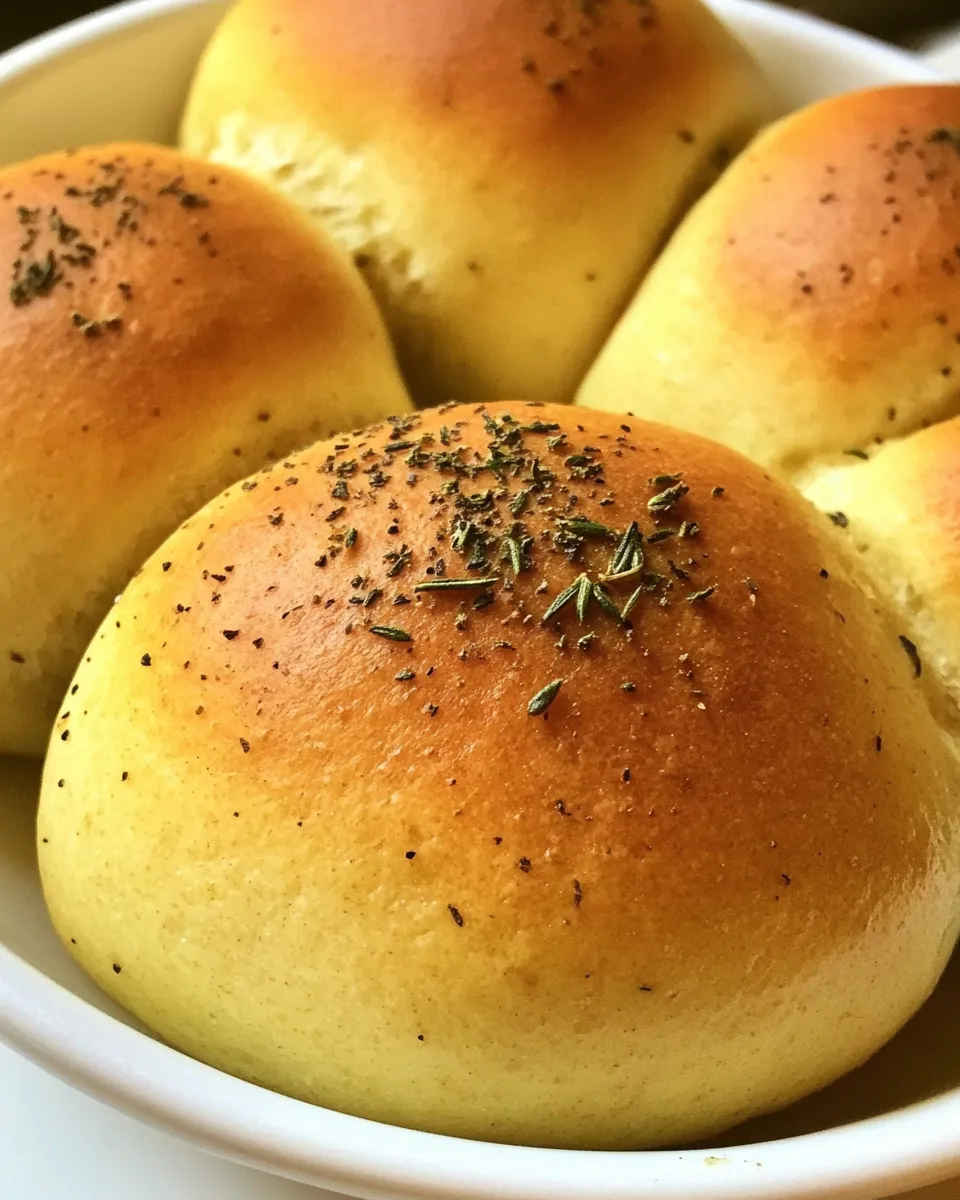
Olive Oil and Rosemary Rolls
These Olive Oil and Rosemary Rolls are a staple whenever I want something simple, aromatic, and reliably pillowy on the inside with a golden crust. The rosemary-infused olive oil gives the dough a subtle herb flavor throughout, while a buttery brush before baking adds richness and helps the crust brown beautifully. They come together without fuss and reward patience at every rise.
I write recipes to be usable on weeknights and impressive on weekends. This one fits both: the process is straightforward, the ingredients are familiar, and the technique focuses on a few small decisions that make a big difference—proofing the yeast properly, gentle shaping for surface tension, and timing the two rises so flavor and structure develop. Read the steps, prep your station, and these rolls will be ready to serve warm.
Below you’ll find a clear ingredient list, the exact step-by-step build, and practical notes for variations, equipment, troubleshooting, storage, and reheating. I include the exact directions as written so you can follow them without guessing. Let’s get rolling.
Ingredient Rundown

Before you begin, it helps to understand what each ingredient does. These rolls rely on a short list of pantry staples. Each item contributes to texture, flavor, or structure, so treating them with their simple roles in mind will produce the best outcome.
Ingredients
- ¼ cup extra virgin olive oil — adds flavor and tenderizes the crumb; it’s also the base for the rosemary infusion.
- 1 tablespoon chopped fresh rosemary — aromatics that scent the dough; chop finely so the oils release into the oil.
- 2¼ teaspoons active dry yeast — leavening agent; ensures a good rise when proofed in warm water.
- 1 cup warm water — hydrates the yeast and starts gluten formation; keep it 105–110°F for best yeast activity.
- 4¼ cups bread flour (+ extra for dusting) — provides structure and chew; bread flour has higher protein for stronger gluten.
- 1¾ teaspoons sea salt or kosher salt — seasons the dough; salt also strengthens gluten and controls yeast activity.
- ½ cup butter, melted and cooled slightly — brushed on top before baking for color, flavor, and a tender crust.
Build Olive Oil and Rosemary Rolls Step by Step
- In a small bowl combine 1/4 cup extra virgin olive oil and 1 tablespoon chopped fresh rosemary. Set aside to marinate at room temperature for at least 30 minutes.
- Pour 1 cup warm water (105–110°F) into a bowl. Sprinkle 2 1/4 teaspoons active dry yeast over the water, stir to dissolve, and let stand 5–10 minutes, until the mixture foams and bubbles.
- Fit a stand mixer with the paddle attachment. Pour the foamed yeast mixture into the mixer bowl.
- Add 1/2 cup of the 4 1/4 cups bread flour and 1 3/4 teaspoons salt to the bowl. Mix on low speed until incorporated.
- Continue adding the remaining bread flour in 1/2-cup increments, mixing on low after each addition, until all 4 1/4 cups flour are added and the dough is combined.
- Remove the paddle attachment and fit the mixer with the dough hook. With the mixer on low, slowly pour in the reserved olive oil and rosemary mixture.
- Increase the mixer to speed 3 and knead the dough for about 2 minutes, until the dough comes together (it should be cohesive and pull away from the sides of the bowl).
- Remove the dough, shape it quickly into a ball, dust lightly with flour, and place the dough ball into a large zip-top bag. Press out excess air and seal the bag.
- Place the sealed bag on a cutting board or in a warm, draft-free spot and let the dough rise until doubled in size, about 1 hour. After it has doubled, gently punch the dough down inside the bag and reseal; let rise again for an additional hour.
- After the second rise, remove the dough from the bag, punch it down to deflate, and let it rest 10 minutes.
- Lightly dust a baking sheet with flour. Divide the dough into 12 equal pieces. Shape each piece into a smooth ball (tuck the edges under to create surface tension) and place the rolls on the prepared baking sheet, spaced slightly apart. Cover loosely with plastic wrap and let rise at room temperature until nearly doubled, about 1 hour.
- Meanwhile, preheat the oven to 450°F.
- Remove the plastic wrap and lightly brush each roll with 1/2 cup melted butter (cooled slightly).
- Bake the rolls at 450°F for 10 minutes. Reduce the oven temperature to 375°F and bake for an additional 10–15 minutes, until the rolls are browned and sound hollow when tapped.
- Transfer the rolls to a wire rack to cool slightly before serving.
Why This Recipe Works

The method separates development stages so you get a well-flavored, well-structured roll without complicated steps. Proofing the yeast in warm water ensures an active rise. The two-stage bulk fermentation—one rise, a gentle knockdown, and a second rise—builds flavor and strengthens the gluten. That gentle development gives you interior softness and a stable crumb.
Using olive oil infused with rosemary folded into the dough at the kneading stage disperses herb flavor throughout rather than only on top. The melted butter brushed on before baking is a finishing move: it encourages deep, even browning and adds a silky mouthfeel. Baking first hot, then lowering the temperature, helps set the crust quickly and then completes the crumb without overbrowning.
Ingredient Flex Options
These rolls are forgiving with small swaps, but each swap changes texture and flavor. If you need a little more chew, up to 1/2 cup of whole wheat flour can replace part of the bread flour; reduce total additional liquid slightly if the dough feels loose. You can swap fresh rosemary for 1 teaspoon dried rosemary if fresh isn’t available—crease it between your fingers before adding to wake up the oils.
If olive oil’s flavor feels too assertive, use a milder extra virgin or a light olive oil; it will still tenderize without overwhelming the herb. For a dairy-free finish, brush with more olive oil instead of the melted butter. The result will be slightly less glossy but still richly flavored.
Equipment Breakdown
Stand mixer with paddle and dough hook: this recipe uses both. The paddle helps combine flour without overdeveloping gluten early, and the dough hook finishes the kneading cleanly. If you don’t have a mixer, you can mix by hand and knead on a floured surface for 8–10 minutes until cohesive and elastic.
Large zip-top bag: using the bag for the bulk rise keeps the dough moist and lets you gently handle the dough with minimal cleanup. A baking sheet and wire rack are standard; the rack prevents soggy bottoms when the rolls cool. Finally, an instant-read thermometer is helpful to keep water at 105–110°F for yeast proofing, though the palm test (warm, not hot) works too.
Watch Outs & How to Fix
Yeast not foaming
If the yeast doesn’t foam after 5–10 minutes, the water was likely too hot, too cold, or the yeast is old. Discard that mixture and start over with fresh yeast and water closer to 105–110°F. Active dry yeast should foam visibly; otherwise skip forward and don’t expect a proper rise.
Dough too sticky or too dry
Stickiness varies by flour and humidity. If the dough is extremely sticky and won’t hold shape after the mixer step, add flour 1 tablespoon at a time until it pulls away from the bowl. If it’s too stiff or dry, add 1 teaspoon of warm water at a time while mixing until it becomes cohesive. Avoid large adjustments—small increments preserve the intended hydration.
Rolls won’t brown or sound dense
Underbaked rolls can feel dense and lack color. Check oven temperature with an oven thermometer; many ovens run cool. The initial 450°F burst sets structure—don’t skip it. If rolls brown too quickly, reduce top rack height or cover lightly with foil after 10 minutes.
Allergy-Friendly Swaps
Dairy-free: substitute the 1/2 cup melted butter brushed on top with 1/2 cup extra olive oil (cooled) and brush just before baking. The rolls will be slightly less glossy but still tender.
Gluten-free: this recipe relies on bread flour and gluten development; a direct swap won’t work. If you need gluten-free rolls, use a tested gluten-free roll recipe that includes xanthan gum or another binder. Do not attempt to substitute a gluten-free flour one-to-one here and expect the same texture.
Yeast-free: these rolls depend on yeast for rise. For a no-yeast option, use a quick bread or biscuit-style roll recipe instead.
Author’s Commentary
I make these on a weekend morning when the house needs to smell like bread and rosemary. The process is meditative: whisking yeast, infusing oil, kneading just enough. The two rises are worth the time—skip them and you’ll lose both flavor and structure. In my kitchen, these rolls show up with soups, roast chicken, or simply with a sliver of butter while still warm.
Small touches matter: chop the rosemary fine if you prefer it to melt into the dough rather than appear as flecks on top. If you want a crisper crust, leave them in the oven the full additional 15 minutes after lowering the temperature. For a softer crust, pull them a few minutes earlier.
Storage & Reheat Guide
Short-term (1–2 days)
Store cooled rolls in a paper bag or loosely wrapped in plastic at room temperature. If left in a sealed container while still warm they will soften but may become slightly soggy due to trapped steam. For the best texture, use within 48 hours.
Long-term (freezing)
Freeze cooled rolls in a sealed freezer bag for up to 3 months. To reheat: thaw at room temperature for 30–60 minutes, then warm in a 325°F oven for 8–10 minutes until heated through. To revive a single roll quickly, wrap in foil and warm in the oven at 350°F for 8–10 minutes.
Quick reheat for serving
If you want a fresh-from-the-oven experience, split the batch and reheat only what you need. Brush slightly with melted butter or olive oil before warming to refresh the crust and boost flavor.
Common Questions
Q: Can I make the dough the night before? A: Yes. After the first rise and the gentle punchdown step inside the sealed bag, refrigerate the dough overnight. Bring it back to room temperature before dividing, shaping, and completing the second rise. Cold retardation develops flavor but adds time to the process.
Q: Do I have to use bread flour? A: Bread flour gives stronger gluten and a chewier texture. You can use all-purpose flour in a pinch; expect slightly softer, less structured rolls. Use the same total volume and watch dough consistency rather than relying only on time.
Q: Can I add other herbs or aromatics? A: Yes. Try substituting or adding thyme or a pinch of garlic powder to the rosemary. Mince any additions finely so they distribute evenly.
Q: Why brush with butter instead of olive oil? A: Butter browns differently and adds a richer flavor and sheen. Olive oil will work—use it if you prefer dairy-free—but expect a slightly different crust and finish.
Wrap-Up
These Olive Oil and Rosemary Rolls are an easy way to add warmth and flavor to any meal. They favor technique over complexity: proof your yeast, let the dough develop with two rises, and finish with a buttery brush for a beautiful bake. Keep this page handy the first few times you make them; after that, the steps become muscle memory and the results are reliably delicious.
Make them for a weeknight dinner or a weekend gathering. They pair beautifully with soups, roasted meats, or as a simple side for a family meal. Enjoy—and if you try a variation, note what you changed so you can repeat the best version next time.
Olive Oil and Rosemary Rolls
Ingredients
Ingredients
- 1/4 cupextra virgin olive oil
- 1 tablespoonchopped fresh rosemary
- 2 1/4 teaspoonsactive dry yeast
- 1 cupwarm water
- 4 1/4 cupsbread flour + extra for dusting
- 1 3/4 teaspoonssea salt or kosher salt
- 1/2 cupbutter melted and cooled slightly
Instructions
Instructions
- In a small bowl combine 1/4 cup extra virgin olive oil and 1 tablespoon chopped fresh rosemary. Set aside to marinate at room temperature for at least 30 minutes.
- Pour 1 cup warm water (105–110°F) into a bowl. Sprinkle 2 1/4 teaspoons active dry yeast over the water, stir to dissolve, and let stand 5–10 minutes, until the mixture foams and bubbles.
- Fit a stand mixer with the paddle attachment. Pour the foamed yeast mixture into the mixer bowl.
- Add 1/2 cup of the 4 1/4 cups bread flour and 1 3/4 teaspoons salt to the bowl. Mix on low speed until incorporated.
- Continue adding the remaining bread flour in 1/2-cup increments, mixing on low after each addition, until all 4 1/4 cups flour are added and the dough is combined.
- Remove the paddle attachment and fit the mixer with the dough hook. With the mixer on low, slowly pour in the reserved olive oil and rosemary mixture.
- Increase the mixer to speed 3 and knead the dough for about 2 minutes, until the dough comes together (it should be cohesive and pull away from the sides of the bowl).
- Remove the dough, shape it quickly into a ball, dust lightly with flour, and place the dough ball into a large zip-top bag. Press out excess air and seal the bag.
- Place the sealed bag on a cutting board or in a warm, draft-free spot and let the dough rise until doubled in size, about 1 hour. After it has doubled, gently punch the dough down inside the bag and reseal; let rise again for an additional hour.
- After the second rise, remove the dough from the bag, punch it down to deflate, and let it rest 10 minutes.
- Lightly dust a baking sheet with flour. Divide the dough into 12 equal pieces. Shape each piece into a smooth ball (tuck the edges under to create surface tension) and place the rolls on the prepared baking sheet, spaced slightly apart. Cover loosely with plastic wrap and let rise at room temperature until nearly doubled, about 1 hour.
- Meanwhile, preheat the oven to 450°F.
- Remove the plastic wrap and lightly brush each roll with 1/2 cup melted butter (cooled slightly).
- Bake the rolls at 450°F for 10 minutes. Reduce the oven temperature to 375°F and bake for an additional 10–15 minutes, until the rolls are browned and sound hollow when tapped.
- Transfer the rolls to a wire rack to cool slightly before serving.
Equipment
- Stand mixer
- Paddle Attachment
- dough hook
- Baking Sheet
- Zip-top Bag
- Wire Rack
Notes
*If you don’t have a stand mixer, you can always knead by hand instead. It’s just a little messy.
*Trick to dividing the dough into 12 equal pieces:Divide the dough in half, then in half again, then you can divide each of the four pieces into three equal dough balls.