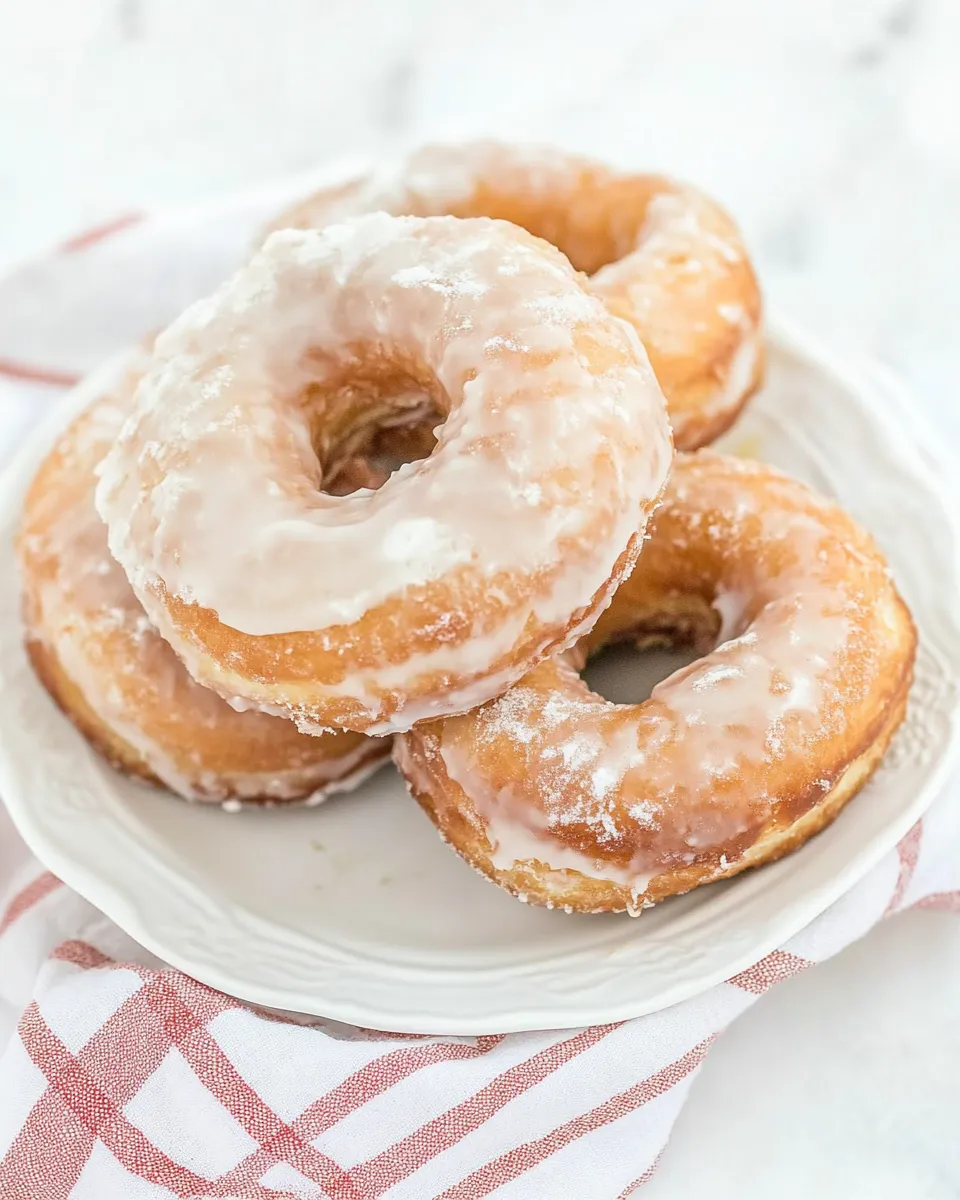
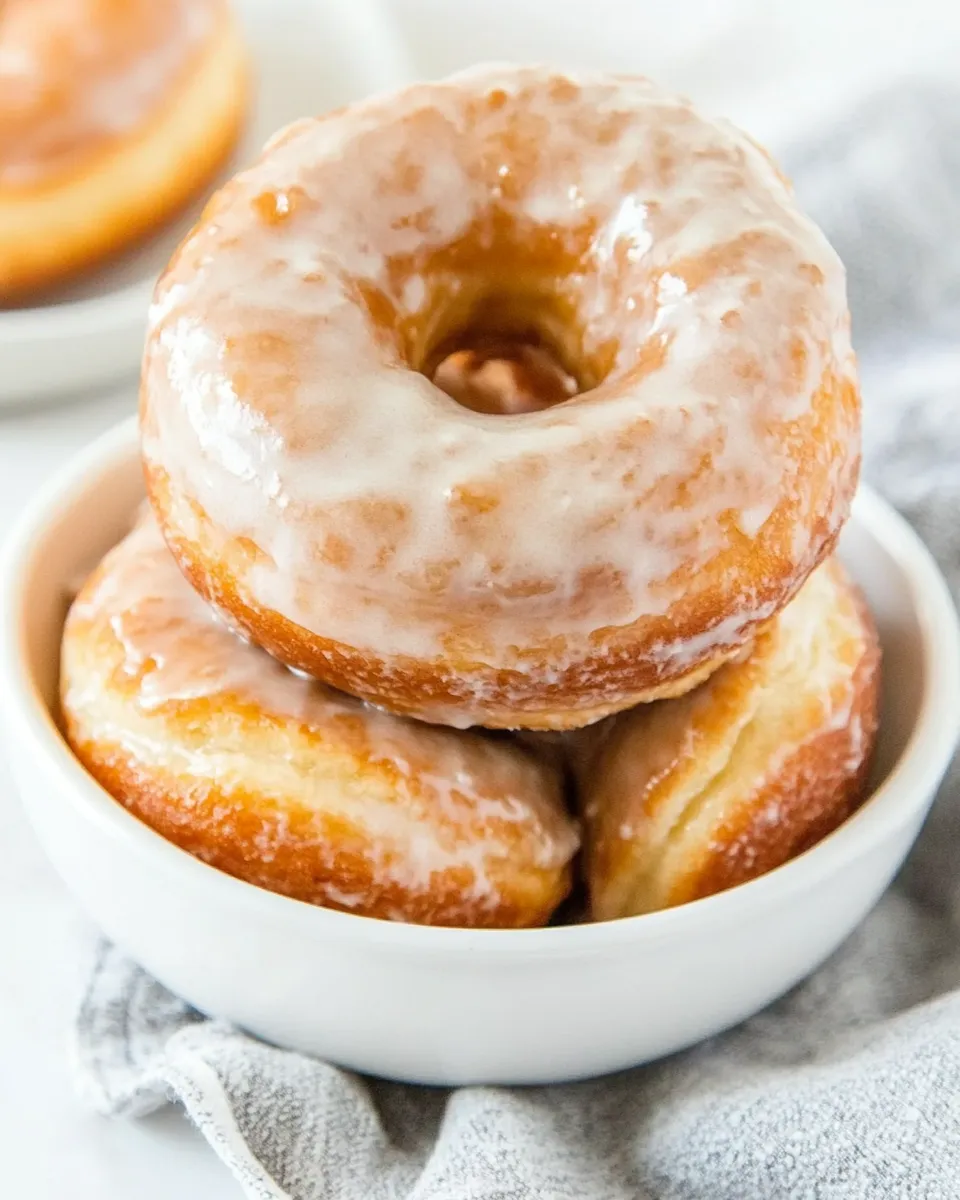
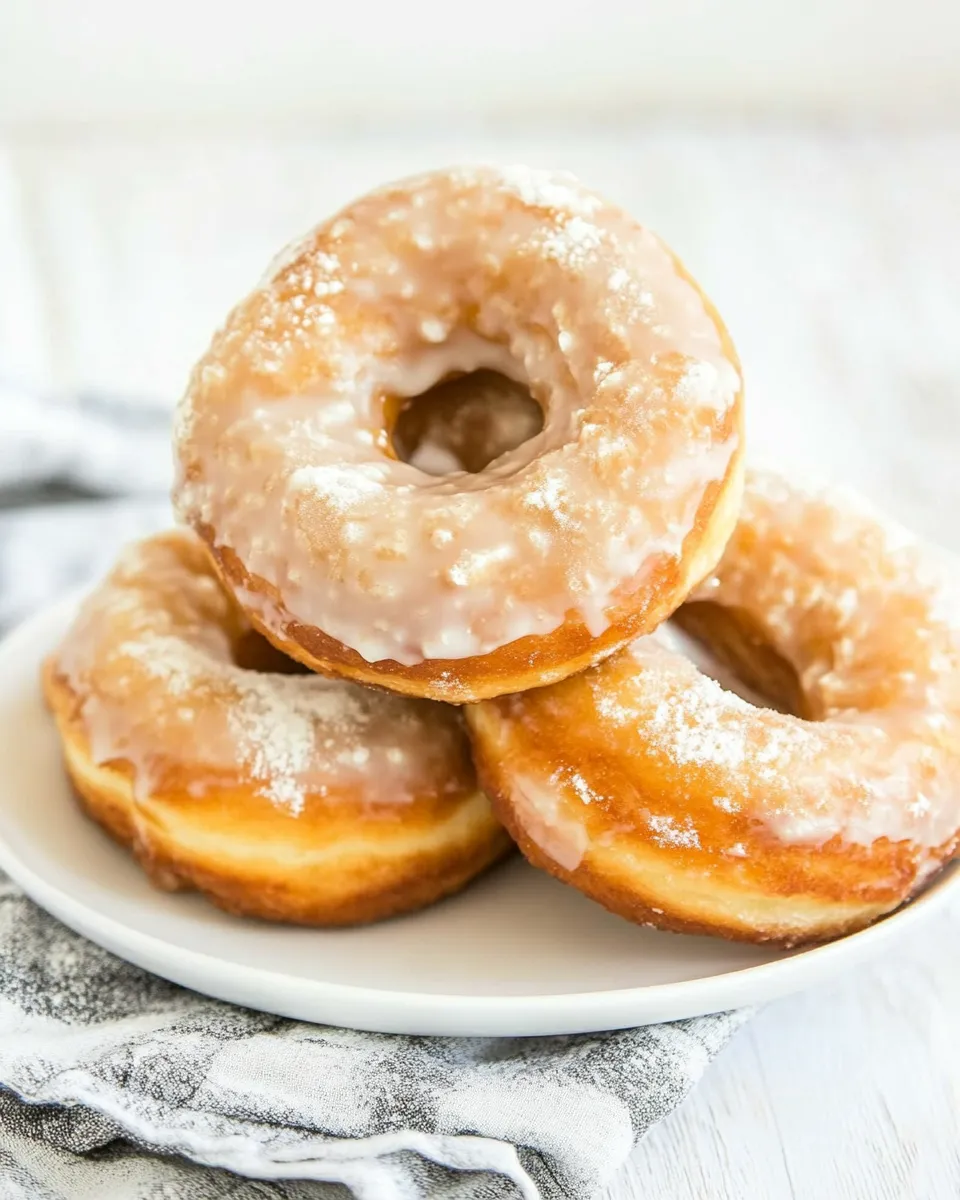
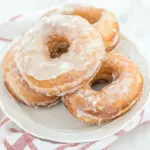
Old Fashioned Donuts
These Old Fashioned Donuts are the kind of thing I make when I want something reliably comforting and a little nostalgic. They’re straightforward: a soft, slightly cake-like dough, fried until golden, and finished with a simple glaze that sets glossy and sweet. No fancy equipment, just a little patience and a good frying thermometer.
I like to keep the process practical. Follow the steps, mind the oil temperature, and don’t rush the rest and cut stage — that 20-minute rest helps the dough relax and keep its shape in the oil. The glaze comes together in moments, and dipping warm donuts gives you a thin, crackly coating that clings to every ridge.
Below you’ll find the ingredient list, a clear step-by-step method from start to finish, troubleshooting tips, and sensible storage and reheating advice. I include small notes for each ingredient and stage so you can understand why each thing matters and how to fix problems if they come up.
Ingredient List

- 4 eggs — provide structure, richness, and help with browning.
- 2 cups sugar — sweetens the dough and contributes to a tender crumb and color.
- ¼ cup shortening, soft — shortens gluten strands for a tender, slightly cake-like texture.
- 1½ cups buttermilk — adds acidity for flavor and reacts with leaveners for lift.
- 7 cups all-purpose flour — the main structure; measure by spooning and leveling for accuracy.
- 4 teaspoons baking powder — primary leavening to lighten the dough.
- 2 teaspoons baking soda — works with the buttermilk for additional lift and browning.
- 1 teaspoon salt — balances sweetness and strengthens dough flavor.
- ½ teaspoon nutmeg — warm, classic spice for aroma and character.
- ½ teaspoon cinnamon — complements nutmeg and adds depth.
- vegetable oil — for frying; neutral-flavored and high smoke point is best.
- 4 tablespoons butter, melted — enriches the glaze for flavor and shine.
- 3 cups powdered sugar — forms the base of the glaze; sift if lumpy.
- 1 teaspoon vanilla extract — rounds and brightens the glaze flavor.
- 4–6 tablespoons half and half — thins the glaze to the right consistency; adjust within the range.
Make Old Fashioned Donuts: A Simple Method
- In a large mixing bowl, beat 4 eggs until combined. Add 2 cups sugar and 1/4 cup shortening (soft) and beat until smooth.
- Stir in 1 1/2 cups buttermilk until incorporated.
- Add 7 cups all-purpose flour, 4 teaspoons baking powder, 2 teaspoons baking soda, 1 teaspoon salt, 1/2 teaspoon nutmeg, and 1/2 teaspoon cinnamon. Mix until a soft, cohesive dough forms (do not overmix).
- Divide the dough into two equal portions. Lightly flour your work surface and turn the dough portions out onto it.
- Lightly flour the top of the dough and roll each portion to about 1/3 inch thickness.
- Allow the rolled dough to rest for 20 minutes.
- While the dough is resting, pour vegetable oil into a high-sided skillet (enough for frying) and heat the oil to 370–380°F.
- After the rest period, cut donuts and donut holes from the rolled dough using a donut cutter.
- When the oil reaches 370–380°F, fry one test donut. Adjust the heat as needed to maintain 370–380°F.
- Using a wide spatula, carefully place as many donuts in the oil as can be turned easily (usually about 3–4 at a time). Turn donuts as they rise to the surface and fry for about 3 minutes, until golden all over. Be careful not to poke or smash them when turning.
- Use a long fork or slotted spoon to lift the donuts from the oil. Drain on a wire rack set over paper towels and allow to cool slightly.
- Whisk together 4 tablespoons melted butter, 3 cups powdered sugar, 1 teaspoon vanilla extract, and 4–6 tablespoons half-and-half until smooth. The glaze should be runny and about the consistency of honey; adjust with the 4–6 tablespoons half-and-half as needed.
- While the donuts are warm (not piping hot), dip them into the glaze or spoon the glaze over them. Return glazed donuts to the wire rack to allow excess glaze to drip and the glaze to set.
Why This Recipe Belongs in Your Rotation
These donuts are a dependable weekday or weekend treat. The combination of baking powder and baking soda with buttermilk gives a balanced lift and a tender crumb that’s sturdier than yeasted donuts, which means they handle glazing and spreading without collapsing. They fry quickly and consistently when you control temperature, so you can batch-produce a tin for the family or a single morning service for guests.
They’re also forgiving. A little variance in shaping won’t ruin them, and the dough keeps well enough to roll and cut in two batches if you need to. Finally, the classic glaze is simple and flexible; adjust thickness for a thin, crackly coat or a thicker sheen depending on preference.
International Equivalents
Donuts are worldwide in spirit. In the U.K. and parts of Europe you’ll find similar fried cakes called doughnuts, or in some regions simply fried cake rings; the spices here (nutmeg and cinnamon) give a flavor profile close to many Central European fried pastries. In North America, these are classic “old-fashioned” raised-style cake donuts — not yeast-raised, but still pillowy.
Measurement notes: this recipe uses cups and teaspoons. If you prefer metric, use a reliable converter or scale for flour (7 cups all-purpose flour is approximately a large amount—if you convert, pay attention to how you measure flours to avoid over-packing).
Before You Start: Equipment
- Large mixing bowl — for beating eggs, sugar, and incorporating wet ingredients.
- Rolling surface & rolling pin — a lightly floured countertop or board and a sturdy pin for even thickness.
- Donut cutter (and small round cutter) — for neat rings and holes; a set with two sizes is ideal.
- High-sided skillet or Dutch oven — enough oil for shallow immersion frying; sides protect against splatter.
- Deep-fry or candy thermometer — essential to hold 370–380°F; temperature control is the single biggest consistency factor.
- Wide spatula and long fork or slotted spoon — to place, turn, and lift donuts safely.
- Wire rack and paper towels — wire rack over towels drains excess oil while preventing sogginess.
- Whisk and bowl for glaze — for smooth, lump-free glaze mixing.
Watch Outs & How to Fix
Oil temperature. Too cool and donuts absorb oil and turn greasy; too hot and they’ll brown on the outside before cooking through. Use a thermometer and test-fry one donut first. If it browns too quickly, lower the heat; if it takes too long to color, raise it.
Dough too sticky or dry. If the dough is tacky to work with, flour your board and hands lightly, but avoid adding flour to the dough itself beyond what’s called for — over-flouring makes dense donuts. If it feels crumbly and won’t come together, a tablespoon or two of buttermilk can bring it back (add sparingly).
Donuts collapsing in oil. That often means they were handled roughly, were too thin, or the oil temperature was fluctuating. Handle with care when turning and keep cuts about the prescribed 1/3 inch thickness and rest time to help the dough relax.
Glaze sagging or not adhering. Dip while donuts are warm, not piping hot, and make sure glaze is the right consistency — runny but not watery. If the glaze is too thin, add a bit more powdered sugar (no amounts given—add slowly to test); if too thick, use a touch more half-and-half, a spoonful at a time.
Substitutions by Diet
Gluten-free: This is a wheat-based recipe. For a gluten-free version, you will need a tested gluten-free flour blend formulated for baking; results and hydration will vary, so follow a tested GF donut recipe when swapping flours.
Dairy-free: Replace buttermilk and half-and-half with dairy-free alternatives and use a dairy-free butter substitute for the glaze if needed. Keep in mind acidity in buttermilk reacts with the baking soda; choose an alternative that provides similar acidity.
Lower-sugar: The dough and glaze call for specific sugars. Reducing sugar will change texture and color. If you must reduce sugar, do so cautiously and test small batches first.
Method to the Madness
Understanding the why helps you bake with confidence. Eggs and sugar beat together create a matrix that traps air and helps with tenderness and rise. Shortening keeps those gluten strands short so the finished donut stays tender. Buttermilk’s acidity reacts with baking soda, boosting lift and adding a subtle tang that balances sweetness.
Resting the rolled dough is not optional if you want tidy rings: it relaxes the gluten created while rolling, so shapes don’t spring back or become irregular in the oil. Maintaining oil at 370–380°F ensures a quick crust forms, sealing in moisture while giving a golden color.
The glaze recipe is intentionally flexible: 4–6 tablespoons half-and-half is a range to fit your texture preference. Start with less, then add liquid to reach the honey-like consistency the recipe describes for a clean, glossy coating.
How to Store & Reheat
Store glazed donuts at room temperature on a plate covered loosely with foil or in an airtight container for up to 1–2 days for best texture. If you need to keep them longer, refrigerate; note that refrigeration can affect the glaze and chew.
To reheat, warm briefly in a 300°F oven for 5–8 minutes just to take the chill off and revive a bit of crispness around the edges. Microwaving will soften them quickly but can make the glaze tacky—use short bursts and a low power setting if you must.
Ask & Learn
Commonly asked questions
Q: Can I freeze these? A: Yes, freeze unglazed donuts in a single layer on a tray, then transfer to a sealed container. Thaw and glaze when ready to serve. Freezing glazed donuts can make the glaze weep, so I recommend glazing after thawing.
Q: Why both baking powder and baking soda? A: They work together here—baking powder provides reliable mechanical lift, while baking soda reacts with buttermilk for extra lift and browning.
Q: My donuts are dense—what went wrong? A: Common causes are overmixing the dough, packing too much flour when measuring, or frying at too low a temperature so they absorb oil. Double-check mixing and thermometer readings.
Serve & Enjoy
Serve these Old Fashioned Donuts warm, with coffee, tea, or cold milk. They make a great weekend treat or a thoughtful offering at a casual brunch. If you’re hosting, keep donuts on a wire rack with a shallow tray underneath to catch drips and allow guests to choose their favorites.
When you share homemade donuts, expect compliments—and maybe a request for the recipe. Keep this method on hand; it’s one I turn to when I want a dependable, comforting baked-fried treat that reminds me of childhood bake sales and late-morning kitchen warmth.
Old Fashioned Donuts
Ingredients
Ingredients
- 4 eggs
- 2 cupssugar
- 1/4 cupshortening soft
- 1 1/2 cupsbuttermilk
- 7 cupsall-purpose flour
- 4 teaspoonsbaking powder
- 2 teaspoonsbaking soda
- 1 teaspoonsalt
- 1/2 teaspoonnutmeg
- 1/2 teaspooncinnamon
- vegetable oil
- 4 tablespoonsbutter melted
- 3 cupspowdered sugar
- 1 teaspoonvanilla extract
- 4-6 tablespoonshalf and half
Instructions
Instructions
- In a large mixing bowl, beat 4 eggs until combined. Add 2 cups sugar and 1/4 cup shortening (soft) and beat until smooth.
- Stir in 1 1/2 cups buttermilk until incorporated.
- Add 7 cups all-purpose flour, 4 teaspoons baking powder, 2 teaspoons baking soda, 1 teaspoon salt, 1/2 teaspoon nutmeg, and 1/2 teaspoon cinnamon. Mix until a soft, cohesive dough forms (do not overmix).
- Divide the dough into two equal portions. Lightly flour your work surface and turn the dough portions out onto it.
- Lightly flour the top of the dough and roll each portion to about 1/3 inch thickness.
- Allow the rolled dough to rest for 20 minutes.
- While the dough is resting, pour vegetable oil into a high-sided skillet (enough for frying) and heat the oil to 370–380°F.
- After the rest period, cut donuts and donut holes from the rolled dough using a donut cutter.
- When the oil reaches 370–380°F, fry one test donut. Adjust the heat as needed to maintain 370–380°F.
- Using a wide spatula, carefully place as many donuts in the oil as can be turned easily (usually about 3–4 at a time). Turn donuts as they rise to the surface and fry for about 3 minutes, until golden all over. Be careful not to poke or smash them when turning.
- Use a long fork or slotted spoon to lift the donuts from the oil. Drain on a wire rack set over paper towels and allow to cool slightly.
- Whisk together 4 tablespoons melted butter, 3 cups powdered sugar, 1 teaspoon vanilla extract, and 4–6 tablespoons half-and-half until smooth. The glaze should be runny and about the consistency of honey; adjust with the 4–6 tablespoons half-and-half as needed.
- While the donuts are warm (not piping hot), dip them into the glaze or spoon the glaze over them. Return glazed donuts to the wire rack to allow excess glaze to drip and the glaze to set.
Equipment
- Large Mixing Bowl
- Donut Cutter
- work surface
- high-sided skillet
- wide spatula
- long fork or slotted spoon
- Wire Rack
- Paper Towels
- Whisk
Notes
Donut holes.
Fry them in the same manner as the regular donuts, just cut down the fry time by about half.
Prep ahead of time.
Make the dough, cover with plastic, and chill in the fridge for 8-12 hours.
Store.
Keep in an airtight container at room temperature for 1-2 days. To freeze, place the individual donuts into a sandwich bag or wrap them with plastic wrap and place them all in a freezer Ziploc. Freeze for up to 3 months.