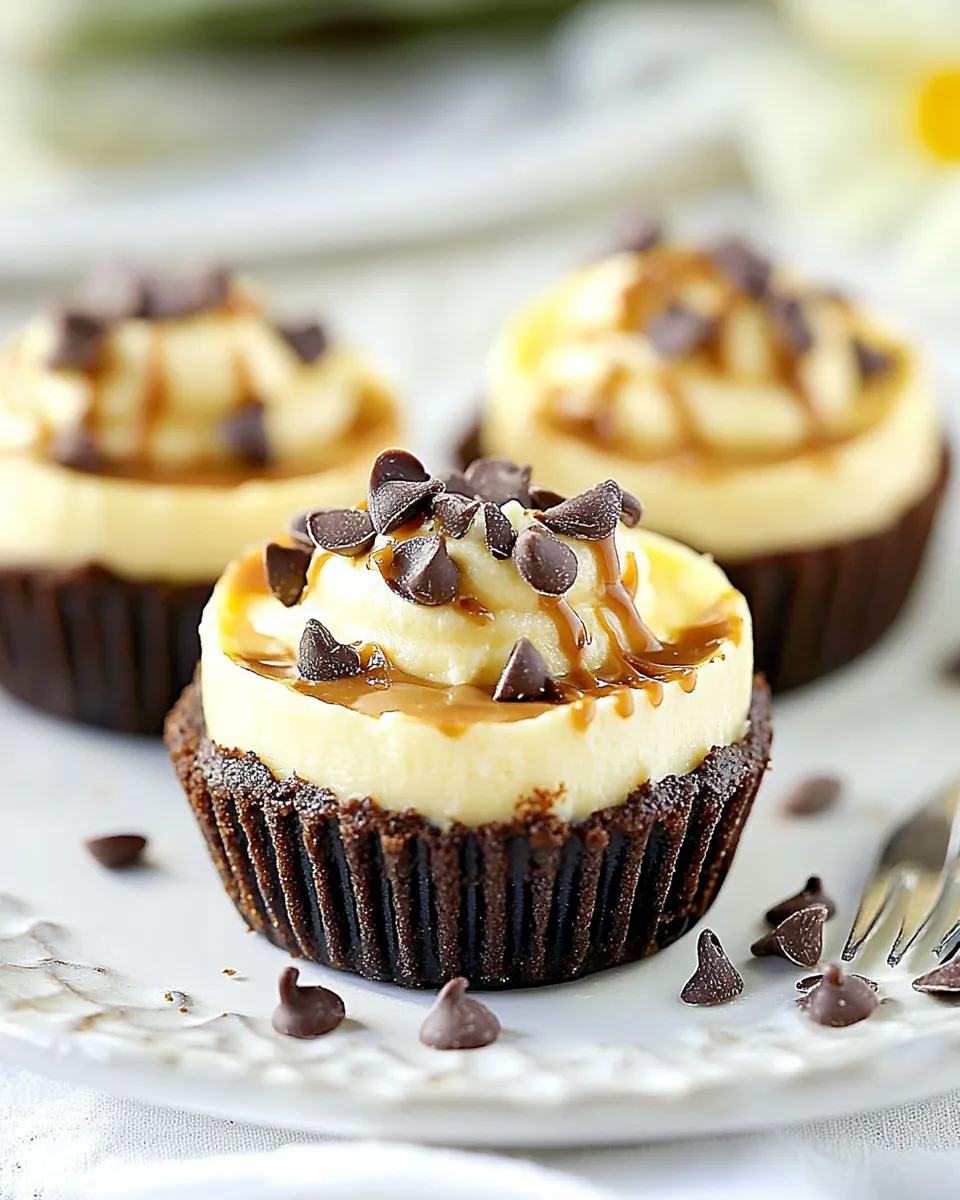
Mini No Bake Chocolate Peanut Butter Cheesecakes
These mini cheesecakes are the kind of thing I make when I want an impressive dessert without babysitting the oven. They come together fast, rely on pantry favorites, and still feel indulgent: a crunchy cereal crust, a tangy vanilla cheesecake filling, a warm peanut butter drizzle, and a scatter of mini chocolate chips on top. No complicated folding, no tempering chocolate—just straightforward steps that produce consistent results.
I like that they’re portion-controlled. Twelve little cups mean you can hand one to a neighbor, put a few in the fridge for hungry kids, and still save some for dessert. The recipe is sturdy, forgiving, and very adaptable if you want to swap flavors or tweak the sweetness. If you follow the order of steps and respect the chilling time, these will set up perfectly every time.
Below you’ll find the ingredients broken down with quick notes, the exact step-by-step directions, and practical tips from the test kitchen so you don’t have to experiment on the day you need them. Read through once, assemble, and enjoy the payoff.
Ingredients at a Glance

- 2 cups Reese’s Puffs Cereal — the base for the crust; toasts nicely and gives peanut-butter-chocolate flavor without extra mix-ins.
- pinch salt — balances the sweetness and enhances the cereal flavor; a little goes a long way.
- 2 tbsp butter, melted — binds the cereal crumbs so the crust compresses and holds together once chilled and baked briefly.
- 8 oz. cream cheese, softened — the creamy body of the filling; bring to room temperature for a smooth, lump-free mix.
- 1/2 vanilla bean pod, seeds of (or 1 tsp vanilla extract) — vanilla bean adds flecks and pure flavor; extract is an easy swap if you don’t have a pod.
- 1 vanilla instant pudding mix, 3.4 oz package — adds body and stability to the no-bake filling so it sets into a cheesecake-like texture.
- 1 1/4 cup milk, cold — hydrates the pudding mix; cold milk helps the filling thicken correctly when mixed slowly.
- 2 tbsp peanut butter, melted for 20 seconds in microwave — warmed slightly to thin it for drizzling; use smooth for an even drizzle.
- 1/4 cup mini chocolate chips — finishing touch; sprinkle while the peanut butter drizzle is still tacky so they adhere.
Mini No Bake Chocolate Peanut Butter Cheesecakes: How It’s Done
- Preheat the oven to 350°F. Line a 12-cup muffin tin with paper liners.
- Place 2 cups Reese’s Puffs cereal and a pinch of salt in a food processor and pulse until the cereal is broken into crumbs.
- Add 2 tablespoons melted butter to the cereal crumbs and pulse a few times until the crumbs are evenly coated and hold together when pressed.
- Divide the crumb mixture evenly among the 12 liners and press firmly into the bottom of each liner to form a compact crust.
- Bake the crusts at 350°F for 5 minutes. Remove from the oven and let the crusts cool to room temperature before filling.
- While the crusts cool, beat 8 oz softened cream cheese with the seeds from 1/2 vanilla bean pod (or 1 teaspoon vanilla extract) until smooth and creamy.
- Add the 3.4 oz package of vanilla instant pudding mix to the cream cheese and beat to combine. With the mixer on low, slowly add 1 1/4 cups cold milk and continue beating until the filling is smooth and fully combined.
- Divide the filling evenly among the cooled crusts and smooth the tops.
- Refrigerate the mini cheesecakes for at least 1 hour, or until set.
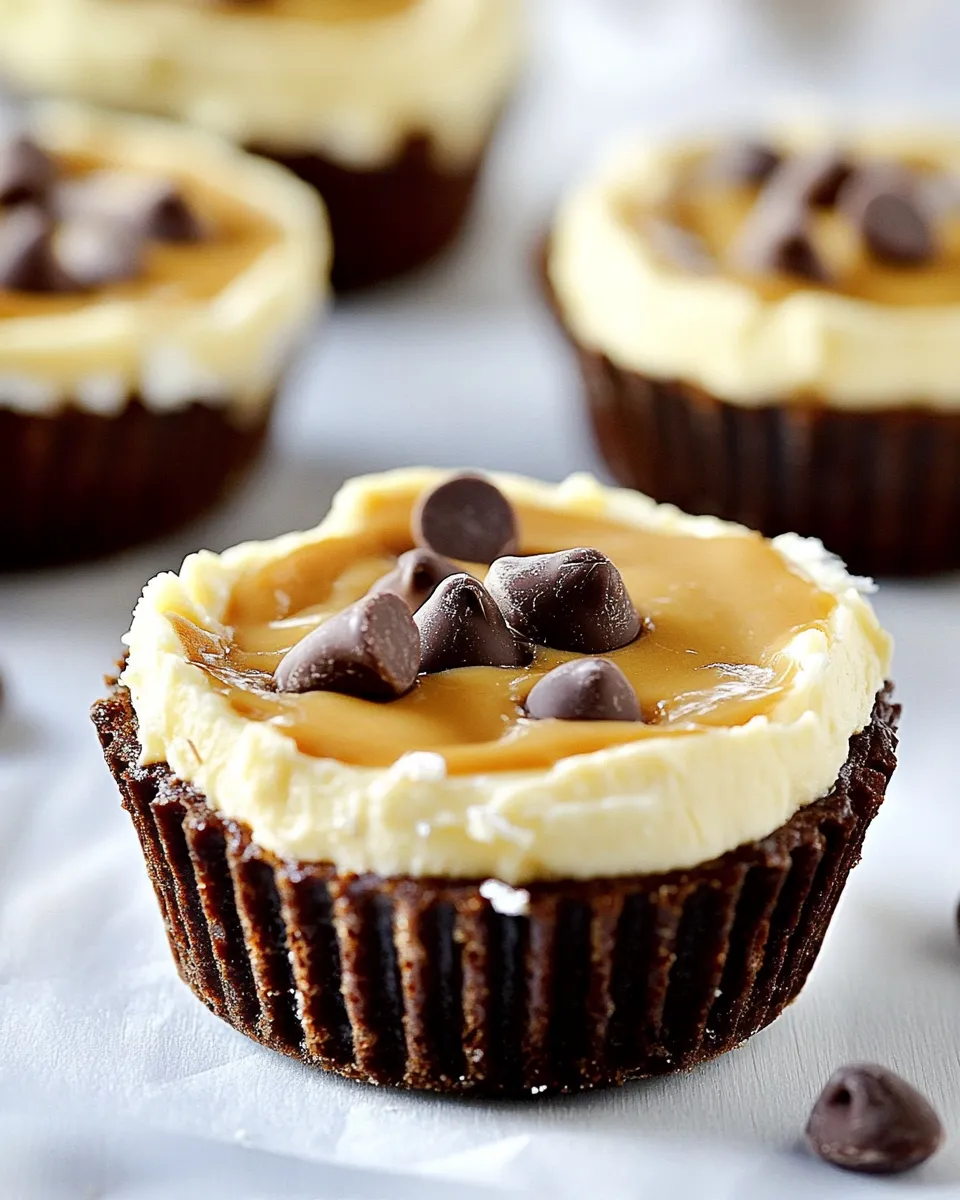
- Microwave 2 tablespoons peanut butter for 20 seconds, stir until smooth, then drizzle the melted peanut butter over each cheesecake.
- Sprinkle 1/4 cup mini chocolate chips over the cheesecakes and serve.
Why It Works Every Time
This recipe balances texture and chemistry simply and reliably. The cereal-crumb crust contains sugar and oils from the cereal itself; a short bake firms it, helping the crumbs stick together and avoid a soggy base. The butter acts as a binder; press it firmly and you’ll get clean little cups that stay intact when you serve them.
The filling uses instant vanilla pudding mix, which contains stabilizers that thicken quickly when combined with cold milk. Mixed into softened cream cheese, the pudding gives structure without the need for gelatin or whipped cream. Chilling is the final “set” step—an hour is the minimum to let the filling firm up to a spoonable consistency.
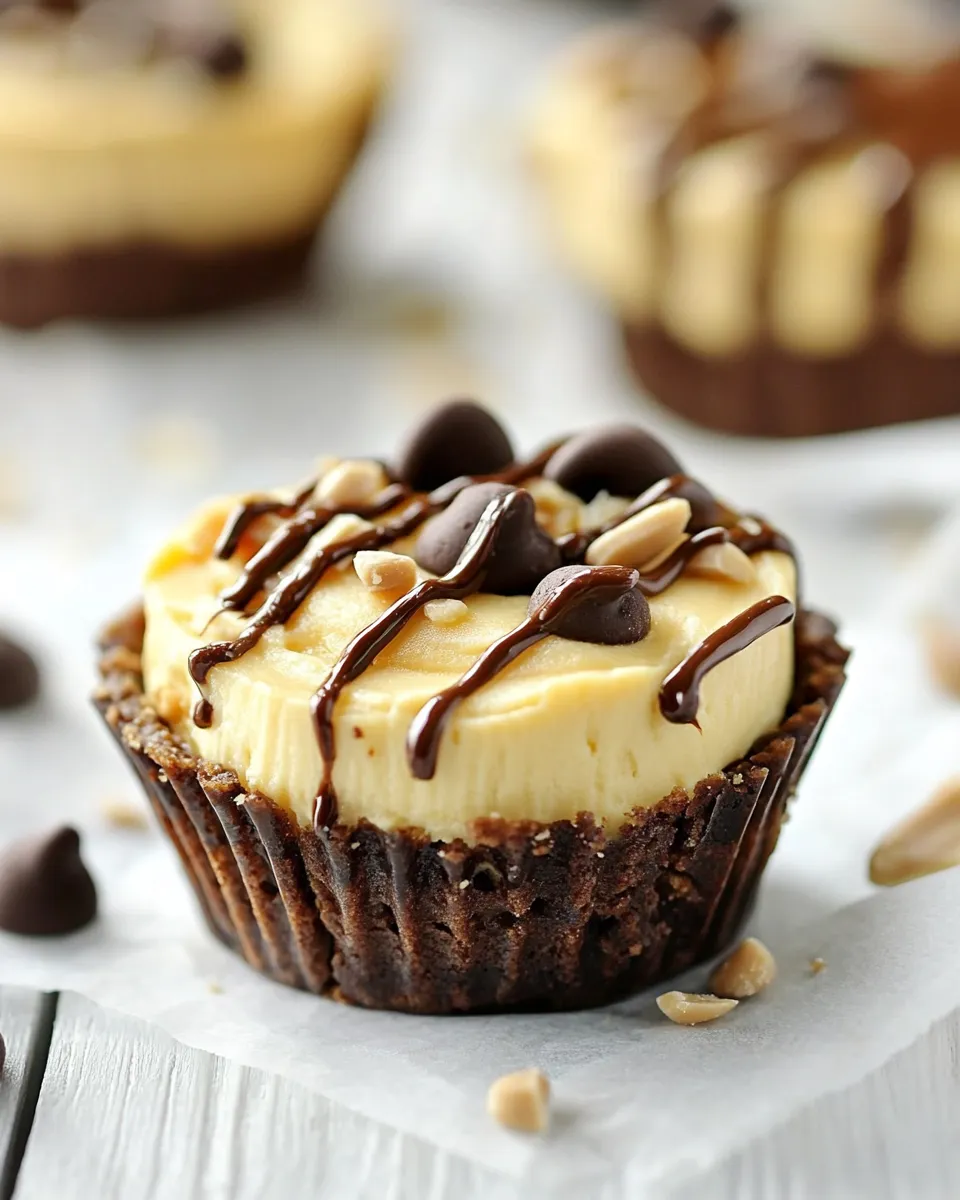
Finally, the warmed peanut butter provides an immediate visual and flavor contrast. Because it’s only lightly warmed, it remains drizzly and glossy rather than hardening into a brittle shell. Mini chocolate chips scattered on top add both texture and visual polish.
Flavor-Forward Alternatives
- Swap the cereal: Use chocolate puff cereal or a peanut-butter-flavored cracker crumble for a denser crust. Keep the same quantity and butter to maintain binding.
- Chocolate filling: Stir 1–2 tablespoons unsweetened cocoa powder into the filling before adding the milk for a chocolatey variation. Adjust to taste.
- Nutty twist: Replace 1 tablespoon of the melted butter with almond or hazelnut butter to layer nut flavors into the crust.
- Fancy toppings: Add chopped roasted peanuts, a sprinkle of flaky sea salt, or a small swirl of chocolate ganache for an elevated finish.
Hardware & Gadgets
- 12-cup muffin tin — holds the liners and shapes the mini cheesecakes.
- Paper liners — make removal and portioning clean and easy.
- Food processor — the quickest way to turn cereal into uniform crumbs; a sealed bag and rolling pin can substitute if needed.
- Hand mixer or stand mixer — ensures the cream cheese and pudding mix become completely smooth without overworking them.
- Measuring cups and spoons — for accurate ratios; no-guess baking works better.
- Microwave-safe bowl or ramekin — to melt the peanut butter quickly.
What Not to Do
- Don’t fill warm crusts: If the crusts are still hot, the filling can become thin or melt the cream cheese. Let them cool to room temperature as directed.
- Don’t skip softening the cream cheese: Cold cream cheese leads to lumps and a grainy texture. Let it sit on the counter until fully softened.
- Don’t pour the milk too fast: Adding the cold milk slowly while the mixer is on low keeps the pudding from clumping and ensures a smooth filling.
- Don’t overbake the crusts: Five minutes at 350°F is enough. Longer will dry the crust and can make it crumbly instead of cohesive.
Seasonal Spins
These minis adapt beautifully to holidays and seasons. In fall, stir 1/2 teaspoon cinnamon and a pinch of nutmeg into the crust crumbs for warming spice. For winter holidays, top with crushed candied ginger or swap chocolate chips for peppermint chips. Spring and summer call for fresh fruit—add a few raspberries or sliced strawberries on top right before serving for a bright contrast.
For parties, make a small topping station: melted peanut butter, mini chips, chopped nuts, and sea salt let guests dress their own. It’s an easy way to make the same base feel festive and tailored to different tastes.
Notes from the Test Kitchen
We tested this recipe across several cereal brands and found Reese’s Puffs provides the most authentic peanut-butter-and-chocolate kick because it’s already flavored. If you use a neutral cereal, consider adding a teaspoon of powdered peanut butter to the crumbs to reinforce the flavor.
When pressing the crust into the liners, use the back of a spoon or a small measuring cup to get an even, compact layer. This helps the crust hold together when you lift the cheesecakes out of the liner. If you plan to unmold them, chill them longer—an extra hour helps the filling firm up enough to release cleanly.
Because the filling relies on instant pudding, it will be slightly softer than a baked cheesecake but still pleasantly dense. If you prefer a firmer texture, chill the minis overnight; they’ll tighten up nicely without losing creaminess.
Refrigerate, Freeze, Reheat
Refrigerate: Store in an airtight container in the refrigerator for up to 4 days. Keep the peanut butter drizzle and mini chips on top; they’ll stay fresh and visually appealing for a couple of days.
Freeze: You can freeze the filled, chilled cheesecakes (without the peanut butter drizzle and chocolate chips) for up to 1 month. Wrap the muffin tin or arrange them on a tray, flash-freeze until solid, then transfer to an airtight container. Thaw in the fridge overnight before finishing with a warmed peanut butter drizzle and chips.
Reheat: These are best served chilled. If you want the peanut butter drizzle a bit warmed for serving, microwave it again for 10–15 seconds and stir until pourable. Do not microwave the whole cheesecake—you’ll lose texture and risk melting the filling.
Questions People Ask
- Can I make these without a food processor? Yes. Place the cereal in a sealed plastic bag and crush with a rolling pin until fine. Work in small batches for even crumbs.
- Can I use natural peanut butter? Natural peanut butter works, but it can separate and be grainier when melted. Stir well after microwaving and test the drizzle thickness before topping.
- What if my filling is too runny? Ensure the cream cheese was softened, but not melted, and that you added the cold milk slowly. If it’s still thin, chill longer—pudding-based fillings will firm as they cool.
- Can I double the recipe? Yes. Double everything and you’ll get 24 mini cheesecakes. Work in batches when pulsing cereal and scooping filling for consistency.
Save & Share
These mini no-bake cheesecakes are a reliable crowd-pleaser and a great last-minute dessert when you want something that looks deliberate but comes together fast. Save the recipe, bookmark the post, and keep a box of Reese’s Puffs and a packet of instant pudding in your pantry for emergency dinner guests.
If you try them, take a photo and share it with someone who loves peanut butter and chocolate. Small desserts like these travel well to potlucks and work events. And if you tweak a topping or swap a cereal, leave a note—I’d love to know what worked for you.
Mini No Bake Chocolate Peanut Butter Cheesecakes
Ingredients
Ingredients
- 2 cupsReese's Puffs Cereal
- pinchsalt
- 2 tbspbutter melted
- 8 oz.cream cheese softened
- 1/2 vanilla bean pod seeds of (or 1 tsp vanilla extract)
- 1 vanilla instant pudding mix 3.4 oz package
- 1 1/4 cupmilk cold
- 2 tbsppeanut butter melted for 20 seconds in microwave
- 1/4 cupmini chocolate chips
Instructions
Instructions
- Preheat the oven to 350°F. Line a 12-cup muffin tin with paper liners.
- Place 2 cups Reese's Puffs cereal and a pinch of salt in a food processor and pulse until the cereal is broken into crumbs.
- Add 2 tablespoons melted butter to the cereal crumbs and pulse a few times until the crumbs are evenly coated and hold together when pressed.
- Divide the crumb mixture evenly among the 12 liners and press firmly into the bottom of each liner to form a compact crust.
- Bake the crusts at 350°F for 5 minutes. Remove from the oven and let the crusts cool to room temperature before filling.
- While the crusts cool, beat 8 oz softened cream cheese with the seeds from 1/2 vanilla bean pod (or 1 teaspoon vanilla extract) until smooth and creamy.
- Add the 3.4 oz package of vanilla instant pudding mix to the cream cheese and beat to combine. With the mixer on low, slowly add 1 1/4 cups cold milk and continue beating until the filling is smooth and fully combined.
- Divide the filling evenly among the cooled crusts and smooth the tops.
- Refrigerate the mini cheesecakes for at least 1 hour, or until set.
- Microwave 2 tablespoons peanut butter for 20 seconds, stir until smooth, then drizzle the melted peanut butter over each cheesecake.
- Sprinkle 1/4 cup mini chocolate chips over the cheesecakes and serve.
Equipment
- Oven
- 12-cup muffin tin
- Paper liners
- Food Processor
- Mixer
- Microwave
Notes
If you don't have a vanilla bean, substitute with 1 teaspoon vanilla extract (as noted in ingredient).