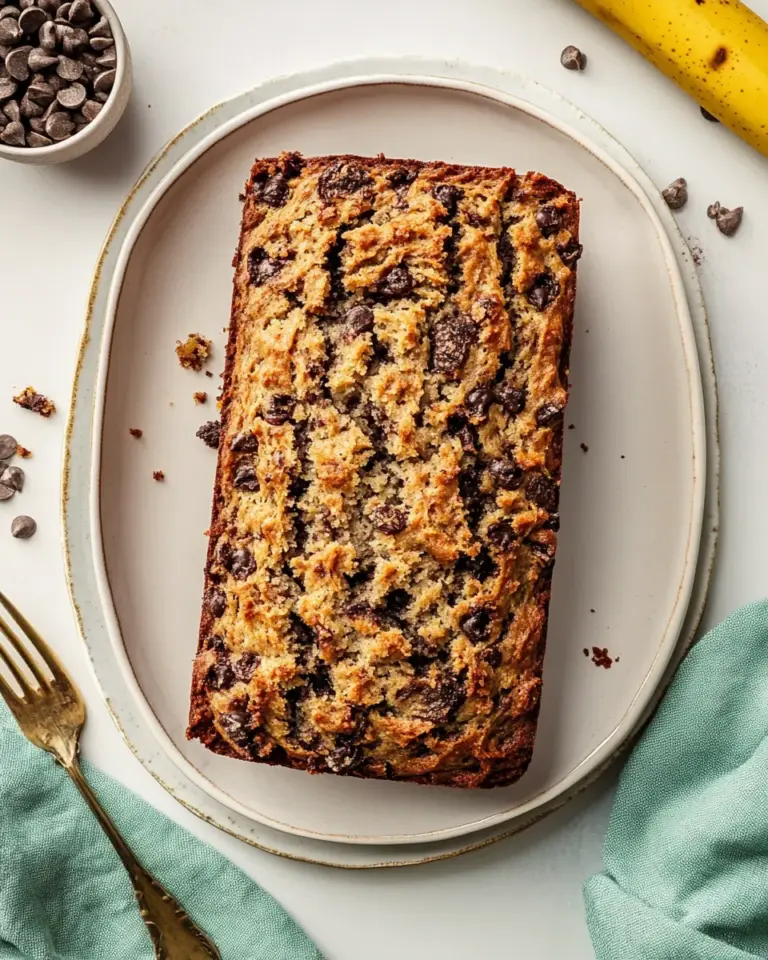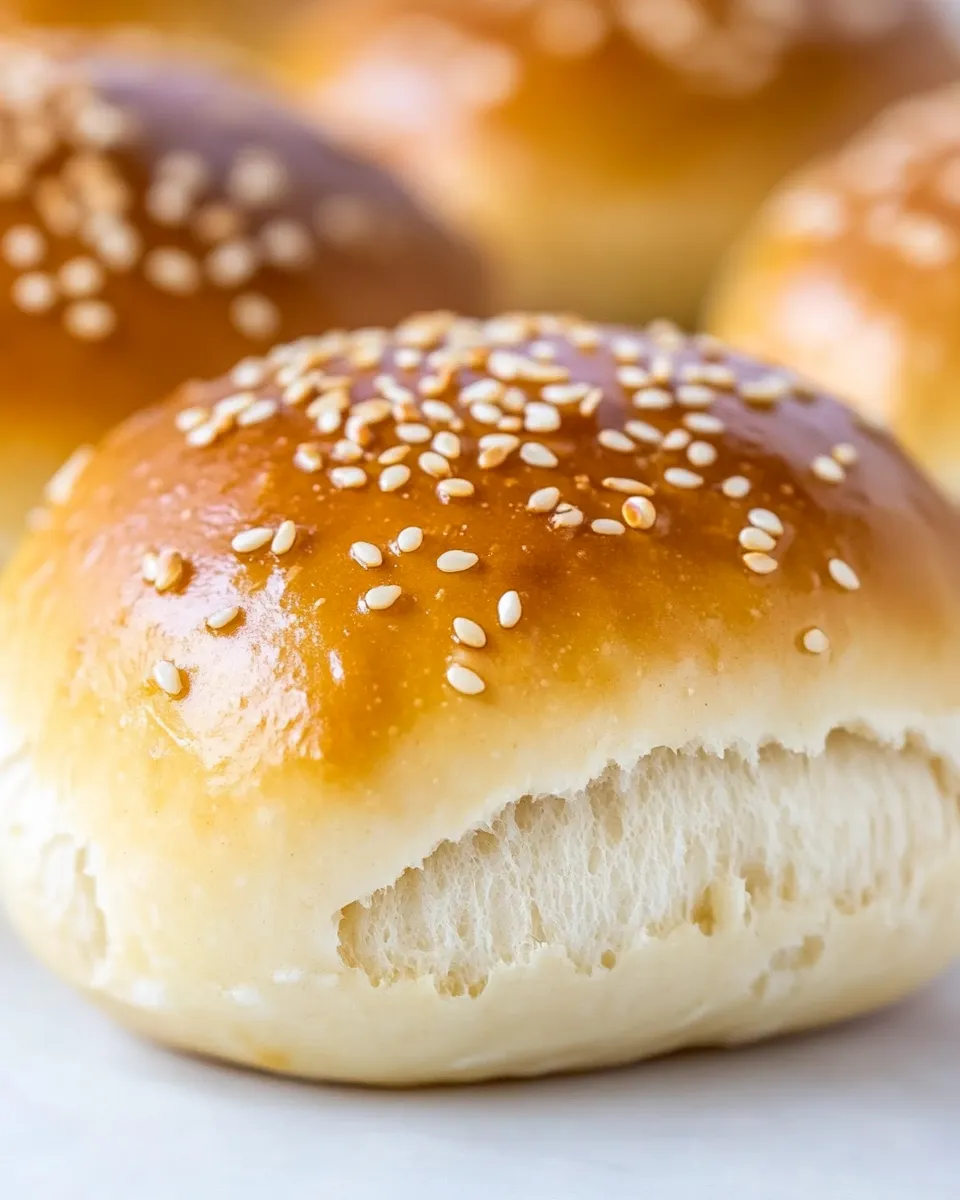
Keto Buns
I make these Keto Buns on busy weeknights when I want a real sandwich that won’t derail a low‑carb day. They come together with a handful of pantry staples, and the texture—chewy, slightly pillowy, with a crisp exterior—surprises people who assume “keto” equals cardboard. There’s a rhythm to this recipe: melt, mix, knead, bake. It’s forgiving and quick.
These buns are basically a cheese-and-almond-flour dough. They rely on melted mozzarella and cream cheese for stretch and binding, almond flour for bulk and a tender crumb, and a little baking powder and eggs to give lift. You don’t need special skills—just a microwave or stovetop, a processor, and a few minutes of hands-on time.
I’ll walk you through shopping notes, an exact step-by-step bake, sensible swaps, common mistakes, and how to store and reheat them so they stay as good as possible. Use this as your go-to when you want buns for burgers, breakfast sandwiches, or sliders without the carbs.
Your Shopping Guide

Buy a block of mozzarella that you can shred if possible. Freshly shredded melts cleaner than some pre-shredded mixes that contain anti-caking agents. If your store only has pre-shredded, it still works—just expect a hair more chewing when you knead.
For almond flour, choose a finely ground version labeled “superfine” or “blanched” if you can. Coarse almond meal will make the crumb grainier and can affect how the dough holds together. Baking powder should be fresh—old baking powder loses lift. Eggs should be room temperature if you can plan ahead; they incorporate more evenly and help with the dough’s cohesion.
Cream cheese should be full-fat and softened for smooth melting. If you’re low on time, buy a tub of pre-softened cream cheese; otherwise soften a block on the counter for 20–30 minutes. These small buying choices (shred vs pre-shred, fine almond flour vs meal) make the difference between “good” and “really good.”
Ingredients
- 3 cups shredded mozzarella cheese — the primary binder and source of stretch; melt thoroughly for a cohesive dough.
- 2 ounces cream cheese — adds creaminess, helps the mozzarella melt smoothly, and keeps the crumb tender.
- 1 3/4 cups almond flour — provides structure and body; use finely ground for best texture.
- 1 tablespoon baking powder — gives lift and keeps the buns from being dense; make sure it’s fresh.
- 2 large eggs — bind and enrich the dough; room temperature eggs mix in more evenly.
Keto Buns Cooking Guide
- Preheat the oven to 200°C / 400°F. Line a large baking tray with parchment paper and set it on the middle rack.
- In a microwave-safe bowl, combine the 3 cups shredded mozzarella and 2 ounces cream cheese. Microwave in 20-second intervals, stirring between each interval, until the cheeses are mostly melted.
- Whisk the melted cheeses until smooth and combined. Let the mixture cool slightly (about 1–2 minutes) so it is warm but not piping hot.
- Transfer the warm cheese mixture to a food processor. Add 1 3/4 cups almond flour, 1 tablespoon baking powder, and the 2 large eggs. Pulse (or process) until the mixture forms a thick, cohesive dough, stopping to scrape down the sides as needed.
- Lightly dust a work surface with a little almond flour. Transfer the dough onto the surface. With slightly damp hands, knead the dough several times until it is smooth and holds together.
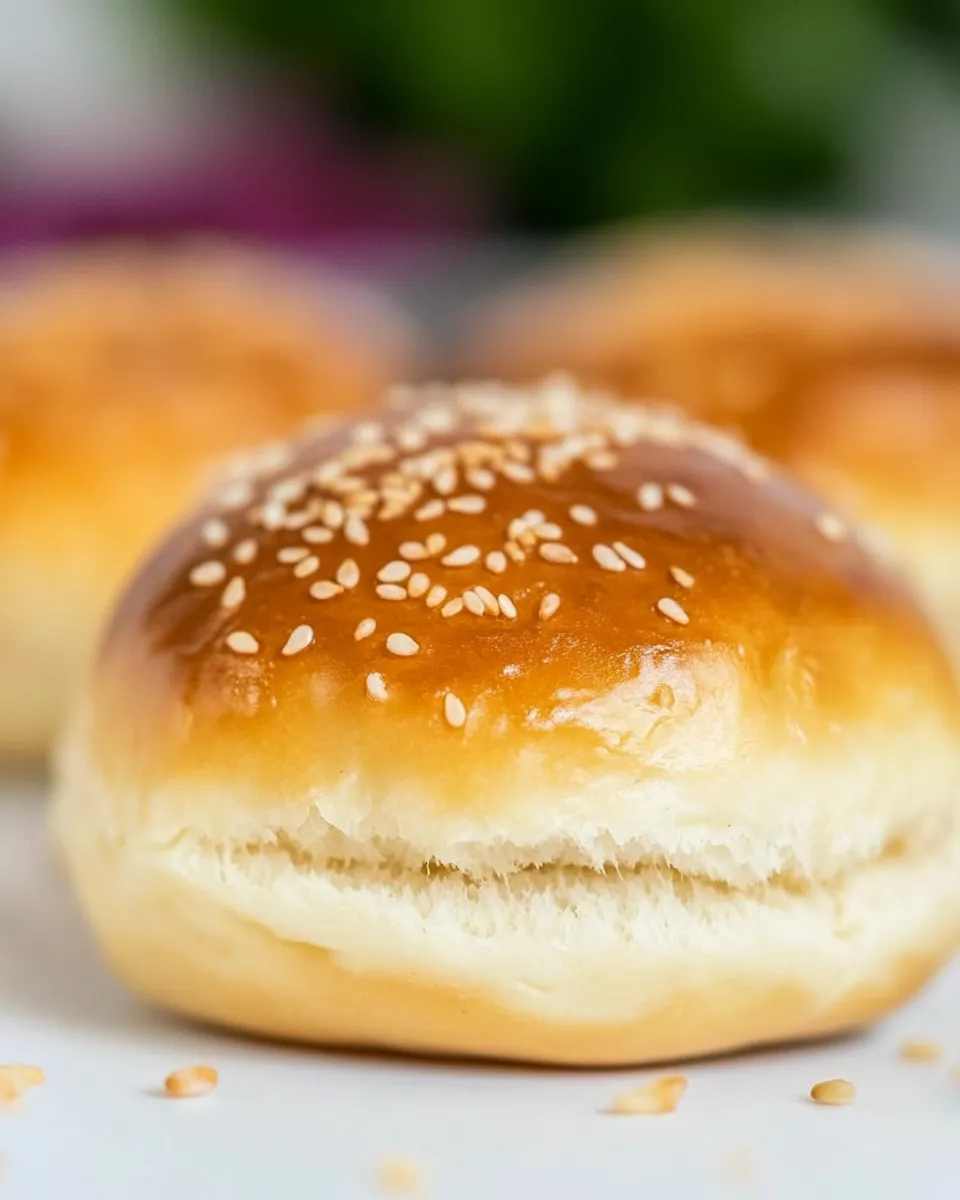
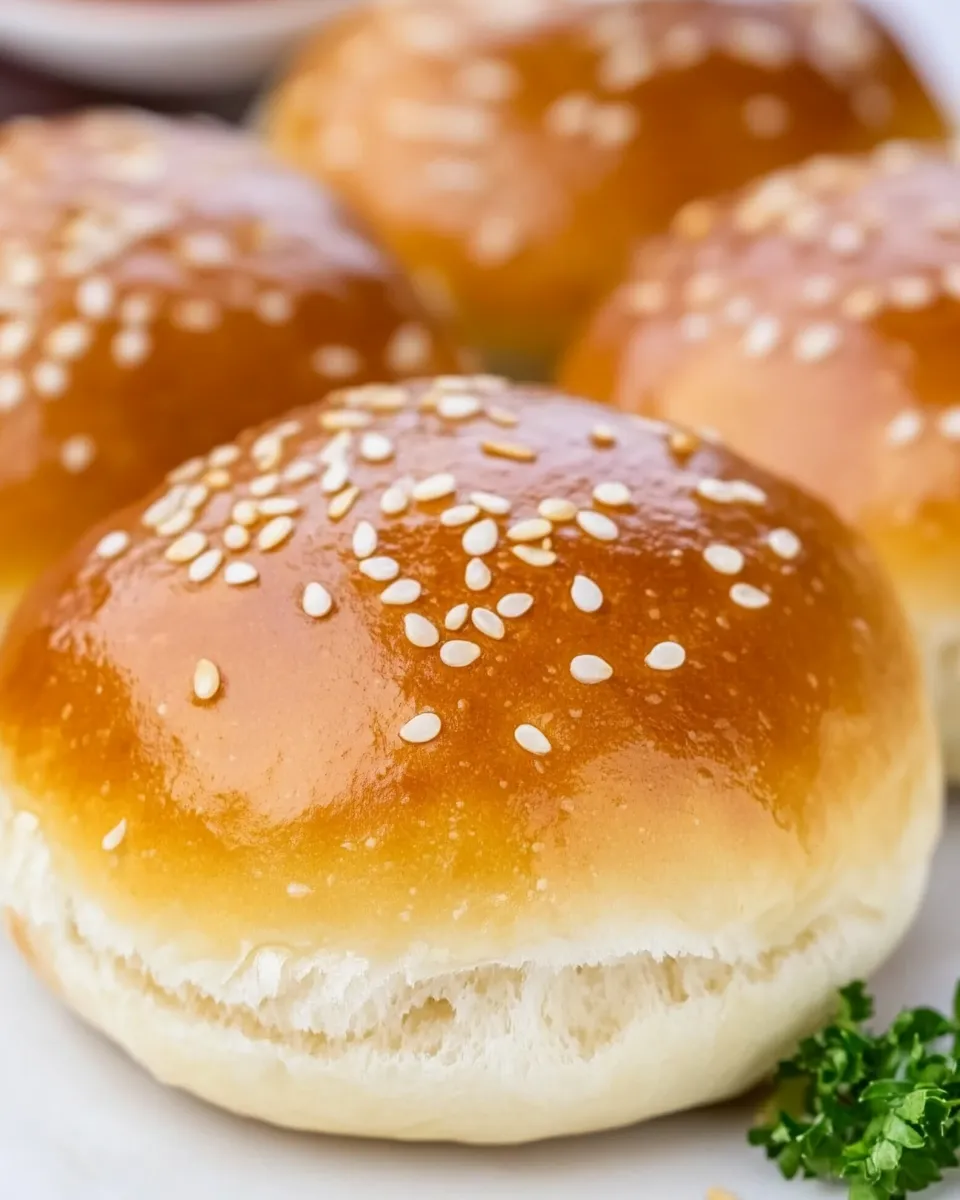
- Divide the dough into 6 equal portions. Roll each portion into a ball, place them on the prepared tray, and gently press each ball into a bun shape about 1/2–3/4 inch thick.
- Bake the buns for 14–17 minutes, or until the tops are golden brown.
- Remove the tray from the oven and let the buns cool on the tray for 5 minutes before slicing in half and serving.
Why Cooks Rave About It
These buns deliver a real bread-like experience without the carbs. The melted cheese gives them chew and structure; almond flour contributes a tender crumb and nutty flavor. They’re quick—about 25 minutes from oven-on to cooling—so they fit into busy routines. Cooks who want sandwiches, sliders, or burger buns without gluten or grains find these hitting the right notes.
They’re also extremely forgiving. A slightly different oven temperature, a change in almond flour brand, or a small timing tweak rarely ruins them. That reliability makes them a favorite for meal prep and for anyone new to low-carb baking.
Swap Guide
- Mozzarella options — low-moisture or whole-milk mozzarella both work; low-moisture yields a drier, sturdier dough.
- Almond flour alternatives — finely ground almond meal is the closest swap, but expect a coarser texture; reduce any added liquid slightly if you use coconut flour (coconut flour absorbs a lot more moisture, so treat it with caution).
- Cream cheese — full-fat is best; light cream cheese can be used, but buns may be slightly drier.
- Eggs — there’s no reliable vegan swap here because eggs are key for structure; for strict dietary swaps, expect to experiment.
Must-Have Equipment
Keep it simple: a microwave-safe bowl (or a double boiler if you prefer stovetop melting), a food processor or strong hand mixer with a paddle, parchment-lined baking tray, and a kitchen scale or reliable measuring cups. Damp hands and a bench scraper help shape the buns. A microwave makes melting fast, but a double boiler is a fine alternative if you want more control.
Mistakes That Ruin Keto Buns
These are the common missteps I see and how to avoid them.
- Not melting the cheese enough — if the cheese isn’t well melted, you’ll end up with clumps and a dough that won’t come together smoothly. Microwave in short bursts and stir until mostly melted.
- Using coarse almond meal — a coarse grind creates a gritty texture. Use finely ground or blanched almond flour for the best tender crumb.
- Overbaking — these buns brown quickly. Watch the oven toward the end of the 14–17 minute window; overbaking makes them dry.
- Skipping the cooling time — slicing too hot can cause them to crumble. Five minutes on the tray is the minimum to settle the crumb.
Warm & Cool Weather Spins
In warm climates or hot kitchens, the melted cheese can be more fluid and sticky to handle. Keep your hands slightly damp and dust the surface with almond flour to make handling easier. For cooler kitchens, the dough firms faster; work quickly or warm the dough briefly in a low oven (or in your hands) to soften before shaping.
Serve warm with melting cheese or let fully cool and use as hamburger buns. For summer picnics, make smaller slider-sized buns and keep them chilled; reheat briefly before serving to restore pliability. In winter, a quick toast on a griddle gives a fantastic, warm crust.
Pro Tips & Notes
Texture & Handling
Keep a dish of water nearby to wet your hands between shaping rounds. Slightly damp hands prevent the dough from sticking while allowing you to smooth each bun. If the dough gets too sticky, chill it for 5–10 minutes; it firms up and becomes more manageable.
Flavor & Serving
Split and toast the buns inside a cast-iron skillet or under a broiler for a minute to get golden edges before assembling sandwiches. These buns pair well with burger toppings, deli meats, smoky roasted vegetables, or a fried egg for breakfast.
Notes on Ingredients
Because the recipe depends heavily on cheese, its moisture content affects the dough. If your mozzarella is particularly wet, briefly pat it with paper towels before measuring to avoid an overly loose dough.
Storage & Reheat Guide
Room temperature: store cooled buns in an airtight container for up to 24 hours. They’re best eaten the same day if you like a softer interior.
Refrigerator: keep in an airtight container or wrapped tightly for up to 4 days. Reheat in a toaster oven or skillet over medium heat for a few minutes to revive the exterior and soften the interior. Avoid the microwave for extended reheating—it can make the bun rubbery.
Freezer: wrap each bun individually in cling film and place in a freezer bag for up to 2 months. Thaw in the refrigerator overnight, then reheat in a skillet or low oven (160°C / 325°F) until warmed through.
Keto Buns Q&A
Q: Can I make these dairy-free?
A: The recipe relies on melted mozzarella and cream cheese for structure; dairy-free cheeses don’t always behave the same when melted. You can experiment with firm vegan melts, but results will vary and may not yield the same texture.
Q: Can I make smaller or larger buns?
A: Yes. Divide the dough to make more small slider buns or fewer larger burger buns. Adjust baking time slightly—smaller buns may bake faster, larger buns may need a couple extra minutes. Watch the color, not just the clock.
Q: My buns are dense—what went wrong?
A: Check baking powder freshness, ensure cheeses were well melted and mixed, and that eggs were fully incorporated. Also, over-packing the dough or using coarse almond meal can cause density.
Q: Can I double the batch?
A: You can double the ingredients, but mix in batches if your food processor is small. Keep the ratio the same and work quickly when shaping.
The Takeaway
These Keto Buns are an easy, reliable swap when you want real sandwich bread without the carbs. With only five ingredients and straightforward steps—melt, mix, knead, shape, and bake—you’ll have fresh buns ready in under 30 minutes. Focus on good-quality mozzarella and finely ground almond flour, and you’ll have soft, flavorful buns that hold up to toppings and toast up nicely. Make a batch, and you’ll find these become a quick favorite for dinners, breakfasts, and meal prep.

Keto Buns
Ingredients
Ingredients
- 3 cupsshredded cheesemozzarella cheese * See notes
- 2 ouncescream cheese
- 1 3/4 cupsalmond flour
- 1 tablespoonbaking powder
- 2 largeeggs
Instructions
Instructions
- Preheat the oven to 200°C / 400°F. Line a large baking tray with parchment paper and set it on the middle rack.
- In a microwave-safe bowl, combine the 3 cups shredded mozzarella and 2 ounces cream cheese. Microwave in 20-second intervals, stirring between each interval, until the cheeses are mostly melted.
- Whisk the melted cheeses until smooth and combined. Let the mixture cool slightly (about 1–2 minutes) so it is warm but not piping hot.
- Transfer the warm cheese mixture to a food processor. Add 1 3/4 cups almond flour, 1 tablespoon baking powder, and the 2 large eggs. Pulse (or process) until the mixture forms a thick, cohesive dough, stopping to scrape down the sides as needed.
- Lightly dust a work surface with a little almond flour. Transfer the dough onto the surface. With slightly damp hands, knead the dough several times until it is smooth and holds together.
- Divide the dough into 6 equal portions. Roll each portion into a ball, place them on the prepared tray, and gently press each ball into a bun shape about 1/2–3/4 inch thick.
- Bake the buns for 14–17 minutes, or until the tops are golden brown.
- Remove the tray from the oven and let the buns cool on the tray for 5 minutes before slicing in half and serving.
Equipment
- Oven
- baking tray
- Parchment Paper
- Microwave-safe bowl
- Microwave
- Food Processor
Notes
* Mozzarella cheese is best, as it is mild flavored. You can also use cheddar cheese or provolone, but the flavor will be more prominent.
** 2 eggs will be used for the dough, and the remaining egg will be used to brush on top of the buns.
For slider buns, make 12 portions.
For the glaze and topping: 1 large egg and 1 tablespoon sesame seeds
TO STORE
: Leftover buns should be stored in the refrigerator, covered. They will keep well for up to 1 week.
TO FREEZE
: Slice the buns in half and place them in a ziplock bag and store them in the freezer for up to 6 months.
TO REHEAT
: Either microwave the buns for 30 seconds or slice them in half and heat in a non-stick pan until warm.