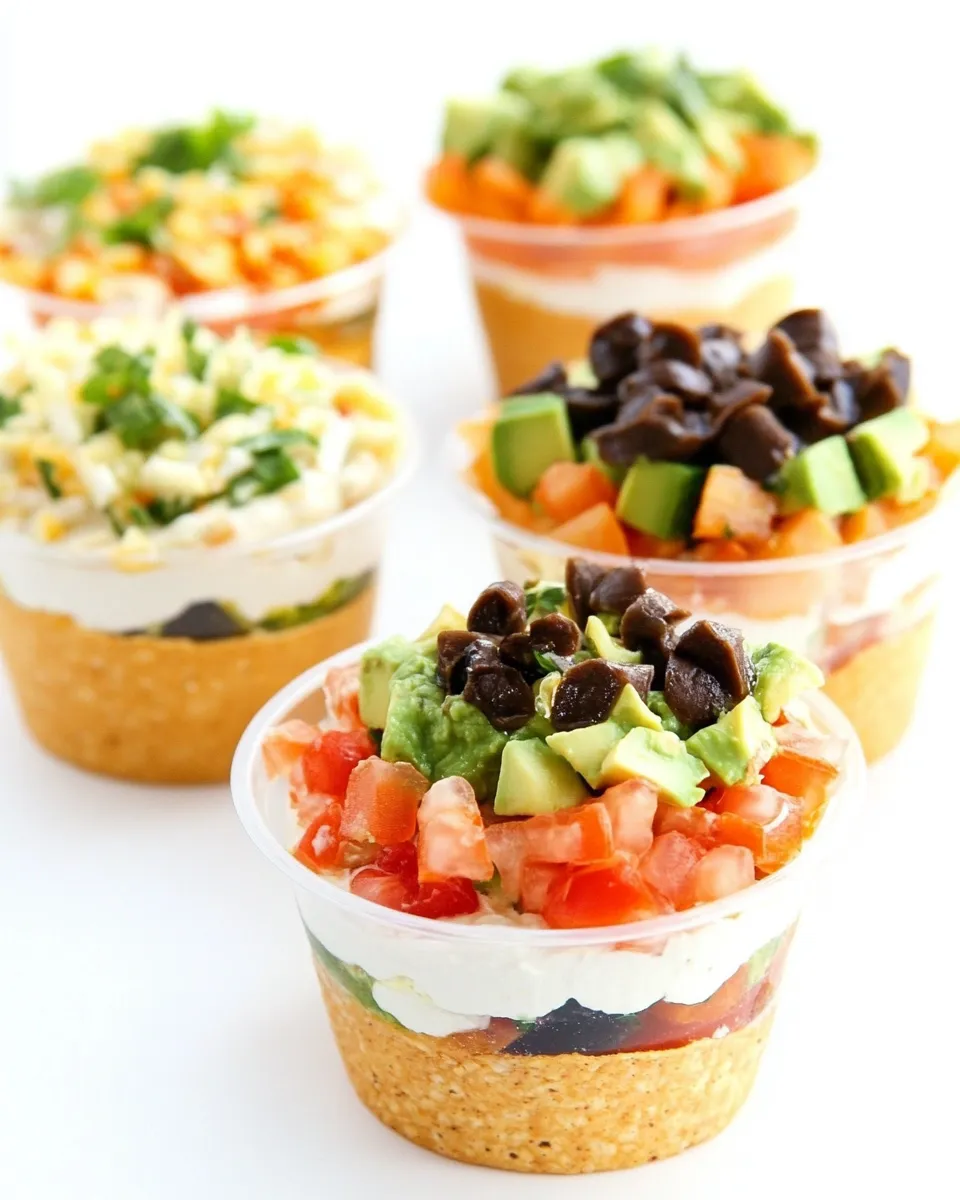
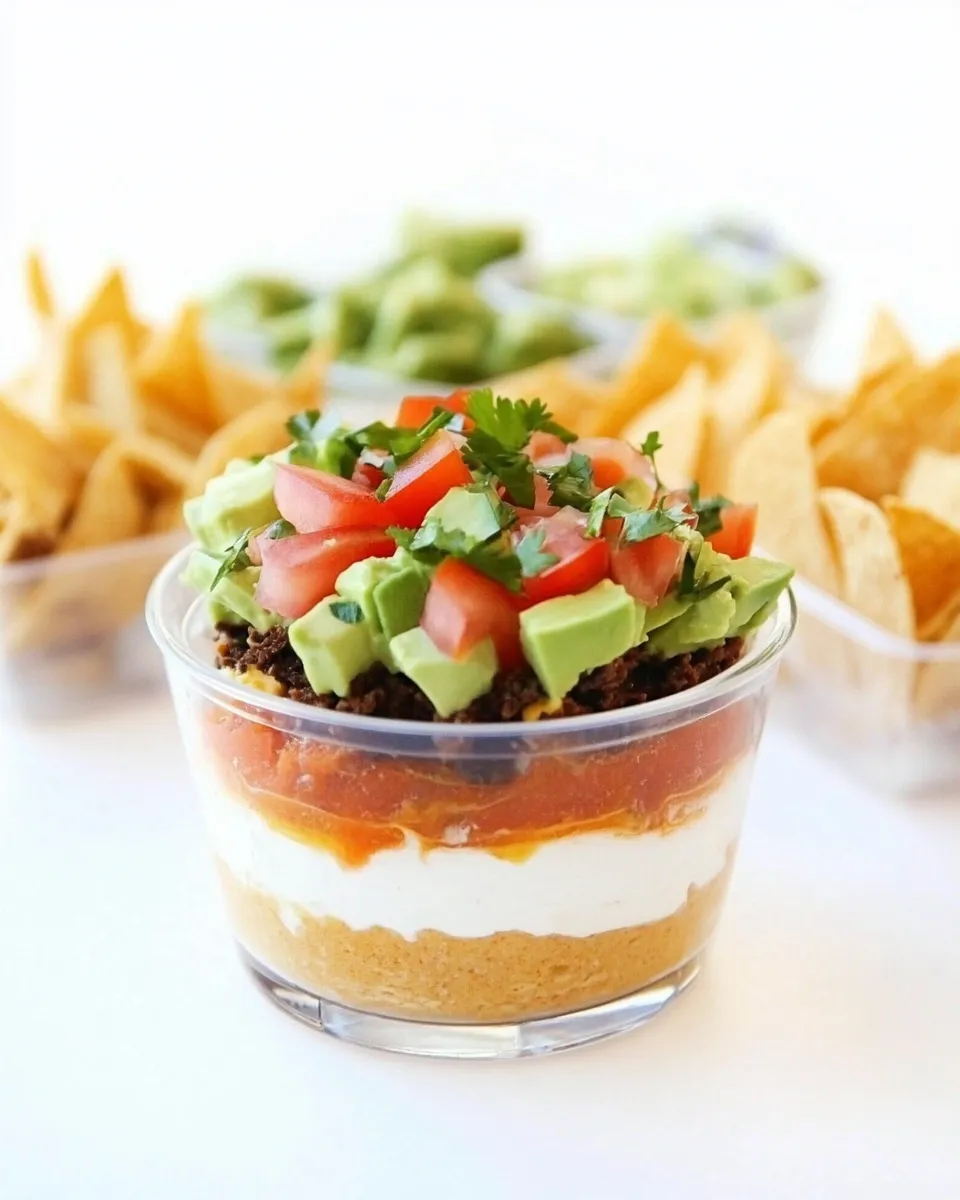
Individual Seven-Layer Dips
Small, personal-sized dips are my go-to for parties because they feel thoughtful and reduce the pileup at the chip bowl. These Individual Seven-Layer Dips give everyone their own cup of layered goodness — no double-dipping, no knife-and-fork juggling, just crunchy chips and bright flavors. They’re simple to assemble and visually appealing, which helps when you want the spread to look as good as it tastes.
I like to prepare most of the components ahead of time and assemble the tumblers right before guests arrive. That keeps the tomatoes and green onions fresh and the chips crisp. This recipe is forgiving; it scales easily, and it’s a great vehicle for using store-bought shortcuts like pre-made guacamole and pico de gallo when time is tight.
There’s a practical rhythm to building these: beans, sour cream, guacamole, salsa, cheese, then bright toppings. The assembly is quick, and the payoff is instant. If you’re hosting, these individual portions save space on the table and let guests grab a single-serving cup to take to their seat.
Your Shopping Guide

Buy items that hold up in the fridge and on a buffet. Look for a sturdy plastic tumbler — 9-ounce sizes are perfect here — and be sure your salsa or pico de gallo isn’t watery. A watery salsa will make the guacamole weep and the layers sloppy.
Pick a medium-sharp cheddar or a Mexican blend for flavor and meltability. If you’re using pre-made guacamole, check the label for lime content and salt so you can balance other layers accordingly. Buy fresh Roma tomatoes and green onions for the final pop of color and texture; they’re inexpensive but make a big visual difference.
Don’t forget the tortilla chips. Get a good-quality sturdy chip for dipping; thin chips will break off in the cup. And pick up that extra can of sliced olives if you expect a larger crowd — they disappear fast.
Ingredients
- 1 (16 ounce) can refried beans — the hearty base layer that holds the cup together.
- 1 (1 ounce) package taco seasoning — seasons the beans quickly and evenly.
- 1 cup guacamole or make homemade guacamole — adds creaminess and bright avocado flavor.
- 1 (8 ounce) container sour cream — provides tang and a clean layer between beans and guacamole.
- 1 cup chunky salsa or pico de gallo; or make homemade pico de gallo — fresh acidity and texture; drain excess liquid first.
- 1 cup shredded cheddar or Mexican blend cheese — melty, salty binder for the savory layers.
- 2 Roma tomatoes, diced — fresh finishing touch; adds color and brightness.
- 1/2 bunch of green onions, sliced — sharp, oniony crunch for contrast.
- 1 (2.25 ounce) can sliced olives, drained — briny garnish that cuts through richness.
- 8 (9 ounce) plastic tumblers — individual serving vessels; clear ones showcase the layers.
- Tortilla chips — for scooping; choose sturdy chips for dipping.
Cook Individual Seven-Layer Dips Like This
- Drain the 1 (2.25 ounce) can sliced olives and set aside. Slice the 1/2 bunch green onions and dice the 2 Roma tomatoes; keep the tomatoes, green onions, and olives separate until assembly (see step 10). Drain any excess liquid from the 1 cup chunky salsa or pico de gallo.
- In a medium bowl, stir together the 1 (16 ounce) can refried beans and the 1 (1 ounce) package taco seasoning until the seasoning is fully incorporated.
- Place the 8 (9 ounce) plastic tumblers on a tray or work surface for assembly.
- Divide the seasoned refried beans evenly among the 8 tumblers (about 1/4 cup or 4 tablespoons per cup). Smooth each bean layer lightly with the back of a spoon.
- Divide the 1 (8 ounce) container sour cream evenly among the 8 tumblers (about 2 tablespoons per cup). Spoon the sour cream over the bean layer and smooth gently.
- Divide the 1 cup guacamole evenly among the 8 tumblers (about 2 tablespoons per cup) and spread over the sour cream.
- Divide the drained 1 cup salsa or pico de gallo evenly among the 8 tumblers (about 2 tablespoons per cup) and spoon it over the guacamole.
- Sprinkle the 1 cup shredded cheddar or Mexican blend cheese evenly over the salsa layer (about 2 tablespoons per cup).
- Top each cup by dividing the diced tomatoes, sliced green onions, and drained sliced olives evenly among the 8 tumblers. If you prefer to make these ahead of time, wait to add the tomatoes, green onions, and olives until shortly before serving.
- Garnish each individual dip with one tortilla chip. Refrigerate the assembled dips until serving. Serve with extra tortilla chips.
Why It’s Crowd-Pleasing

People love variety, and this dip delivers seven distinct textures and flavors in each bite. The beans and cheese satisfy the savory craving, the guacamole and sour cream bring creaminess, and the salsa, tomatoes, and green onions add brightness. The olives provide a salty contrast that keeps the palate interested.
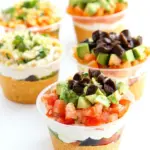
Individual portions feel personal. Guests don’t argue over who’s next to dip, and it’s easier to manage portion control. Visually, the layers are inviting — colorful and tidy when served in clear tumblers — which sets a positive tone at any gathering.
Ingredient Flex Options
Swap within the recipe’s framework, not outside it. You can substitute refried beans with a black bean mash spiced with the taco seasoning for a different texture. Use plain Greek yogurt in place of sour cream for tang and protein. If you prefer a smoky note, try a chipotle salsa but drain it well to avoid sogginess.
Cheese can be any shredded blend you like; pepper jack adds heat, while a mild cheddar keeps things approachable. If guests are vegetarian or want extra veggies, a layer of roasted corn or black beans can be added between salsa and cheese without changing the method.
Recommended Tools
Use a medium mixing bowl and a sturdy spoon for the refried beans. A small rubber spatula helps smooth each layer cleanly. Clear 9-ounce plastic tumblers are recommended so guests can see the layers, but any similar single-serve cup will work.
A rimmed baking sheet or tray is useful for transporting assembled cups to the fridge or serving table. Keep a small bowl for drained salsa juices so you can control moisture — excess liquid is the biggest enemy of layered dips.
What Not to Do
Do not skip draining the salsa or olives. Excess liquid leads to watery guacamole and soggy chips. Don’t overfill the cups; leave a little space at the top so guests can insert a chip without displacing layers.
Avoid assembling everything too far in advance if you want the toppings to stay fresh. Tomatoes and green onions can wilt or release moisture. Also, don’t use flimsy chips for garnish — they’ll snap and frustrate your guests.
Better-for-You Options
For a lighter version, swap full-fat sour cream for nonfat Greek yogurt. Choose a reduced-sodium refried bean option if available, and use a light shredded cheese. Increase the ratio of fresh vegetables: add diced bell peppers or shredded lettuce just before serving to bump fiber and nutrients.
If you’re watching calories, serve smaller cups or use endive leaves or cucumber rounds as vessels instead of chips, though that changes the crunchy experience. Balance flavor rather than trying to remove all fat; a modest amount of cheese and guacamole make the dish satisfying, which helps prevent overeating.
Behind the Recipe
This is a party-friendly riff on the classic seven-layer dip. The recipe simplifies assembly by portioning into individual cups, which keeps serving neat and fun. The use of taco seasoning in the beans is a quick trick to impart a familiar Tex-Mex profile without simmering additional spices.
I first made these for a small gathering where space was limited. The tumblers kept things tidy and allowed guests to sample other dishes without committing to a large plate. Over time I refined the order of layers to preserve texture: beans first for weight, then a cooling sour cream barrier before avocado, and salsa above that to protect the guacamole from excess moisture.
Store, Freeze & Reheat
Refrigerate assembled cups for up to 24 hours, but add the fresh tomato, green onion, and olive toppings just before serving if possible. The layered cups hold up well overnight if the salsa is well-drained.
Do not freeze assembled dips — the texture of guacamole and sour cream degrades on thawing. If you need to prep ahead, mix the seasoned beans and store in an airtight container, keep guacamole and sour cream separate, and chop tomatoes and onions the day of the event.
Handy Q&A
Q: Can I make a larger batch instead of individual cups?
A: Yes. Layer ingredients in a shallow dish in the same order, but expect earlier serving because chips will soften faster when everyone digs into the same platter.
Q: Any tips for preventing guacamole browning?
A: Keep it tightly covered with plastic wrap pressed to the surface, or add a thin layer of lime juice and press a strip of plastic directly against the guacamole until assembly time.
Q: How do I keep chips from getting soggy?
A: Serve chips on the side and slot one into each cup as a garnish only at the last minute. Pick sturdy chips and avoid overly watery salsas.
Q: Can I prep components a day ahead?
A: Yes. Beans, seasoned and stored; cheese shredded; salsa drained and refrigerated; guacamole kept airtight. Chop the fresh toppings the day of and assemble shortly before serving for best texture.
Ready, Set, Cook
Checklist before you start: drain olives and salsa, dice tomatoes, slice green onions, and soak up any excess salsa liquid with a paper towel. Mix the refried beans with the taco seasoning, set out your tumblers, and assemble in the order in the instructions.
Plan about 15–20 minutes for full assembly once your components are ready. If you prep components ahead of time, assembly is closer to 10 minutes. Refrigerate until serving and place a bowl of extra tortilla chips nearby. Small, thoughtful details — like draining and keeping toppings separate until service — make these cups a reliable hit every time.
Individual Seven-Layer Dips
Ingredients
Ingredients
- 1 16 ounce canrefried beans
- 1 1 ounce packagetaco seasoning
- 1 cupguacamole or make homemade guacamole
- 1 8 ounce containersour cream
- 1 cupchunky salsa or pico de gallo; or make homemade pico de gallo
- 1 cupshredded cheddar or Mexican blend cheese
- 2 Roma tomatoes , diced
- 1/2 bunch of green onions , sliced
- 1 2.25 ounce cansliced olives, drained
- 8 9 ounceplastic tumblers
- tortilla chips
Instructions
Instructions
- Drain the 1 (2.25 ounce) can sliced olives and set aside. Slice the 1/2 bunch green onions and dice the 2 Roma tomatoes; keep the tomatoes, green onions, and olives separate until assembly (see step 10). Drain any excess liquid from the 1 cup chunky salsa or pico de gallo.
- In a medium bowl, stir together the 1 (16 ounce) can refried beans and the 1 (1 ounce) package taco seasoning until the seasoning is fully incorporated.
- Place the 8 (9 ounce) plastic tumblers on a tray or work surface for assembly.
- Divide the seasoned refried beans evenly among the 8 tumblers (about 1/4 cup or 4 tablespoons per cup). Smooth each bean layer lightly with the back of a spoon.
- Divide the 1 (8 ounce) container sour cream evenly among the 8 tumblers (about 2 tablespoons per cup). Spoon the sour cream over the bean layer and smooth gently.
- Divide the 1 cup guacamole evenly among the 8 tumblers (about 2 tablespoons per cup) and spread over the sour cream.
- Divide the drained 1 cup salsa or pico de gallo evenly among the 8 tumblers (about 2 tablespoons per cup) and spoon it over the guacamole.
- Sprinkle the 1 cup shredded cheddar or Mexican blend cheese evenly over the salsa layer (about 2 tablespoons per cup).
- Top each cup by dividing the diced tomatoes, sliced green onions, and drained sliced olives evenly among the 8 tumblers. If you prefer to make these ahead of time, wait to add the tomatoes, green onions, and olives until shortly before serving.
- Garnish each individual dip with one tortilla chip. Refrigerate the assembled dips until serving. Serve with extra tortilla chips.
Notes
It makes it easier to place the wet ingredients like sour cream and guacamole in a Ziploc bag and snip of the corner for easy piping.
Note: All measurements are approximate. Depending on whether you want thicker or thinner layers you will need more or less.