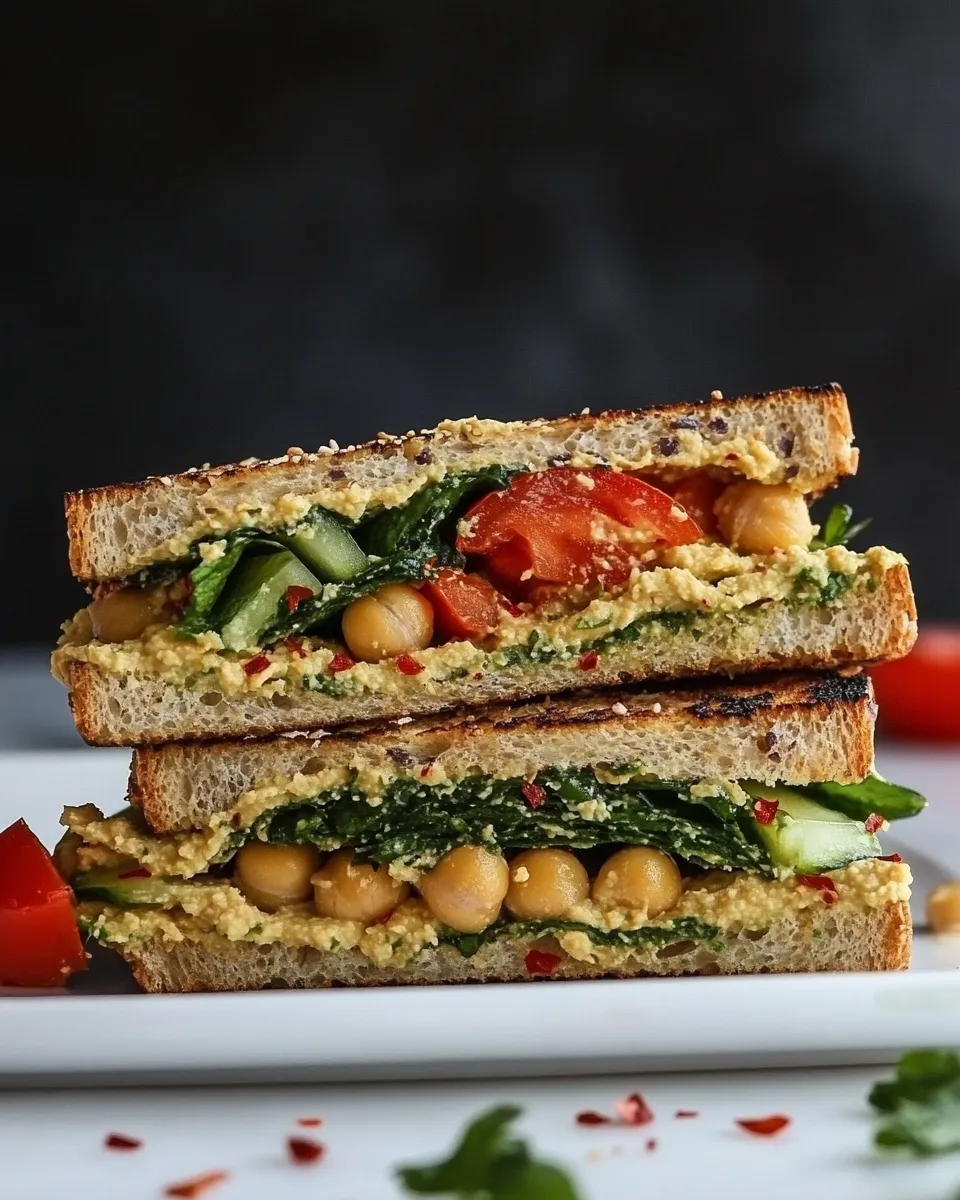
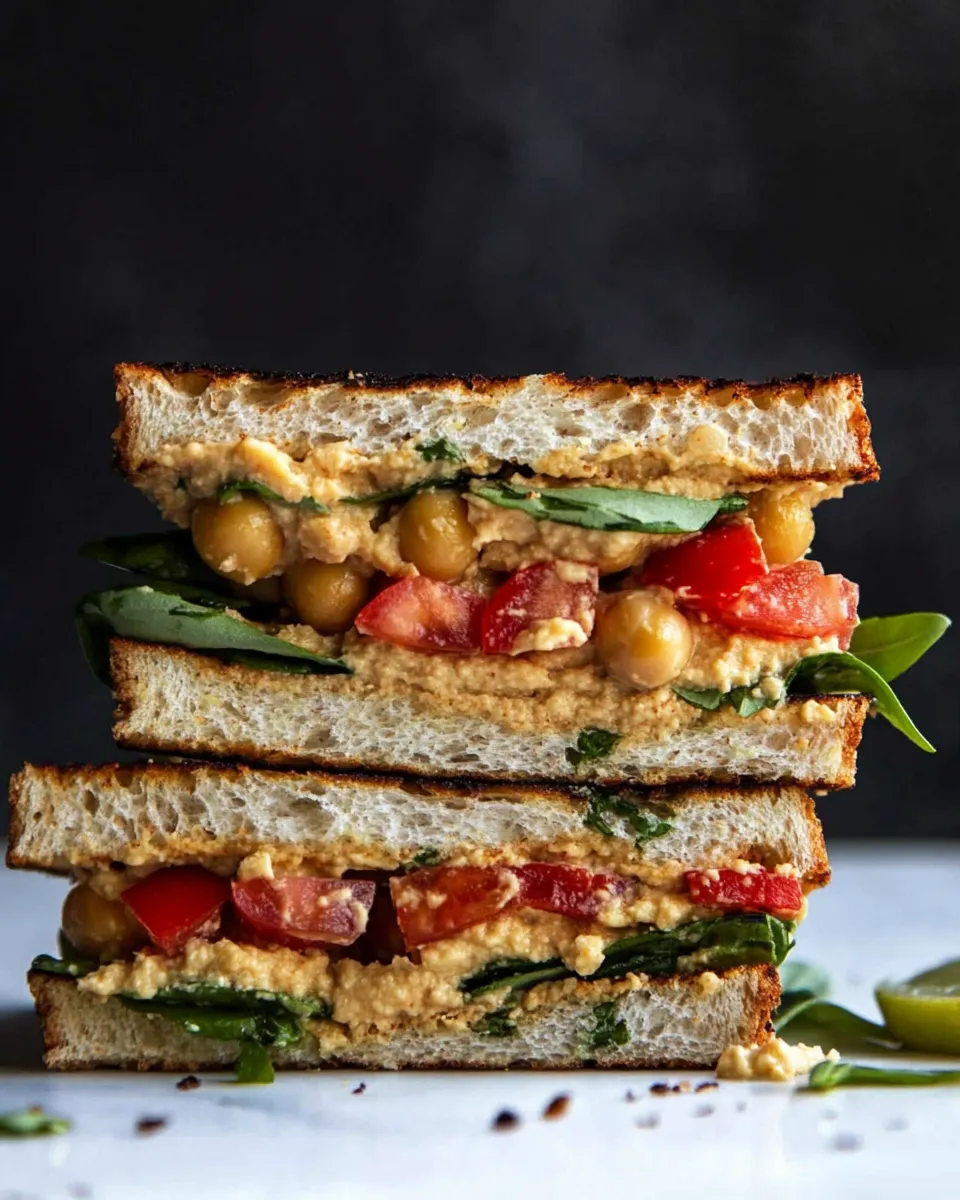
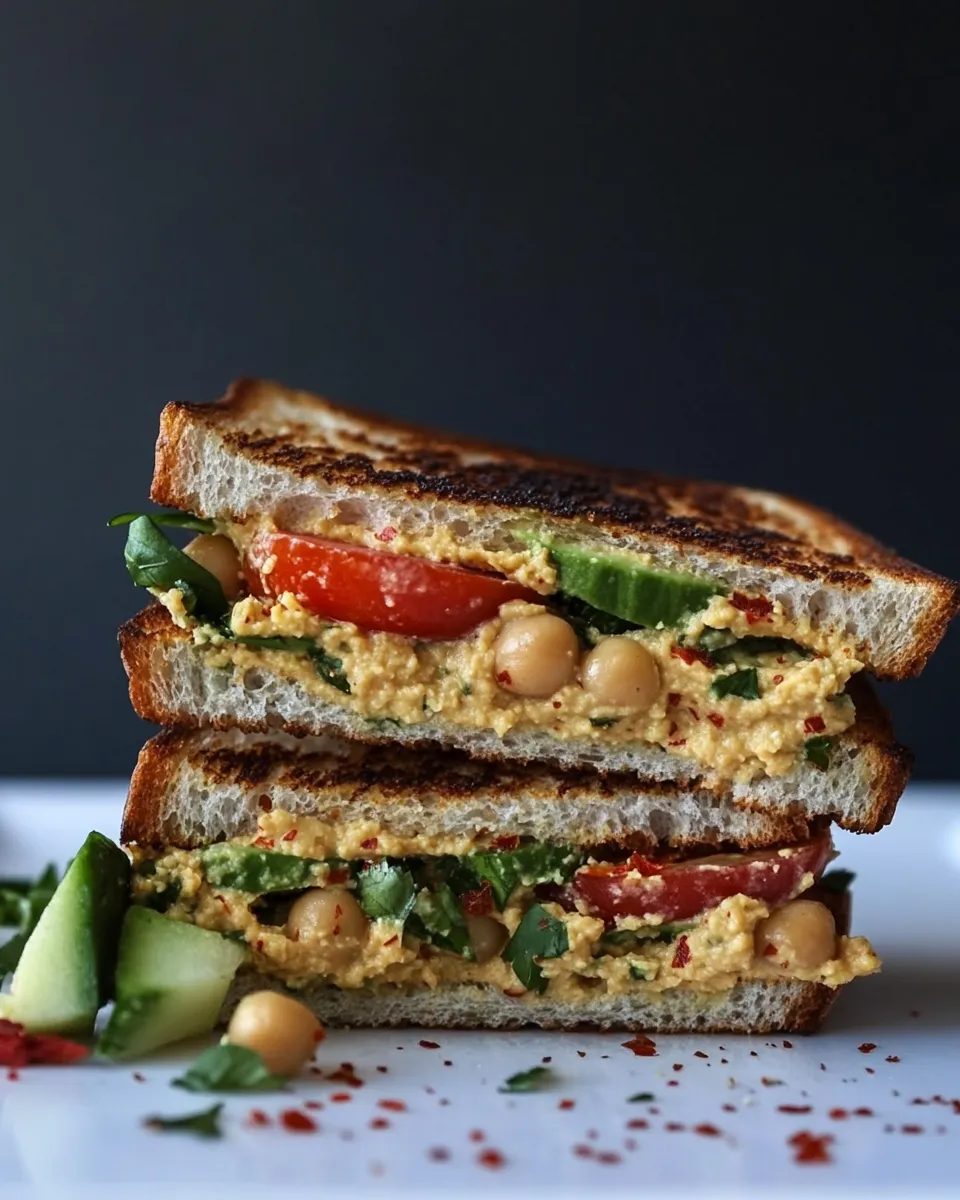
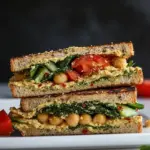
Hummus Mashed Chickpea Sandwiches
These sandwiches are a weekday mainstay for me — fast to build, filling, and forgiving. You get the comfort of a classic chickpea mash with the creaminess hummus brings, tempered by bright produce and toasted bread. They travel well, stack easily, and hold up for a lunchbox or a quick dinner.
I like them because they don’t require a food processor or fancy prep. You can mash by hand, adjust texture instantly, and tweak the seasoning to taste. The assembly is straightforward, and swapping one element can change the entire mood of the sandwich.
Below you’ll find the exact ingredients and step-by-step method I follow, plus practical notes on substitutions, equipment, and troubleshooting. If you’re making these for the first time, follow the steps in order; if you’re returning, use the quick tips to speed things up.
What You’ll Need

Ingredients
- 114-ounce can chickpeas, drained and rinsed — the mash base; rinsing removes excess sodium and can reduce canning liquid flavor.
- 3 to 6Tbsphummusto taste — controls creaminess and flavor; start low and add until you like the texture and salt level.
- sea saltto taste — finish to balance flavors; add sparingly and taste as you go.
- 6slicesto 8 gluten-free breadtoasted — provides structure and crunch; toast until golden so the sandwich doesn’t get soggy.
- 1ripe avocadopeeled and sliced — adds richness and softness; choose ripe but not overripe fruit for clean slices.
- 1large vine-ripened tomatosliced — bright acidity and juiciness; slice thin so it layers evenly.
- 2handfuls mixed greens or spinach — freshness and bite; pat greens dry to avoid wilting the toast.
- 1/4red onionthinly sliced — sharpness and texture; slice paper-thin for milder flavor.
Step-by-Step: Hummus Mashed Chickpea Sandwiches
- Drain and rinse the chickpeas in a colander; transfer them to a medium bowl.
- Add 3 to 6 tablespoons hummus to the bowl (start with 3 Tbsp and add up to 6 Tbsp to reach your preferred creaminess). Mash the chickpeas with a sturdy fork or potato masher until the mixture reaches your desired consistency (smooth or slightly chunky).
- Taste the mashed chickpeas and add sea salt to taste; adjust hummus amount if you want a creamier or more seasoned mixture.
- Toast 6 to 8 slices of gluten-free bread until golden and crisp.
- Prepare the produce: peel and slice the avocado, slice the tomato, and thinly slice the red onion; have the mixed greens or spinach ready.
- Assemble sandwiches: spread a generous portion of the mashed chickpea mixture onto half of the toasted bread slices. Top each with mixed greens, avocado slices, tomato slices, and red onion. Place the remaining toasted slices on top.
- Press sandwiches lightly, cut each in half, and serve.
What Makes This Recipe Special
There are three simple things that elevate this sandwich above a basic spread-on-toast lunch: texture contrast, adjustable creaminess, and quick freshness. The toasted gluten-free bread gives a necessary backbone and crunch. The mashed chickpea mixture combines the nutty bite of chickpeas with the tang and cream of hummus, which also brings seasoning so you don’t need a lot of extra ingredients. Finally, the fresh elements — avocado, tomato, red onion, and greens — make each bite bright and layered.
The recipe scales well and is forgiving. You can go very chunky or almost smooth with the mash, and the hummus range (3–6 Tbsp) lets you fine-tune flavor without altering the basic formula. It’s an easy recipe to keep in rotation for meal prep because the components come together quickly and tolerate short-term storage.
Substitutions by Category
If you need to swap something, focus on role rather than exact product: base, binder/cream, bread, and produce. Below are practical alternatives grouped by what that ingredient contributes to the sandwich.
- Base (chickpeas) — Other mild, mashed beans work well when you want the same texture and protein.
- Binder/Cream (hummus) — Use another savory spread for creaminess and flavor if necessary; adjust amount based on strength of flavor.
- Bread — Any sturdy, toasted slice that will hold up works; gluten-free is listed here but regular bread is fine if not avoiding gluten.
- Greens and produce — Swap mixed greens for baby arugula, lettuce, or thinly sliced cabbage for extra crunch; tomato can be swapped with roasted red pepper for less juice.
- Onion — If raw red onion is too sharp, soak slices briefly in cold water to mellow them.
Setup & Equipment
You don’t need special tools. The essentials are a medium mixing bowl, a fork or a potato masher for mashing, a serrated knife for slicing avocado and tomato, a toaster or skillet for toasting bread, and a cutting board. A colander for draining and rinsing the chickpeas helps speed clean-up.
Set up a small assembly line: toast the bread first, place the bowl of mashed chickpea mixture in the center, and lay out the sliced avocado, tomato, onion, and greens on a plate nearby. This reduces handling time and keeps the sandwich assembly tidy.
Things That Go Wrong
Here are common pitfalls and how to fix them quickly:
- Soggy bread: Toast bread thoroughly and assemble right before serving. If you’re making them ahead, keep components separate and toast the bread again briefly before building.
- Mash too dry or too wet: If the mash is dry, add more hummus a spoonful at a time. If it becomes too loose, add additional chickpeas and mash to absorb moisture.
- Overly salty: Taste before adding sea salt. If it ends up too salty, add unsalted mashed chickpeas or extra avocado slices to balance.
- Avocado browning: Slice the avocado last and use immediately. For short holds, press plastic wrap directly onto the exposed avocado surface to reduce oxidation.
Holiday-Friendly Variations
For holiday or event service, small adjustments make these sandwich halves or finger sandwiches more special without extra fuss:
- Party platter: Cut sandwiches into quarters and garnish with a sprinkle of toasted sesame seeds or chopped fresh herbs to add visual appeal and flavor.
- Warm variation: Lightly grill the assembled sandwich in a skillet to warm the filling and crisp the edges for a panini-style finish.
- Festive toppings: Add pickled red onions or roasted red peppers to introduce acidity and color when serving a crowd.
Cook’s Notes
Taste as you build. Start with the minimum hummus amount listed and add more to reach the texture you like. The hummus does the heavy lifting for flavor, so choose one you enjoy straight from the container.
For a chunkier texture, mash only half the chickpeas; leave the rest whole and fold them in for bite. If you prefer a very smooth spread, a brief run through a food processor with hummus will get you there faster, but it’s not necessary.
Freezer-Friendly Notes
These sandwiches are best eaten fresh, but you can prepare the chickpea mash ahead and freeze it. Freeze in an airtight container for up to 1 month. Thaw overnight in the refrigerator and give it a stir; you may need to adjust the hummus amount after thawing.
Avoid freezing assembled sandwiches; the avocado and tomato will degrade in texture when frozen and thawed. Keep bread, mash, and produce separate if you’re planning ahead.
Quick Questions
Q: Can I make this vegan? A: Yes. The ingredients listed are already plant-based.
Q: Can I use dried chickpeas instead of canned? A: Yes. If you cook dried chickpeas, drain and cool them before using; they behave the same once drained and rinsed.
Q: How long will leftovers keep? A: Store the mashed chickpea mixture in an airtight container in the fridge for up to 3 days. Assemble sandwiches just before eating for best texture.
Ready to Cook?
Gather your drained chickpeas and hummus, toast some slices, and slice the produce. Follow the step-by-step section in order and taste as you go: start with 3 tablespoons hummus, mash, then add up to 6 tablespoons if you want silkier creaminess. Assemble, press lightly, and cut. That’s it — a reliable, quick sandwich that delivers satisfying texture and flavor without fuss.
If you try a variation that works especially well, note the change and make it your next go-to. These sandwiches reward small experiments: a different hummus flavor, a new green, or a quick skillet press can all make a familiar recipe feel fresh.
Hummus Mashed Chickpea Sandwiches
Ingredients
Ingredients
- 114- ounce can chickpeas drained and rinsed
- 3 to 6 Tbsphummusto taste
- sea saltto taste
- 6 slicesto 8 gluten-free breadtoasted
- 1 ripe avocadopeeled and sliced
- 1 large vine-ripened tomatosliced
- 2 handfuls mixed greens or spinach
- 1/4 red onionthinly sliced
Instructions
Instructions
- Drain and rinse the chickpeas in a colander; transfer them to a medium bowl.
- Add 3 to 6 tablespoons hummus to the bowl (start with 3 Tbsp and add up to 6 Tbsp to reach your preferred creaminess). Mash the chickpeas with a sturdy fork or potato masher until the mixture reaches your desired consistency (smooth or slightly chunky).
- Taste the mashed chickpeas and add sea salt to taste; adjust hummus amount if you want a creamier or more seasoned mixture.
- Toast 6 to 8 slices of gluten-free bread until golden and crisp.
- Prepare the produce: peel and slice the avocado, slice the tomato, and thinly slice the red onion; have the mixed greens or spinach ready.
- Assemble sandwiches: spread a generous portion of the mashed chickpea mixture onto half of the toasted bread slices. Top each with mixed greens, avocado slices, tomato slices, and red onion. Place the remaining toasted slices on top.
- Press sandwiches lightly, cut each in half, and serve.
Equipment
- Medium Bowl
- Colander
- Fork or potato masher
- Toaster