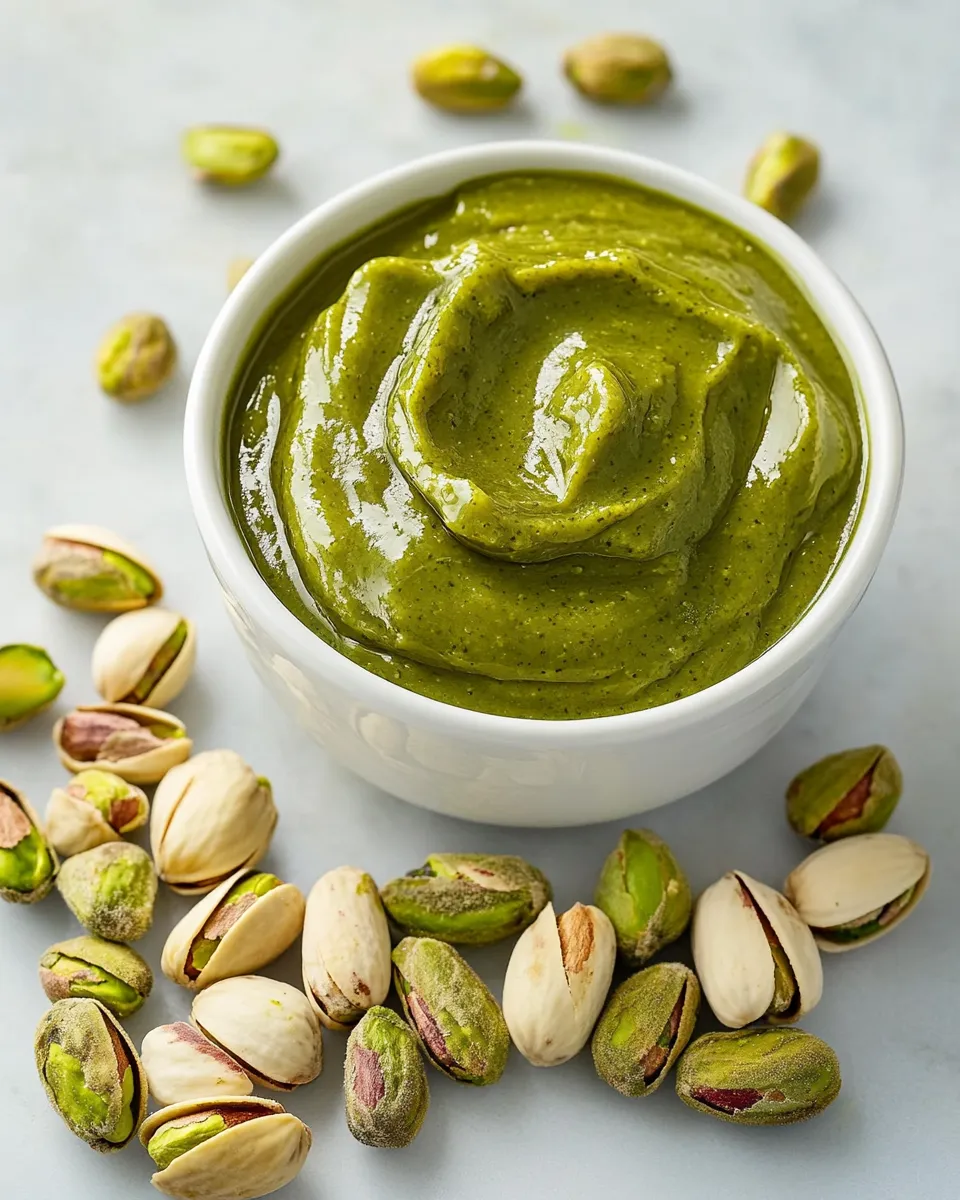
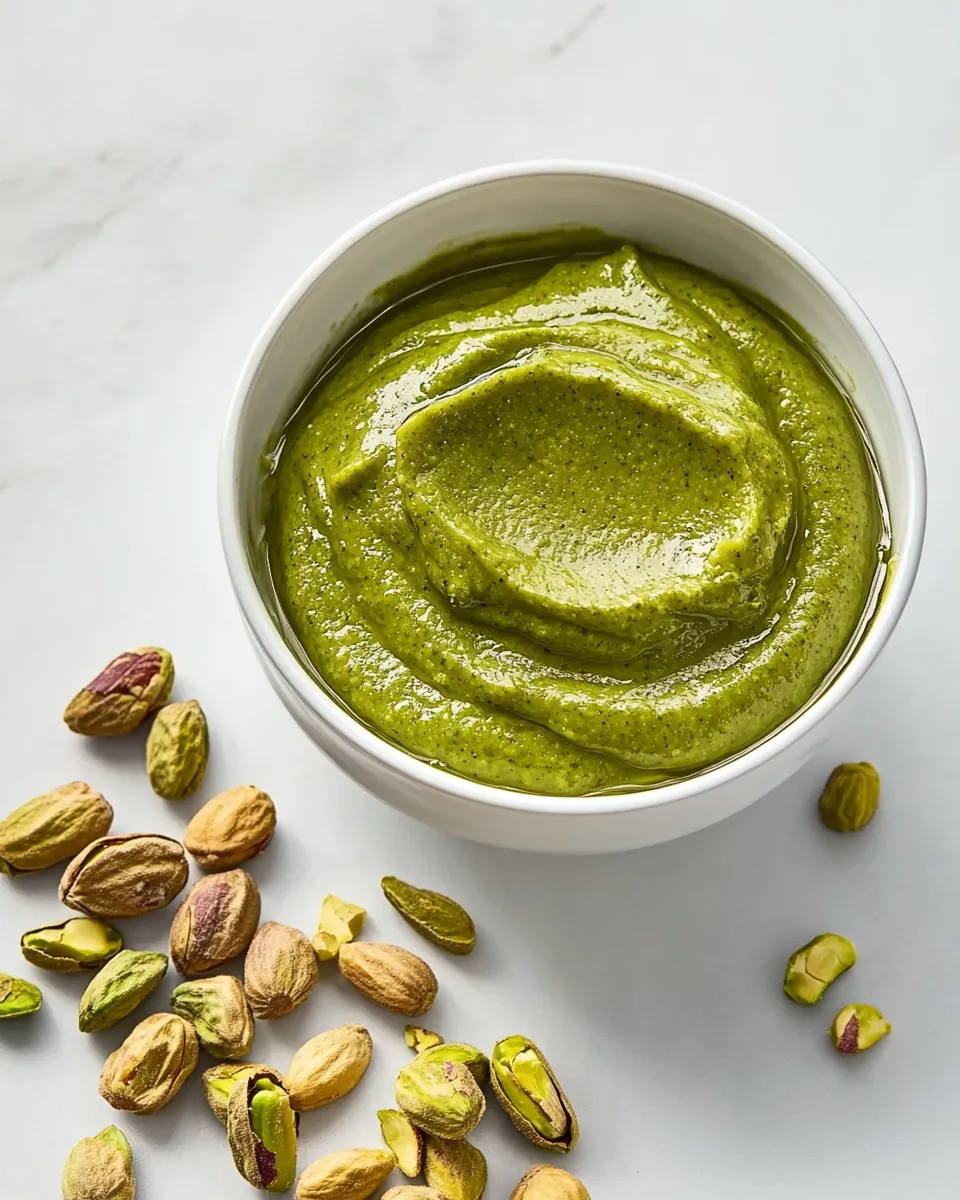
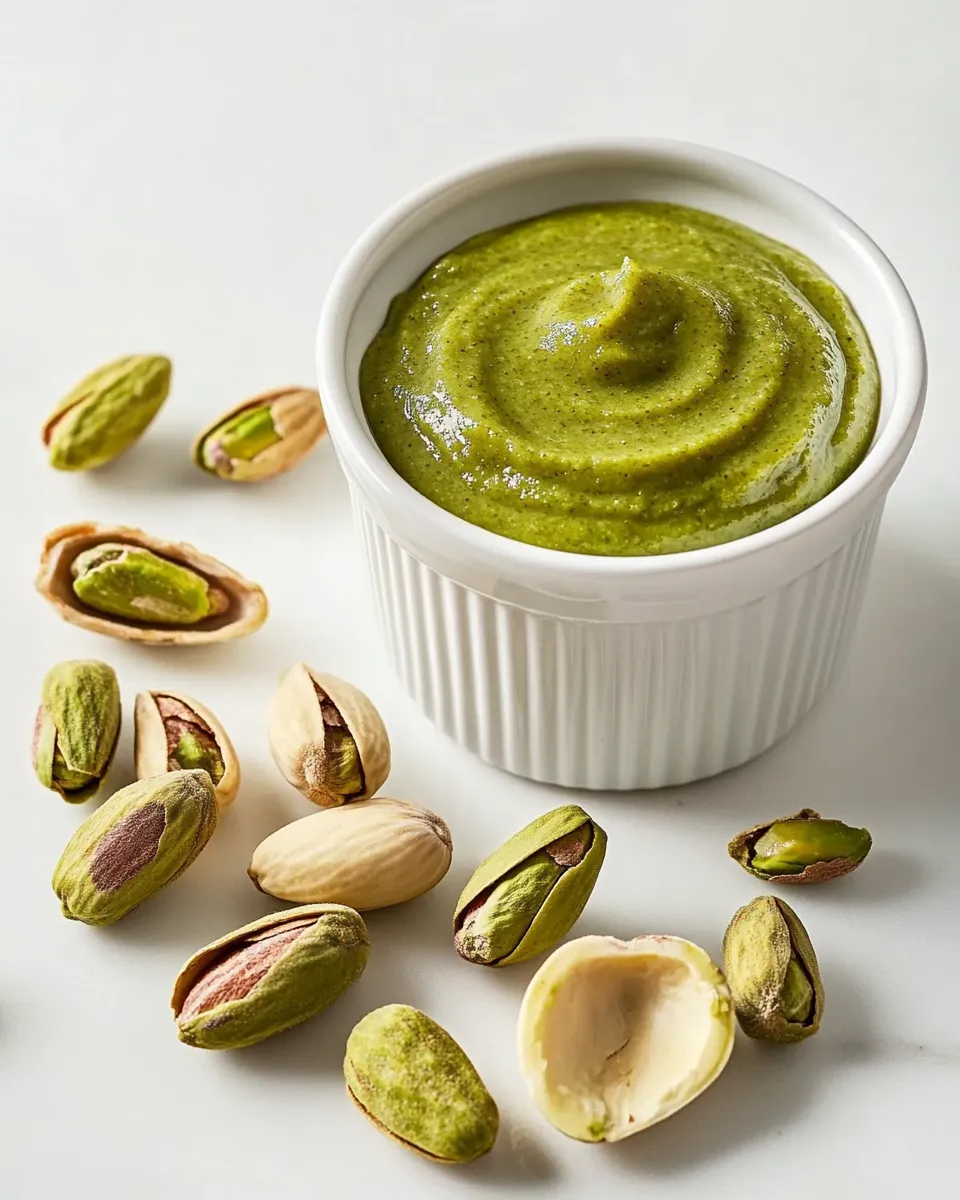
Homemade Pistachio Butter
There are recipes that require a long list of ingredients and an evening of effort, and then there’s this: three pantry-friendly items, a food processor, and a predictable result that’s richer and fresher than anything from a jar. I make this pistachio butter on slow Sunday mornings, and it wakes up recipes across the week — spread on toast, folded into yogurt, or stirred through warm oatmeal.
The flavor is quietly luxurious: the green tint, gentle sweetness, and the slightly grassy, almost floral notes that pistachios bring. Texture matters here. A short processing time leaves a grainy paste; the patient processing turns it glossy and spreadable. I’ll walk you through the exact steps I use, from oven to jar, and share the small tricks that keep the butter smooth and flavorful.
Ingredients

- 2 cups / 250 g shelled pistachios — the base. Use unsalted, raw or roasted pistachios for the purest flavor; shelled saves you prep time.
- 1 teaspoon toasted pistachio oil or other neutral flavored oil, optional — helps the butter come together if your machine struggles or you prefer a looser texture.
- fine sea salt, optional (to taste) — brightens the flavor. Add a pinch at a time and taste as you go.
What to Buy
Buy good-quality shelled pistachios. If you can, choose unsalted and either raw or already shelled-roasted pistachios depending on the flavor you want. Raw pistachios give a cleaner, more green and grassy profile; lightly roasted ones offer deeper nutty notes. Make sure they’re fresh — pistachios should smell nutty, not musty.
If your store stocks pistachio oil, get a small bottle; it’s handy but truly optional. Otherwise, pick a neutral oil like grapeseed or light olive oil if you plan to thin the butter. You won’t need much. For storage, have a clean jar or airtight container ready. A wide-mouth jar makes scooping simpler.
Homemade Pistachio Butter in Steps
- Preheat the oven to 325°F (163°C). Spread 2 cups (250 g) shelled pistachios in a single, even layer on a rimmed baking sheet.
- Toast the pistachios in the preheated oven for 5–10 minutes, checking at 5 minutes and stirring or shaking the pan once. Remove when they are fragrant and lightly toasted but not browned. Let the pistachios cool for 5–10 minutes.
- Transfer the cooled pistachios to the bowl of a food processor or a high‑speed blender.
- Pulse or process until the pistachios break down into a fine powder, stopping to scrape down the sides as needed.
- Continue processing continuously, scraping the bowl every 1–2 minutes, until the nuts pass through a gritty and then pasty stage and become smooth and creamy. This can take about 5–10 minutes total depending on your machine.
- If the mixture is too thick or not coming together smoothly, add up to 1 teaspoon toasted pistachio oil or another neutral flavored oil (optional) and process until incorporated and the butter reaches your desired consistency.
- Taste and add fine sea salt to taste (optional). Pulse once or twice to combine.
- Transfer the pistachio butter to a clean jar or airtight container, seal, and store in the refrigerator for best quality (keeps about one month). You may also freeze for longer storage.
Why This Homemade Pistachio Butter Stands Out
Most commercial nut butters aim for shelf stability and uniformity. Homemade pistachio butter focuses on immediacy and purity. You control the toasting level, the texture, and whether any salt or oil is added. That control results in a brighter, more nuanced nut flavor and a color that makes the butter feel special on sight alone.
Processing by hand (well, by machine but with human attention) creates a texture that machines in factories often smooth out with emulsifiers. If you like a bit of character — slight flecks of nut and a creamy finish — homemade wins every time. Also, small batches mean you’ll use it while it’s freshest, rather than letting it sit on the supermarket shelf for months.
Dairy-Free/Gluten-Free Swaps
This recipe is naturally dairy-free and gluten-free as written. No dairy products are used and pistachios are tree nuts, not grains. If you need to alter texture without adding oil, try processing a little longer; the nuts release more of their own oils the longer you process.
If you’re serving someone with nut allergies, this recipe isn’t suitable — do not substitute tree nuts for seeds in this recipe unless you have a tested seed-butter method on hand. For strict dietary needs, always label jars and note any cross-contact if you use shared equipment.
Recommended Tools
- Food processor — my top choice. It’s forgiving and handles the heat that develops during processing.
- High‑speed blender — works if you have one, but stop and scrape often to avoid overheating the motor.
- Rimmed baking sheet — for even toasting and easy stirring.
- Spatula — to scrape the bowl clean and transfer the butter to a jar.
- Clean glass jar or airtight container — for storage; a wide mouth is most convenient.
Mistakes That Ruin Homemade Pistachio Butter
- Overtoasting the nuts — dark or burnt pistachios taste bitter and will mask the delicate, floral notes of good pistachios.
- Stopping too early — underprocessed butter stays grainy and dry. Keep going until it’s glossy and spreads easily.
- Skipping the scrape — if you don’t scrape down the sides, you’ll end up with uneven texture and wasted pockets of nut meal.
- Adding too much oil too soon — a teaspoon can be enough. Add only if necessary and in small increments.
- Using rancid nuts — any off smell or taste means throw them out. Rancid nuts will ruin the final product no matter how well you process them.
Health-Conscious Tweaks
Pistachios are already one of the more nutrient-dense nuts: rich in heart-healthy fats, vitamin B6, and fiber. To keep the recipe as healthful as possible, skip the optional oil unless your machine needs it. Also, keep added salt minimal or omit it entirely to control sodium intake.
If you want a slightly lighter spread, blend pistachios with a small proportion of neutral, unsaturated oil (as the recipe allows) and use sparingly on toast. Portion control matters; a tablespoon or two delivers flavor without excess calories. Finally, pair the butter with whole-grain bread or fruit for a balanced snack.
Author’s Commentary
I make this in small batches so the flavor never dulls. My favorite moment is the transition from gritty powder to glossy butter — it feels like magic every time. I tend to toast for about 7 minutes in my oven; it gives a gentle roast without any browning. I usually skip any added oil unless I’m aiming for a pourable texture to drizzle into dressings.
For uses: stir a spoonful into morning yogurt with honey, spread it on slices of crisp apple, fold into whipped cream for a pistachio mousse, or use it as a base for nut-forward sauces. It brightens both sweet and savory dishes. And if a jar survives the week, it becomes the thing I reach for when I want something simple, satisfying, and homemade.
Keep-It-Fresh Plan
Seal pistachio butter in a clean glass jar and refrigerate. Refrigeration keeps the color and flavor and slows oil separation. Stored this way, expect best quality for about one month. If you want it to last longer, freeze in small portions; thaw in the fridge and stir before using.
To refresh slightly separated butter, stir it vigorously or bring it to room temperature for 20–30 minutes, then stir. Always smell before tasting — if it smells off or rancid, discard. Use clean utensils to avoid introducing moisture or contaminants that shorten its life.
Handy Q&A
Q: Can I skip toasting the pistachios?
A: Toasting develops flavor and releases some oils, improving texture. You can skip it if you prefer a raw taste, but expect a milder flavor and possibly longer processing time.
Q: My butter is still gritty after 10 minutes. What gives?
A: It may be your machine. High-speed processors finish faster. Scrape down the bowl often and keep processing; if it still won’t come together, add up to the allowed teaspoon of neutral oil and continue.
Q: Can I add sweeteners or other flavors?
A: Yes, but the written recipe keeps things pure. If you add honey, maple, or spices, do it at the end and add sparingly so you don’t alter texture too much.
Q: Will the color change over time?
A: Yes, the vibrant green will fade slightly in the fridge, but the flavor remains. Keeping the jar airtight slows oxidation.
Ready to Cook?
When you’re ready: preheat the oven, lay out 2 cups (250 g) of shelled pistachios, and follow the steps. The process is forgiving, and the payoff is immediate: a jar of pistachio butter that tastes fresh, downright luxurious, and entirely yours. Make a batch, label it, and tuck it into the fridge. Then open it at breakfast, at tea, or when you want a small, handmade pleasure.

Homemade Pistachio Butter
Ingredients
Ingredients
- 2 cups/250 gshelled pistachios
- 1 teaspoontoasted pistachio oil or other neutral flavored oil optional
- fine sea salt optional (to taste)
Instructions
Instructions
- Preheat the oven to 325°F (163°C). Spread 2 cups (250 g) shelled pistachios in a single, even layer on a rimmed baking sheet.
- Toast the pistachios in the preheated oven for 5–10 minutes, checking at 5 minutes and stirring or shaking the pan once. Remove when they are fragrant and lightly toasted but not browned. Let the pistachios cool for 5–10 minutes.
- Transfer the cooled pistachios to the bowl of a food processor or a high‑speed blender.
- Pulse or process until the pistachios break down into a fine powder, stopping to scrape down the sides as needed.
- Continue processing continuously, scraping the bowl every 1–2 minutes, until the nuts pass through a gritty and then pasty stage and become smooth and creamy. This can take about 5–10 minutes total depending on your machine.
- If the mixture is too thick or not coming together smoothly, add up to 1 teaspoon toasted pistachio oil or another neutral flavored oil (optional) and process until incorporated and the butter reaches your desired consistency.
- Taste and add fine sea salt to taste (optional). Pulse once or twice to combine.
- Transfer the pistachio butter to a clean jar or airtight container, seal, and store in the refrigerator for best quality (keeps about one month). You may also freeze for longer storage.
Equipment
- Oven
- Rimmed Baking Sheet
- food processor or high-speed blender
- Jar or Airtight Container