Homemade Peanut Butter Fudge
I make this peanut butter fudge whenever I want something nostalgic, fast, and utterly reliable. It’s the kind of treat that travels well to potlucks, disappears during movie night, and sits proudly on cookie trays during the holidays. The texture is dense and creamy, and the flavor is pure peanut butter—no fuss, no tempering, just straightforward comfort.
I keep the technique consistent because small changes make a big difference with fudge. There are only a handful of ingredients and one straightforward method, so the payoff is immediate: smooth, sliceable squares with a satin sheen. I’ll walk you through every step, what to watch for, and the easy swaps that still give you great results.
If you’re here for a recipe that doesn’t require candy thermometers or long, anxious stirring sessions, this is it. Read the steps once, gather the ingredients, and you’ll have perfect peanut butter fudge in under three hours from start to finish—most of that time is chilling. Let’s get to the checklist and the method so you can make a pan tonight.
Ingredient Checklist

Ingredients
- 1 cup unsalted butter — provides richness and a smooth mouthfeel; unsalted lets you control the seasoning.
- 1 cup creamy peanut butter — I use Skippy; do not use a “natural” peanut butter since oil separation can change texture.
- ½ cup Reese’s peanut butter chips — boosts peanut flavor and helps the fudge set with a chocolate-peanut note.
- 1 tablespoon pure vanilla extract — rounds and brightens the peanut butter without adding sweetness.
- 3½ cups powdered sugar — measured and then sifted well; for the smoothest texture and appearance, DO sift the sugar!
- ½ teaspoon kosher salt — balances sweetness and amplifies peanut flavor.
- ¼ cup marshmallow creme — I use Kraft; adds chew and helps keep the fudge tender.
Cooking (Homemade Peanut Butter Fudge): The Process
- Line an 8″x8″ pan with parchment paper or foil, leaving an overhang on two sides for easy lifting; set the pan aside.
- Measure and then sift 3½ cups powdered sugar into a large bowl; set the sifted sugar aside.
- Place a heavy-bottomed saucepan over medium heat. Add 1 cup unsalted butter, 1 cup creamy peanut butter, and ½ cup Reese’s peanut butter chips. Stir constantly until everything is melted and the mixture is completely smooth.
- Reduce the heat to low and stir in 1 tablespoon pure vanilla extract.
- Still over low heat, add the sifted powdered sugar and ½ teaspoon kosher salt to the pan. Use a spatula to stir and incorporate the sugar and salt until the mixture is completely smooth.
- If you see lumps or a grainy texture, vigorously whisk and press the mixture against the bottom of the pan with the spatula to work out the lumps until smooth.
- Stir in ¼ cup marshmallow creme until fully incorporated and the mixture is smooth.
- Immediately spread the fudge mixture evenly into the prepared 8″x8″ pan and smooth the top with an offset spatula or the back of a spoon.
- Refrigerate the pan for 1½ to 2 hours, or until the fudge is firm.
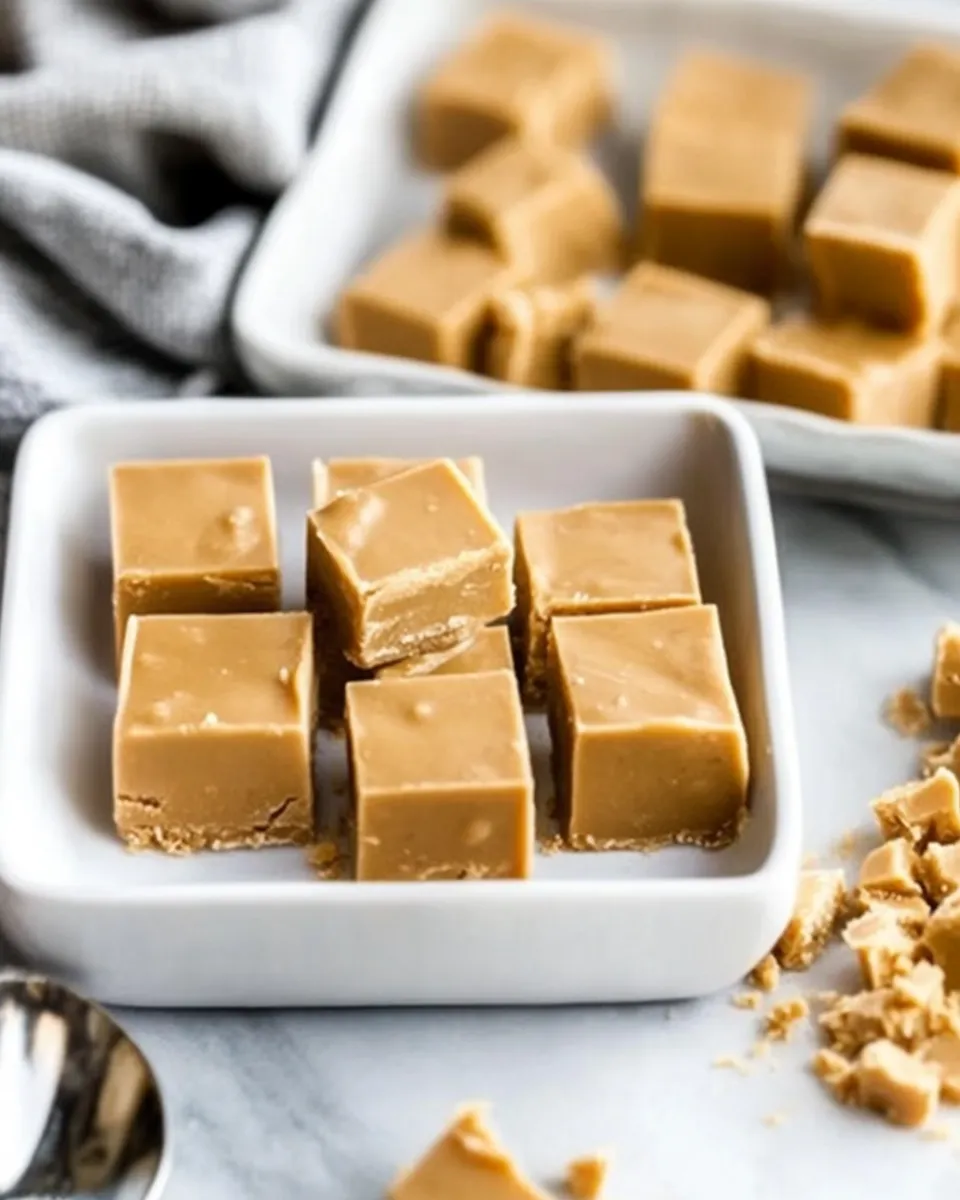
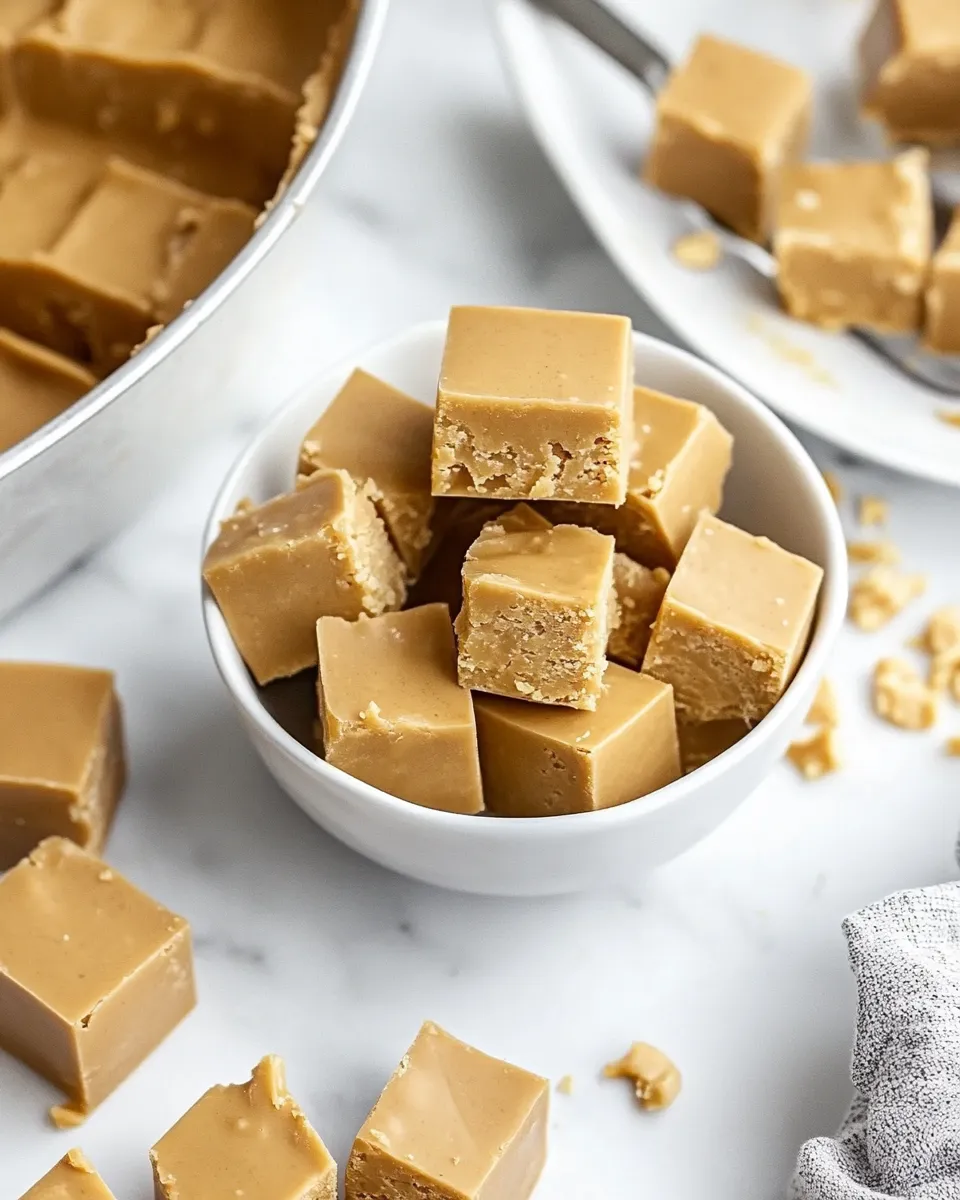
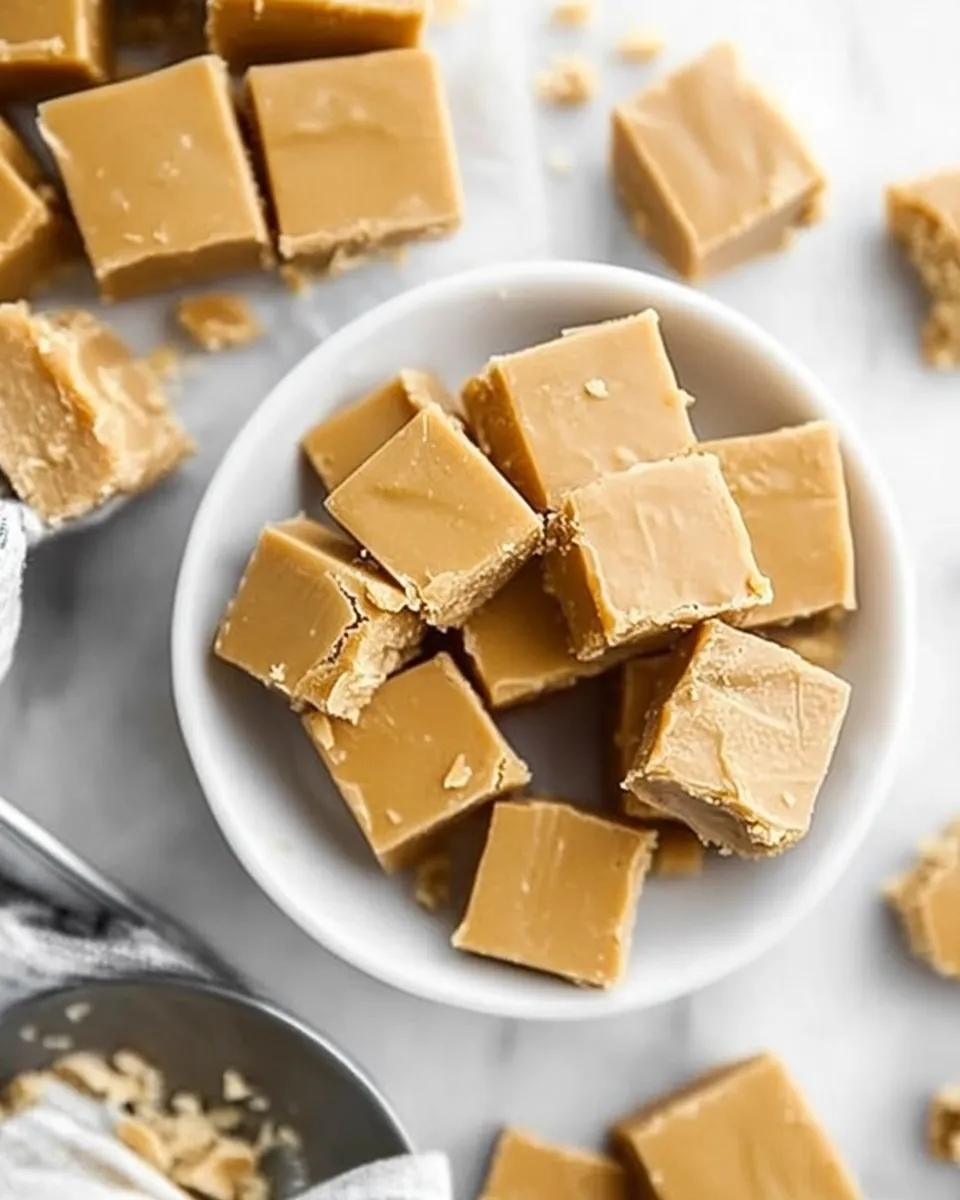
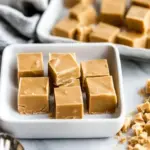
- Use the parchment or foil overhang to lift the chilled fudge out of the pan and place it on a cutting board. Cut into desired pieces (the recipe author prefers small pieces and cuts the 8″x8″ pan into 64 pieces—8 cuts in each direction).
Why This Recipe Is Reliable
There are a few deliberate choices here that make the difference between a grainy mess and a smooth slab of fudge. First, using a heavy-bottomed saucepan gives even heat distribution so the butter and peanut butter melt uniformly. That reduces hotspots and prevents scorching, which can make sugar seize up.
Sifting the powdered sugar is not optional. Any clumps of powdered sugar will survive the stirring and create grit in the finished fudge. The recipe tells you to measure, then sift—measure first so you keep the proportions accurate, then sift to remove lumps. That small extra step creates a silky bite.
The marshmallow creme is a texture hack. It adds a bit of marshmallow sweetness and keeps the fudge tender instead of rock-hard. And the choice of peanut butter matters: a stabilized, commercial creamy peanut butter (like Skippy) keeps oil separation from ruining the texture. Together, these elements make the outcome predictable and forgiving.
Easy Ingredient Swaps
- Peanut butter — If you must swap, use a similarly stabilized, creamy nut butter (commercial almond or cashew butters can work), but expect a change in flavor. Avoid natural peanut butters that separate.
- Reese’s peanut butter chips — Regular peanut butter chips add a similar flavor; if unavailable, omit them and the fudge will still set, though the peanut-chocolate note will be milder.
- Marshmallow creme — You can omit it for a firmer fudge, or use an equivalent volume of mini marshmallows melted into the mixture—though that slightly changes the texture.
- Vanilla — Pure vanilla gives the best flavor; a splash of bourbon or dark rum can be substituted for an adult twist, used sparingly (start with the same 1 tablespoon).
Tools of the Trade
Keep your setup minimal and practical. You’ll want a heavy-bottomed saucepan for even heat and a sturdy rubber or silicone spatula to scrape and press lumps against the pan. An offset spatula or the back of a spoon helps you smooth the top cleanly once the fudge is in the pan.
Other helpful items: an 8″x8″ pan lined with parchment or foil with an overhang for easy lifting, a fine-mesh sifter for the powdered sugar, and a large bowl for sifting. If you like perfectly even squares, a ruler and a sharp chef’s knife or a bench scraper make neat cuts. A whisk comes in handy if the mixture gets grainy and needs vigorous smoothing.
Slip-Ups to Skip
- Skipping the sift — That’s the fastest path to gritty fudge. Sift your powdered sugar.
- Overheating — Don’t crank the heat. Melt on medium then reduce to low for incorporation; too much heat can change the sugar’s behavior and make texture fail.
- Using natural peanut butter — Oil separation will affect texture and may prevent the fudge from setting properly.
- Rushing the chill — Cutting too soon can cause the fudge to fall apart. Wait the full 1½ to 2 hours until fully firm.
- Not using a heavy-bottomed pan — Thin pans create hot spots that burn and grain the mix; invest in a good pan.
Customize for Your Needs
Once you’re comfortable with the base, customization is where this recipe shines. If you like a swirled top, reserve a couple of tablespoons of melted Reese’s chips and drizzle before the fudge sets, then swirl with a skewer. For a salty-sweet version, sprinkle flaky sea salt across the top right after smoothing—the salt adheres and looks pretty.
Want nuts? Stir in a small handful of chopped roasted peanuts after step 7, then press gently and chill. For a chocolate-forward bar, line half the pan with a thin layer of melted chocolate before adding the fudge mixture, or fold in a few tablespoons of cocoa powder at the end—just note that adding cocoa will change the texture slightly and may require a touch more marshmallow creme to keep things tender.
Method to the Madness
There’s a straightforward logic to the order of operations here. Melt the fats and chocolate chips first to create a homogeneous base. Add vanilla while warm so its aroma disperses evenly. Incorporating sifted powdered sugar over low heat lets the sugar dissolve into the fats without seizing. If any graininess appears, the vigorous pressing and whisking step will break up crystals and integrate them into a smooth matrix.
The marshmallow creme works on two levels: it brings a bit of stabilized air and sugar typical of marshmallows, which keeps the fudge from becoming like a candy brick, and it improves the sheen and mouthfeel. Spreading into an 8″x8″ pan gives a uniform thickness that chills consistently. Small pieces are often preferred because the fudge is rich—cutting into 64 small squares makes it easier to serve and enjoy in moderation.
Meal Prep & Storage Notes
After the fudge is fully chilled and cut, store it in an airtight container. Refrigerated, it keeps well for up to two weeks. If you prefer the fudgy bite at room temperature, pull pieces out of the fridge 15–20 minutes before serving. For longer storage, you can freeze the squares in a single layer on a baking sheet until firm, then stack them with parchment between layers in a freezer-safe container for up to 2 months. Thaw overnight in the refrigerator or at room temperature for an hour.
When packing fudge for gifting, line a box or tin with parchment. If transporting in warm weather, keep the container chilled until the last minute and use an insulated bag—this fudge sets in the refrigerator and can soften if left in heat.
Common Qs About Homemade Peanut Butter Fudge
Q: Can I make this without marshmallow creme?
A: Yes. Omitting the marshmallow creme yields a firmer, denser fudge. It will still be tasty, but expect a slightly less tender texture.
Q: Why does my fudge get grainy?
A: Graininess usually comes from unsifted powdered sugar or overheating. Sift the sugar and keep the heat low when adding and incorporating it. If graininess appears, follow step 6—vigorously whisk and press against the pan to work the lumps out.
Q: Can I use natural peanut butter?
A: I don’t recommend it for this recipe. Natural peanut butter separates oil and can lead to a greasy or inconsistent set. Use a stable, commercial creamy peanut butter like Skippy for predictable results.
Q: How do I get clean cuts?
A: Chill completely, then use a large, sharp knife warmed under hot water and wiped dry between passes, or a bench scraper. For uniform squares, mark equal intervals on the top before cutting.
Q: Can this be made ahead?
A: Yes. Make it up to two weeks ahead and keep refrigerated, or freeze for longer storage. Thaw in the fridge to maintain texture.
Make It Tonight
This is a real pantry-friendly fix for a craving. Gather the butter, your favorite commercial creamy peanut butter, Reese’s chips, powdered sugar, vanilla, salt, and marshmallow creme. Line the pan, sift the sugar, melt, stir, and chill. The steps are short and intentional—no candy thermometer, no mystery. If you want small, shareable bites, cut into 64 tiny squares. If you want decadent hand-sized pieces, go for 16. Either way, you’ll have rich, peanut-forward fudge that tastes like nostalgic kitchen magic.
Set aside about 30 minutes of hands-on time and a couple of hours for chilling, and you’ll be rewarded with a pan of Homemade Peanut Butter Fudge that’s easy to package, hard to resist, and reliable every time.
Homemade Peanut Butter Fudge
Ingredients
Ingredients
- 1 cupunsalted butter
- 1 cupcreamy peanut butter – I use Skippydo not use a “natural” peanut butter
- 1/2 cupReese’s peanut butter chips
- 1 tablespoonpure vanilla extract
- 3 1/2 cupspowdered sugarmeasured and then sifted well – for the smoothest texture and appearance DO sift the sugar!
- 1/2 teaspoonkosher salt
- 1/4 cupmarshmallow creme – I use Kraft
Instructions
Instructions
- Line an 8"x8" pan with parchment paper or foil, leaving an overhang on two sides for easy lifting; set the pan aside.
- Measure and then sift 3½ cups powdered sugar into a large bowl; set the sifted sugar aside.
- Place a heavy-bottomed saucepan over medium heat. Add 1 cup unsalted butter, 1 cup creamy peanut butter, and ½ cup Reese’s peanut butter chips. Stir constantly until everything is melted and the mixture is completely smooth.
- Reduce the heat to low and stir in 1 tablespoon pure vanilla extract.
- Still over low heat, add the sifted powdered sugar and ½ teaspoon kosher salt to the pan. Use a spatula to stir and incorporate the sugar and salt until the mixture is completely smooth.
- If you see lumps or a grainy texture, vigorously whisk and press the mixture against the bottom of the pan with the spatula to work out the lumps until smooth.
- Stir in ¼ cup marshmallow creme until fully incorporated and the mixture is smooth.
- Immediately spread the fudge mixture evenly into the prepared 8"x8" pan and smooth the top with an offset spatula or the back of a spoon.
- Refrigerate the pan for 1½ to 2 hours, or until the fudge is firm.
- Use the parchment or foil overhang to lift the chilled fudge out of the pan and place it on a cutting board. Cut into desired pieces (the recipe author prefers small pieces and cuts the 8"x8" pan into 64 pieces—8 cuts in each direction).
Equipment
- 8x8-inch Pan
- Parchment Paper or Foil
- Large Bowl
- Saucepan
- Spatula
- offset spatula or spoon
- Whisk
- Cutting Board
Notes
Store fudge in a covered container in the fridge for up to a week, or in the freezer in a freezer-safe container or baggie for up to 3 months. Separate any layers with parchment paper.