Gooey Peanut Butter Chocolate Chip Cookie Bars
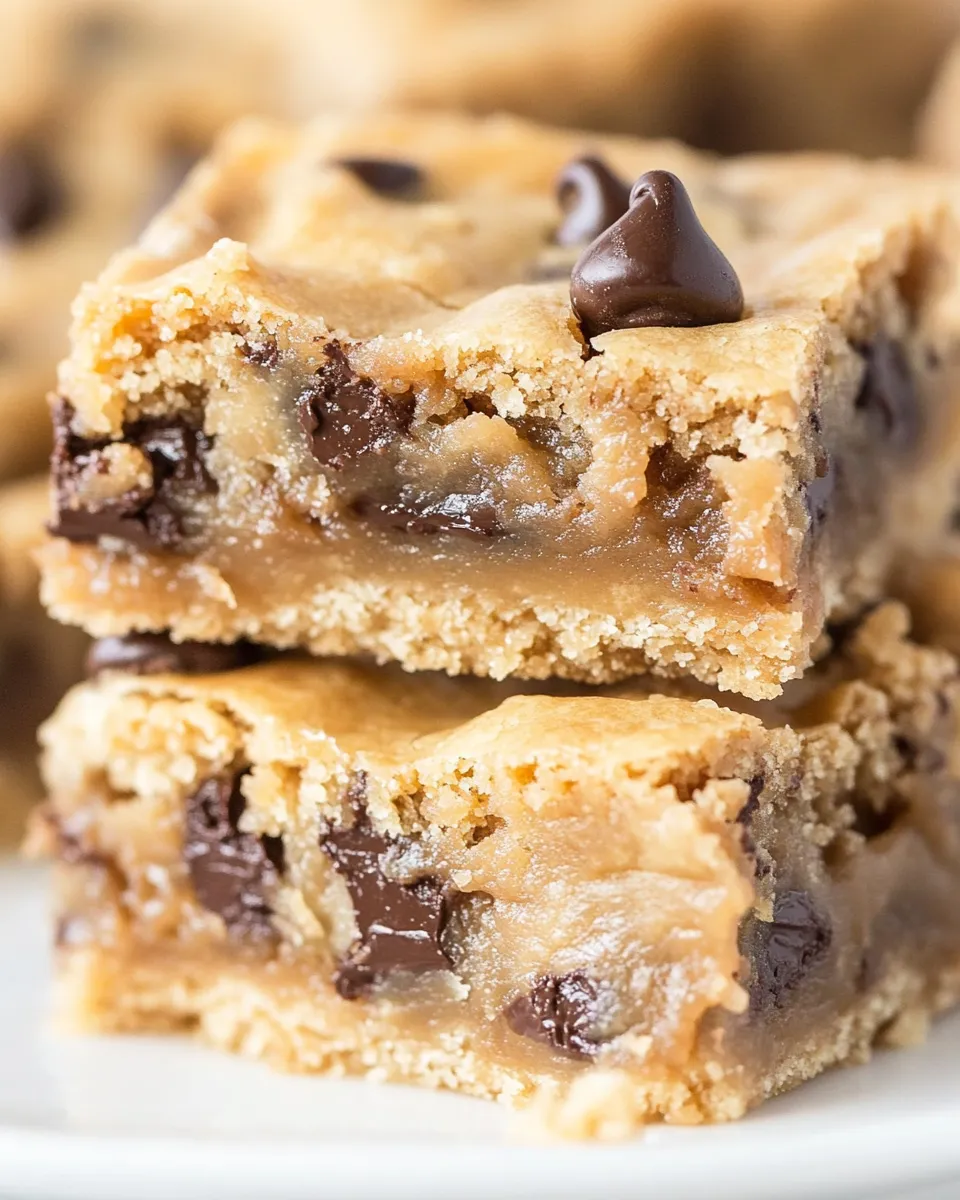
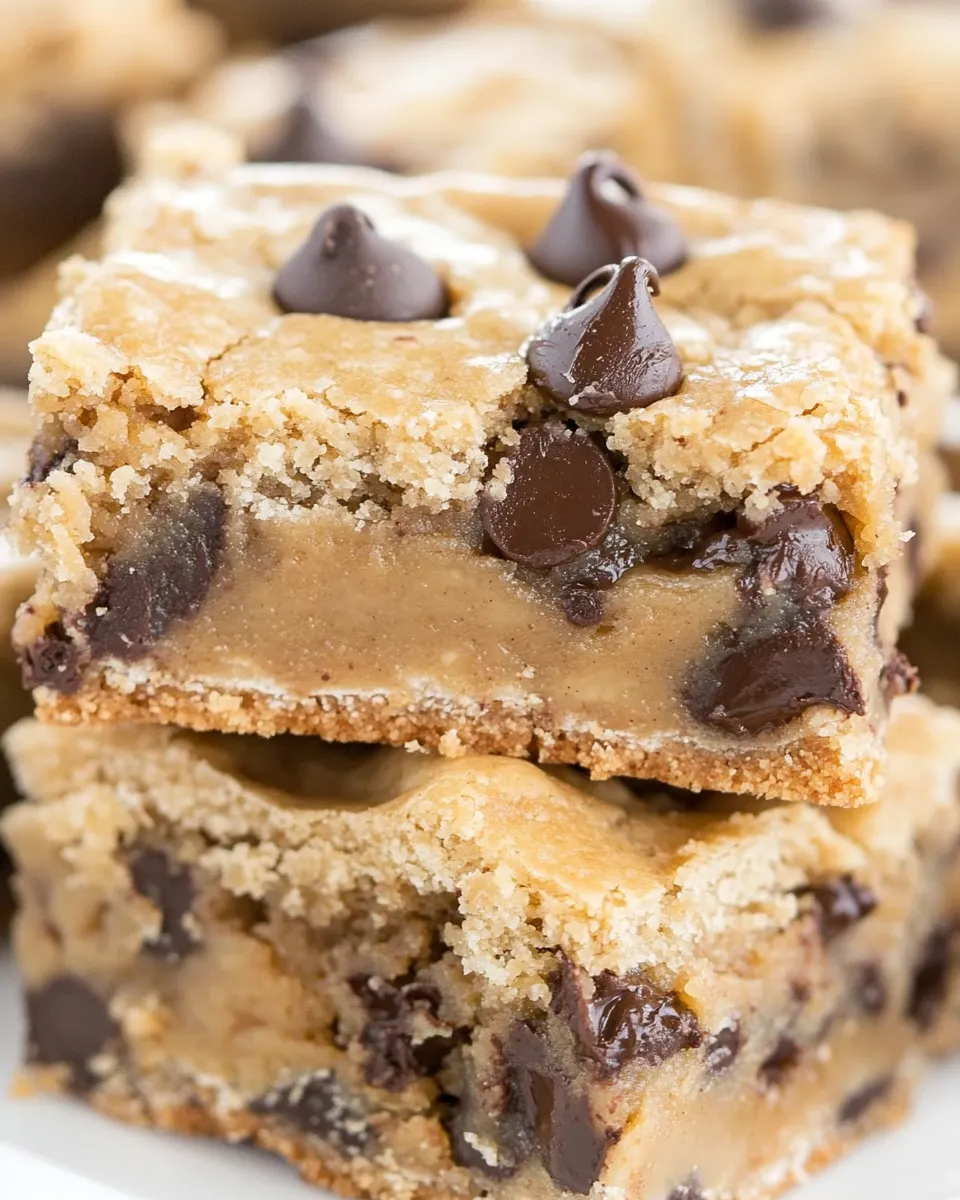
These bars are the kind of dessert I reach for when I want something crowd-pleasing, fast, and impossibly chewy. They use store-bought refrigerated cookie dough to cut the hands-on time, but the combination of sweetened condensed milk and peanut butter gives a rich, molten center that feels homemade. The top bakes into a golden, slightly crackly cookie layer while the filling stays soft and gooey—perfect for serving warm with a glass of milk or a scoop of vanilla ice cream.
I like this recipe because it balances convenience and comfort: two rolls of cookie dough, a can of sweetened condensed milk, a little flour, and peanut butter turn into bars that travel well and disappear quickly. If you plan to bring these to a potluck, bake them the day of and slice them while still slightly warm. They hold their texture and flavor for a couple of days in an airtight container.
Below you’ll find everything you need: the exact ingredients, step-by-step directions straight from the tested method, swaps for dietary needs, equipment that makes the process smoother, and troubleshooting notes so your bars turn out gooey instead of dry. I write plainly—no fluff—so you can jump in and get them into the oven.
What You’ll Need

This is a short checklist of the essential components and the basic prep. You’ll need a 9×13-inch pan, foil, and a spray for nonstick protection. The recipe relies on refrigerated cookie dough for the crust and topping, and a simple filling of sweetened condensed milk, peanut butter, and a touch of flour to bind.
Ingredients
- 2 rolls refrigerated chocolate chip cookie dough, 16.5 ounces each — forms the crust and the crumbly top layer; one roll presses flat for the base, the other is crumbled on top for texture.
- 1 can 14 ounces sweetened condensed milk — gives the filling its sweet, custardy richness and helps create the gooey center.
- 1/2 cup peanut butter — adds flavor, fat, and stickiness to the filling; smooth peanut butter blends easiest.
- 1/4 cup all purpose flour — a small binder that helps stabilize the filling so it slices cleanly without losing that gooey quality.
Mastering Gooey Peanut Butter Chocolate Chip Cookie Bars: How-To
- Preheat oven to 350°F. Line a 9×13-inch pan with foil and spray the foil with nonstick cooking spray.
- Remove both rolls of refrigerated cookie dough from their packaging. Press one roll evenly into the bottom of the prepared pan to form a thin, even crust that covers the entire bottom.
- In a small bowl, stir together the 14-ounce can of sweetened condensed milk, 1/2 cup peanut butter, and 1/4 cup all-purpose flour until smooth and combined.
- Spread the peanut butter mixture evenly over the cookie crust, leaving a small border around all edges.
- Crumble the remaining roll of cookie dough into small pieces and sprinkle them evenly over the peanut butter layer. Lightly press the crumbled dough so it adheres and mostly covers the filling (some filling may remain visible).
- Bake 20–30 minutes, or until the bars are golden brown on top and the center has a slight jiggle.
- Cool the pan completely on a wire rack before slicing. Store in an airtight container for up to 3 days or freeze for up to 1 month.
Why It Deserves a Spot
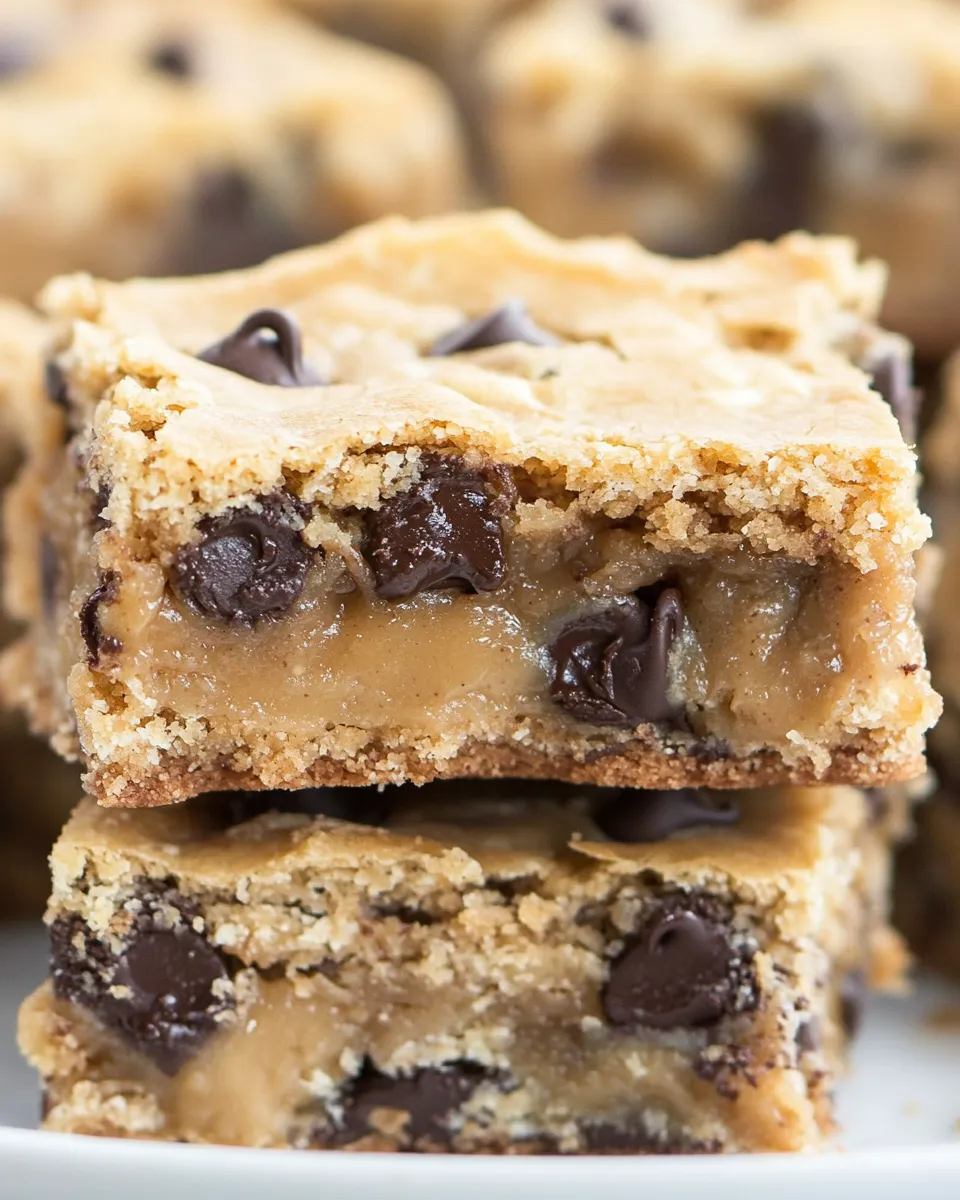
These bars deserve space in your rotation because they deliver maximum flavor with minimal effort. Using refrigerated cookie dough keeps prep time short, but the filling—made from sweetened condensed milk and peanut butter—creates complexity and depth. The finished texture is what sells it: a crisp, golden top with pockets of soft, molten peanut-buttered filling beneath. That contrast is irresistible.
They’re also flexible. Make them for last-minute company, a casual bake sale, or a weeknight treat when you want something indulgent without a long ingredient list or complicated steps. The bars slice into hearty squares that travel well and appeal to both grown-ups and kids. If you need to double the batch, the pan scales and the approach remains the same.
Finally, the flavors are familiar but elevated. The cookie dough contributes buttery sweetness and chocolate chips, while the condensed milk and peanut butter deepen the profile so each bite feels rich, not one-note. It’s comfort food with a little structural intentionality so you get gooey, not messy.
Dairy-Free/Gluten-Free Swaps
If you need dairy-free or gluten-free options, the structure of this recipe makes swaps straightforward—choose products designed to mimic the originals.
- For dairy-free: use a dairy-free sweetened condensed milk alternative (available in many grocery stores or online) and ensure the refrigerated cookie dough is dairy-free. Some plant-based cookie doughs are sold refrigerated; check labels for compliance.
- For gluten-free: buy refrigerated gluten-free chocolate chip cookie dough. Gluten-free dough behaves similarly in this layered format, though baking time can vary slightly—watch for golden color and the slight center jiggle rather than relying solely on minutes.
- For both dairy-free and gluten-free: cross-reference product labels. Peanut butter is naturally both dairy-free and gluten-free, but watch for added oils or flavorings if labels are a concern.
Recommended Tools
- 9×13-inch baking pan — the size specified in the recipe; it creates the right thickness for the crust-to-filling ratio.
- Aluminum foil — for lining the pan so you can lift the whole slab out to slice cleanly after cooling.
- Nonstick cooking spray — prevents sticking to the foil and makes cleanup easy.
- Wire rack — to cool the pan completely so the filling sets before slicing.
- Mixing bowl and spatula — a small bowl is sufficient for the filling; a rubber spatula helps spread it evenly.
- Sharp knife or bench scraper — to slice neat bars after the slab has cooled.
Troubleshooting Tips
Here are concise fixes for common issues so you don’t waste time guessing.
- If the centers are too runny after baking the full time: the bars should still have a slight jiggle. If they’re liquidy, bake an additional 3–5 minutes and check again. Oven temperatures vary—use color and jiggle as your guide.
- If the top browns too quickly: tent loosely with foil for the last 5–10 minutes of baking to prevent over-browning while the center finishes setting.
- If the bars are crumbly instead of holding together: make sure you pressed the bottom dough into an even, thin crust and distributed the crumbled top dough so it bonds to the filling. Overbaking can also dry them out—aim for the lower end of the time range if your oven runs hot.
- If the filling separates or looks oily: use smooth peanut butter and stir thoroughly with the condensed milk and flour to ensure emulsification before spreading.
In-Season Flavor Ideas
Small additions can highlight seasonal flavors without changing the method. In fall, fold a pinch of cinnamon into the peanut butter filling or scatter chopped roasted peanuts over the top before baking for a toasty note. In winter, a few drops of peppermint extract mixed into the filling will give a holiday spin—add sparingly so it doesn’t overpower the peanut butter. In summer, warm the finished bars slightly and serve with fresh berries or a tiny drizzle of salted caramel for contrast.
For a spring-forward riff, stir a tablespoon of lemon zest into a small amount of melted white chocolate and drizzle over cooled bars for a bright counterpoint to the peanut butter. These are optional touches; the base recipe is delicious as written and supports small seasonal tweaks without losing its signature gooey texture.
Chef’s Rationale
Why this exact construction? Pressing one roll as a thin crust gives a stable base that crisps in the oven, while crumbling the second roll creates pockets and texture on top. The peanut butter-condensed milk-flour filling is intentionally simple: the condensed milk provides sweetness and a settable, custard-like body; peanut butter provides fat, flavor, and chew; the flour brings just enough structure to slice neatly without turning the center cakey.
This approach minimizes steps but maximizes mouthfeel. The foil lining and spray make removal and cleanup easy—important for busy cooks. The bake window of 20–30 minutes accounts for differences between ovens and cookie dough brands, so I emphasize visual cues (golden top, slight center jiggle) over strict timing.
Save for Later: Storage Tips
Allow the pan to cool completely on a wire rack before covering. For short-term storage, slice and store the bars in an airtight container at room temperature for up to 3 days. Add a piece of parchment between layers to prevent sticking.
For longer storage, freeze the cooled, sliced bars on a baking sheet until firm, then transfer to a freezer-safe container or bag. They’ll keep up to 1 month. Thaw in the refrigerator or at room temperature for 30–60 minutes before serving; warm briefly in a low oven (300°F) or microwave in short bursts if you prefer them warm and gooey.
Troubleshooting Q&A
Q: I followed the bake time but the center is still soupy. What now?
A: Return it to the oven for 3–5 minute increments, checking the center each time. Use the jiggle test: the center should move a little but not be liquid. If the top is browning too much, tent loosely with foil.
Q: The top is golden but the filling looks split or oily.
A: That can happen if the peanut butter and condensed milk weren’t fully combined. Next time, whisk until smooth before spreading. If it happens during this bake, allow the pan to cool completely so the fats can redistribute and firm up before slicing.
Q: My bars are falling apart when I try to lift them out.
A: Make sure the foil was long enough to create overhang before baking. Use the foil overhang to lift the whole slab out and slice on a cutting board. If you didn’t line the pan, chill the slab for 30–60 minutes so it firms and is easier to slice.
Q: Can I use crunchy peanut butter?
A: Yes; it will add texture. Smooth peanut butter emulsifies more easily and produces a uniformly gooey filling, but crunchy works if you like bits of peanut through the center.
In Closing
If you want a dessert that bridges convenience and homemade comfort, Gooey Peanut Butter Chocolate Chip Cookie Bars are a dependable go-to. The method is simple: a pressed cookie crust, a rich condensed-milk-and-peanut-butter filling, and a crumbly cookie top. Follow the visual cues during baking, and use the storage tips to keep them fresh. Serve warm for maximum gooeyness and watch them vanish.
Happy baking—keep the foil overhang long, don’t overbake, and enjoy the way the peanut butter and chocolate chip cookie flavors play off each other. Let me know how yours turn out or what seasonal twist you try next.

Gooey Peanut Butter Chocolate Chip Cookie Bars
Ingredients
Ingredients
- 2 rolls refrigerated chocolate chip cookie dough16.5 ounces each
- 1 can14 ounces sweetened condensed milk
- 1/2 cuppeanut butter
- 1/4 cupall purpose flour
Instructions
Instructions
- Preheat oven to 350°F. Line a 9x13-inch pan with foil and spray the foil with nonstick cooking spray.
- Remove both rolls of refrigerated cookie dough from their packaging. Press one roll evenly into the bottom of the prepared pan to form a thin, even crust that covers the entire bottom.
- In a small bowl, stir together the 14-ounce can of sweetened condensed milk, 1/2 cup peanut butter, and 1/4 cup all-purpose flour until smooth and combined.
- Spread the peanut butter mixture evenly over the cookie crust, leaving a small border around all edges.
- Crumble the remaining roll of cookie dough into small pieces and sprinkle them evenly over the peanut butter layer. Lightly press the crumbled dough so it adheres and mostly covers the filling (some filling may remain visible).
- Bake 20–30 minutes, or until the bars are golden brown on top and the center has a slight jiggle.
- Cool the pan completely on a wire rack before slicing. Store in an airtight container for up to 3 days or freeze for up to 1 month.
Equipment
- 9x13-inch pan
- Foil
- nonstick cooking spray
- Small Bowl
- Wire Rack