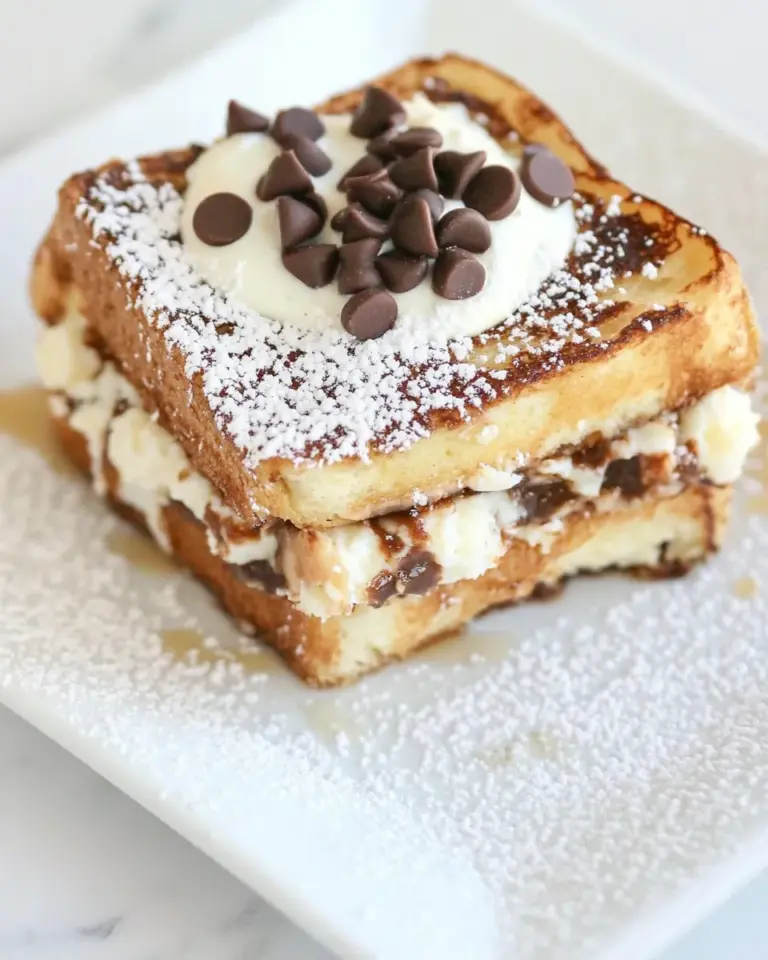
Gooey Chocolate Chunk Cookie Butter Bars
These bars live in that sweet spot between cookie and brownie: tender, gooey, and packed with warm cookie-butter flavor and melty chocolate pockets. They bake up in an 8×8-inch pan, which makes them perfect for sharing, bringing to a potluck, or keeping on the counter for emergency chocolate emergencies.
There’s no flaky frosting or complicated technique—just a straightforward batter, a hot oven, and a finishing sprinkle of flaky sea salt that lifts everything. I test these for texture: soft center, slightly chewy edges, and those chocolate chunks that soften on contact with the hot bars.
Below you’ll find a clear shopping list, step-by-step directions exactly as written, and practical tips to make this easy and reliably delicious. Read through once, gather your ingredients, and you’ll be slicing into gooey squares in about an hour and a half from start to finish.
What to Buy

These bars use pantry-friendly ingredients with a couple of items you might not already have on hand: cookie butter and flaky sea salt. Cookie butter is the star—creamy, spiced, and deeply caramelized in flavor—so buy a jar you like on its own. For chocolate, go for semi-sweet chunks or chop a bar into irregular pieces so you get melting pockets instead of uniform chips.
If you need to restock basics, prioritize fresh eggs and quality chocolate. Molasses here is used for depth—regular (not blackstrap) is what you want. You’ll also want an 8×8-inch baking pan and parchment or foil to line it for clean release. Non-stick spray helps with tidy edges.
Ingredients
- 1 cup creamy cookie butter — the base fat and flavor; choose a brand you enjoy eating with a spoon.
- 1/2 cup light brown sugar, packed — adds moisture and a soft chew.
- 1/3 cup granulated sugar — balances sweetness and contributes slight crisping at the edges.
- 1 tablespoon vanilla extract — rounds flavors and brightens the cookie butter.
- 1 large egg plus one egg yolk — provides structure while keeping the center gooey.
- 1/4 cup molasses (not black strap) — adds deep, warm flavor without bitterness.
- 1 cup plus 1 tablespoon all-purpose flour (not packed!) — the dry structure; measure without compacting for correct texture.
- 1 and 1/2 teaspoons ground cinnamon — complements the spice notes in cookie butter.
- 1/2 teaspoon salt — balances sweetness; don’t skip.
- 4 ounces semi-sweet chocolate, chopped into chunks — folded into the batter for melty pockets.
- 2 ounces semi sweet chocolate, chopped into chunks, for topping the bars with after they’ve been baked — sprinkled on hot bars to melt into glossy puddles.
- Flaky sea salt, for sprinkling — finishing touch to enhance contrast and flavor.
Directions: Gooey Chocolate Chunk Cookie Butter Bars
- Preheat the oven to 350 degrees F. Line an 8×8-inch baking pan with parchment paper or foil and spray the lining well with non-stick baking spray. Set the prepared pan aside.
- In the bowl of a stand mixer fitted with the paddle attachment, place 1 cup creamy cookie butter. Beat on medium-high until smooth and creamy, about 2 minutes.
- Add 1/2 cup light brown sugar (packed), 1/3 cup granulated sugar, and 1 tablespoon vanilla extract. Beat on medium for 2 to 3 minutes, stopping once or twice to scrape down the sides of the bowl.
- Add 1 large egg plus 1 egg yolk and beat until incorporated. Then add 1/4 cup molasses and beat just until combined.
- Turn the mixer off. Add 1 cup plus 1 tablespoon all-purpose flour (measured without packing), 1 1/2 teaspoons ground cinnamon, and 1/2 teaspoon salt. Turn the mixer to low and mix only until just combined, about a minute—do not overmix. The batter will be very thick.
- Fold in the 4 ounces semi-sweet chocolate chunks with a spatula, mixing just until evenly distributed.
- Scrape the batter into the prepared pan and press it down into an even layer.
- Bake for 30 to 32 minutes, until the edges are set and the center is just slightly soft.
- Remove the pan from the oven. Immediately sprinkle the reserved 2 ounces semi-sweet chocolate chunks evenly over the hot bars so they soften/melt; if desired, press them lightly into the surface. Sprinkle flaky sea salt over the top to taste.
- Transfer the pan to a cooling rack and cool completely in the pan for at least 1 hour before slicing into bars.
What Makes This Recipe Special
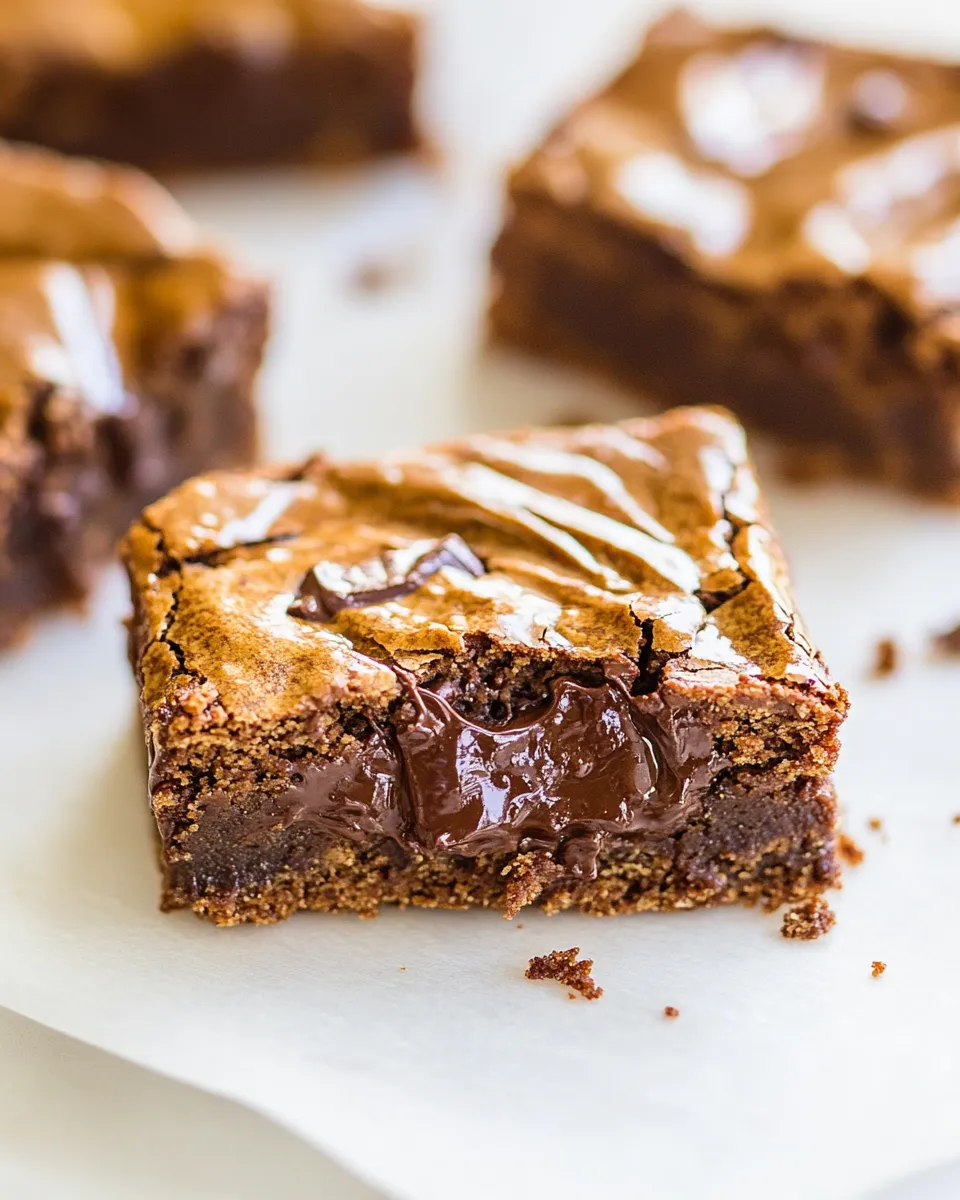
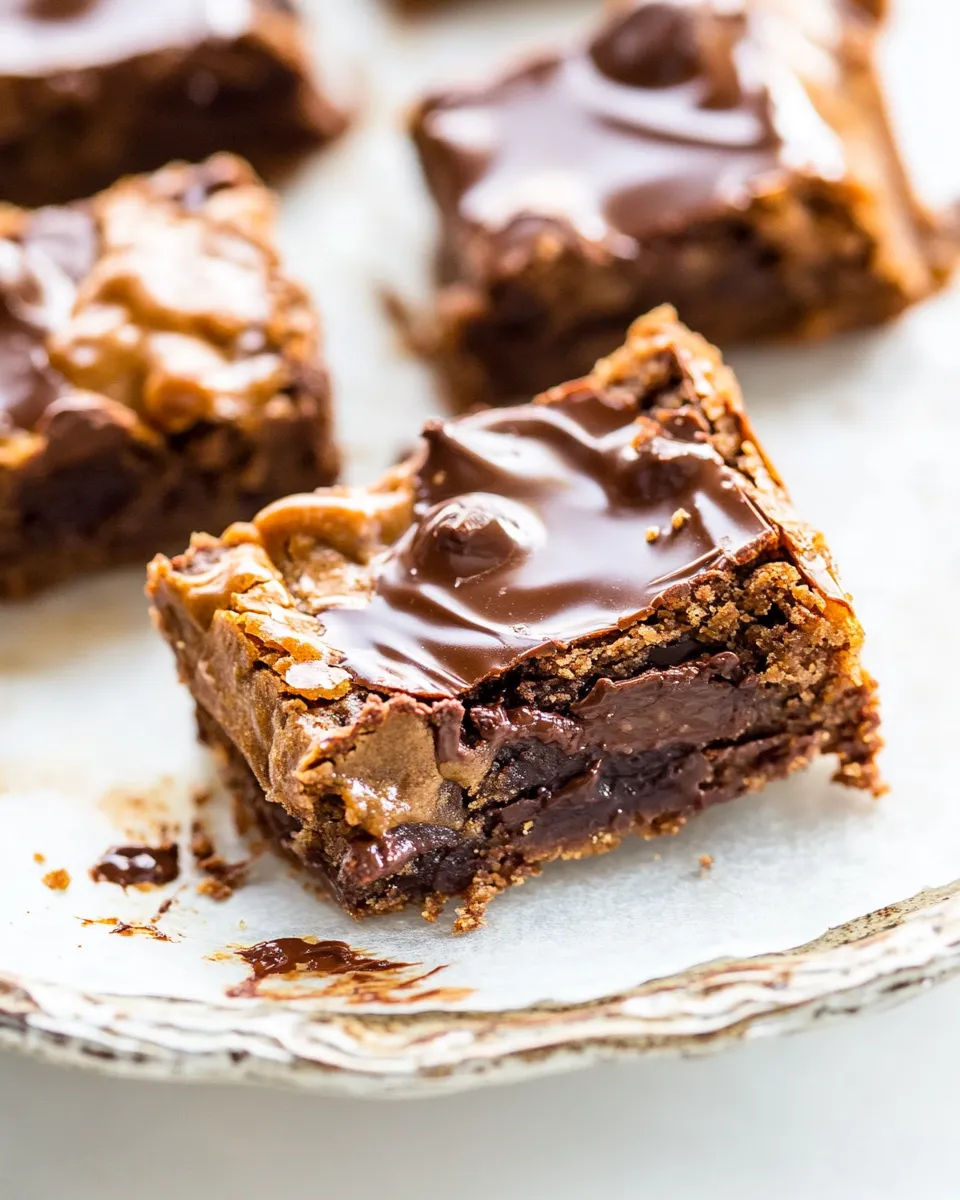
This recipe leans on cookie butter rather than butter or oil, which gives the bars a distinct caramelized, spiced backbone you won’t get with plain nut butter or butter. The combination of brown sugar plus molasses deepens that flavor and keeps the interior moist and gooey. Chocolate chunks—rather than chips—create irregular melting pockets so every bite feels a little different.
The finishing step—sprinkling the second set of chocolate chunks on the hot pan—creates glossy, melty pools and avoids overbaking the interior trying to melt chocolate inside the batter. Flaky sea salt at the end cuts through the sweetness and makes the chocolate sing.
International Equivalents

Ingredient names can vary by region. Cookie butter is often labeled as “speculoos spread” in parts of Europe. Light brown sugar may be sold as “soft brown sugar.” Molasses can be found under the same name; the recipe specifies not to use blackstrap, which is darker and more bitter than regular molasses.
If you’re outside the U.S., look for standard equivalents at your grocery store—an 8×8-inch pan is roughly a small square oven dish (about 20 x 20 cm). If a metric scale or exact gram conversions are preferred, use a trusted converter for accuracy rather than estimating by eye.
Essential Tools for Success
- Stand mixer with paddle attachment — makes the batter smooth and removes lumps easily; a handheld mixer works in a pinch.
- 8×8-inch baking pan — gives the correct depth for gooey bars.
- Parchment paper or foil and non-stick spray — for clean release and tidy edges.
- Spatula — for folding chocolate and pressing batter evenly into the pan.
- Cooling rack — helps the pan cool evenly so bars slice cleanly.
Things That Go Wrong
Underbaked center: If you take the pan out too early, bars will be overly loose and may not slice nicely after an hour. Follow the bake time and look for set edges with a slightly soft center. The bars continue to set as they cool.
Dry, crumbly bars: Packing flour when measuring or overmixing after adding flour can create a drier, tougher texture. Measure flour without packing and mix only until just combined.
Chocolate doesn’t melt on top: If the top chocolate doesn’t soften, the bars likely cooled too long before you added the chunks. Add them immediately when the pan is hot from the oven so they soften and become glossy.
Variations for Dietary Needs
Gluten-free: Use a reliable 1-to-1 gluten-free all-purpose flour blend in place of the all-purpose flour. Textures vary across blends; a binder like xanthan gum may already be included in your mix. Expect slightly different chew.
Dairy-free / vegan adjustments: Swap semi-sweet chocolate for dairy-free chocolate and ensure the cookie butter is dairy-free (many are). Replace the egg and yolk with a tested vegan egg substitute such as a commercial binder or a mixture recommended for baking—note that the original egg structure contributes to the gooey center, so texture will change.
Less-sweet option: Reduce the granulated sugar by a tablespoon or use slightly darker chocolate to balance the sweetness. Be mindful that sweetness also affects texture and moisture.
Cook’s Notes
Measuring flour
The recipe notes “measured without packing” for a reason. Scoop the flour into your measuring cup and level it with a knife rather than tapping or packing it down; packed flour adds too much and dries the bars.
Doneness check
Look for set edges and a center that still gives slightly when nudged. The total bake time is 30 to 32 minutes, but ovens vary—start checking toward the 28-minute mark if your oven runs hot.
Chocolate chunks vs chips
Chunks melt more unpredictably than chips, which is the point: you want those gooey, irregular pockets. If you only have chips, the bars will still be delicious but with a more uniform chocolate texture.
Keep-It-Fresh Plan
Store cooled bars in an airtight container at room temperature for up to 3 days. For longer storage, refrigerate in an airtight container for up to a week—bring to room temperature before serving so the center regains some softness.
To freeze: wrap individual bars tightly in plastic wrap and seal in an airtight container or freezer bag for up to 3 months. Thaw overnight in the refrigerator and bring to room temperature before enjoying. Rewarm gently for a freshly baked feel—10–15 seconds in the microwave on a low setting softens the chocolate without overheating the cookie butter.
Your Top Questions
Q: Can I make these in a larger pan?
A: You can scale, but baking time and thickness will change. An 8×8 pan gives the intended depth and bake time. If you use a 9×9, expect slightly thinner bars and reduce baking time by a few minutes; watch the center closely.
Q: What if I only have crunchy cookie butter?
A: Crunchy cookie butter will change texture slightly and add little crunch bits—but the overall structure and flavor remain enjoyable.
Q: Can I mix in nuts or other add-ins?
A: Yes—chopped nuts or dried fruit could be folded in when you add the chocolate chunks. Keep additions modest so the batter maintains its structure and the bars bake evenly.
Ready to Cook?
Gather your ingredients, preheat the oven, and line that pan. The steps are straightforward and forgiving if you follow the key cues: measure flour without packing, don’t overmix after adding flour, and add the final chocolate while the bars are hot from the oven. You’ll end up with squares that are deeply flavored, chewy at the edges, and luxuriously gooey in the center—perfect with a glass of milk or a hot cup of coffee.
When you slice them, use a sharp knife wiped between cuts for clean edges. Enjoy, and if you share these, expect compliments and requests for the recipe.
Gooey Chocolate Chunk Cookie Butter Bars
Ingredients
Ingredients
- 1 cupcreamy cookie butter
- 1/2 cuplight brown sugar packed
- 1/3 cupgranulated sugar
- 1 tablespoonvanilla extract
- 1 large egg plus one egg yolk
- 1/4 cupmolasses not black strap
- 1 cupplus 1 tablespoon all-purpose flour not packed!
- 1 and 1/2 teaspoons ground cinnamon
- 1/2 teaspoonsalt
- 4 ouncessemi-sweet chocolate chopped into chunks
- 2 ouncessemi sweet chocolate chopped into chunks, for topping the bars with after they've been baked
- Flaky sea salt for sprinkling
Instructions
Instructions
- Preheat the oven to 350 degrees F. Line an 8x8-inch baking pan with parchment paper or foil and spray the lining well with non-stick baking spray. Set the prepared pan aside.
- In the bowl of a stand mixer fitted with the paddle attachment, place 1 cup creamy cookie butter. Beat on medium-high until smooth and creamy, about 2 minutes.
- Add 1/2 cup light brown sugar (packed), 1/3 cup granulated sugar, and 1 tablespoon vanilla extract. Beat on medium for 2 to 3 minutes, stopping once or twice to scrape down the sides of the bowl.
- Add 1 large egg plus 1 egg yolk and beat until incorporated. Then add 1/4 cup molasses and beat just until combined.
- Turn the mixer off. Add 1 cup plus 1 tablespoon all-purpose flour (measured without packing), 1 1/2 teaspoons ground cinnamon, and 1/2 teaspoon salt. Turn the mixer to low and mix only until just combined, about a minute—do not overmix. The batter will be very thick.
- Fold in the 4 ounces semi-sweet chocolate chunks with a spatula, mixing just until evenly distributed.
- Scrape the batter into the prepared pan and press it down into an even layer.
- Bake for 30 to 32 minutes, until the edges are set and the center is just slightly soft.
- Remove the pan from the oven. Immediately sprinkle the reserved 2 ounces semi-sweet chocolate chunks evenly over the hot bars so they soften/melt; if desired, press them lightly into the surface. Sprinkle flaky sea salt over the top to taste.
- Transfer the pan to a cooling rack and cool completely in the pan for at least 1 hour before slicing into bars.
Equipment
- 8x8-inch baking pan
- Parchment Paper or Foil
- non-stick baking spray
- stand mixer with paddle attachment
- Spatula
- Cooling Rack
Notes
Please see post for all tips and tricks!