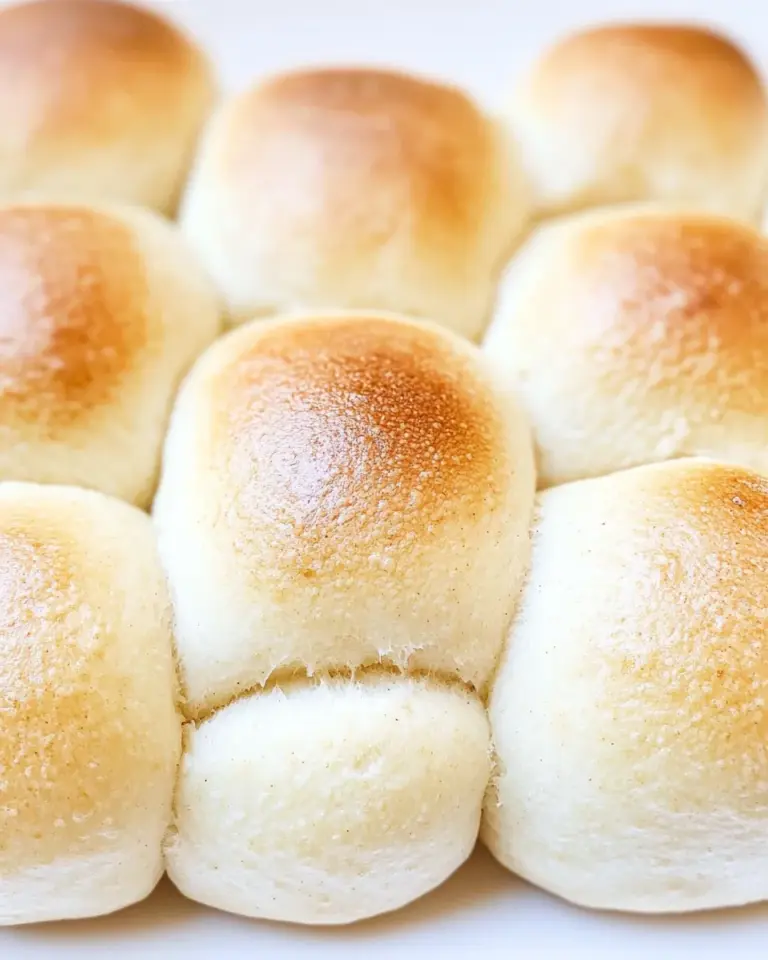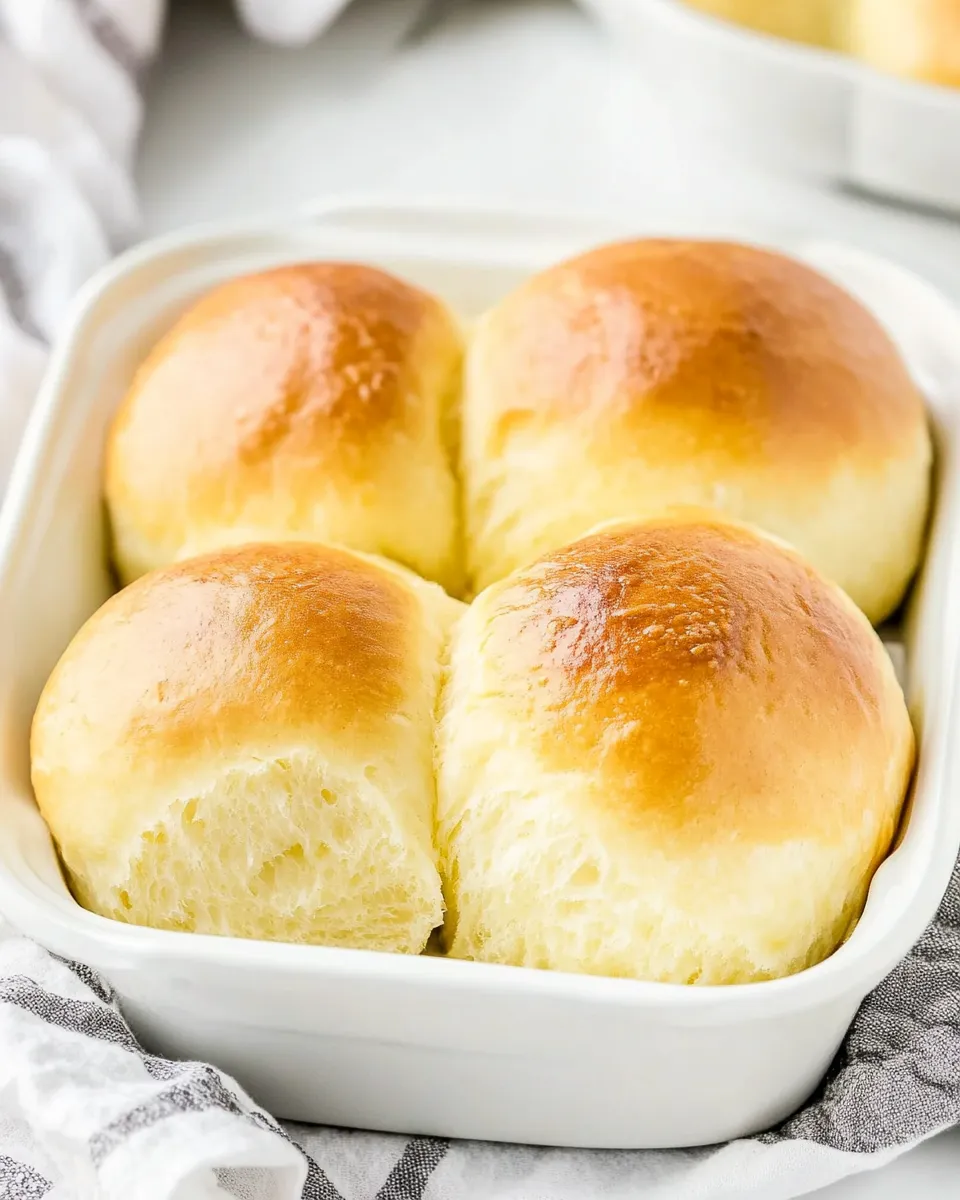
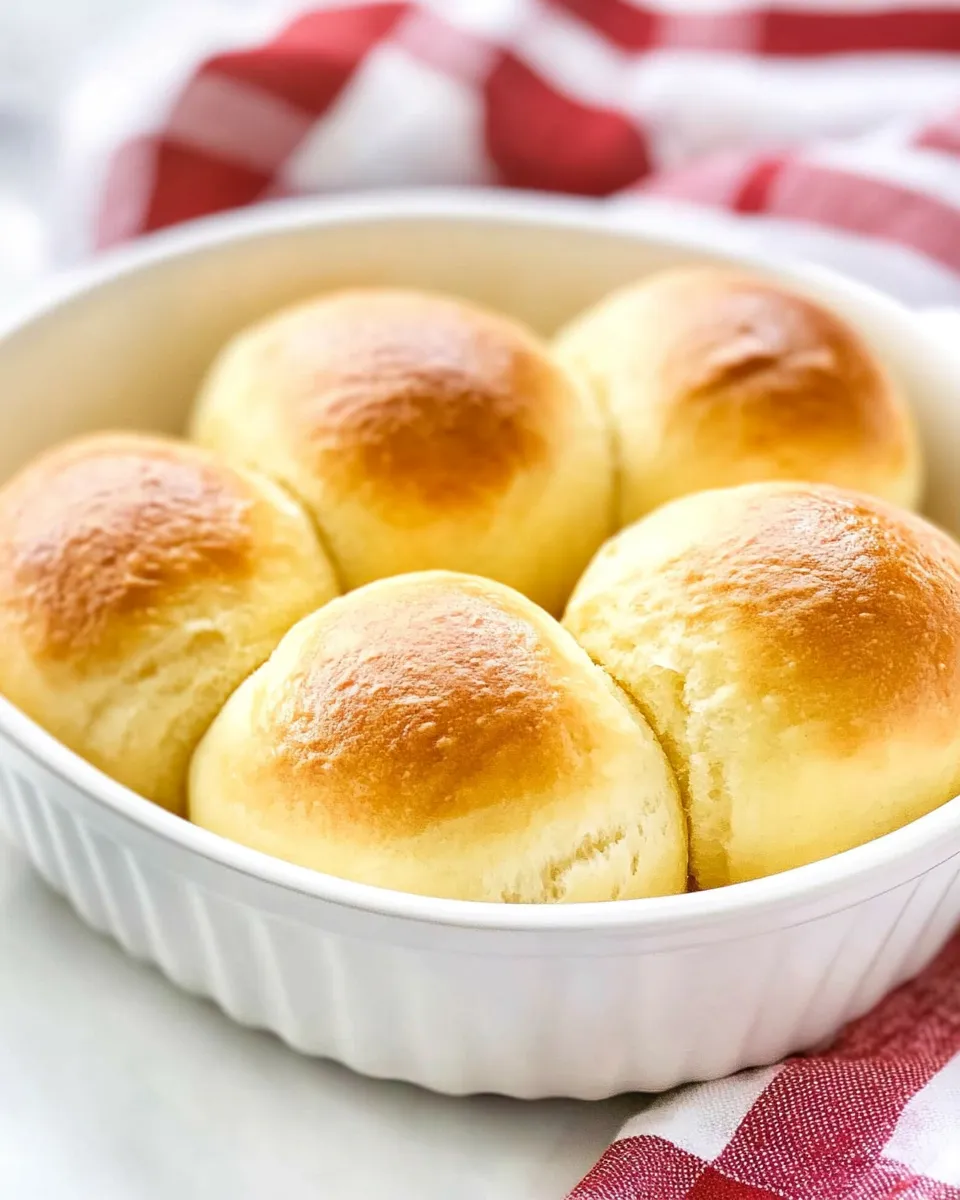
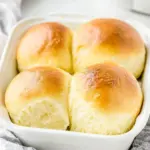
Golden Corral Rolls Easy Copycat Recipe
I baked these rolls until my kitchen smelled like a bakery and my kids were asking if we could serve them with dinner — twice. Golden Corral’s dinner rolls are famously soft, slightly sweet, and just buttery enough to disappear within a single meal. I wanted to recreate that exact texture and flavor at home without fuss. This is a straightforward, reliable copycat that leans on a stand mixer and a little patience.
There’s no tricky kneading by hand and no unusual ingredients. You’ll warm the milk, wake the yeast, and let the dough do most of the work. The result is a batch of 12 pillow-soft rolls that hold up well at the table and freeze beautifully for later. If you want a dependable roll that’s nearly identical to the restaurant classic, this is it.
What to Buy

Before you start, gather the basics and a couple of small comforts that make the process smoother. Buy the dairy and flour fresh — bread flour has the protein content you want unless you plan to swap it. Pick a good unsalted butter you enjoy eating; its flavor comes through when the rolls are hot and brushed with the final bit of melted butter.
Other shopping notes: get a reliable instant or active dry yeast (check the date), a large egg, and a small container of granulated sugar. If you don’t already have a silicone baking mat or parchment paper, it’s worth getting one — it prevents sticking and helps the bottoms brown evenly. Finally, if you don’t own a stand mixer, a sturdy bowl and a willingness to knead by hand will do in a pinch, though the mixer saves time and effort.
Ingredients
- 1 1/4 cups milk — warmed to steaming to help melt butter and temper the yeast mixture.
- 1/4 cup water — combines with the milk to create the right hydration and temperature.
- 6 tablespoons granulated sugar (81 grams) — gives the rolls their gentle sweetness and helps yeast activity.
- 1/4 cup + 2 tablespoons butter, melted, divided use — fat for tenderness; reserve 2 tablespoons to brush the tops after baking.
- 2 1/4 teaspoons instant or active dry yeast — the leavening power; store fresh for best rise.
- 1 large egg — adds richness, color, and structure to the dough.
- 1 teaspoon salt — balances sweetness and strengthens the dough.
- 4 1/4 to 4 1/2 cups bread flour (about 566 to 600 grams) — gives the rolls their soft but structured crumb; add up to 4 1/2 cups if needed.
From Start to Finish: Golden Corral Rolls
- Melt the butter and measure out 1/4 cup plus 2 tablespoons, keeping them together for now. Heat 1 1/4 cups milk in a small saucepan until steaming and tiny bubbles form around the edges.
- Pour the hot milk into the bowl of a stand mixer fitted with the dough hook. Add 1/4 cup water, 6 tablespoons granulated sugar (81 grams), and 1/4 cup of the melted butter. Let the mixture cool until warm to the touch (like a warm bath).
- Stir in 2 1/4 teaspoons instant or active dry yeast and let it sit 5 to 7 minutes, until foamy.
- Add 1 large egg, 1 teaspoon salt, and 4 1/4 cups bread flour to the mixer. Start mixing on low speed, then gradually add up to 4 1/2 cups bread flour as needed until the dough pulls away from the sides of the bowl and forms a soft, slightly sticky ball. Do not add more than 4 1/2 cups flour.
- Continue kneading the dough on low speed for 5 to 6 minutes, until it is smooth and elastic.
- Shape the dough into a ball, cover the bowl with plastic wrap or a clean kitchen towel, and let it rise in a warm, draft-free spot until doubled in size, about 1 hour.
- Punch down the dough and divide it into 12 equal pieces. Gently shape each piece into a roughly square roll and place them on a rimmed baking sheet lined with a silicone mat or parchment paper, arranging them so they will touch as they rise.
- Cover the rolls and let them rise again until very puffy and touching one another, about 45 to 60 minutes.
- While the rolls are finishing their second rise, preheat the oven to 375°F and position a rack in the center.
- When the oven reaches temperature, bake the rolls for 15 to 20 minutes, until golden brown on top and bottom.
- Remove the rolls from the oven and immediately brush the tops with the remaining 2 tablespoons melted butter. Serve warm.
Why This Recipe is a Keeper
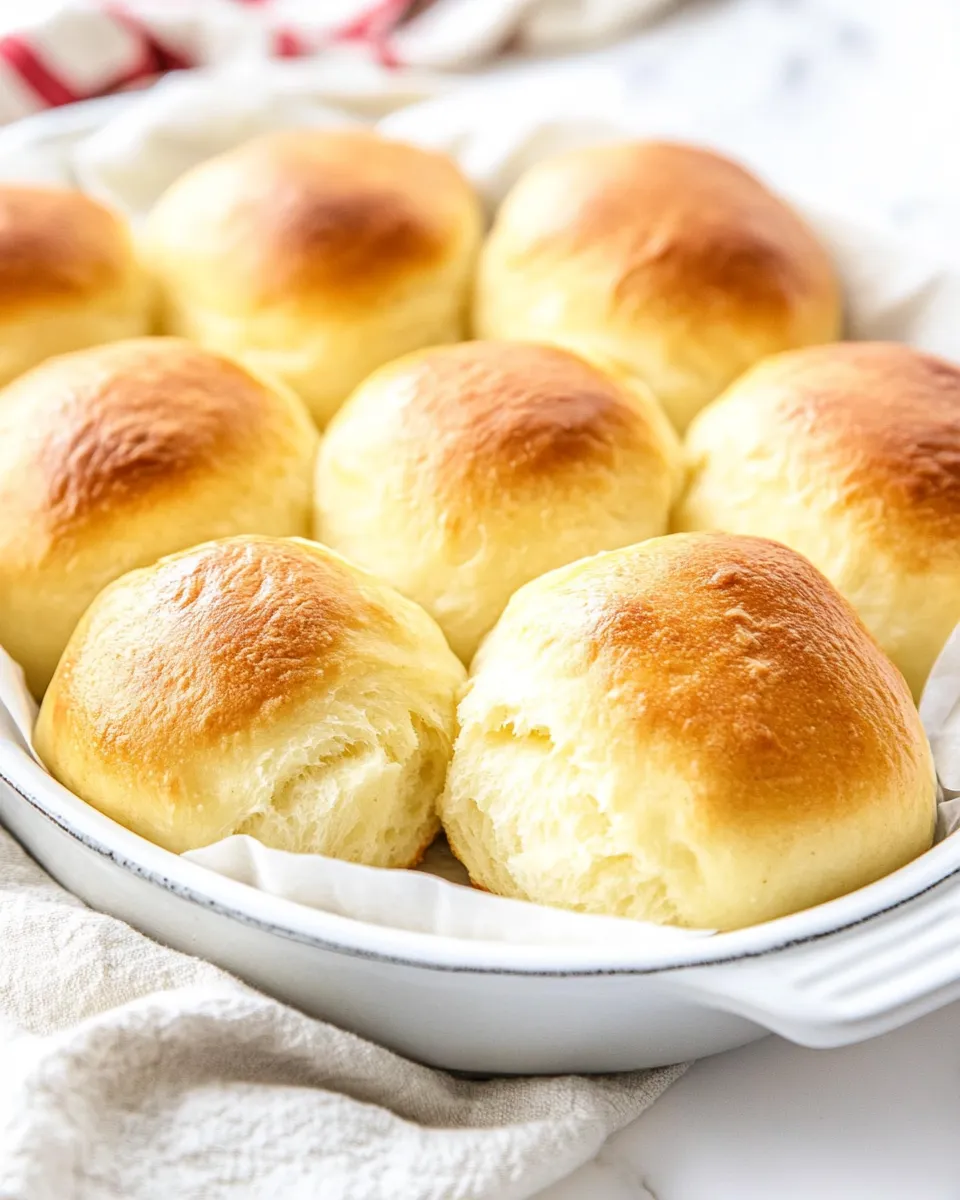
This version nails the texture: soft, tender crumb with a slightly sweet flavor that’s never cloying. The combination of warmed milk and just the right amount of butter produces rolls that brown nicely while staying moist inside. The method is forgiving — you can see the dough’s progress and adjust flour within a narrow range.
It’s also scalable and practical. Twelve rolls are ideal for a family meal, but the method handles double batches without drama. The final butter brush makes them shine and smell irresistible; that small step elevates the whole batch.
What to Use Instead
If you don’t have bread flour, all-purpose can stand in, but expect slightly less structure and a softer, more delicate roll — you might need to reduce the higher end of the flour range by a few tablespoons. If you only have active dry yeast and prefer instant, you can use either; activate active dry in the warm milk-water mixture if you’re unsure.
Unsalted butter is recommended so you control the salt level. If you only have salted, omit a pinch of the measured salt or use as-is and reduce the added salt to taste when you bake again.
Must-Have Equipment
- Stand mixer with dough hook — not mandatory, but it does the kneading cleanly and consistently.
- Small saucepan — to heat the milk so it’s steaming with tiny bubbles around the edge.
- Rimmed baking sheet — keeps the rolls contained as they expand and touch.
- Silicone mat or parchment paper — prevents sticking and promotes even browning.
- Kitchen scale or measuring cups — accuracy matters for flour and sugar to get the right texture.
- Plastic wrap or clean kitchen towel — for a good, draft-free rise.
Learn from These Mistakes
Too much flour is the most common pitfall. The dough should be slightly sticky at the lower flour amount and only tacky at the higher end. Resist adding extra flour quickly; let the mixer incorporate and give the dough time to come together.
Another misstep is overheating the milk. If it’s hot to the point of steaming vigorously, it can kill the yeast. You want steaming with tiny bubbles at the edge — warm to the touch, not scalding. If the dough won’t rise, check the yeast date and room temperature; yeast likes a cozy environment.
Finally, don’t skip the second rise. Those extra 45–60 minutes produce the pillowy interior and allow the rolls to touch and set the final shape. Underproofed rolls will be dense and won’t brown evenly.
Allergy-Friendly Swaps
If you need dairy-free options, use an unsweetened non-dairy milk with similar protein and fat content (oat milk often works well) and swap butter for a dairy-free spread that melts cleanly. Note: texture will shift slightly.
For an egg-free version, a commercial egg replacer or a flax “egg” (1 tablespoon ground flax + 3 tablespoons water, rested until gelled) can work, though the crumb and richness will be a touch different. For gluten-free needs, this dough isn’t directly transferable — gluten-free bread baking requires specific blends and binding agents, and rise behavior will differ.
What I Learned Testing
I tested these rolls over several weeks and adjusted nothing crucial about the method — only the feel of the dough. At 4 1/4 cups the dough is noticeably softer and more delicate; at 4 1/2 it’s firmer and easier to shape. Both work. My preference is to start at 4 1/4 cups and add a tablespoon or two only if the dough is too sticky to handle.
I also found that brushing just as the rolls come out of the oven delivers the best shine and flavor. The butter melts into the warm tops and keeps them soft. If you wait, the butter won’t absorb as well and the shine will be diminished.
Make-Ahead & Storage
Make-ahead: shape the rolls, place them on the tray, cover tightly with plastic, and refrigerate for up to 24 hours. When ready to bake, take them out, let them sit at room temperature for 30–60 minutes, then proceed with the second rise and bake as directed. The cold slow-rise gives a subtle depth of flavor.
Storage: cooled rolls keep in an airtight container at room temperature for 2 days. For longer storage, freeze in a sealed bag for up to 3 months. Reheat individual rolls wrapped in foil at 300°F for 10–12 minutes, or microwave a thawed roll for 10–15 seconds and finish in a low oven for crisping if desired.
Top Questions & Answers
Q: Can I use whole milk, 2% or skim?
A: Whole milk gives the richest flavor and tenderness, but 2% works fine. Skim will yield slightly less richness but the structure remains.
Q: Can I mix and knead by hand instead of a stand mixer?
A: Yes. Combine ingredients in a bowl, turn onto a lightly floured surface, and knead 8–10 minutes until smooth and elastic. The dough will respond to consistent kneading.
Q: What if my dough doesn’t rise?
A: Check yeast freshness and room temperature. If the yeast didn’t foam in step 3, temperatures were likely too hot or the yeast was inactive. Start over with fresh yeast and make sure the liquid is warm, not hot.
Q: Can I make smaller or larger rolls?
A: Yes. Adjust baking time slightly: smaller rolls bake a few minutes less, larger ones need more time. Watch for an even golden color and that the bottoms are cooked through.
Q: Why bread flour?
A: Bread flour has higher protein, which gives the rolls better structure and a slightly chewier, satisfying crumb while still being soft. All-purpose will work in a pinch but expect a bit less chew and more delicate texture.
Final Bite
These Golden Corral-inspired rolls are straightforward, forgiving, and exactly the sort of recipe that makes weeknight dinners feel a little special. Follow the steps, watch your dough’s feel rather than relying on flour by sight, and you’ll have warm, buttery rolls that disappear fast. If you try them, let me know how you shaped them, what you served, and whether you brushed them with extra butter (you absolutely should).
Happy baking — and may your kitchen be warm and your rolls be golden.
Golden Corral Rolls Easy Copycat Recipe
Ingredients
Ingredients
- 1 1/4 cupsmilk
- 1/4 cupwater
- 6 tablespoonsgranulated sugar 81 grams
- 1/4 cup+ 2 tablespoons buttermelted divided use
- 2 1/4 teaspoonsinstant or active dry yeast
- 1 largeegg
- 1 teaspoonsalt
- 4 1/4 to 4 1/2 cupsbread flour about 566 to 600 grams
Instructions
Instructions
- Melt the butter and measure out 1/4 cup plus 2 tablespoons, keeping them together for now. Heat 1 1/4 cups milk in a small saucepan until steaming and tiny bubbles form around the edges.
- Pour the hot milk into the bowl of a stand mixer fitted with the dough hook. Add 1/4 cup water, 6 tablespoons granulated sugar (81 grams), and 1/4 cup of the melted butter. Let the mixture cool until warm to the touch (like a warm bath).
- Stir in 2 1/4 teaspoons instant or active dry yeast and let it sit 5 to 7 minutes, until foamy.
- Add 1 large egg, 1 teaspoon salt, and 4 1/4 cups bread flour to the mixer. Start mixing on low speed, then gradually add up to 4 1/2 cups bread flour as needed until the dough pulls away from the sides of the bowl and forms a soft, slightly sticky ball. Do not add more than 4 1/2 cups flour.
- Continue kneading the dough on low speed for 5 to 6 minutes, until it is smooth and elastic.
- Shape the dough into a ball, cover the bowl with plastic wrap or a clean kitchen towel, and let it rise in a warm, draft-free spot until doubled in size, about 1 hour.
- Punch down the dough and divide it into 12 equal pieces. Gently shape each piece into a roughly square roll and place them on a rimmed baking sheet lined with a silicone mat or parchment paper, arranging them so they will touch as they rise.
- Cover the rolls and let them rise again until very puffy and touching one another, about 45 to 60 minutes.
- While the rolls are finishing their second rise, preheat the oven to 375°F and position a rack in the center.
- When the oven reaches temperature, bake the rolls for 15 to 20 minutes, until golden brown on top and bottom.
- Remove the rolls from the oven and immediately brush the tops with the remaining 2 tablespoons melted butter. Serve warm.
Equipment
- Stand mixer
- dough hook
- Small Saucepan
- Rimmed Baking Sheet
- silicone mat or parchment paper
- plastic wrap or kitchen towel
- Oven