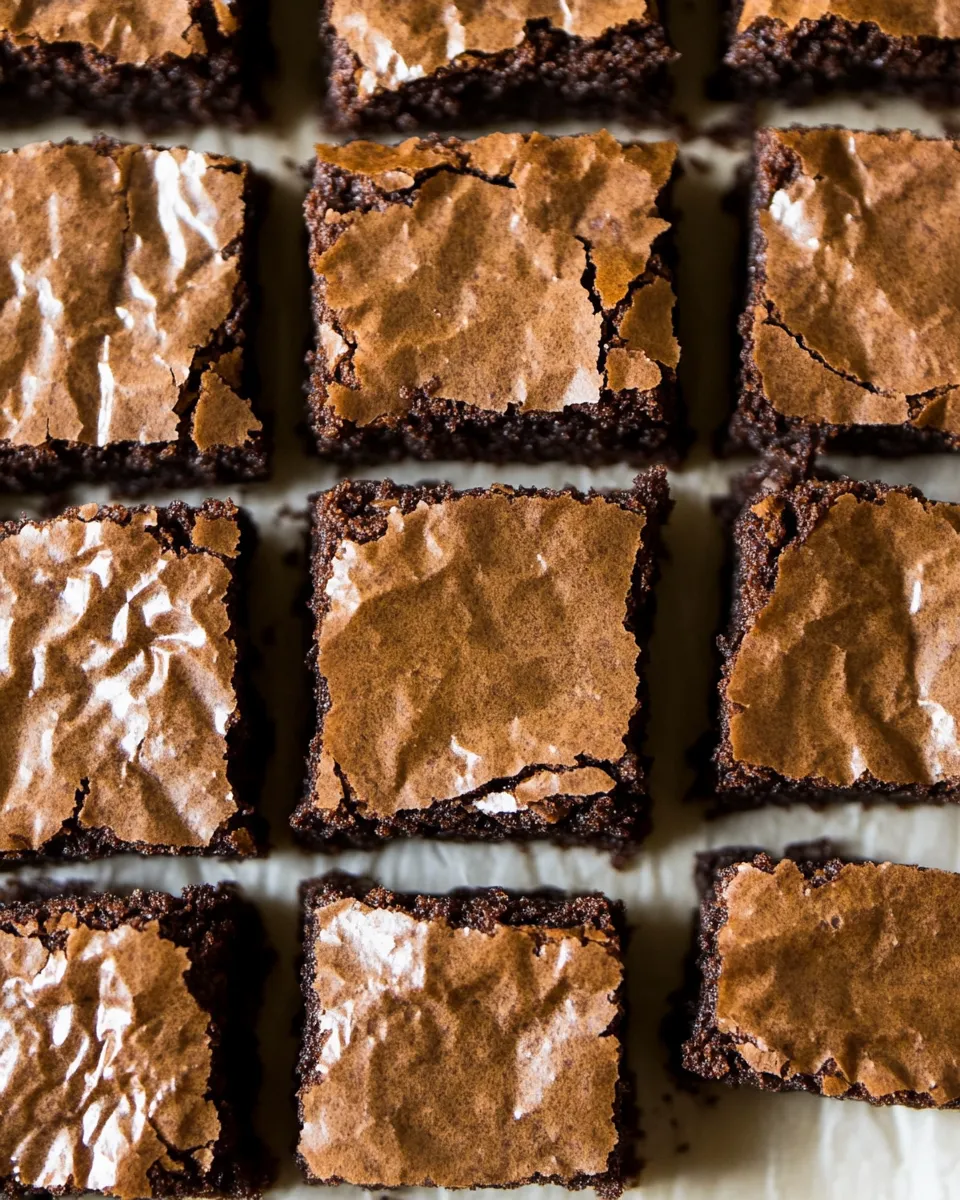
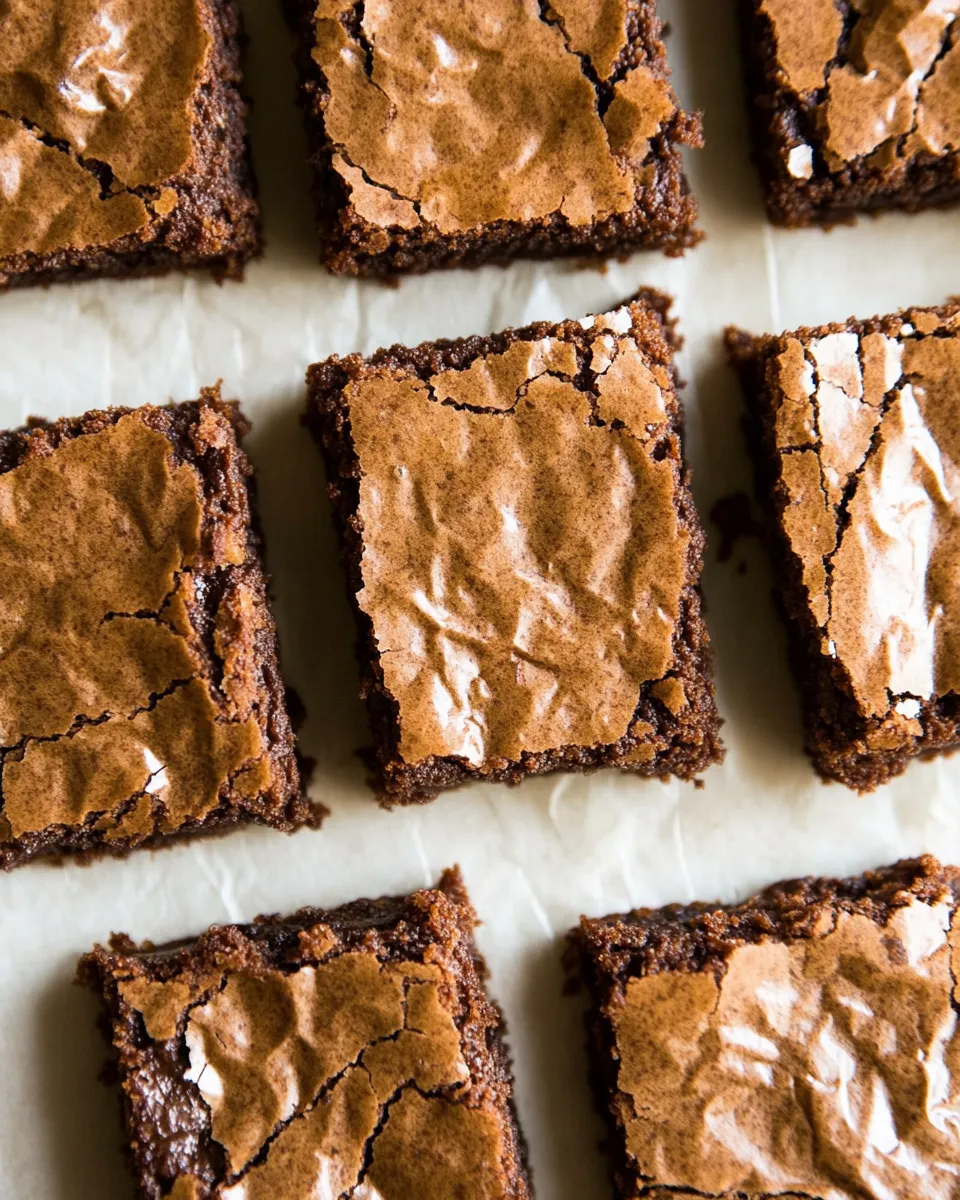
Gluten-Free Brownies (Perfect Crinkle Top!)
These brownies give you that glossy, crackly top and a chewy, fudgy interior—without wheat. I developed this version after testing a dozen flour blends and timing variations until the texture and flavor balanced. The result is reliably decadent and forgiving, whether you want gooey, fudgy, or slightly firm bars.
I keep the method simple: melt butter, mix sugars, add eggs, fold in the dry mix, and bake. Little adjustments—like resting the batter briefly or choosing a slightly different bake time—let you control the crumb. The batter is thick and chocolate-forward, and the instant coffee in the dry mix deepens the chocolate without tasting like coffee.
Below you’ll find exact ingredients and steps, plus practical notes on equipment, troubleshooting, substitutions, and make-ahead tips. Follow the recipe as written the first time, then tailor timing to match your preferred level of fudginess.
What Goes Into Gluten-Free Brownies (Perfect Crinkle Top!)

Ingredients
- 1cup (240g)unsalted butter(2 sticks), melted — Provides richness and helps create a shiny top; use fully melted but not scalding hot.
- 2Tbsp (30ml)avocado oil* — Adds moisture and keeps the crumb tender; neutral-flavored oil works too.
- 1cup (200g)granulated cane sugar — Contributes to structure and that crinkle; don’t reduce too much unless adjusting other sugars.
- 1cup (200g)light brown sugar, tightly packed — Adds moisture and depth; the molasses helps keep the brownies chewy.
- 1Tbsp (15ml)pure vanilla extract — Rounds and brightens the chocolate.
- 4largeeggsat room temperature — Eggs build structure and help form the crinkled top; bring them to room temp for even mixing.
- 1cup (120g)gluten-free all-purpose flour — Use a blend with xanthan or guar included for best texture; measure by weight for consistency.
- 1cup (100g)raw cacao powder — Intense chocolate flavor without added sugar; Dutch-processed will change acidity and flavor.
- 2Tbspinstant coffeeor espresso powder — Enhances chocolate depth; it won’t make the brownies taste like coffee.
- ½tspsea saltto taste — Balances sweetness; flaky finishing salt on slices is optional.
- 1cup (170g)semi-sweet chocolate chipsor chopped chocolate bars — Melt pockets of chocolate and add texture; use quality chocolate for best results.
Gluten-Free Brownies (Perfect Crinkle Top!) Made Stepwise
- Preheat the oven to 350°F and place a rack in the center. Line a 13″ x 9″ baking pan with parchment paper (leave an overhang for easy removal) or grease/spray the pan.
- In a large bowl combine the melted unsalted butter and avocado oil, then add the granulated cane sugar, light brown sugar, and pure vanilla extract. Stir until the sugars are evenly moistened and the mixture is combined (it may look greasy).
- In a small bowl whisk the room-temperature eggs until blended. If the melted butter mixture is still warm to the touch, let it cool briefly until lukewarm, then add the beaten eggs to the butter–sugar mixture and mix until incorporated.
- In a separate bowl whisk together the gluten-free all-purpose flour, raw cacao powder, instant coffee or espresso powder, and sea salt until evenly combined.
- Add the dry ingredients to the wet ingredients and stir until a thick, uniform batter forms, scraping the sides and bottom of the bowl. Avoid overmixing.
- Fold the semi-sweet chocolate chips into the batter until evenly distributed.
- Pour the batter into the prepared pan and spread it into an even layer.
- Bake on the center rack. For very gooey brownies bake about 23–25 minutes; for fudgy brownies bake about 25–30 minutes; for firmer brownies bake about 35–40 minutes. The brownies are done when the edges are set and the center is mostly set with a slight jiggle when the pan is gently shaken (or a toothpick inserted into the center comes out with a few moist crumbs).
- Remove the pan from the oven and let the brownies cool in the pan for at least 15 minutes. Use the parchment overhang to lift the brownies from the pan, then slice and serve (cool longer for cleaner slices if desired).
Why This Gluten-Free Brownies (Perfect Crinkle Top!) Stands Out
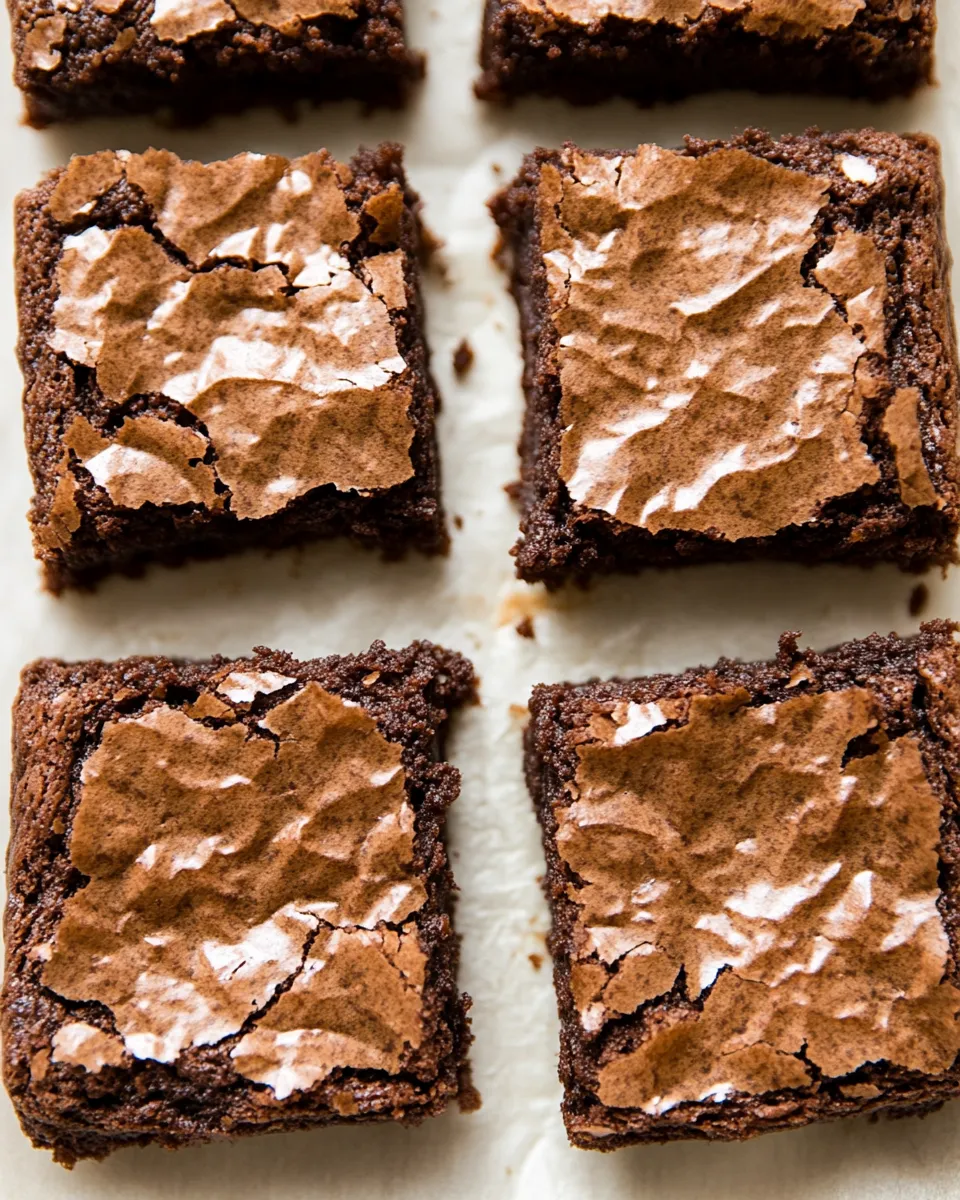
These brownies deliver three things I look for: a glossy crinkle top, pronounced chocolate flavor, and a forgiving bake window. The combination of melted butter and sugars sets up the top as it cools. The eggs and sugar create that delicate film that cracks into the desired crinkle.
Using raw cacao keeps the chocolate intense without extra sweetness. The instant coffee is a stealth ingredient: it brightens the chocolate rather than adding a coffee taste. Gluten-free blends can go gummy or dry; here, the ratio of fat to flour is tuned to keep the interior dense, chewy, and pleasantly moist.
This recipe is practical. It doesn’t require tempering chocolate or multiple bowls for a complicated ganache. You get bakery-quality brownies with pantry-stable ingredients and straightforward technique.
Allergy-Friendly Substitutes
If you need to adjust for allergies or preferences, here are tested swaps and their likely effects.
- Dairy-free — Replace the unsalted butter with a 1:1 plant-based butter (melted) or use coconut oil; expect a slightly different flavor and potentially a firmer set if using coconut oil.
- Egg-free — Try aquafaba (3 tablespoons per egg) or a commercial egg replacer; texture will be less cakey and slightly more fragile—bake times may shift, and the crinkle top may be less pronounced.
- Nut-free — This recipe is naturally nut-free if your gluten-free flour blend is nut-free—always check labels.
- Lower sugar — Reducing sugar will change browning and the crinkle top. If you must lower sweetness, reduce granulated sugar by up to 25% and keep brown sugar for moisture, but expect a denser, less shiny top.
- Flour swaps — If your blend lacks xanthan gum, add 1/2 teaspoon; without it you’ll risk a crumbly bar. If using a single-grain flour (like almond or oat), re-test volumes—those flours absorb differently and will alter texture.
Equipment at a Glance
- 13″ x 9″ baking pan — the recipe is calibrated for this size for even depth and bake time.
- Parchment paper — lining with overhang makes removal easy and cleanup quick.
- Mixing bowls — one large for wet, one for dry; use heat-safe if you need to cool the butter mixture quickly.
- Whisk and rubber spatula — whisk eggs and dry ingredients; spatula for folding and scraping.
- Kitchen scale — I recommend weighing ingredients, especially gluten-free flour and cacao, for consistent results.
- Oven thermometer — oven temps vary; an oven thermometer helps hit the 350°F target accurately.
Common Errors (and Fixes)
- Dry, crumbly brownies — Cause: too much flour or overbaking. Fix: weigh your flour, shorten bake time by 3–5 minutes, or reduce bake time for fudgier bars.
- No crinkle on top — Cause: eggs not properly incorporated or sugar ratios off. Fix: whisk eggs until blended and ensure sugars are stirred into the butter. Don’t skip the granulated sugar; it helps form the glossy top.
- Edges burned before middle sets — Cause: oven too hot or pan too thin. Fix: lower temperature by 10–15°F and move rack to center. Use an insulated or darker pan cautiously; it can brown faster.
- Gummy texture — Cause: underbaking or not cooling. Fix: follow the jiggle test and cool at least 15 minutes; cooling lets interior set. If gummy after cooling, add a few more minutes in the oven next bake.
- Soggy center with raw batter — Cause: batter too cold going into oven or incorrect measurements. Fix: bring bats to room temp and ensure accurate measurements by weight.
Seasonal Serving Ideas
Brownies are a year-round comfort, but a few small seasonal touches make them shine for holidays or gatherings.
- Winter — Serve warm with a spoonful of salted caramel sauce and a dusting of flaky sea salt. A scoop of vanilla bean ice cream balances the richness.
- Spring — Top small squares with whipped cream and a few fresh berries for a lighter presentation.
- Summer — Make brownie sundaes: warm brownie, cold berry compote, and a drizzle of chocolate sauce.
- Fall — Stir 1/2 teaspoon ground cinnamon into the dry mix and top slices with a spiced pecan brittle (if not nut-free).
Author’s Commentary
I bake these brownies every few weeks. My family prefers the 25–30 minute window for true fudginess—edges set, middle dense and moist. For parties, I bake slightly firmer so slices hold up on a platter. The crinkled top is as much about technique as ingredients: beat the eggs until blended, and stir the sugar into the butter until moistened. That creates the right emulsion for the glossy crust.
When testing, I tried too many flour blends. The single best improvement was consistency in measuring—use a scale. Another small win: letting the melted-butter mixture cool to lukewarm before adding eggs prevents scrambling and preserves texture.
Make Ahead Like a Pro
These brownies travel and store well.
- Room temperature — Keep in an airtight container for up to 3 days; they stay moist and maintain texture.
- Refrigerate — Store for up to 7 days. Bring to room temperature before serving for best chew.
- Freeze — Wrap cooled, sliced brownies tightly in plastic, then foil. Freeze up to 3 months. Thaw in the fridge overnight or at room temperature for a couple of hours.
- Reheating — Warm single slices in a 300°F oven for 5–8 minutes or microwave briefly (10–15 seconds) for a gooey treat.
Ask the Chef
Q: Can I use cocoa powder instead of raw cacao?
A: Yes. Cocoa powder (natural or Dutch-processed) will work, but flavor and acidity change. If you use Dutch-processed, baking reactions can shift slightly; the brownies will still be chocolatey but taste smoother and less fruity.
Q: My gluten-free flour blend doesn’t contain xanthan gum. What now?
A: Add 1/4 to 1/2 teaspoon xanthan gum to the dry mix to help bind and improve texture. Without it, brownies can be fragile or crumbly.
Q: Do I have to use instant coffee?
A: You can omit it, but the coffee powder heightens chocolate notes. If you don’t want any coffee flavor, use 2 tablespoons unsweetened espresso powder substitute or remove it entirely—expect a slightly flatter chocolate profile.
Q: How do I get perfectly clean slices?
A: Chill the cooled brownies for 30–60 minutes, then use a sharp knife wiped between cuts. Warm knives tend to smear; a chilled slice holds a cleaner edge.
The Last Word
If you bake once with the exact ingredients and steps above, you’ll quickly see what I mean about the crinkle top and rich interior. This recipe is reliable and forgiving, and it rewards small adjustments—timing, cooling, and a careful hand when folding chocolate chips. Bake to your preferred level of fudginess, and don’t be afraid to experiment with small swaps (not all at once).
Come back to this page when you want a no-fail chocolate hit that happens to be gluten-free. Share your tweaks and timing preferences—I read every note and I love pairing reader tips with new test bakes.
Gluten-Free Brownies (Perfect Crinkle Top!)
Ingredients
Ingredients
- 1 cup 240 gunsalted butter(2 sticks), melted
- 2 Tbsp 30 mlavocado oil*
- 1 cup 200 ggranulated cane sugar
- 1 cup 200 glight brown sugar, tightly packed
- 1 Tbsp 15 mlpure vanilla extract
- 4 largeeggsat room temperature
- 1 cup 120 ggluten-free all-purpose flour
- 1 cup 100 graw cacao powder
- 2 Tbspinstant coffeeor espresso powder
- 1/2 tspsea saltto taste
- 1 cup 170 gsemi-sweet chocolate chipsor chopped chocolate bars
Instructions
Instructions
- Preheat the oven to 350°F and place a rack in the center. Line a 13" x 9" baking pan with parchment paper (leave an overhang for easy removal) or grease/spray the pan.
- In a large bowl combine the melted unsalted butter and avocado oil, then add the granulated cane sugar, light brown sugar, and pure vanilla extract. Stir until the sugars are evenly moistened and the mixture is combined (it may look greasy).
- In a small bowl whisk the room-temperature eggs until blended. If the melted butter mixture is still warm to the touch, let it cool briefly until lukewarm, then add the beaten eggs to the butter–sugar mixture and mix until incorporated.
- In a separate bowl whisk together the gluten-free all-purpose flour, raw cacao powder, instant coffee or espresso powder, and sea salt until evenly combined.
- Add the dry ingredients to the wet ingredients and stir until a thick, uniform batter forms, scraping the sides and bottom of the bowl. Avoid overmixing.
- Fold the semi-sweet chocolate chips into the batter until evenly distributed.
- Pour the batter into the prepared pan and spread it into an even layer.
- Bake on the center rack. For very gooey brownies bake about 23–25 minutes; for fudgy brownies bake about 25–30 minutes; for firmer brownies bake about 35–40 minutes. The brownies are done when the edges are set and the center is mostly set with a slight jiggle when the pan is gently shaken (or a toothpick inserted into the center comes out with a few moist crumbs).
- Remove the pan from the oven and let the brownies cool in the pan for at least 15 minutes. Use the parchment overhang to lift the brownies from the pan, then slice and serve (cool longer for cleaner slices if desired).
Equipment
- 13" x 9" Baking Dish
Notes
*swap the avocado oil for vegetable oil or two additional tablespoons of melted butter