French Bread Rolls
These French bread rolls are one of my go-to weekend projects: straightforward, forgiving, and reliably comforting. The dough is simple—flour, water, yeast, salt, a touch of oil—and it rewards a little patience with a crisp, golden crust and a tender crumb. No fancy equipment required, just a few clear steps and a warm spot for rising.
I make a batch whenever I want dinner that feels a touch special without a lot of fuss. They take hands-on time at the start and then sit while the yeast does its work. The result is snackable rolls perfect beside soup, for sandwiches, or straight from the pan with a smear of butter.
Below you’ll find the exact ingredient list and the step-by-step method I use every time, along with practical troubleshooting, small variations, and serving ideas. Read through once, then follow the steps—the dough tells you when it’s ready.
Ingredients

- 1 ½ cups warm water (about 105°F) — activates the yeast and hydrates the dough.
- 2 ¼ teaspoons (1 packet) active dry yeast — the leavener; proofing confirms freshness.
- 1 teaspoon granulated sugar — feeds the yeast for a reliable rise.
- 3 ¾ cups (500 grams) all-purpose flour, plus more as needed — the bulk of the dough; add sparingly if the dough is too sticky.
- 1 ½ teaspoons table salt or fine sea salt — balances flavor and tightens gluten.
- 1 teaspoon olive oil — keeps the dough from sticking during the first rise and adds a touch of softness.
- Melted salted butter, for tops, optional — brushed on after baking for sheen and richness.
What We’re Using
This recipe leans on basic pantry staples and minimal fat. The active dry yeast and a brief proofing step are what make the roll interior light and tender. All-purpose flour gives a predictable structure; if you want a chewier roll, a higher-protein flour can be tried, but it’s not necessary.
A stand mixer with a dough hook speeds kneading and makes the process neater, but you can mix and knead by hand with a sturdy bowl and a little elbow grease. A 9×13-inch baking dish is called for to arrange the rolls so they rise into one another and retain moisture—this gives soft sides but still allows each roll to brown on top.
From Start to Finish: French Bread Rolls
- In a small bowl, combine 1 1/2 cups warm water (about 105°F), 2 1/4 teaspoons active dry yeast, and 1 teaspoon granulated sugar. Stir and let sit 5 minutes, or until the mixture is foamy.
- In a stand mixer fitted with the dough hook or in a large mixing bowl, stir together 2 cups of the all-purpose flour and 1 1/2 teaspoons salt.
- Add the yeast mixture to the flour mixture and mix on medium-low speed (or stir by hand) until incorporated.
- Add the remaining 1 3/4 cups of all-purpose flour in increments, kneading until the dough is smooth and slightly tacky but not sticky. Add a little more flour only if needed. Knead until the dough is elastic (about several minutes).
- Lightly coat the inside of a clean bowl with the 1 teaspoon olive oil, place the dough in the bowl, and turn it to coat the dough with oil. Cover the bowl with a towel and let the dough rest in a warm spot at least 30 minutes and up to 1 hour, or until doubled in size.
- Butter a 9×13-inch baking dish and set it aside.
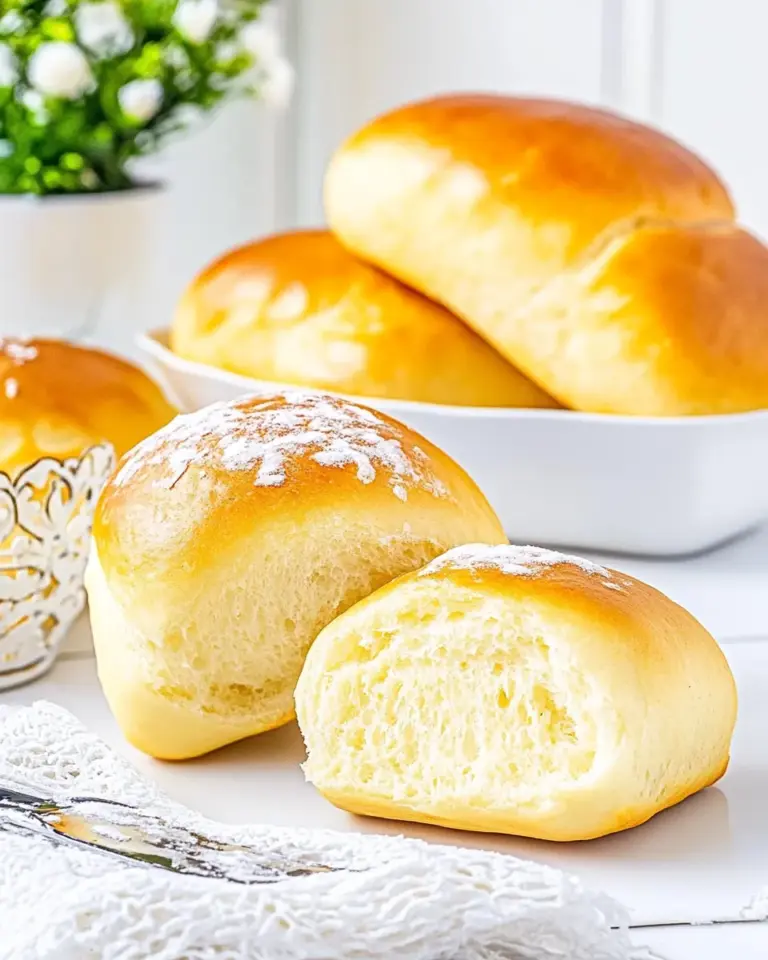
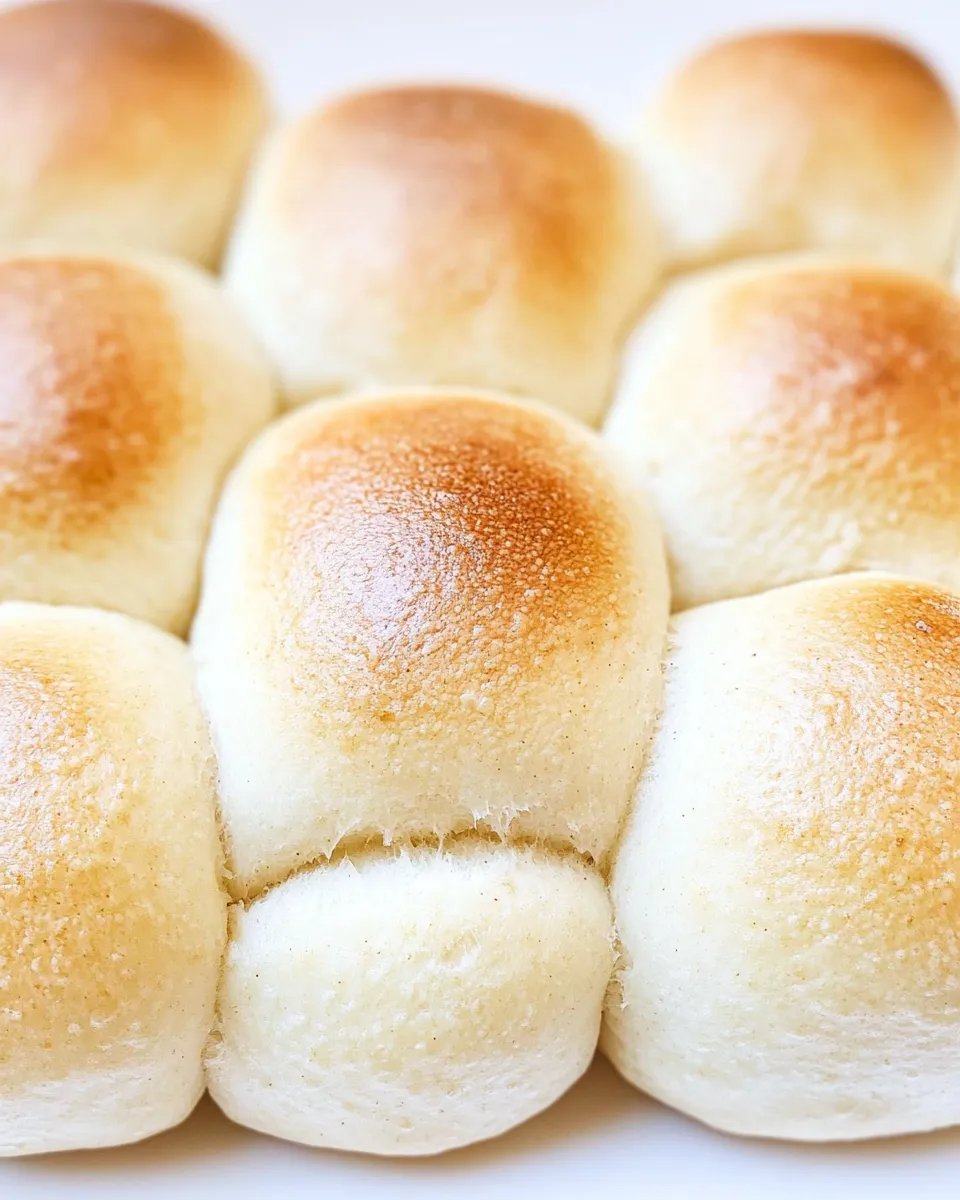
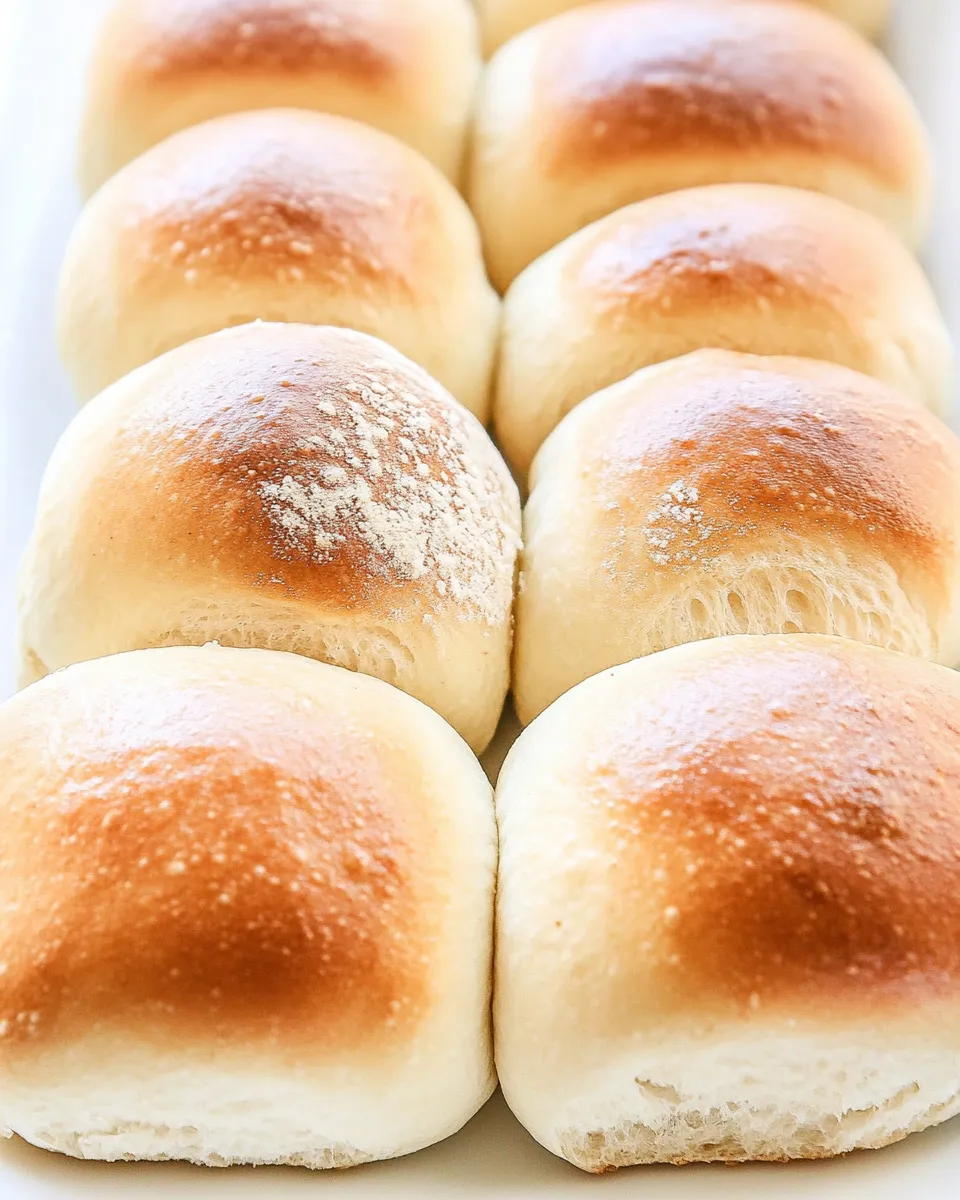
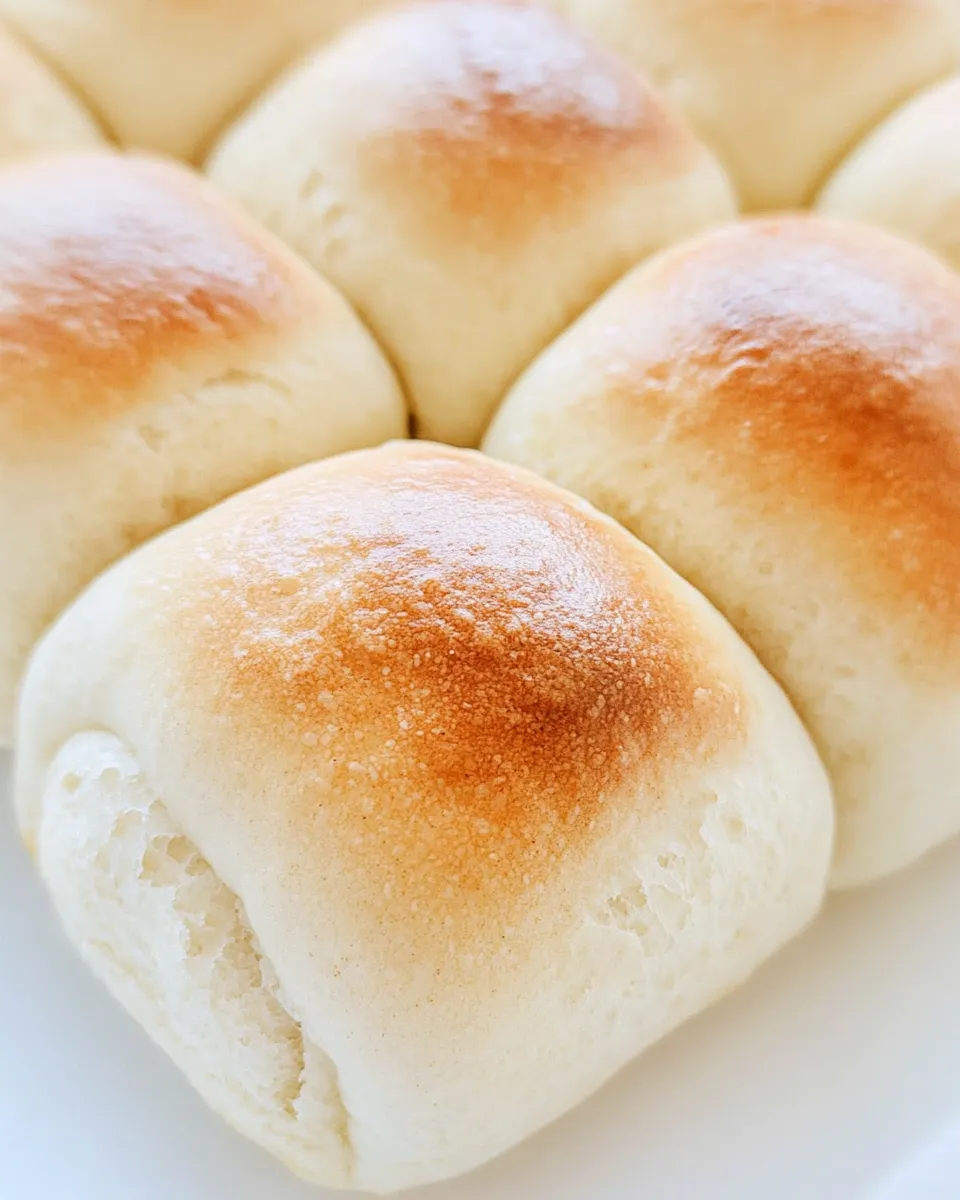
- Punch the dough down, turn it onto a lightly floured surface, and divide it into 12 pieces for larger rolls or 16 pieces for smaller rolls. Shape each piece into a smooth ball.
- Place the formed rolls in the prepared baking dish, spacing them evenly. Make a diagonal cut across the top of each roll with a sharp bread knife or lame.
- Cover the dish lightly with a towel and let the rolls rise in a warm spot about 45 minutes, or until doubled in size.
- While the rolls finish their second rise, preheat the oven to 400°F.
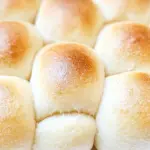
- Bake the rolls for 15 minutes, or until the tops are golden brown.
- If desired, brush the tops with the melted salted butter. Slice and serve while warm.
Why You’ll Keep Making It
These rolls hit the sweet spot between ease and reward. The recipe uses a short ingredient list and simple steps, but the texture and color come out like something you’d buy at a bakery. They’re versatile: large or small, soft or slightly crusty depending on whether you brush with butter, and quick enough for a weeknight when you plan ahead.
I also appreciate how forgiving the dough is. Small timing differences in rises won’t ruin the outcome, and the recipe scales well—double it for a crowd, or keep it as written for a family dinner. Fresh-baked bread has a way of elevating any meal; these rolls do exactly that.
What to Use Instead
If you don’t have exactly what the recipe lists:
- Active dry yeast can often be swapped for instant yeast. If you do, you can skip the initial proofing in warm water; mix it directly into the flour and adjust timing because instant yeast can act faster.
- All-purpose flour is specified for a consistent result. If you only have bread flour, expect a slightly chewier texture; if you use part whole-wheat, reduce the amount slightly or add a splash more water since whole-wheat absorbs more.
- If you don’t have melted salted butter for finishing, a brush of neutral oil works to give shine; the butter is optional.
Setup & Equipment
You don’t need a lot: a mixing bowl or stand mixer with a dough hook, a small bowl for proofing the yeast, a 9×13-inch baking dish, a sharp knife or lame for scoring, and a towel to cover the dough. A kitchen thermometer is handy for checking that the water is around 105°F, especially in cooler kitchens.
Work on a lightly floured surface for shaping and have a bench scraper or spatula nearby to help divide and move dough. If your oven runs hot or cool, an oven thermometer will help ensure the 400°F bake temperature is accurate.
Frequent Missteps to Avoid
- Using water that’s too hot or too cold — too hot can kill the yeast; too cold slows activation. Aim for about 105°F for proofing.
- Adding all the flour at once — the dough needs to reach a slightly tacky, elastic feel. Add the remaining flour in increments and stop when the dough is easy to handle.
- Under-kneading or over-kneading — knead until the dough is elastic and smooth; a few minutes in a mixer or 6–8 minutes by hand is typical.
- Skipping the second rise — that 45 minutes gives the rolls their light crumb. Baking too soon makes dense rolls.
- Scoring too shallowly — make a clean diagonal cut so the roll expands predictably instead of bursting unevenly.
In-Season Flavor Ideas
Because the base dough is neutral and soft, the rolls adapt to seasonal meals. In colder months they’re perfect with a bowl of stew or soup. In spring and summer, they’re great for light sandwiches with roasted vegetables or simple sliced meats. Brushing with the optional melted salted butter right after baking adds richness year-round.
For holidays or gatherings, arrange the rolls close together in the dish to create pull-apart clusters—guests love tearing warm bread and passing around a dish of butter.
What Could Go Wrong
If the dough doesn’t rise: check the yeast. If your yeast didn’t foam during the initial proof (step 1), the yeast may be dead. Also check that the water temperature was correct. If the dough is too sticky to shape, you likely need a touch more flour; add it sparingly so you don’t dry the dough out.
If the rolls brown too quickly: your oven may run hot. Tent the dish loosely with foil for the last few minutes of baking to prevent over-browning while ensuring the insides finish cooking. If the crumb is gummy after baking, the rolls probably needed more time in the oven; ovens vary, so test one roll before removing the whole batch.
Storing, Freezing & Reheating
Store baked rolls in an airtight container at room temperature for up to 2 days. For longer storage, freeze cooled rolls individually wrapped in plastic or foil for up to 3 months. Thaw rolls at room temperature, then refresh in a 350°F oven for 8–10 minutes or until warmed through. Brushing with a little melted butter after reheating brings back a fresh-baked shine.
If you need to freeze unbaked rolls: shape them, place on a baking sheet until firm, then transfer to a freezer bag. Thaw and finish the second rise before baking—allow extra time for them to come to room temperature and double in size.
Ask & Learn
Quick checks I ask readers to use while learning this recipe: How does the dough feel after kneading—smooth and elastic or sticky and loose? Did the yeast foam during proofing? Did the rolls double in size during both rises? Those observations tell you what to change next time: knead a bit more, proof with slightly warmer water, or give more time to rise.
If you find the crumb too dense, give the dough more kneading to encourage gluten development and make sure you allow full rises. If the crust is too soft for your taste, bake a few minutes longer or bake on a preheated baking sheet to encourage bottom browning.
Bring It to the Table
Serve these rolls while warm with a pat of salted butter. They’re ideal alongside soups, salads, or roasted proteins, and they make weeknight sandwiches more inviting. Offer a small dish of olive oil or leftover melted butter for dipping if you like. Leftovers toast beautifully the next day, either split and toasted under a broiler or warmed in a skillet.
Make a plan for when you’ll next bake them: a simple Sunday morning bake makes midweek meals feel homemade, and the process is small enough to repeat often. These French Bread Rolls are uncomplicated, crowd-pleasing, and dependable—everything I look for in a staple bread recipe.
French Bread Rolls
Ingredients
Ingredients
- 1 1/2 cupswarm water about 105°F
- 2 1/4 teaspoons 1 packetactive dry yeast
- 1 teaspoongranulated sugar
- 3 3/4 cups 500 gramsall-purpose flour, plus more as needed
- 1 1/2 teaspoonstable salt or fine sea salt
- 1 teaspoonolive oil
- Melted salted butter for tops, optional
Instructions
Instructions
- In a small bowl, combine 1 1/2 cups warm water (about 105°F), 2 1/4 teaspoons active dry yeast, and 1 teaspoon granulated sugar. Stir and let sit 5 minutes, or until the mixture is foamy.
- In a stand mixer fitted with the dough hook or in a large mixing bowl, stir together 2 cups of the all-purpose flour and 1 1/2 teaspoons salt.
- Add the yeast mixture to the flour mixture and mix on medium-low speed (or stir by hand) until incorporated.
- Add the remaining 1 3/4 cups of all-purpose flour in increments, kneading until the dough is smooth and slightly tacky but not sticky. Add a little more flour only if needed. Knead until the dough is elastic (about several minutes).
- Lightly coat the inside of a clean bowl with the 1 teaspoon olive oil, place the dough in the bowl, and turn it to coat the dough with oil. Cover the bowl with a towel and let the dough rest in a warm spot at least 30 minutes and up to 1 hour, or until doubled in size.
- Butter a 9×13-inch baking dish and set it aside.
- Punch the dough down, turn it onto a lightly floured surface, and divide it into 12 pieces for larger rolls or 16 pieces for smaller rolls. Shape each piece into a smooth ball.
- Place the formed rolls in the prepared baking dish, spacing them evenly. Make a diagonal cut across the top of each roll with a sharp bread knife or lame.
- Cover the dish lightly with a towel and let the rolls rise in a warm spot about 45 minutes, or until doubled in size.
- While the rolls finish their second rise, preheat the oven to 400°F.
- Bake the rolls for 15 minutes, or until the tops are golden brown.
- If desired, brush the tops with the melted salted butter. Slice and serve while warm.
Equipment
- Stand mixer (optional)
- dough hook (optional)
- Large Mixing Bowl
- 9x13 inch Baking Dish
- towel
- sharp bread knife or lame
Notes
Shiny tops:
I prefer a soft crust, but for a crispier/shinier crust, brush 1 egg white (whisked) with a teaspoon of water before baking the rolls. You can also add a few ice cubes into the oven to help trap the steam and add a few minutes onto the cooking time.
Storing:
These rolls store best in a brown paper bag on the counter.
Freezer instructions:
Allow to cool and then place in a large zip-top bag to freeze. Remove all the air from the bag and then freeze up to 3 months. Thaw overnight on the counter. Reheat in the oven at 250°F for a few minutes.