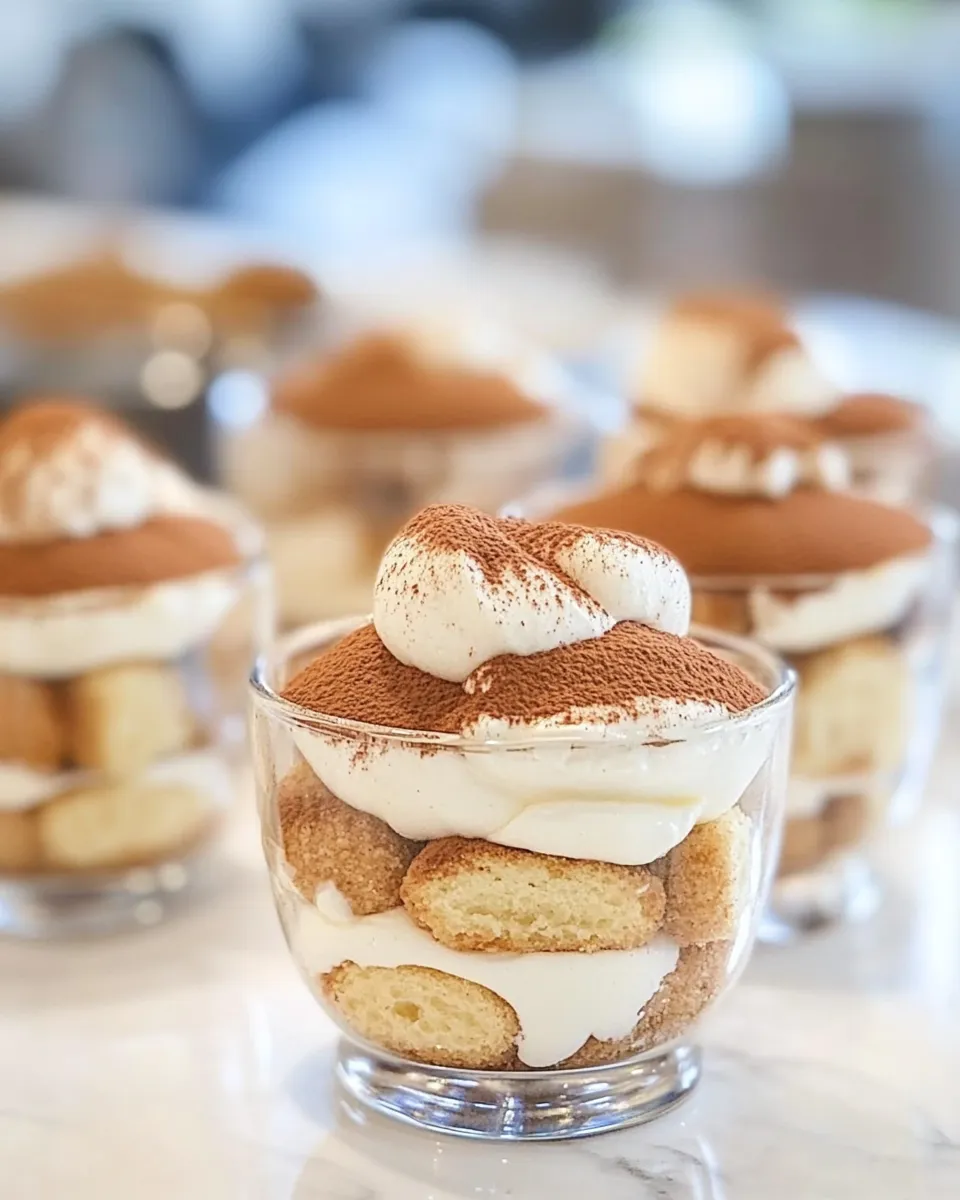
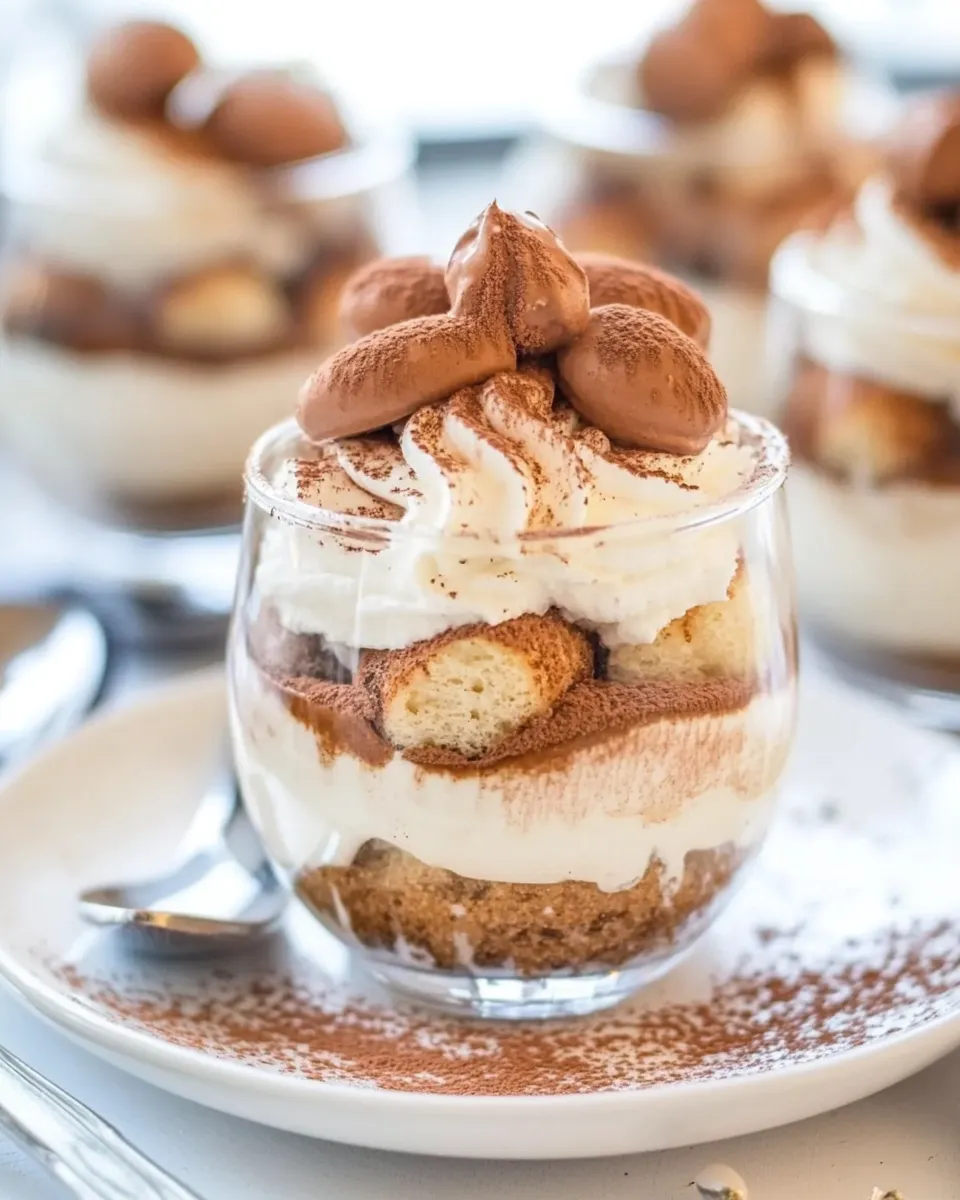
Easy Tiramisu Cups
These tiramisu cups are the kind of dessert I reach for when I want something elegant without a lot of fuss. They layer creamy mascarpone, coffee‑dipped Nilla Wafers, and cocoa for the classic flavors of tiramisu but in perfectly portioned little glasses. They come together fast and look pretty on a dessert tray.
I like making them for casual dinner parties or whenever I want an easy make‑ahead sweet. The structure is simple: a whipped mascarpone mixture, a quick coffee dip for the cookies, and a light dusting of cocoa between layers. No complicated custard or long soaking times.
Below you’ll find the exact ingredients and the step‑by‑step sequence I always follow. I keep notes on equipment, common problems and seasonal twists so you can customize without guessing.
Ingredients

- 16 ounces mascarpone cheese (454 grams) — the rich, creamy base; bring it close to room temperature so it whips smooth without breaking.
- 1/3 cup granulated sugar (67 grams) — sweetens and helps stabilize the mascarpone so layers hold their shape.
- 1/4 cup 2% milk (57 grams) — thins the mascarpone just enough for piping; use only the 1/4 cup called for.
- 1/4 cup unsweetened cocoa powder (21 grams) — for dusting between layers and on top; use a fine sieve to avoid clumps.
- 36 Nabisco Nilla Wafers (135 grams) — the cookie layers; quick coffee dips give them tiramisu flavor without turning them to mush.
- 1/2 cup strongly brewed coffee (114 grams) — used to moisten the wafers; make it bold so the coffee comes through between the creamy layers.
The Essentials
Tiramisu in cup form is about timing and proportion. The mascarpone mixture is whipped just enough to be smooth and pipeable; you don’t want it thin, but you do want it pliable for neat layers. The cookies should be moistened, not soaked—three quick dips per layer gives them coffee flavor while keeping structure.
Use small clear cups so the layers show; that little visual makes these feel special. Keep everything within arm’s reach: mixer, piping bag (or spoon), coffee bowl, cocoa sieve, and the Nilla Wafers. That saves fumbling when you’re assembling quickly.
Cook Tiramisu Cups Like This
- In the bowl of a stand mixer fitted with the whisk attachment, combine 16 ounces mascarpone cheese, 1/3 cup granulated sugar, and 1/4 cup 2% milk. Beat on medium-high until smooth and fluffy, about 1–2 minutes. Use only the 1/4 cup milk called for; do not add more liquid. Transfer the mixture to a piping bag or a resealable plastic bag with a corner snipped, or keep in a bowl for spooning.
- Set out 4 small glass cups.
- Pipe or spoon an even thin layer of the mascarpone mixture into the bottom of each cup (divide the mixture evenly so you have enough for all layers).
- Using a fine-mesh sieve, lightly dust a portion of the 1/4 cup unsweetened cocoa powder over the cream in each cup.
- Pour the 1/2 cup strongly brewed coffee into a shallow bowl. Quickly dip 3 Nabisco Nilla Wafers in the coffee—just long enough to moisten them without soaking—and place those 3 wafers into each cup as the first cookie layer (3 wafers × 4 cups = 12 wafers used).
- Pipe or spoon an even layer of mascarpone mixture over the wafers in each cup, then dust each cream layer lightly with cocoa.
- Repeat the dipping and placing of 3 more coffee-dipped Nilla Wafers into each cup for the second cookie layer (another 12 wafers).
- Add another even layer of mascarpone mixture over that wafer layer and dust with cocoa.
- Dip and place the final 3 Nilla Wafers into each cup for the third cookie layer (final 12 wafers, using all 36 total).
- Finish by dusting the tops with the remaining cocoa powder and placing one whole Nilla Wafer on top of each cup for garnish. Chill if desired before serving.
What Sets This Recipe Apart

This version keeps the tiramisu flavor but simplifies assembly into single-serving cups. There’s no separate zabaglione or egg custard to temper and cool—just mascarpone, a little milk and sugar whisked until silky. Because the mascarpone is beaten briefly with milk, it stays light enough to layer smoothly but rich enough to feel indulgent.
The use of Nilla Wafers instead of ladyfingers is another practical twist. They’re uniform, sturdy, and easy to dip quickly—no fragile fingers falling apart mid‑assembly. The result is a familiar tiramisu flavor profile with a shorter prep time and fewer steps.
Low-Carb/Keto Alternatives
If you want to lower carbs, swap the Nilla Wafers for a low‑carb cookie alternative or thin almond flour biscuits that hold up to a quick coffee dip. Replace granulated sugar with a granulated erythritol or monk fruit blend that measures similarly if you prefer a keto sweetener—taste and adjust before assembling.
Mascarpone is naturally low in carbs and works well for keto versions, so you can keep the same creamy base and technique. For the cocoa dusting, use unsweetened cocoa as written.
Equipment Breakdown
Must-have
- Stand mixer with whisk attachment — gives quick, even whipping for the mascarpone.
- Fine-mesh sieve — for a light, even cocoa dusting between layers.
- Shallow bowl — for the coffee dip.
- Small glass cups — clear cups show off the layers and keep portions tidy.
Nice-to-have
- Piping bag or resealable plastic bag — for neat, even layers; a spoon works fine if you don’t have one.
- Small offset spatula or spoon — for smoothing layers if desired.
Problems & Prevention
Runny mascarpone: if the mixture becomes runny, you likely overbeat or added extra liquid. Beat 1–2 minutes at medium-high and stop when smooth and fluffy. Use only the specified 1/4 cup milk.
Soggy cookies: dip wafers quickly—just long enough to moisten. If you leave them in coffee, they’ll collapse. A shallow bowl and quick in-and-out motion is the trick.
Clumpy cocoa: sift cocoa through a fine sieve. Tap the side lightly to create a fine dust rather than concentrated patches.
Spring–Summer–Fall–Winter Ideas
Spring: add a few fresh raspberries or a thin raspberry coulis drizzle for brightness. The tart fruit cuts the richness.
Summer: swap coffee for a chilled espresso or coffee liqueur for a slightly boozy version; top with shaved dark chocolate and a mint sprig.
Fall: stir a pinch of cinnamon into the cocoa dusting or add a light sprinkle of toasted chopped hazelnuts on the final layer for warmth and crunch.
Winter: fold a teaspoon of orange zest into the mascarpone mixture for a citrus lift, or top with candied orange peel and extra cocoa for holiday presentation.
If You’re Curious
Mascarpone is a soft Italian cream cheese that gives tiramisu its luxurious mouthfeel. Beating it briefly with a touch of milk and sugar makes it pipeable without overwhipping. Nilla Wafers are used here for convenience and structure; they’re sturdier than ladyfingers and easier to handle when dipping.
Strongly brewed coffee is called for because the cookies only get a quick dip—using bold coffee ensures the flavor still comes through the cream. If you prefer, you can chill the brewed coffee before dipping to speed assembly and reduce evaporation of aroma.
Meal Prep & Storage Notes
You can assemble these cups a few hours ahead and refrigerate them until serving; chilling helps the layers settle and flavors meld. Store covered in the refrigerator. For best texture and flavor, plan to serve within about 3 days—past that, the cookies will continue to soften.
Freezing is not recommended: freezing and thawing changes the delicate texture of mascarpone and can make the layers watery when they thaw.
Troubleshooting Q&A
Q: My mascarpone split or became grainy. What happened?
A: It was likely overwhipped or too cold when you started. Stop whipping once smooth and fluffy; if it starts to lose sheen, pull back. Bring mascarpone to just under room temperature before mixing.
Q: The cookies went mushy after a few hours. Any tips?
A: Dip them faster and less deeply—moisten only. Also assemble closer to serving time if you want firmer texture. Using slightly sturdier cookies like Nilla Wafers (as written) helps.
Q: My cocoa clumped on top. How do I get a fine dusting?
A: Use a fine-mesh sieve and tap lightly from a small height. If the cocoa seems damp, toss it through the sieve with a dry spoon to break clumps first.
In Closing
These Tiramisu Cups give you classic tiramisu flavor with minimal fuss and clear, repeatable steps. They’re forgiving, make‑ahead friendly, and visually pleasing for a crowd. Follow the quantities and sequence above and you’ll have consistent results every time—silky mascarpone, coffee‑kissed wafers, and tidy cocoa finishes.
Make a double batch for a party or scale down for a quiet dinner. Either way, you’ll have a dessert that feels thoughtful without the marathon prep. Enjoy—and if you try a seasonal tweak, tell me which one became your favorite.

Easy Tiramisu Cups
Ingredients
Ingredients
- 16 ouncesmascarpone cheese454 grams
- 1/3 cupgranulated sugar67 grams
- 1/4 cup2% milk57 grams
- 1/4 cupunsweetened cocoa powder21 grams
- 36 Nabisco Nilla Wafers135 grams
- 1/2 cupstrongly brewed coffee114 grams
Instructions
Instructions
- In the bowl of a stand mixer fitted with the whisk attachment, combine 16 ounces mascarpone cheese, 1/3 cup granulated sugar, and 1/4 cup 2% milk. Beat on medium-high until smooth and fluffy, about 1–2 minutes. Use only the 1/4 cup milk called for; do not add more liquid. Transfer the mixture to a piping bag or a resealable plastic bag with a corner snipped, or keep in a bowl for spooning.
- Set out 4 small glass cups.
- Pipe or spoon an even thin layer of the mascarpone mixture into the bottom of each cup (divide the mixture evenly so you have enough for all layers).
- Using a fine-mesh sieve, lightly dust a portion of the 1/4 cup unsweetened cocoa powder over the cream in each cup.
- Pour the 1/2 cup strongly brewed coffee into a shallow bowl. Quickly dip 3 Nabisco Nilla Wafers in the coffee—just long enough to moisten them without soaking—and place those 3 wafers into each cup as the first cookie layer (3 wafers × 4 cups = 12 wafers used).
- Pipe or spoon an even layer of mascarpone mixture over the wafers in each cup, then dust each cream layer lightly with cocoa.
- Repeat the dipping and placing of 3 more coffee-dipped Nilla Wafers into each cup for the second cookie layer (another 12 wafers).
- Add another even layer of mascarpone mixture over that wafer layer and dust with cocoa.
- Dip and place the final 3 Nilla Wafers into each cup for the third cookie layer (final 12 wafers, using all 36 total).
- Finish by dusting the tops with the remaining cocoa powder and placing one whole Nilla Wafer on top of each cup for garnish. Chill if desired before serving.
Equipment
- Kitchen Scale(optional)
- Stand mixer
- Piping Tip Set(optional)
- Fine Mesh Sieve
Notes
Crème fraîche or whipped ricotta cheese can be alternatives to mascarpone cheese.
Use room temperature mascarpone cheese to avoid lumps in the cream cheese mixture.
Use ladyfingers if available, I use Nilla wafer as an substitute.