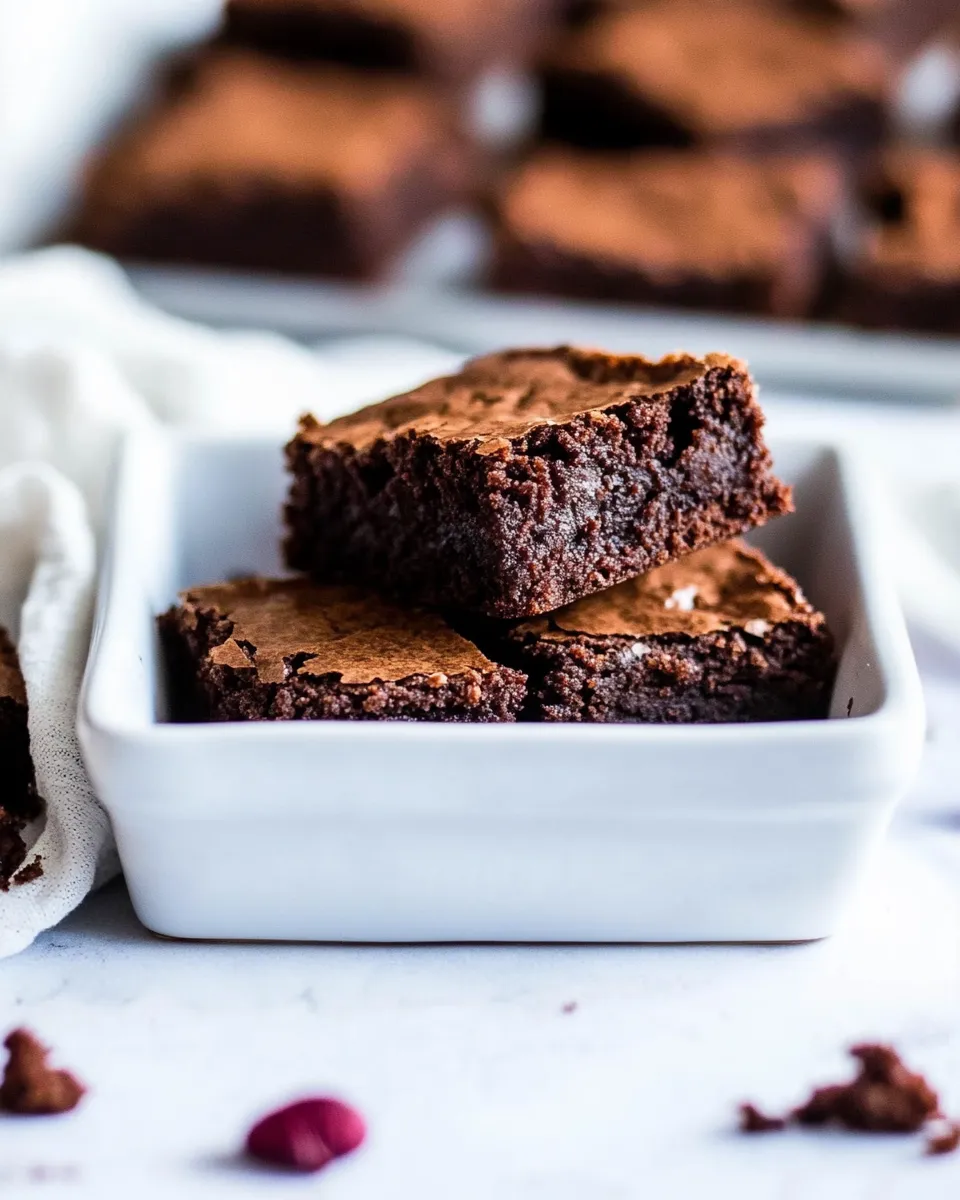
Easy Gluten-Free Dairy-Free Brownies
These brownies are the kind I make when friends drop by without warning and someone in the group needs a dairy-free option. They are dense, chocolatey, and straightforward — no complicated swaps or long ingredient lists. I love that they come together quickly and don’t demand a lot of equipment.
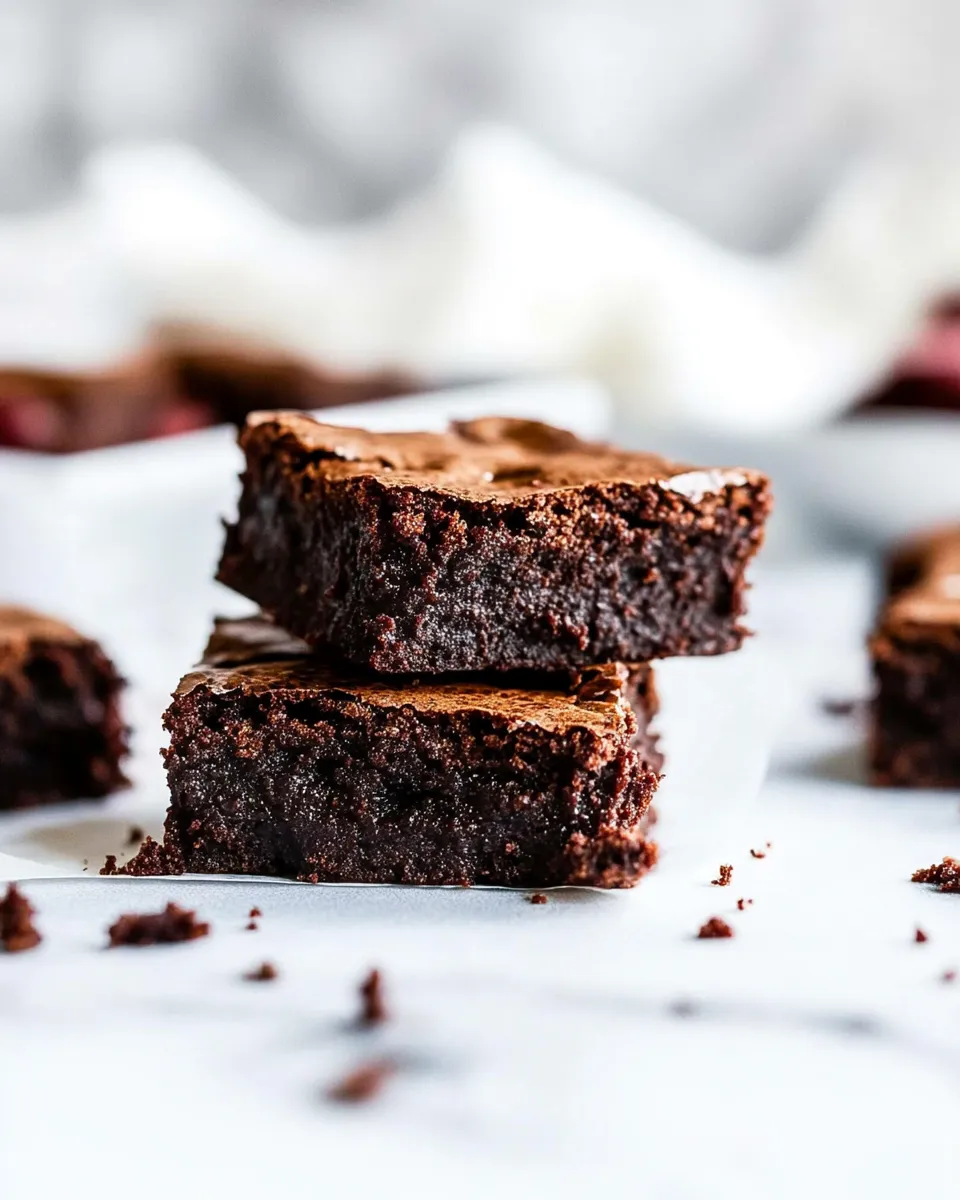
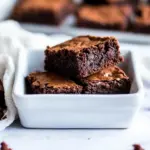
They have a fudgy texture rather than cakey, thanks to almond flour and a short ingredient list. If you follow the method exactly you get consistent results: a crackly top and a rich center that holds together when sliced. There’s room for small adjustments, but the base is reliable.
Below you’ll find a clear shopping list, the exact ingredient notes, step-by-step directions, and practical tips for avoiding common mistakes. This is a do-able recipe for everyday baking — no fuss, just good brownies.
What to Buy

Shop for the basics first: almond flour, cocoa powder, and coconut sugar. Those three shape flavor and texture. Then pick up dairy-free mini chocolate chips and coconut oil so the batter stays moist without butter.
Buy extras only if you want to customize: extra mini chips for sprinkling on top, flakey salt for finishing, or a different sweetener if coconut sugar isn’t your thing (see the Healthier Substitutions section for options).
Ingredients
- 1 1/2 cups almond flour — provides structure and a naturally tender, moist crumb; use finely ground almond flour for best texture.
- 1/4 cup cocoa powder — brings chocolate flavor; unsweetened Dutch-process or natural both work, but flavor will vary slightly.
- 1/4 teaspoon baking soda — a small lift so brownies aren’t overly dense; measure precisely.
- 1/4 teaspoon salt — balances sweetness and enhances chocolate notes; don’t skip.
- 1 cup coconut sugar — sweetens and contributes a subtle caramel note; packs the surface texture differently than refined sugar.
- 3 tablespoons coconut oil, melted — fat for richness and fudginess; melted so it blends easily with the sugar.
- 1 large egg — binds and adds structure; room temperature works best.
- 1 egg yolk — extra richness and moistness without too much lift.
- 1 teaspoon vanilla — rounds the chocolate and lifts flavors.
- 1/4 cup dairy-free mini chocolate chips — pockets of melty chocolate that keep the brownies indulgent while staying dairy-free.
Gluten-Free Dairy-Free Brownies: Step-by-Step Guide
- Preheat the oven to 350°F. Line the bottom of an 8-inch baking pan with parchment paper.
- In a medium bowl, stir together 1 1/2 cups almond flour, 1/4 cup cocoa powder, 1/4 teaspoon baking soda, and 1/4 teaspoon salt. Set aside.
- In a separate medium bowl, use an electric hand mixer to beat 1 cup coconut sugar and 3 tablespoons melted coconut oil just until the sugar is moistened.
- Add 1 large egg, 1 egg yolk, and 1 teaspoon vanilla to the sugar‑oil mixture. Beat with the mixer until just combined (about 20 seconds). Do not overbeat — avoid incorporating extra air.
- Pour the dry ingredients into the wet ingredients and stir with a wooden spoon until the batter is well mixed and uniform. Do not overmix.
- Stir in 1/4 cup dairy-free mini chocolate chips.
- Press the very thick batter evenly into the prepared pan. Use lightly damp hands or a piece of waxed/parchment paper to help press it into the corners.
- Bake until a toothpick inserted in the center comes out clean, about 26–28 minutes.
- Allow the brownies to cool completely in the pan before slicing and serving.
What Makes This Recipe Special
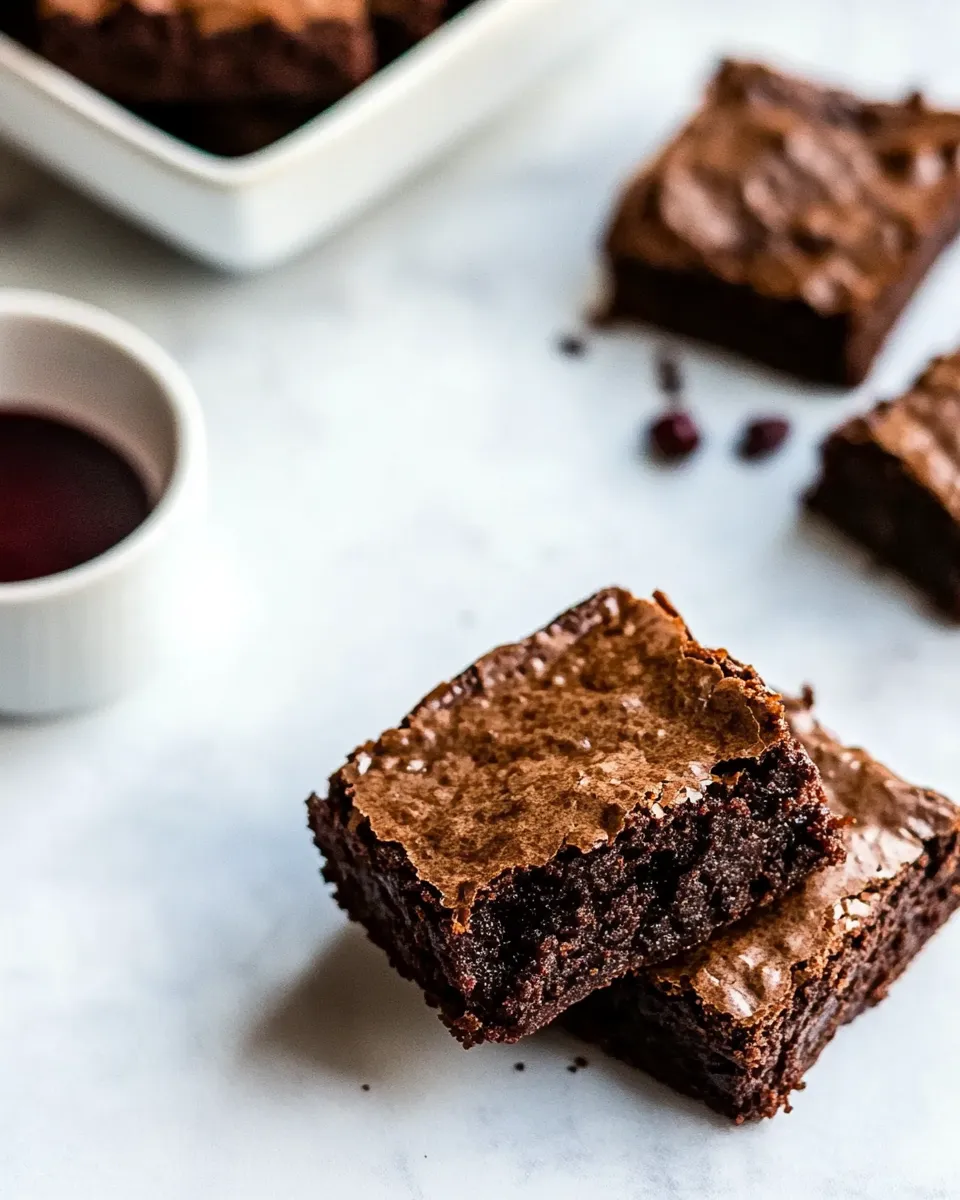
These brownies are reliably fudgy without relying on butter or wheat flour. Almond flour gives them a rich mouthfeel and keeps them naturally gluten free. The combination of an egg plus an extra yolk creates structure and chew without becoming cakey.
Coconut sugar and coconut oil add subtle caramel and tropical notes that play well with cocoa. The recipe favors straightforward technique over complicated texture tricks, which means you can bake them successfully even if you’re newer to gluten-free baking.
Healthier Substitutions
If you want to tweak the recipe for dietary preferences, here are safe swaps that keep the spirit of the brownies:
- Swap for lower-sugar: I don’t recommend inventing a replacement amount here; if you must, replace coconut sugar with a granulated erythritol blend 1:1 and watch texture — the final product may be slightly drier.
- Oil alternative: If you prefer a neutral oil, light olive oil or avocado oil will work in place of coconut oil, though flavor will shift.
- Egg replacement note: Eggs are structural here. For egg-free needs, use a tested egg substitute designed for baking and expect some change in texture.
What You’ll Need (Gear)
- 8-inch baking pan — the recipe is calculated for this size; a different pan will change baking time and thickness.
- Parchment paper — lines the pan for easy removal and cleaner slices.
- Two medium bowls — one for dry ingredients, one for wet.
- Electric hand mixer — used briefly to moisten the sugar and blend the wet ingredients; you can whisk by hand but mixing by machine is faster and more even.
- Wooden spoon or spatula — to combine batter without overworking it.
- Measuring cups and spoons — accuracy matters for the small leavening amounts and fats.
Mistakes That Ruin Gluten-Free Dairy-Free Brownies
Overbeating the wet mixture is the most common mistake. The directions warn to beat only until just combined — extra air will make the brownies cakey and dry. Beat the egg and yolk briefly and stop.
Using almond meal instead of finely ground almond flour will produce a grainier texture and may change how the batter binds. Scoop and level your almond flour; packing it in can lead to dense, gummy brownies.
Skipping the parchment or not pressing the batter evenly into the pan can lead to uneven baking and odd shapes. Press firmly and evenly so corners bake at the same rate as the center.
In-Season Flavor Ideas
These brownies are a blank canvas for seasonal touches. In winter add a sprinkle of coarse sea salt and crushed candied ginger on top for contrast. In late summer, fold in a few chopped dried cherries or scatter a handful of fresh raspberries on top before baking — they’ll add brightness.
For fall, dust a little cinnamon into the batter with the cocoa powder. Keep additions modest so they don’t overwhelm the chocolate base or alter bake time too much.
What Could Go Wrong
If your brownies come out too soft in the center after cooling, they may not have been fully baked; return the pan to the oven for a few additional minutes and check again. Too long in the oven will dry them out, so monitor closely near the 26–28 minute mark.
Gummy texture often points to too much moisture or underbaked batter. Make sure the dry ingredients are measured accurately and the batter is placed evenly in the pan. Overloading with mix-ins will also interfere with the set.
If the surface cracks excessively, the oven temperature might be too high or the batter had too much air. Confirm your oven temperature with a thermometer and avoid overmixing.
Storage Pro Tips
Store cooled brownies in an airtight container at room temperature for up to 3 days. For a softer, almost fudgier texture, store with a slice of bread in the container — the bread helps retain moisture without sogginess.
Refrigeration and Freezing
To keep them longer, refrigerate in an airtight container for up to a week. Rewarm briefly in a low oven or microwave to return some softness. For longer storage, freeze slices in a single layer on a tray, then transfer to a freezer bag for up to 3 months. Thaw at room temperature before serving.
Ask & Learn
If something didn’t turn out the way you expected, here are quick troubleshooting prompts to ask yourself: Did you measure the almond flour correctly? Did you overmix or overbeat? Was the oven at the right temperature? Answering these will usually point to the fix.
When you try a variation, change one element at a time. Swap the oil or the sweetener but keep the rest constant. That way you’ll know what altered the texture or flavor, and you’ll build confidence with each bake.
Wrap-Up
These Gluten-Free Dairy-Free Brownies are a dependable, straightforward recipe for delicious results without dairy or gluten. They’re dense, fudgy, and easy to scale with small adjustments. Follow the steps precisely the first time, and you’ll have a reliable template to personalize later.
Make a batch, let them cool completely, slice neatly, and enjoy with coffee or a dairy-free vanilla ice cream. Simple baking. Good brownies. That’s what I bake for friends, and I hope you’ll make them one afternoon soon.
Easy Gluten-Free Dairy-Free Brownies
Ingredients
Ingredients
- 1 1/2 cupsalmond flour
- 1/4 cupcocoa powder
- 1/4 teaspoonbaking soda
- 1/4 teaspoonsalt
- 1 cupcoconut sugar
- 3 tablespoonscoconut oilmelted
- 1 large egg
- 1 egg yolk
- 1 teaspoonvanilla
- 1/4 cupdairy-free mini chocolate chips
Instructions
Instructions
- Preheat the oven to 350°F. Line the bottom of an 8-inch baking pan with parchment paper.
- In a medium bowl, stir together 1 1/2 cups almond flour, 1/4 cup cocoa powder, 1/4 teaspoon baking soda, and 1/4 teaspoon salt. Set aside.
- In a separate medium bowl, use an electric hand mixer to beat 1 cup coconut sugar and 3 tablespoons melted coconut oil just until the sugar is moistened.
- Add 1 large egg, 1 egg yolk, and 1 teaspoon vanilla to the sugar‑oil mixture. Beat with the mixer until just combined (about 20 seconds). Do not overbeat — avoid incorporating extra air.
- Pour the dry ingredients into the wet ingredients and stir with a wooden spoon until the batter is well mixed and uniform. Do not overmix.
- Stir in 1/4 cup dairy-free mini chocolate chips.
- Press the very thick batter evenly into the prepared pan. Use lightly damp hands or a piece of waxed/parchment paper to help press it into the corners.
- Bake until a toothpick inserted in the center comes out clean, about 26–28 minutes.
- Allow the brownies to cool completely in the pan before slicing and serving.
Equipment
- 8-inch baking pan
- Parchment Paper
- Medium Bowl
- Electric hand mixer
- Wooden Spoon