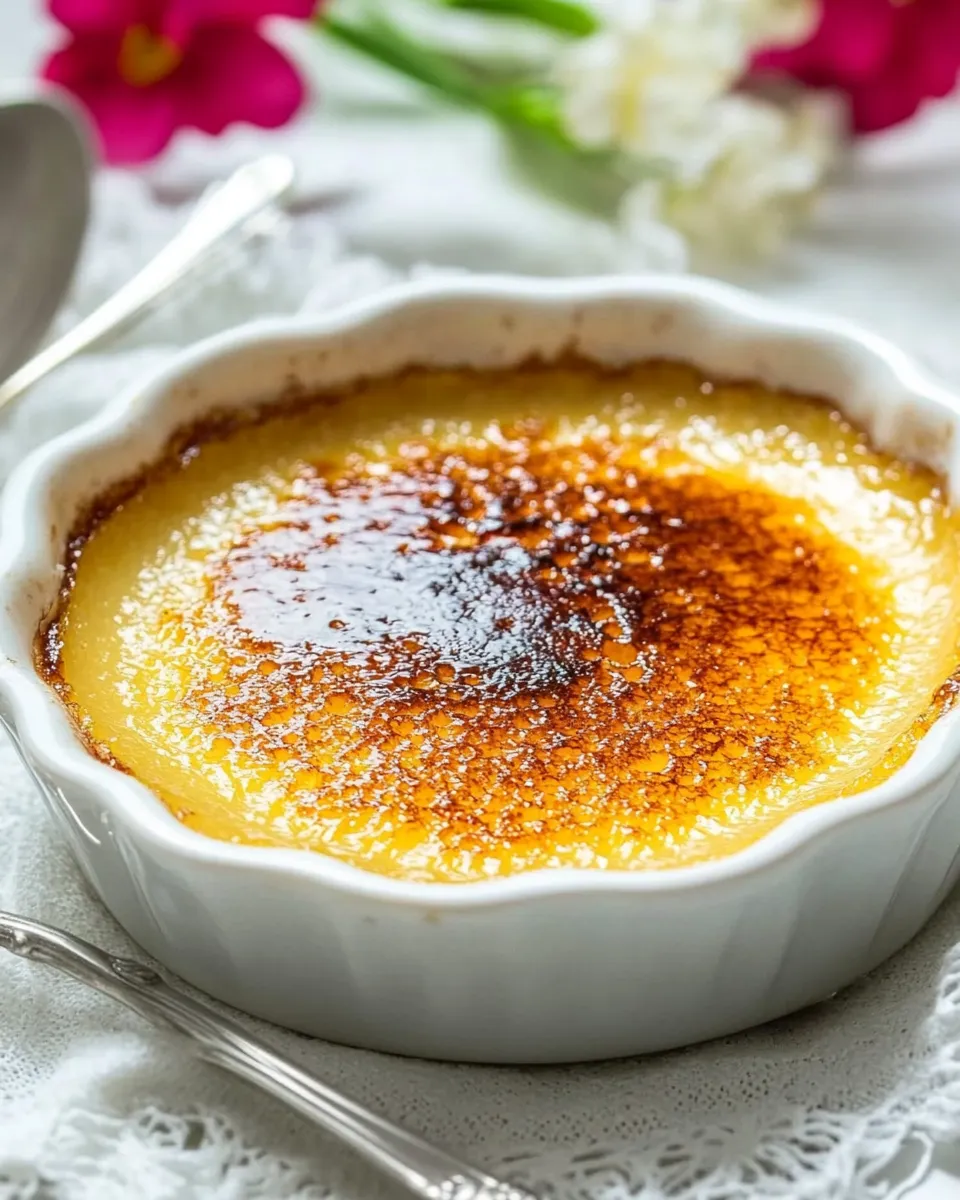
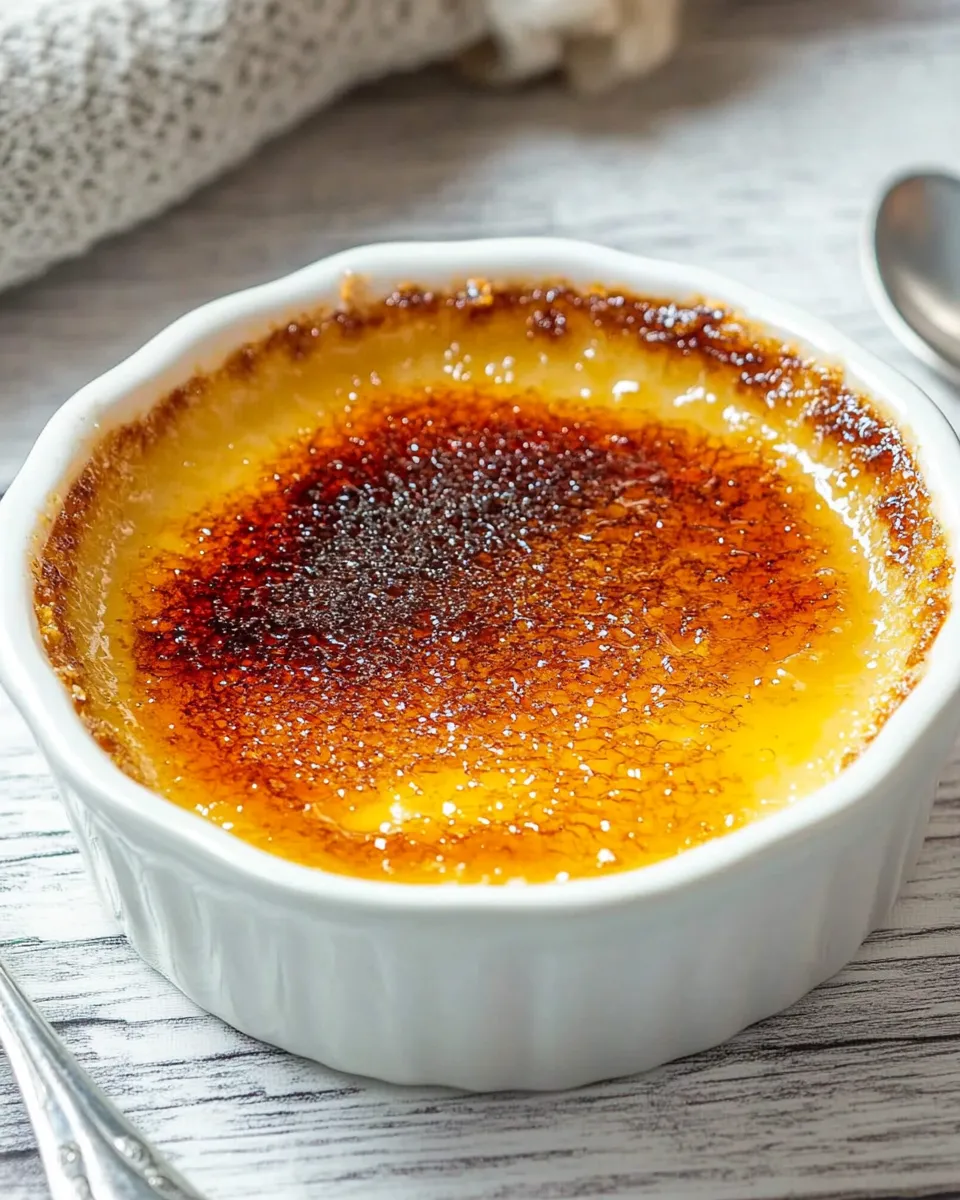
Classic Vanilla Bean Creme Brulee: Simple Homemade Dessert
Crème brûlée feels fancy, but it’s one of the easiest elegant desserts you can make at home. A smooth, custardy base flavored with real vanilla, topped with a thin, glassy caramel shell — that contrast is what keeps people coming back. There’s no need for complicated techniques or rare ingredients. You only need patience and a few simple steps done right.
In this post I’ll walk you through what to buy, the exact steps to follow, common pitfalls, and a few practical swaps. I write recipes I actually make on weeknights and serve to guests on the weekend; this one fits both. Read through the shopping and gear lists before you start so everything is within reach when you begin.
Keep this recipe in your repertoire. It’s forgiving, impressive, and makes a small number of perfect servings every time. Let’s get the oven warming and the cream steeping.
Ingredients

- 1 quart heavy cream — provides the rich, silky base for the custard.
- 1 vanilla bean — seeds and pod give the most authentic, intense vanilla flavor.
- 1/2 cup sugar — sweetens and helps set the custard when whipped with yolks.
- 6 egg yolks — the structure and creaminess of the custard come from these.
- 1/4 cup sugar for brulee — used to create the crisp caramel top on each serving.
Your Shopping Guide
Buy the best vanilla bean you can find. It matters more than most people realize because vanilla is the central flavor. Look for a plump, moist bean with a glossy skin — cheaper, dry beans will produce a weaker flavor. If you see Madagascar or Bourbon vanilla, that’s a safe choice.
Heavy cream should be the regular, full-fat kind labeled heavy cream or heavy whipping cream. Avoid lower-fat creams; the texture will change and the custard will be less luxurious. For the eggs, fresh is fine — you’re using yolks only, so color differences won’t affect taste much, but fresher eggs set a touch better.
Sugar can be standard granulated. For the brûlée crust, some bakers prefer superfine sugar because it melts evenly; granulated sugar works well if you sweep the torch evenly. If you don’t have a torch, you can caramelize under a very hot broiler, but I’ll cover that in gear and tips.
Classic Vanilla Bean Creme Brulee Made Stepwise
- Preheat the oven to 300°F.
- Place 1 quart heavy cream in a heavy-bottomed pot. Split 1 vanilla bean lengthwise and scrape the seeds into the cream; add the scraped pod to the pot as well.
- Heat the cream and vanilla over medium heat until it just begins to steam and small bubbles form at the edges (a gentle simmer). Do not let it boil over. Remove the pot from the heat and let the cream and vanilla steep for 15 minutes.
- Meanwhile, whisk 6 egg yolks with 1/2 cup sugar in a bowl until the mixture is pale and slightly thickened.
- Remove and discard the vanilla pod from the cream. Warm the steeped cream briefly if it has cooled (it should be warm, not boiling).
- Temper the eggs: with the yolk mixture in a bowl, slowly add the warm cream in a thin stream while whisking constantly. Continue adding until all the cream is incorporated and the mixture is smooth.
- Strain the custard through a fine-mesh sieve into a large measuring cup or bowl to remove any solids or air bubbles.
- Divide the custard evenly among six ramekins. Place the ramekins in a baking dish or roasting pan.
- Carefully pour boiling or very hot water into the baking dish so it reaches about halfway up the sides of the ramekins, creating a water bath. Bake at 300°F for about 30 minutes, or until the custards are mostly set but still slightly jiggly in the center.
- Remove the ramekins from the water bath and let them cool to room temperature on a rack. Then refrigerate the custards for at least 2 hours (or up to overnight) to fully chill and set.
- Before caramelizing, blot any moisture from the surface with a paper towel. Evenly divide the 1/4 cup sugar for brulee among the six ramekins, sprinkling a thin, even layer over each custard. Using a kitchen torch, melt and caramelize the sugar by sweeping the flame across the surface until it bubbles and turns golden brown, rotating the ramekin as needed for even color. Let the caramel cool and harden for a minute or two before serving.
Why This Recipe is a Keeper
This recipe is straightforward, uses pantry-friendly ingredients, and produces consistent results. The technique focuses on two simple things: infusing the cream with real vanilla and carefully tempering the yolks so the custard sets without curdling. Once you nail those, the rest is patience and a steady hand with the torch.
It’s also flexible. Make it ahead and keep refrigerated until you’re ready to torch. The chilling step helps the custard set fully and keeps the caramel from melting into the custard too quickly. Finally, the recipe scales predictably — six ramekins is a manageable batch for most ovens and dinner parties.
Substitutions by Category
- Vanilla — If you don’t have a vanilla bean, use 1 to 2 teaspoons pure vanilla extract added to the warm cream after removing it from heat. It won’t be as aromatic as the bean but still very good.
- Heavy cream — For slightly lighter custard, a mix of half-and-half with heavy cream (not recommended to use milk alone) can work, but texture will be less rich.
- Sugar for the custard — Regular granulated sugar is ideal. If you only have caster/superfine sugar, use it for a quicker dissolve.
- Sugar for brulee — Granulated or superfine sugar both work; demerara or turbinado will give a deeper, caramel flavor but may not melt as evenly.
- Egg yolks — No direct substitute — yolks are necessary for the correct custard structure. Whole eggs will change the texture.
What’s in the Gear List
Essentials
- Heavy-bottomed pot — for gently heating the cream without scorching.
- Ramekins (six) — 4 to 6-ounce size is standard; choose straight-sided ones for an even caramel top.
- Baking dish or roasting pan — deep enough to hold a water bath up to roughly halfway up your ramekins.
- Fine-mesh sieve — to strain the custard for a silky texture.
- Kitchen torch — the fastest, most controlled way to caramelize sugar.
Nice-to-haves
- Digital thermometer — helps ensure the cream is warm and not boiling when tempering, though not strictly necessary.
- Small offset spatula or spoon — for spreading sugar evenly before torching.
Frequent Missteps to Avoid
Don’t let the cream boil. When the cream reaches a full boil it can change flavor and form a skin; remove it from heat at a gentle simmer. You should see steam and small bubbles at the edge.
Temper slowly. Pouring hot cream too quickly into the yolks will scramble them. Add the cream in a thin stream while whisking to slowly raise the eggs’ temperature.
Overbaking is easy. The centers should be slightly jiggly when you take them out; they’ll continue to set while chilling. Dry, curdled custard means it was baked too long or too hot.
Allergy-Friendly Swaps
If you need dairy-free or egg-free options, be aware these moves will change the dessert into something different from classic crème brûlée, but you can create similar textures:
- Dairy-free base — Use a full-fat coconut milk as a substitute for heavy cream. The flavor will be coconut-forward; consider reducing any additional coconut accents if you want a subtler profile.
- Egg-free custard — Silken tofu blended with coconut milk and a thickener like cornstarch or agar can approximate a set custard, but it won’t be identical. Test small batches first.
- Caramel top — If sugar intolerance is a concern, there’s no perfect swap for the classic brûlée glass top. Some use a thin layer of granulated sugar alternatives made for baking, but results vary.
What Could Go Wrong
Curdled custard: This happens when eggs cook too quickly. Fixes are prevention — tempering diligently and baking at a low, steady temperature. If curdling occurs, the texture is compromised and it’s best to start over.
Soggy bottoms: If the water bath floods the ramekins or the oven steams excessively, the bottoms can absorb water. Pour water carefully and make sure the baking dish sits level in the oven.
Uneven caramel: Torching too close or too long will burn edges while leaving the center pale. Move the torch in steady sweeps and keep it a few inches back for even color.
Save for Later: Storage Tips

Refrigerate the custards uncovered or loosely covered for up to 2 days before torching. The caramel top is best made right before serving because it will soften as it sits. If you must prepare everything ahead, torch the tops briefly and then re-crisp with a quick torch pass before serving.
Leftovers with the caramel already set can be stored covered in the fridge for 2–3 days but expect the top to lose crispness. Do not freeze — freezing alters the custard texture badly.
Ask the Chef
Q: Can I bake these at a different temperature? A: You can bake at 325°F for a shorter time or 275°F for a bit longer. The goal is a gentle, even bake so the centers remain slightly jiggly. Stick close to the stated 300°F for best, predictable results.
Q: No torch — what then? A: Place ramekins under a very hot broiler for 1–3 minutes, watching closely. Rotate the pan for even color. The broiler method browns the sugar but gives slightly different texture and risks reheating the custard beneath.
Q: How do I know when the custards are done? A: They’re done when the edges are set and the centers wobble slightly when you jiggle the ramekin. Think pudding that still has a soft wobble in the middle.
Serve & Enjoy
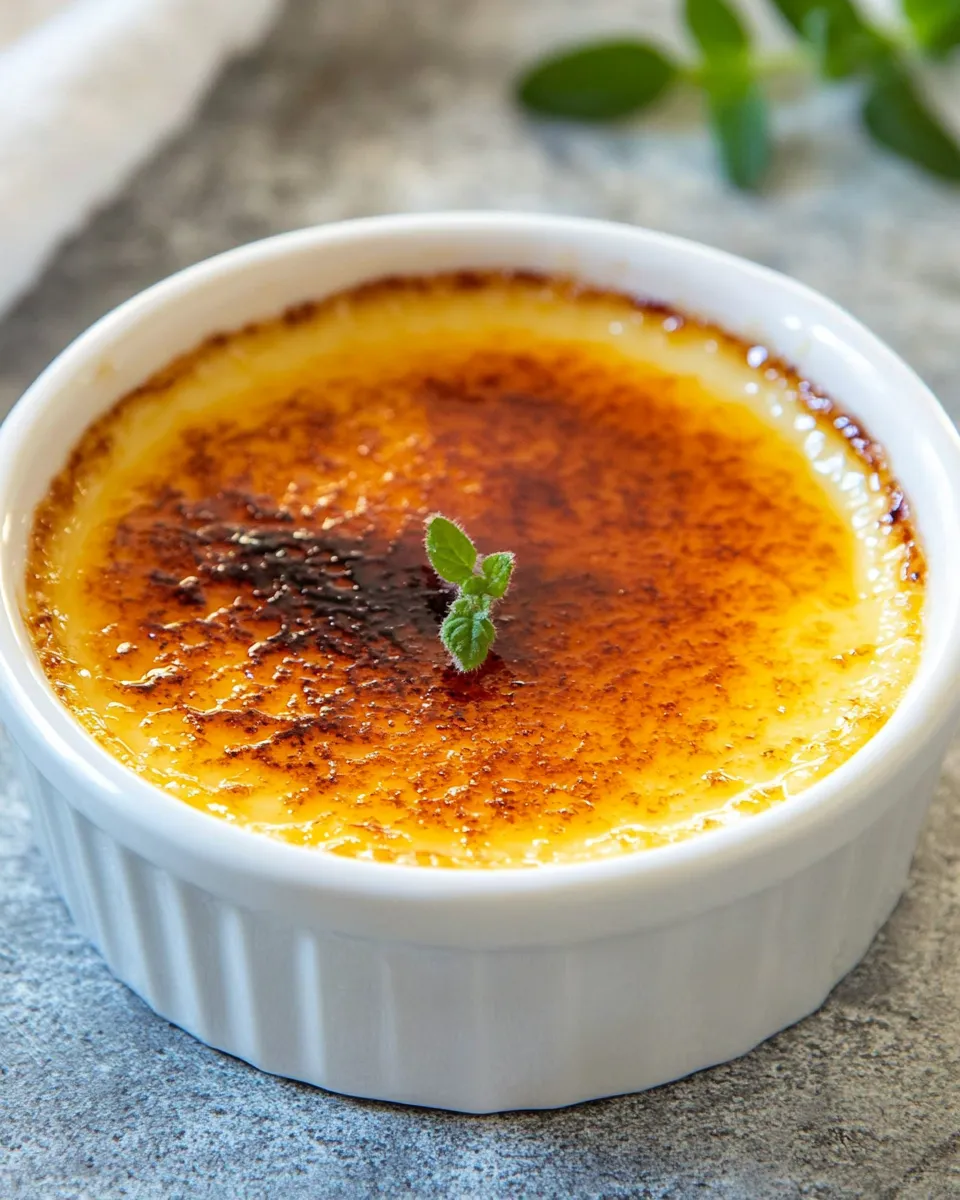
Let the brûlée sit for a minute after caramelizing so the sugar cools and hardens. Serve immediately so your guests get that satisfying tap through the crisp top into creamy custard. A simple garnish — a few fresh berries or a light dusting of grated citrus zest — complements the vanilla without stealing the show.
Crème brûlée is a small, elegant dish that rewards precision and patience. Do the prep, chill thoroughly, and torch at the last minute. You’ll have a dessert that looks restaurant‑level and tastes even better because you made it yourself.
Classic Vanilla Bean Creme Brulee: Simple Homemade Dessert
Ingredients
Ingredients
- 1 quartheavy cream
- 1 vanilla bean
- 1/2 cupsugar
- 6 egg yolks
- 1/4 cupsugarfor brulee.
Instructions
Instructions
- Preheat the oven to 300°F.
- Place 1 quart heavy cream in a heavy-bottomed pot. Split 1 vanilla bean lengthwise and scrape the seeds into the cream; add the scraped pod to the pot as well.
- Heat the cream and vanilla over medium heat until it just begins to steam and small bubbles form at the edges (a gentle simmer). Do not let it boil over. Remove the pot from the heat and let the cream and vanilla steep for 15 minutes.
- Meanwhile, whisk 6 egg yolks with 1/2 cup sugar in a bowl until the mixture is pale and slightly thickened.
- Remove and discard the vanilla pod from the cream. Warm the steeped cream briefly if it has cooled (it should be warm, not boiling).
- Temper the eggs: with the yolk mixture in a bowl, slowly add the warm cream in a thin stream while whisking constantly. Continue adding until all the cream is incorporated and the mixture is smooth.
- Strain the custard through a fine-mesh sieve into a large measuring cup or bowl to remove any solids or air bubbles.
- Divide the custard evenly among six ramekins. Place the ramekins in a baking dish or roasting pan.
- Carefully pour boiling or very hot water into the baking dish so it reaches about halfway up the sides of the ramekins, creating a water bath. Bake at 300°F for about 30 minutes, or until the custards are mostly set but still slightly jiggly in the center.
- Remove the ramekins from the water bath and let them cool to room temperature on a rack. Then refrigerate the custards for at least 2 hours (or up to overnight) to fully chill and set.
- Before caramelizing, blot any moisture from the surface with a paper towel. Evenly divide the 1/4 cup sugar for brulee among the six ramekins, sprinkling a thin, even layer over each custard. Using a kitchen torch, melt and caramelize the sugar by sweeping the flame across the surface until it bubbles and turns golden brown, rotating the ramekin as needed for even color. Let the caramel cool and harden for a minute or two before serving.
Equipment
- Equipment
- Blow torch
Notes
Temperature control is crucial for perfect creme brulee. The custard should reach an internal temperature of about 170-175°F when done. If you don’t have a thermometer, look for a slight jiggle in the center when gently shaken. For the caramelized topping, a regular hardware store torch works perfectly (often better than culinary torches) but make sure it uses butane or propane—never use industrial torches that might use unsafe fuel.