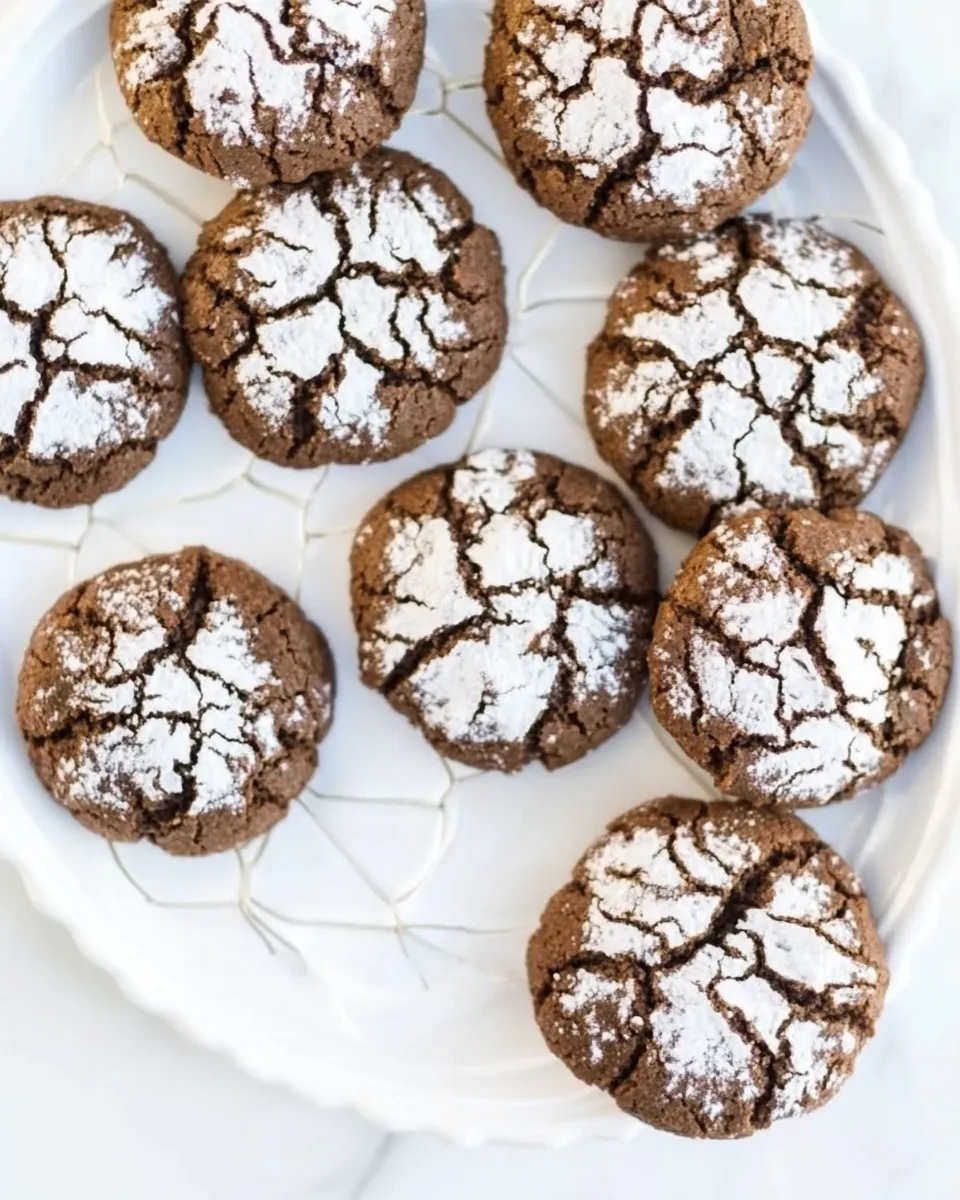
Chocolate Crinkle Cookies
I make these Chocolate Crinkle Cookies several times a season. They’re simple, dramatic, and reliably satisfying — deep chocolate crinkles rimmed in powdered sugar, slightly fudgy inside and set at the edges. The dough is forgiving and benefits from a rest in the fridge, which makes them great to prepare ahead of baking day.
This recipe leans on straightforward pantry staples and a short list of steps that stay the same whether you want small, delicate rounds or larger, sandwichable cookies. The technique — whisking the wet ingredients, gently folding in the dry, chilling the dough, then rolling in powdered sugar — is what creates that signature crackled look.
I’ll walk you through the exact ingredients and the step-by-step directions I follow in my own kitchen, explain why the method matters, and offer practical tips for variations, troubleshooting, and storage. No fuss, just clear guidance so you can get these on the table with confidence.
Gather These Ingredients

Ingredients
- ½ cup unsweetened natural cocoa powder — Sift if it’s lumpy to prevent streaks and ensure even chocolate flavor.
- 1 cup granulated sugar — Provides structure and sweetness; helps create the glossy top before the powdered sugar crackles.
- 2 large eggs — Bind the dough and add moisture; room temperature eggs mix into the cocoa more smoothly.
- ¼ cup vegetable oil — Keeps the crumb tender and gives a slightly fudgy interior without butter.
- 1 teaspoon pure vanilla extract — Balances the chocolate and rounds the flavor.
- 1 cup all-purpose flour — The primary structure; measure by spooning into the cup and leveling for accuracy.
- 1 teaspoon baking powder — Adds lift so the cookies crack and spread correctly.
- ¼ teaspoon salt — Enhances sweetness and chocolate notes; don’t skip.
- ½ cup powdered sugar — To roll the cookies in before baking; creates the classic crinkle contrast.
Chocolate Crinkle Cookies in Steps
- If the cocoa is lumpy, sift the ½ cup unsweetened natural cocoa powder into a large bowl. Add 1 cup granulated sugar, 2 large eggs, ¼ cup vegetable oil, and 1 teaspoon pure vanilla extract. Whisk until the mixture is smooth and well combined.
- Add 1 cup all-purpose flour, 1 teaspoon baking powder, and ¼ teaspoon salt to the bowl. Whisk just until the dry ingredients are incorporated and no large streaks of flour remain (do not overmix).
- Cover the bowl tightly with plastic wrap and chill the dough in the refrigerator for at least 2 hours and up to 48 hours.
- When ready to bake, preheat the oven to 350°F (180°C). Line a baking sheet with parchment paper or a silicone baking mat and place a wire rack nearby to cool the cookies.
- Put the ½ cup powdered sugar in a shallow bowl for rolling.
- Remove the chilled dough from the refrigerator. Portion the dough into balls using 1 tablespoon portions (about 20 g) for small cookies or 2 tablespoon portions (about 40 g) for large cookies. Roll each portion between your palms to form smooth balls.
- Roll each dough ball in the powdered sugar until well coated, then place the coated balls on the prepared baking sheet about 2 inches apart.
- Bake one sheet at a time in the preheated oven for 12–14 minutes, removing the sheet when the cookie edges are set but the centers are still just slightly underdone.
- Allow the cookies to cool on the baking sheet for 10 minutes, then transfer them to the wire rack to cool completely.
Why This Chocolate Crinkle Cookies Stands Out

There are a few simple reasons these cookies earn a permanent spot in my rotation. First, the method intentionally produces a contrast in texture: glossy, slightly firm edges and a tender, fudgy center. That comes from the balance of oil and eggs with a measured amount of flour, and from removing the cookies from the oven when the centers are still a touch underdone.
Second, the chilled dough is key. Resting the dough lets the dry ingredients hydrate and the cocoa fully bloom. It also firms up the dough so you can roll neat balls and get even cracking without excess spreading. The powdered sugar coating helps the surface crack as the cookie expands, creating the signature “crinkle” look.
Finally, this recipe is forgiving. It doesn’t rely on complicated folding techniques or temperamental temps. The ingredients are common, and the steps are repeatable, which is why you can make them for a party, a holiday platter, or a quiet afternoon treat and get reliable results.
Flavor-Forward Alternatives

I keep my suggestions focused on technique and small, safe adjustments so the recipe’s structure remains intact.
- For a deeper chocolate note, use the best-quality unsweetened natural cocoa powder you have; richer cocoa will read more intensely without changing any measurements.
- Adjust cookie size by following the portion guidance in the steps: 1 tablespoon portions for smaller cookies, 2 tablespoon portions for larger ones. Size changes the bake time and texture but not the ingredient list.
- Roll the dough twice in powdered sugar for a thicker, brighter coating if you want a more pronounced contrast between crackled top and chocolate interior.
- Chill the dough at the longer end of the allowed time window if you prefer neater, less-spread cookies; shorter chills yield slightly flatter, more crinkled tops.
What You’ll Need (Gear)
- Large mixing bowl — for combining wet and dry ingredients.
- Sifter or fine-mesh sieve — to remove lumps from the cocoa powder if needed.
- Whisk — for smoothing the initial batter.
- Measuring cups and spoons — to keep ingredient proportions consistent.
- Plastic wrap — to cover and chill the dough.
- Baking sheet and parchment paper or silicone baking mat — for even baking and easy transfer.
- Wire cooling rack — to cool cookies properly after the brief rest on the sheet.
- Tablespoon or small scoop — to portion dough accurately.
Problems & Prevention
- Problem: Cookies spread too much and lose their crackle. Prevention: Make sure the dough is sufficiently chilled before portioning. A chilled dough firms up the fats and limits spread.
- Problem: Centers are dry or cakey. Prevention: Remove the baking sheet when edges are set but centers remain slightly underdone; the residual heat during the resting period on the sheet finishes the centers without drying them out.
- Problem: Powdered sugar melts into the top and becomes dull. Prevention: Roll the dough balls well and refrigerate so the sugar clings; a quick double-roll can help if humidity is high.
- Problem: Lumpy cocoa causes streaks. Prevention: Sift the ½ cup unsweetened natural cocoa powder into the bowl when necessary, as described in the first step.
Seasonal Serving Ideas
These cookies are versatile. Arrange them on a simple platter for a holiday table, tuck a few into a cookie tin for a gift, or set a small stack beside coffee or tea for weekday indulgence. Serve them slightly warm when you want a softer center, or at room temperature if you need them to hold shape for display.
For a seasonal touch without changing the recipe, vary the presentation: dust extra powdered sugar over the finished platter for a snowy look in winter, or arrange the cookies alongside other small sweets and fruit for a bright spring platter. The cookies themselves stay the same — reliable and visually striking.
Notes from the Test Kitchen

When I test this recipe I pay attention to two things: chilling time and oven rhythm. The chilling window in the steps — anywhere from the minimum up to the longer end — gives you flexibility. I usually make the dough the night before and bake the next day for convenience and consistently neat cookies.
Baking one sheet at a time, as directed, matters. The oven recovers heat faster when you’re not stacking multiple sheets, and that steady environment helps set the edges while the centers remain tender. I also allow the cookies a brief rest on the baking sheet out of the oven; this carries them to completion gently and keeps the crumb moist.
Meal Prep & Storage Notes
You can prepare the dough ahead and keep it chilled until you’re ready to bake; this is one of the recipe’s strengths. Portioning balls and keeping them on a tray covered in the fridge makes baking in batches straightforward. If you bake everything in advance, store cooled cookies in an airtight container at room temperature on parchment or wax paper separated by layers to maintain their powdered sugar finish.
If you need to transport them, arrange in a shallow tin or box so they sit in a single layer and don’t rub together; a gentle stack with parchment between layers also works. Reheating briefly on a baking sheet — just until slightly warm — brings back a fresh-from-the-oven feel if you prefer a softer center.
Common Questions
- Do I have to sift the cocoa? If the cocoa is lumpy, yes — the first step calls for sifting. Small lumps can cause uneven texture, so sift when needed for a smooth batter.
- Can I skip chilling? Chilling is recommended. It firms the dough so the cookies hold their shape and develop the crinkle pattern. Shorter chills are possible but expect more spread.
- How do I know when the cookies are done? Look for set edges while the centers still look slightly underdone. The short rest on the baking sheet finishes the centers without overbaking.
- Why does the recipe use oil instead of butter? Oil contributes tenderness and a fudgy interior without the need to cream butter and sugar. It keeps the method fast and uncomplicated.
- Can I make different sizes? Yes — the steps give the exact portion sizes to choose between small and large cookies; adjust expectations for bake time accordingly.
Time to Try It
These Chocolate Crinkle Cookies are straightforward to make but deliver big on visual impact and texture. Follow the steps, honor the chill time, and watch how the powdered sugar and oven transform the dough into crackled, chocolatey rounds. Make a batch when you want something dependable and special without a lot of fuss.
When you do bake them, take a moment while they cool to admire those glossy cracks — then eat one, still warm if you can. They’re worth every bit of the minimal effort.
Chocolate Crinkle Cookies
Ingredients
Ingredients
- ?1/2 cupunsweetened natural cocoa powderSift if it's lumpy
- ?1 cupgranulated sugar
- ?2 largeeggs
- ?1/4 cupvegetable oil
- ?1 teaspoonpure vanilla extract
- ?1 cupall purpose flour
- ?1 teaspoonbaking powder
- ?1/4 teaspoonsalt
- ?1/2 cuppowdered sugarto roll the cookies in before baking
Instructions
Instructions
- If the cocoa is lumpy, sift the ½ cup unsweetened natural cocoa powder into a large bowl. Add 1 cup granulated sugar, 2 large eggs, ¼ cup vegetable oil, and 1 teaspoon pure vanilla extract. Whisk until the mixture is smooth and well combined.
- Add 1 cup all-purpose flour, 1 teaspoon baking powder, and ¼ teaspoon salt to the bowl. Whisk just until the dry ingredients are incorporated and no large streaks of flour remain (do not overmix).
- Cover the bowl tightly with plastic wrap and chill the dough in the refrigerator for at least 2 hours and up to 48 hours.
- When ready to bake, preheat the oven to 350°F (180°C). Line a baking sheet with parchment paper or a silicone baking mat and place a wire rack nearby to cool the cookies.
- Put the ½ cup powdered sugar in a shallow bowl for rolling.
- Remove the chilled dough from the refrigerator. Portion the dough into balls using 1 tablespoon portions (about 20 g) for small cookies or 2 tablespoon portions (about 40 g) for large cookies. Roll each portion between your palms to form smooth balls.
- Roll each dough ball in the powdered sugar until well coated, then place the coated balls on the prepared baking sheet about 2 inches apart.
- Bake one sheet at a time in the preheated oven for 12–14 minutes, removing the sheet when the cookie edges are set but the centers are still just slightly underdone.
- Allow the cookies to cool on the baking sheet for 10 minutes, then transfer them to the wire rack to cool completely.
Equipment
- Mixing Bowl
- Whisk
- Cookie Sheet
- Parchment Paper or Silicone Mat
Notes
Bake Only One Tray at a Time.This crinkle cookie recipe doesn’t work very well if you try to bake two trays at once. They need to be baked in the very center of the oven, so be patient, and bake only one tray at a time. I suggest prepping two or three cookie trays so that you can keep things moving
Storing.These can be stored in an airtight container at room temperature for about a week. They are best eaten within a few days though.