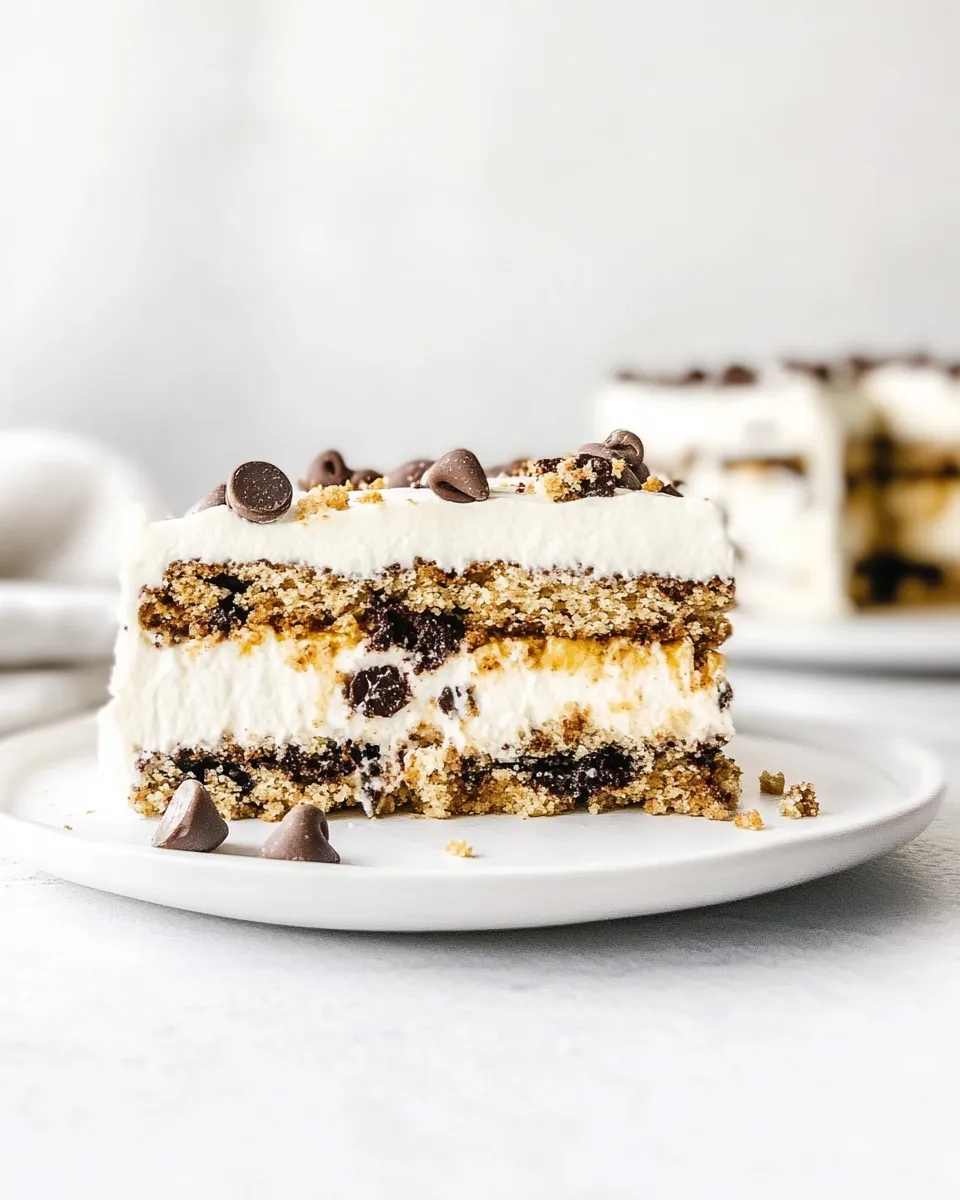
Chocolate Chip Cookie Icebox Cake
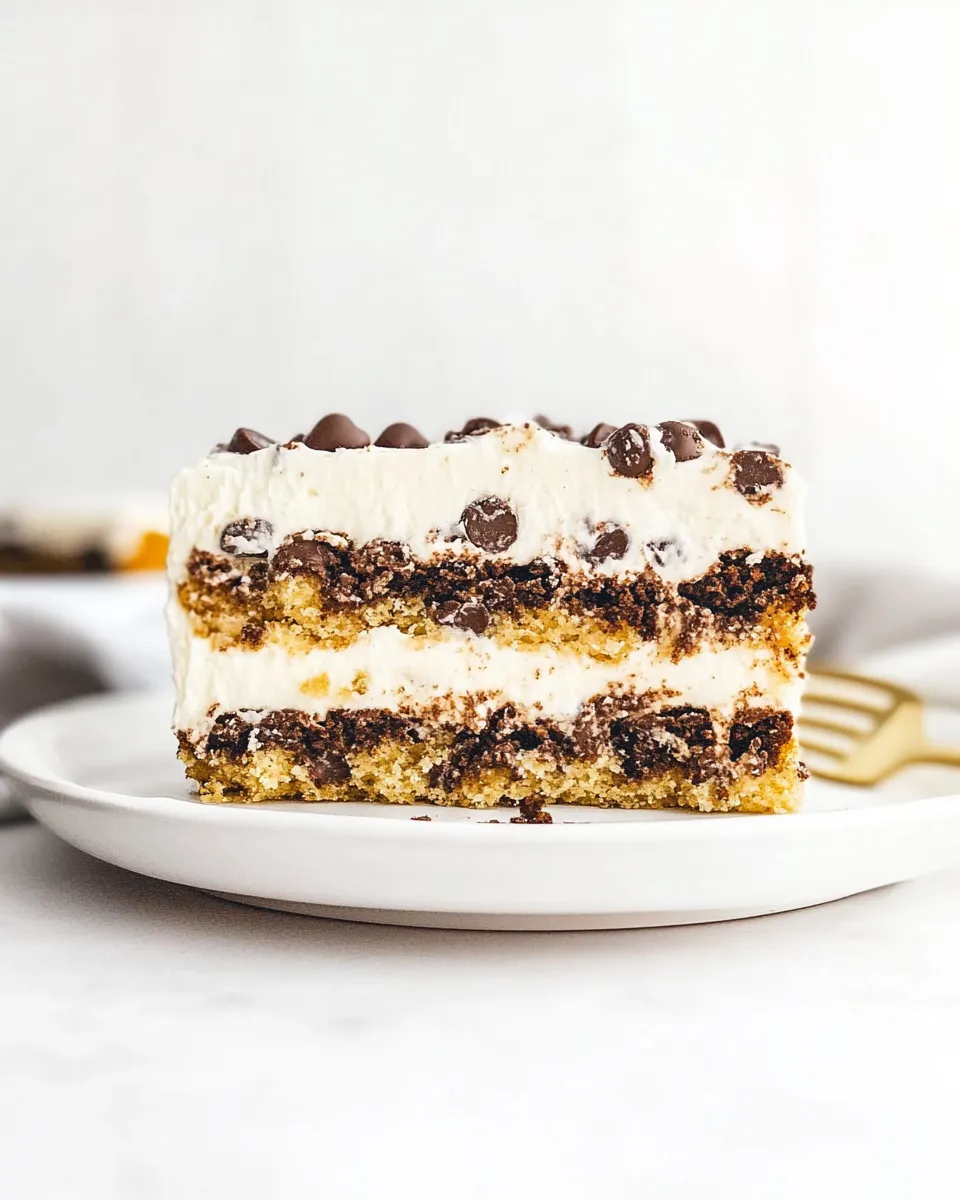
I make this Chocolate Chip Cookie Icebox Cake several times a year—it’s one of those no-bake desserts that feels decadent but is shockingly simple. It’s a great last-minute dessert for a weeknight dinner or a potluck when you want something homey and nostalgic without turning on the oven. The texture is what wins people over: cookie layers that soften into a cake-like, creamy sandwich thanks to the pudding and whipped topping.
There’s comfort in the way the cookies soak up the pudding and milk, and in how the whipped topping keeps everything light. No special equipment. Minimal hands-on time. The long chill time is the real commitment, and it’s worth it. Make it the night before, and it feeds a crowd the next day with very little fuss.
Below you’ll find a tight ingredient breakdown, the step-by-step process using the exact method I follow, tips for substitutions, storage advice, and troubleshooting for the few things that can go sideways. If you want to personalize it, I’ll give a few safe spins that don’t break the structure of the dessert.
Ingredient Breakdown

Ingredients
- 1 (18.2-ounce) package chocolate chip cookies — The cookie layers provide structure and texture; choose your favorite brand. They’ll soften as the cake chills but should still hold some bite.
- 2 (3.4-ounce) packages instant vanilla pudding mix — These create the flavored custard base. Instant mix thickens quickly when combined with milk; it gives body and flavor without cooking.
- 2-1/4 cups whole milk — Activates the pudding mix and adds richness. Whole milk gives the creamiest result; lower-fat milk may thin the final texture slightly.
- 1 (8-ounce) container frozen whipped topping — Thawed, divided. This lightens the pudding and creates the fluffy whipped layers. Reserve 1/2 cup for the top as suggested.
Cooking (Chocolate Chip Cookie Icebox Cake): The Process
- Line an 8×8-inch pan with parchment paper, leaving an overhang on two opposite sides for easy removal. Set the pan aside.
- From the thawed 8-ounce container of whipped topping, scoop out and reserve 1/2 cup in a small bowl; set that reserved portion aside. Use the remaining whipped topping in the next step.
- In a large bowl, add both 3.4-ounce instant vanilla pudding mixes and 2 1/4 cups whole milk. Whisk briskly for about 1 minute, until the mixture is smooth and begins to thicken.
- Gently fold the remaining whipped topping (the portion not reserved) into the pudding mixture until fully incorporated and uniform in texture.
- Place an even layer of chocolate chip cookies in the bottom of the prepared pan, breaking cookies as needed to fit and cover the surface.
- Spoon half of the pudding–whipped mixture over the cookie layer and use the back of a large spoon to spread it into an even layer.
- Add a second layer of chocolate chip cookies to cover the pudding layer.
- Spoon the remaining half of the pudding–whipped mixture over the second cookie layer and spread it evenly.
- Arrange a final layer of chocolate chip cookies on top to cover the pudding layer.
- Spread the reserved 1/2 cup whipped topping in an even layer over the top cookie layer.
- Cover the pan and refrigerate for at least 8 hours (or overnight) so the cookies soften and the cake sets.
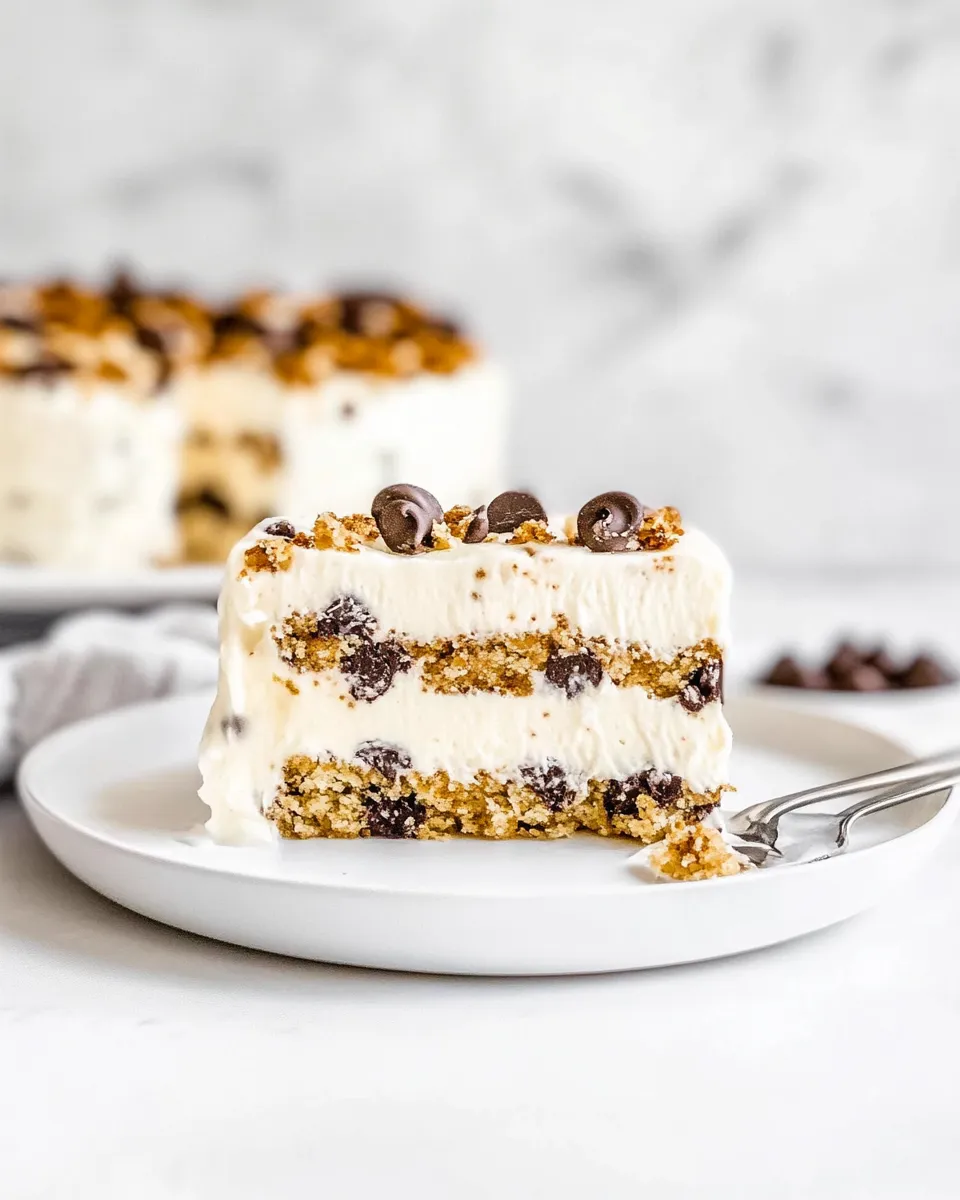
- When ready to serve, use the parchment overhang to lift the cake from the pan and cut into squares. If desired, crumble a few extra cookies from the package over the squares as a garnish.
What You’ll Love About This Recipe
This icebox cake hits the sweet spot between nostalgia and ease. It’s a no-bake dessert that still feels like something you made at home with care. The layers are forgiving: cookies soften, pudding firms, and whipped topping keeps things light so every bite is creamy without being cloying.
It’s also very flexible. You don’t need perfect rows of cookies — broken pieces fit right in. Make it for a last-minute guest or as a make-ahead party dessert; both contexts suit it well. And because there’s no temperature drama, it rarely goes wrong if you follow the simple steps.
Healthier Substitutions
- Swap whole milk for lower-fat milk (2% or 1%) — reduces calories slightly but expect a bit less richness.
- Use sugar-free instant vanilla pudding mix — lowers sugar while keeping the structure. Taste-test first; some brands are sweeter.
- Choose a lighter whipped topping (if available) — will reduce calories and fat, but the texture will be a touch less rich.
- Opt for a reduced-sugar chocolate chip cookie — keeps the cookie layer but cuts added sugar. Texture may be firmer after chilling.
Gear Checklist
- 8×8-inch baking pan (or similar square pan)
- Parchment paper (enough to leave an overhang on two sides)
- Large mixing bowl and whisk
- Small bowl (for reserved whipped topping)
- Spoon or rubber spatula for spreading
- Refrigerator space for an 8+ hour chill
- Sharp knife for slicing squares
Errors to Dodge
Skip the temptation to rush the chill time. The 8-hour refrigeration step is essential so the cookies absorb moisture and the cake sets; cutting it short leaves hard, unpleasant cookie layers. Also, don’t over-whisk the instant pudding beyond the suggested brisk minute—over-mixing can make it overly thick or grainy.
Another common slip-up: using all the whipped topping at once. Reserve the 1/2 cup as directed. That thin final layer is what gives the top a neat finish and an immediate whipped texture when served. If you use it all in the filling, the top can look dry or uneven.
Warm & Cool Weather Spins
In warm months, keep the cake well-chilled until just before serving. It travels better on a cold pack or in a cooler for picnics. For a summery twist, crumble a few cookies and scatter fresh berries on top right before serving—the berries brighten the dessert without altering its structure.
In cooler weather, serve slightly closer to refrigerator temperature so the pudding is firmer and the slices hold neat edges. You can also add a sprinkle of toasted nuts between layers (if you tolerate nuts) for warmth and crunch—add them sparingly so they don’t disrupt the softening process of the cookies.
Cook’s Commentary
I like to keep a stash of the cookie package on hand for this recipe because it’s so handy and reliable. The texture is forgiving: I once forgot a pan in the fridge for 24 hours and the cake was actually easier to slice because the cookies had fully softened and the layers settled uniformly.
If you’re serving kids, slice smaller squares. For adults, garnish with a few crumbled cookies and a dusting of cocoa or instant espresso powder for a slightly grown-up finish. The base recipe is a template—tweak the presentation, not the method, and you’ll be rewarded.
Best Ways to Store
Keep the cake covered in the refrigerator. If you’ve lifted it from the pan, place it on a plate and tent with plastic wrap or store in an airtight container. It holds well for 3 days chilled; after that, the cookies can become overly soft and the texture changes.
If you need to store slices for a single serving later in the day, wrap each square tightly in plastic wrap and keep them chilled. Avoid freezing — the texture of the whipped topping and pudding deteriorates noticeably when frozen and thawed.
Troubleshooting Q&A
Q: My cookie layers stayed hard after 8 hours. What happened?
A: The most common cause is thinner-than-expected pudding or insufficient contact between the pudding and cookie. Make sure you whisk the instant pudding and milk briskly and spread it evenly over the cookies so the moisture reaches all pieces. If your fridge runs very cold, bring the pan to a slightly warmer spot in the fridge for a few hours to encourage softening.
Q: The pudding was lumpy after mixing. Help.
A: Lumps usually mean the pudding mix wasn’t whisked briskly enough into the milk. Whisk for about a minute until the mixture begins to thicken and is smooth. If lumps form, press the mixture through a fine mesh or whisk vigorously until they break down.
Q: Can I make this with homemade whipped cream instead of the frozen whipped topping?
A: You can, but homemade whipped cream is softer and will change the structure slightly. If you substitute, whip heavy cream to medium-stiff peaks and fold half into the pudding and reserve the rest for the top, following the same proportions. Keep everything well chilled.
Q: I want to add a layer of something—jam, caramel, or fruit. When should I add it?
A: Add thin layers between cookie and pudding layers so the cake can still settle. Keep the additions minimal—too much liquid or sticky sauce can prevent even softening or make slicing messy. Fresh berries are best right before serving.
The Last Word
This Chocolate Chip Cookie Icebox Cake is a quietly brilliant dessert: minimal effort, maximum comfort. It’s forgiving, handy to scale, and a crowd-pleaser that stores well for a couple of days. Follow the process as written—especially the chill—and you’ll have clean slices and reliable texture. Keep a package of cookies and instant pudding on the shelf, and you’ll always have a quick, satisfying dessert option ready to go.
Chocolate Chip Cookie Icebox Cake
Ingredients
Ingredients
- 1 18.2-ounce packagechocolate chip cookiessee note 1
- 2 3.4-ounce packagesinstant vanilla pudding mixsee note 2
- 2-1/4 cupswhole milk
- 1 8-ounce containerfrozen whipped toppingthawed, divided, see note 3
Instructions
Instructions
- Line an 8×8-inch pan with parchment paper, leaving an overhang on two opposite sides for easy removal. Set the pan aside.
- From the thawed 8-ounce container of whipped topping, scoop out and reserve 1/2 cup in a small bowl; set that reserved portion aside. Use the remaining whipped topping in the next step.
- In a large bowl, add both 3.4-ounce instant vanilla pudding mixes and 2 1/4 cups whole milk. Whisk briskly for about 1 minute, until the mixture is smooth and begins to thicken.
- Gently fold the remaining whipped topping (the portion not reserved) into the pudding mixture until fully incorporated and uniform in texture.
- Place an even layer of chocolate chip cookies in the bottom of the prepared pan, breaking cookies as needed to fit and cover the surface.
- Spoon half of the pudding–whipped mixture over the cookie layer and use the back of a large spoon to spread it into an even layer.
- Add a second layer of chocolate chip cookies to cover the pudding layer.
- Spoon the remaining half of the pudding–whipped mixture over the second cookie layer and spread it evenly.
- Arrange a final layer of chocolate chip cookies on top to cover the pudding layer.
- Spread the reserved 1/2 cup whipped topping in an even layer over the top cookie layer.
- Cover the pan and refrigerate for at least 8 hours (or overnight) so the cookies soften and the cake sets.
- When ready to serve, use the parchment overhang to lift the cake from the pan and cut into squares. If desired, crumble a few extra cookies from the package over the squares as a garnish.
Equipment
- 8 x 8-inch baking panlined
Notes
Note 1:
You’ll need a lot of cookies for this cake, so make sure to get the family-sized box (18-ounce) instead of the original (13-ounce) size. When it comes to the type of cookies, avoid soft or chewy cookies. I prefer Chips Ahoy original Chocolate Chip Cookies.
Note 2:
Use two boxes of regular instant pudding mix—not sugar-free, low-fat, or cook-and-serve. Be sure to get the small 3.4-ounce boxes. When using the pudding mix, follow my recipe directions—don’t prepare it according to package instructions.
Note 3:
Cool Whip is a common brand of frozen whipped topping and the one I use in the test kitchen. Be sure to use regular, not sugar-free or reduced-fat, which can become watery. You can also make your own; the recipe for homemade whipped cream is in the blog post!
Note 4:
When cutting the cake, use a sharp chef’s knife and make decisive cuts. Run the knife under warm water and dry it on a kitchen towel before cutting and repeat for each slice.
Storage
:
I recommend eating the cake on days 2 or 3. It needs 12 hours to soften properly, but it can become watery after several days. To store the cake, serve it directly from the fridge. Any leftovers should be returned to the fridge promptly. Freezing is not recommended.