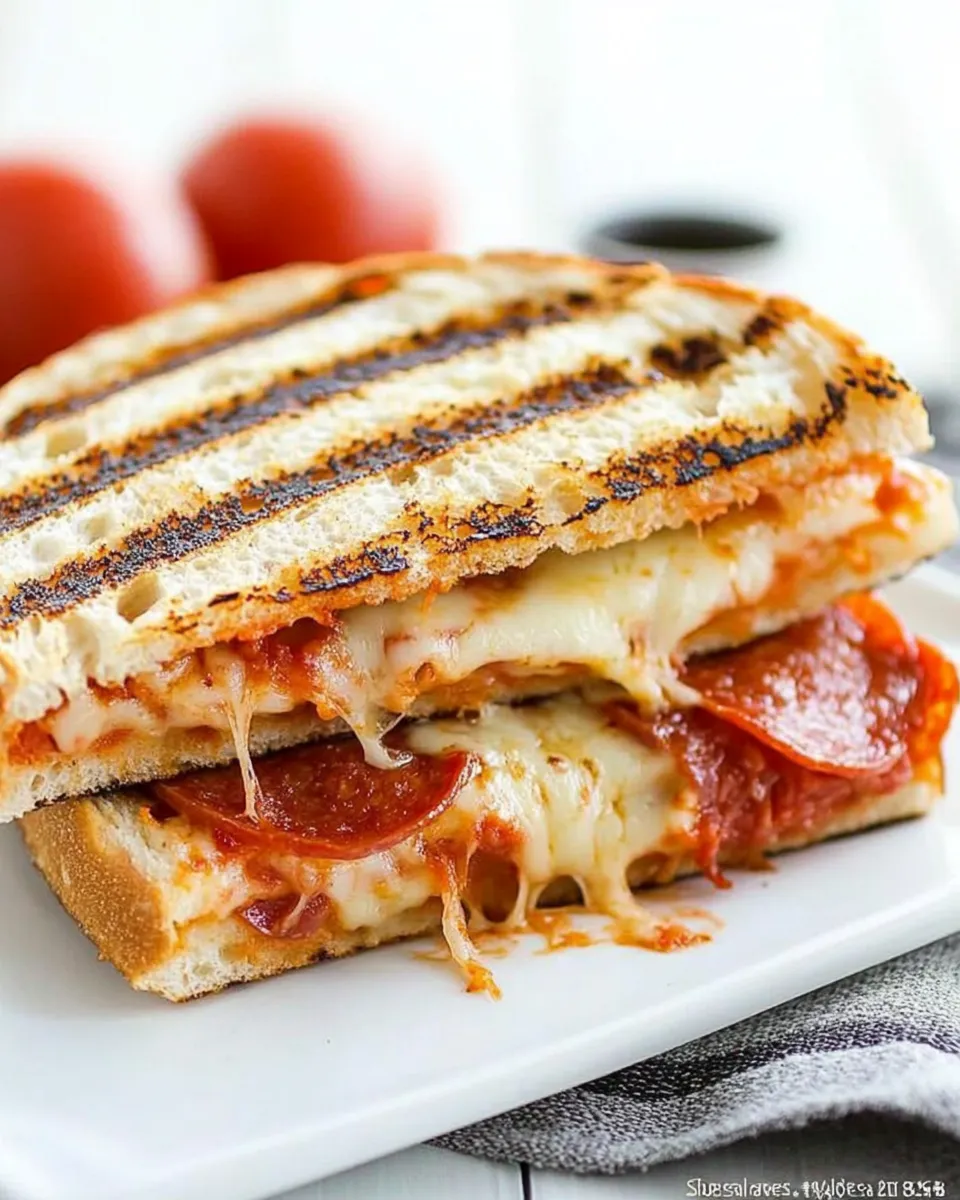
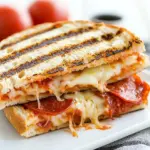
Cheesy Pizza Panini
I love recipes that feel indulgent but are actually fast and reliable, and this Cheesy Pizza Panini is one of those. It turns pantry basics into a handheld sandwich that melts, crisps, and hits the right savory notes every single time. It’s perfect for a busy weeknight dinner, a weekend snack, or when you want pizza flavors without firing up the oven.
The technique is straightforward: sauce on the bread, cheese and pepperoni, brush the outside with oil (or melted butter), and press. A few minutes in a panini press and you have golden, melty sandwiches. Small actions—like lightly brushing the bread or letting the paninis rest a minute—make a tangible difference in texture and ease of slicing.
In this post I’ll walk you through what to buy, the exact method, tools I rely on, common mistakes people make, and storage tips so you can make this again and again. There are no fussy steps or obscure ingredients—just clear, practical guidance so the results match your expectations every time.
What to Buy

Stick to the basics on your shopping list and you’ll have everything needed for six hearty paninis. If you already have olive oil or butter, you’re essentially a single-store run away from dinner. Here’s what to pick up and a quick note on each item to guide your choice at the store.
Ingredients
- 12 slices artisan bread, or any bread — Choose a sturdy loaf (ciabatta, sourdough, or country loaf) for good crust and structure under pressure.
- 6 ounces pizza sauce — Acts as the flavor base and keeps the filling saucy; use your favorite jarred sauce or leftover homemade sauce.
- 16 ounces mozerella cheese sliced — Provides the melt; pre-sliced makes assembly faster and more even.
- 3 ounces pepperoni slices — Adds savory, slightly spicy flavor and a bit of fat for mouthfeel.
- 2 tablespoons olive oil, or melted butter — Brushed on the outside to encourage golden browning and a crisp finish.
The Method for Cheesy Pizza Panini
- Preheat the panini press according to the manufacturer’s instructions.
- Arrange the 12 slices of bread on a clean work surface. Spread 1 tablespoon of the pizza sauce on one side of each slice (this uses all 6 ounces).
- For each sandwich, place one sauced slice sauce-side up. Evenly divide the 16 ounces sliced mozzarella and 3 ounces pepperoni among the 6 sandwiches, layering the cheese and pepperoni on top of the sauce on each bottom slice.
- Close each sandwich with a second slice of bread so the sauce sides are facing inward.
- Lightly brush both outside faces of all sandwiches with the 2 tablespoons of olive oil (or melted butter), using the full amount across the batch.
- Place sandwiches in the preheated panini press (work in batches if needed) and cook until the bread is golden brown and the cheese is melted—about 3–5 minutes, depending on your press.
- Remove the paninis from the press and let them rest 1 minute before slicing and serving.
What Sets This Recipe Apart
This recipe keeps things deliberately simple and proportioned for reliable results. Two choices define the final sandwich: the bread and the fat you use on the exterior. A sturdy artisan loaf holds up under the press and forms satisfying crunch, while olive oil or melted butter changes both flavor and browning characteristics.
Another advantage is speed. From assembly to finished panini takes under 10 minutes once the press is hot. Because the sauce is portioned at 1 tablespoon per slice, it prevents sogginess while still delivering pizza-like flavor. And using sliced mozzarella ensures even melting without long wait times.
International Equivalents
The concept of a pressed, cheese-forward sandwich exists globally, so think of this as a pizza-inspired panini. In Italy, a similar approach might use focaccia or ciabatta with fresh mozzarella and thinly sliced salami; in France you’d find pressed sandwiches with a rich butter crust. For a closer parallel in the U.S., it sits between a grilled cheese and a pizza sub.
If you’re outside the U.S., substitute the bread with a local robust loaf for best results: panini work well with dense country breads or regional rustic loaves that can withstand pressing and heat.
Toolbox for This Recipe
These are the items that make the process fast and reliable:
- Panini press — Central to the method and delivers even heat and pressure. Follow your manufacturer’s preheat instructions.
- Sharp knife — For neat slicing after the 1-minute rest; a serrated blade is handy for crusty bread.
- Pastry brush or small spoon — For brushing olive oil or butter on the bread; a paper towel also works in a pinch.
- Cutting board or work surface — For assembly and resting the paninis.
Errors to Dodge
- Over-saucing the bread — Using more than the specified 1 tablespoon per slice can make the bread soggy and reduce browning.
- Skipping the oil/butter on the outside — That thin layer is what creates the crisp, golden crust. Do not skip it.
- Overcrowding the press — Work in batches. Crowding lowers the press temperature and increases cook time, which can lead to uneven melting.
- Cutting immediately — Slice after a 1-minute rest. Cutting too soon lets hot cheese run out and makes the sandwiches messier to eat.
- Using extremely soft bread — Sandwiches made with very soft, thin bread may compress and leak; choose a loaf with some density.
Fit It to Your Goals
Want to make this lighter? Use olive oil instead of butter and choose a whole-grain or lighter artisan loaf. Want to make it richer or more indulgent? Use melted butter for the outside and a double layer of mozzarella. For vegetarian needs, omit the pepperoni entirely — the sauce and cheese are satisfying on their own.
If you’re cooking for a crowd, assemble sandwiches and keep them warm on a baking sheet in a low oven (about 200°F / 95°C) while you press the rest. This preserves crispness without overcooking.
Notes on Ingredients
Quick notes to get the best result from each listed ingredient.
- 12 slices artisan bread, or any bread — The recipe expects 12 slices to make six sandwiches. Choose a loaf that’s not too thin so it holds fillings and browns nicely.
- 6 ounces pizza sauce — Measure to ensure you’re spreading 1 tablespoon per slice. This prevents excess moisture while delivering consistent flavor.
- 16 ounces mozerella cheese sliced — Using sliced mozzarella makes assembly fast and the melt even. If you have fresh mozzarella, pat it dry to limit extra moisture.
- 3 ounces pepperoni slices — Pepperoni provides a classic pizza note. Evenly distribute across the six sandwiches so each bite has pepperoni presence.
- 2 tablespoons olive oil, or melted butter — Brushing both outer faces with the full 2 tablespoons ensures each sandwich crisps evenly when pressed.
Shelf Life & Storage
Leftover paninis are best eaten the same day. For short-term storage, wrap cooled paninis tightly in foil or cling film and refrigerate up to 24 hours. To reheat, unwrap and warm in a panini press or oven at 350°F (175°C) until heated through and crisped, about 6–8 minutes. Reheating directly from cold in a press may take a little longer, so check that the cheese is fully melted before serving.
Do not freeze assembled, uncooked sandwiches—the sauce makes frozen bread soggy when thawed. If you want to prep ahead, keep components separate (sauced bread, cheese, pepperoni) and assemble right before pressing.
Quick Questions
- Can I make these without a panini press? — Yes. Use a heavy skillet and another weighted pan on top (a foil-wrapped brick or cast-iron pan). Cook over medium heat and flip once, pressing the top down while cooking.
- Can I use shredded mozzarella instead of sliced? — You can, but sliced mozzarella melts with more predictable, even layers. If you use shredded, distribute it evenly and expect slightly different texture.
- Is the 1-minute rest necessary? — Yes. It stabilizes the sandwich so the cheese firms just enough to slice cleanly without oozing everywhere.
- What if my press takes longer than 5 minutes? — Cooking times vary by press; aim for golden-brown bread and fully melted cheese as your cue rather than strict timing.
The Takeaway
This Cheesy Pizza Panini is a dependable, quick way to get pizza flavors into a crisp handheld form. It relies on good bread, measured sauce distribution, and a light brushing of fat on the exterior. Follow the method in order, avoid over-saucing, and work in batches if needed. The result is melty, golden sandwiches with minimal fuss and maximum satisfaction.
Make a batch, keep the process steady, and tweak the bread or exterior fat to match your flavor preference. You’ll have a repeatable formula for fast, crowd-pleasing paninis any night of the week.
Cheesy Pizza Panini
Ingredients
Ingredients
- 12 slicesartisan bread or any bread
- 6 ouncespizza sauce
- 16 ouncesmozerella cheesesliced
- 3 ouncespepperoni slices
- 2 tablespoonsolive oil or melted butter
Instructions
Instructions
- Preheat the panini press according to the manufacturer's instructions.
- Arrange the 12 slices of bread on a clean work surface. Spread 1 tablespoon of the pizza sauce on one side of each slice (this uses all 6 ounces).
- For each sandwich, place one sauced slice sauce-side up. Evenly divide the 16 ounces sliced mozzarella and 3 ounces pepperoni among the 6 sandwiches, layering the cheese and pepperoni on top of the sauce on each bottom slice.
- Close each sandwich with a second slice of bread so the sauce sides are facing inward.
- Lightly brush both outside faces of all sandwiches with the 2 tablespoons of olive oil (or melted butter), using the full amount across the batch.
- Place sandwiches in the preheated panini press (work in batches if needed) and cook until the bread is golden brown and the cheese is melted—about 3–5 minutes, depending on your press.
- Remove the paninis from the press and let them rest 1 minute before slicing and serving.
Equipment
- Panini press