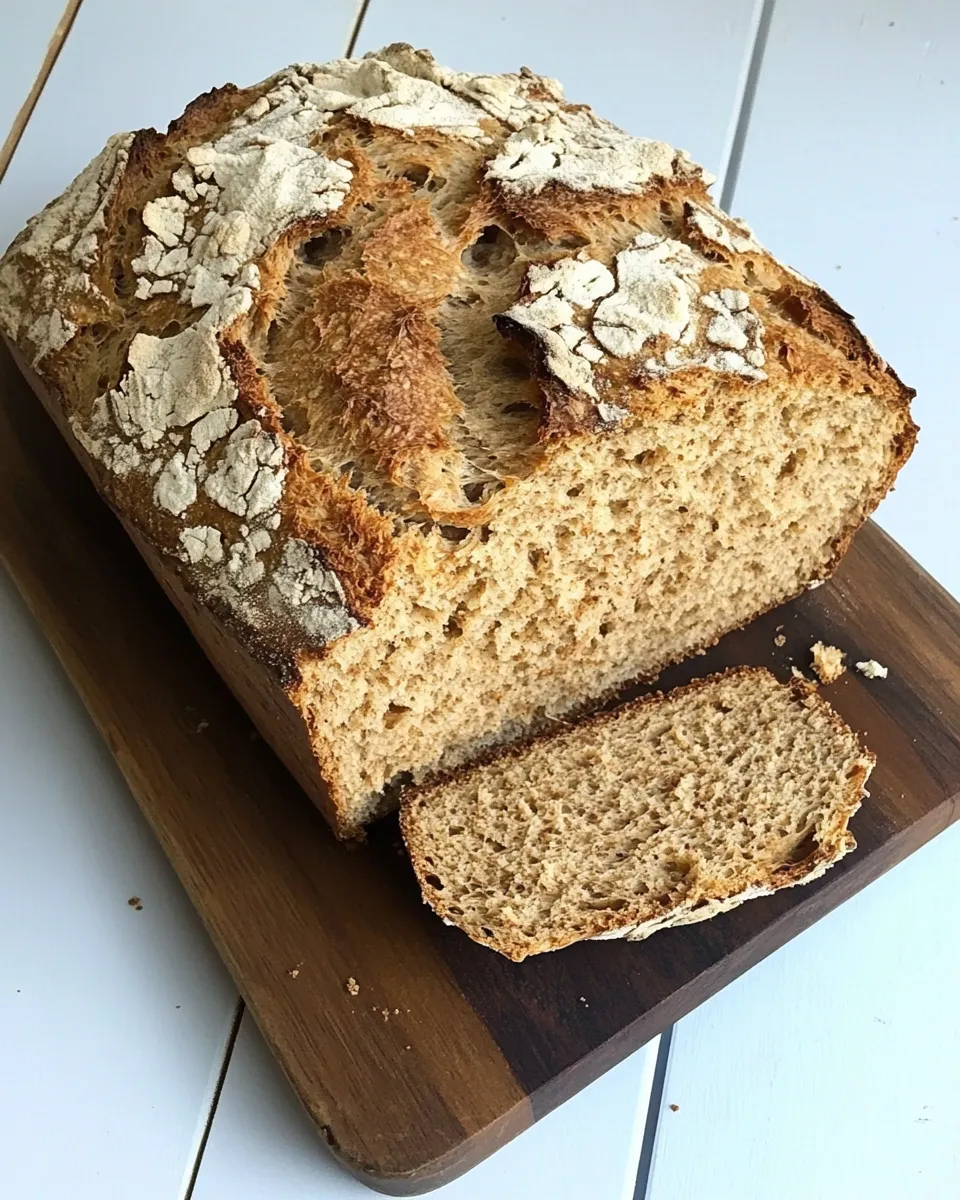
Brown Bread
This loaf is honest bread — nutty, dense enough to hold a smear of butter and honey, but soft enough to slice without crumbling. It’s the kind of bread that makes weekday breakfasts feel considered and weekend lunches feel rooted. No elaborate starters, no fussy proofing. Just good grains and straightforward technique.
Over the years I’ve tested this recipe for friends who wanted “real bread” without an afternoon in the kitchen. The method is forgiving: a short, gentle knead, a hot baking sheet to jump-start the crust, and a simple cross cut to help it bake evenly. The result is a brown loaf that stays interesting for sandwiches and forgiving for toasting.
Below you’ll find exactly what I use, the method I follow, and practical notes — swaps you can make, traps to avoid, and storage tips so your loaf hangs on to that fresh-baked life. If you bake once with these instructions, you’ll see how straightforward this bread is to fit into a busy week.
What We’re Using

Ingredients
- 2 1/4 cups (250 g) whole wheat flour — provides body and that toasty, nutty flavor; gives structure and depth.
- 2 3/4 cups (120 g) wheat bran or wheat germ, or a combination — adds texture and fiber; absorbs moisture and boosts the bread’s rustic character.
- 4 cups (500 g) all-purpose flour — balances the whole grain flours for a tender crumb and workable dough.
- 1 1/2 teaspoons baking soda — the leavening that gives rise and lightness without long fermentation.
- 1 teaspoon salt — sharpens flavor and strengthens the dough’s proteins for better structure.
- 2 ounces (60 g) butter, salted or unsalted — enriches the dough and gives a softer crumb; use unsalted if you prefer control over salt levels.
- 2 1/2 cups (600 ml) buttermilk — provides acidity for the soda to react with and tenderizes the loaf; see notes if you don’t have cultured buttermilk.
- 2 teaspoons molasses — a small touch of sweetness and color that complements the whole wheat notes.
Mastering Brown Bread: How-To
- Position a rack in the middle of the oven and preheat the oven to 350°F (180°C). Line a sturdy baking sheet with parchment paper or a silicone baking mat and place the lined sheet in the oven to heat while you prepare the dough.
- In a large bowl, stir together the 2 1/4 cups (250 g) whole wheat flour and the 2 3/4 cups (120 g) wheat bran or wheat germ (or a combination).
- In a separate bowl, sift or whisk together the 4 cups (500 g) all-purpose flour, 1 1/2 teaspoons baking soda, and 1 teaspoon salt. Add this flour mixture to the large bowl with the whole wheat flour and bran/germ and stir to combine.
- Cut the 2 ounces (60 g) butter into small pieces and add them to the combined flour mixture. Using your fingertips, rub the butter into the flour until the mixture resembles coarse crumbs with pea-sized pieces of butter distributed throughout.
- Stir in the 2 1/2 cups (600 ml) buttermilk and the 2 teaspoons molasses until the dough is uniformly damp and comes together. The dough will be somewhat sticky.
- Turn the dough out onto a lightly floured countertop and knead gently for about 20–30 seconds, just until the dough forms a smooth ball. If you prefer two smaller loaves, divide the dough into two equal pieces and shape each piece into a ball.
- Wearing oven mitts, remove the preheated baking sheet from the oven and set it on a heatproof surface. Transfer the shaped loaf (or loaves) onto the hot lined baking sheet. Use a sharp serrated knife to cut a cross about 1 inch (3 cm) deep into the top of each loaf.
- Return the baking sheet to the oven and bake for about 45 minutes for a single loaf, or until the top is firm and the bottom sounds hollow when tapped. If baking smaller loaves, begin checking for doneness after about 25 minutes.
- Remove the loaf (or loaves) from the oven and transfer to a wire rack. Cool completely for 1 hour before slicing.
Why Cooks Rave About It
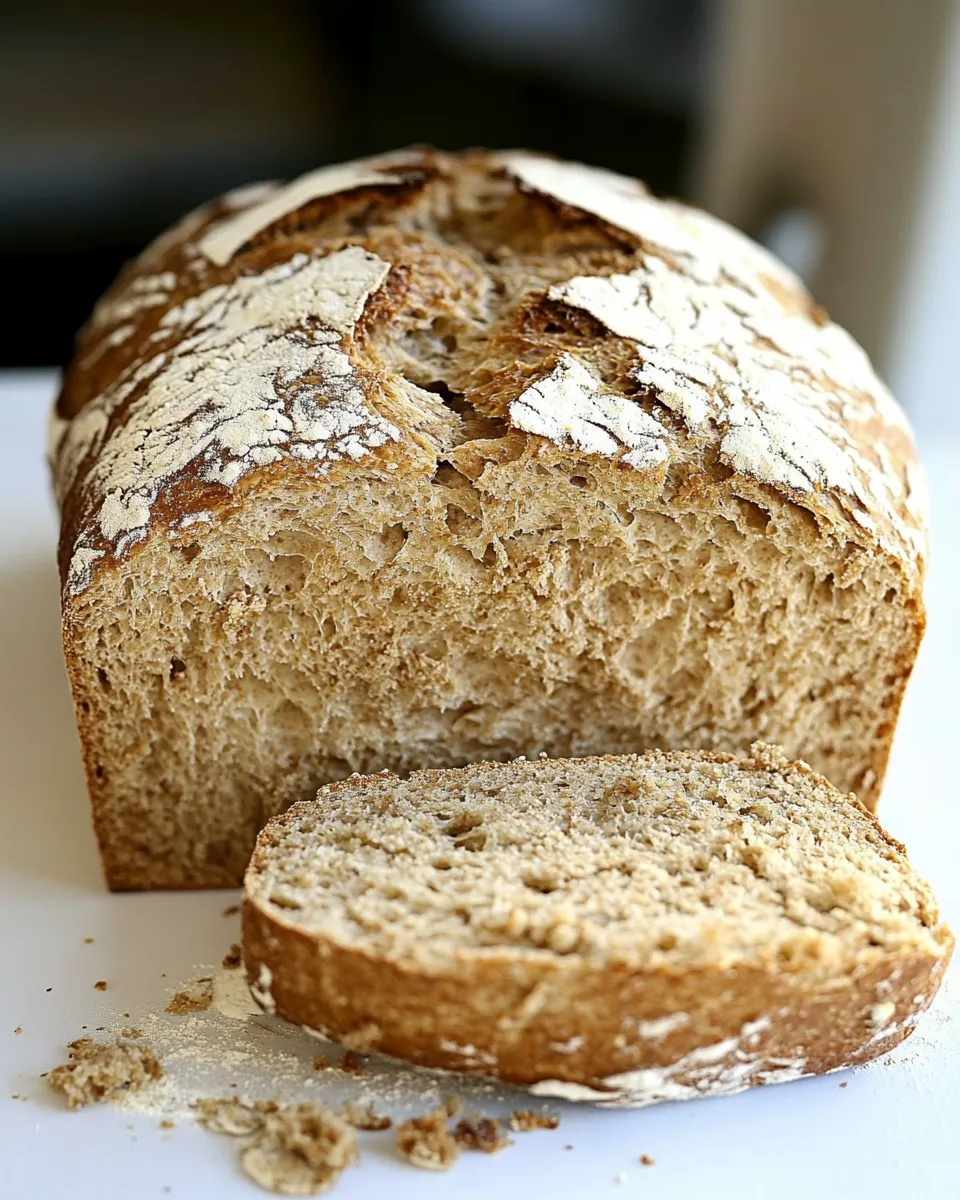
This recipe hits a sweet spot: it’s more wholesome than white sandwich bread, but it doesn’t demand lengthy fermentation or specialized equipment. The mix of whole wheat flour and wheat bran/germ gives an authentic brown-bread flavor and texture that you can taste in every bite. Bakers like it because the chemistry — baking soda reacting with buttermilk — is predictable. You get a reliable rise in a single bake without needing yeast or multiple rises.
Texture-wise, it’s pleasantly dense without being heavy. The butter adds tenderness; the molasses nudges the flavor toward caramel for a richer crumb. For sandwiches, it holds up. For toasting, it crisps beautifully and keeps its interior softness.
Substitutions by Category
- Flours — If you only have one kind of whole grain, use whole wheat flour and reduce the bran slightly to avoid an overly dry loaf. You can experiment with spelt or a 50/50 blend of whole wheat and white whole wheat for a milder taste, but expect textural shifts.
- Leavening and dairy — If you don’t have cultured buttermilk, make a quick substitute by adding 1 tablespoon of vinegar or lemon juice to 2 1/2 cups milk and letting it sit for 5–10 minutes; the acidity is what reacts with the baking soda. The loaf is designed around baking soda, so swapping it for baking powder will change the timing and likely require formula adjustments.
- Fats and sweeteners — You can swap butter for an equivalent weight of neutral oil if you prefer dairy-free fat, though texture will be slightly different. If molasses is unavailable, a small amount of dark brown sugar will add sweetness and color, but molasses gives a distinct depth.
Gear Checklist
- Large mixing bowl — room to combine flours and work the dough.
- Medium bowl for the dry flour mix — makes sifting or whisking easier.
- Baking sheet and parchment paper or silicone baking mat — the recipe asks you to heat the lined sheet in the oven, so choose a sturdy sheet.
- Sharp serrated knife — for the 1 inch (3 cm) cross that helps the loaf expand predictably.
- Wire rack — essential for cooling to avoid a soggy bottom.
- Measuring cups and kitchen scale — weights are given; a scale improves consistency.
Don’t Do This
- Don’t skip preheating the lined baking sheet. Placing the shaped dough on a hot surface creates an immediate crust and helps the loaf rise correctly.
- Don’t over-knead. The dough needs only 20–30 seconds of gentle kneading. Overworking develops too much gluten and will make the loaf tough.
- Don’t slice while it’s hot. Cutting into the bread before it cools traps steam and results in a gummy texture; the recipe asks for a full hour of cooling.
- Don’t omit the molasses entirely without replacing some sweetness or color; it’s subtle but contributes to both flavor and appearance.
Warm & Cool Weather Spins
In warm weather, the dough will be slightly stickier because the butter softens faster. Work quickly and keep your countertop lightly floured to prevent sticking. A brief chill of the dough (10–15 minutes) can firm it enough to shape if you’re finding it too soft.
In cool weather, the ingredients stay firmer and the dough may seem drier. If it resists coming together, add a tablespoon or two of buttermilk — but add sparingly. Because this is a soda bread-style loaf, small adjustments to hydration are easy; don’t exceed more than a few tablespoons unless you compensate elsewhere.
Chef’s Rationale
The formula balances sturdier whole grain elements with enough all-purpose flour to keep the crumb approachable. The wheat bran/wheat germ provides texture and toasty flavor, but it also absorbs moisture, which is why the buttermilk quantity is generous. Baking soda plus acidic buttermilk gives the lift without time-consuming fermentation. The hot baking sheet is a small, intentional step borrowed from hearth baking: thermal shock encourages an early, confident oven spring and promotes a better crust.
That cross on top is not decorative alone. It controls how the loaf opens as it bakes, helping moisture escape and preventing an irregular split. These choices are small, but together they make a loaf that’s predictable, flavorful, and practical to bake often.
Storage Pro Tips
Store the cooled loaf at room temperature, wrapped in a clean kitchen towel or a paper bag inside a loose plastic bag. This preserves the crust while keeping the crumb soft. It will remain fresh for 2–3 days at room temperature.
For longer storage, slice and freeze. Place slices between layers of parchment or wax paper, then seal in a heavy-duty freezer bag. Toast straight from frozen for best results; the texture and flavor revive nicely. If you have leftover whole loaves, freeze the entire cooled loaf wrapped tightly in plastic and then foil — thaw at room temperature before slicing.
Top Questions & Answers
- Can I make this with all whole wheat flour? You can, but expect a denser loaf. You may need slightly more liquid if the dough feels dry, because whole wheat absorbs more moisture.
- What if I only have milk, not buttermilk? Create a quick substitute by adding 1 tablespoon of vinegar or lemon juice to just under 2 1/2 cups of milk and letting it sit for a few minutes — the acidity activates the baking soda.
- How do I know when the loaf is done? The recipe suggests about 45 minutes for a single loaf; you’re looking for a firm top and a hollow sound when tapping the bottom. If unsure, an internal temperature of 200–205°F (93–96°C) indicates doneness.
- Can I add seeds or nuts? Yes — fold in up to 3/4 cup of nuts or seeds at the step when you combine the wet and dry ingredients. That said, keep additions modest so you don’t upset the dough’s hydration balance.
- Why no yeast? This recipe relies on chemical leavening and acid (buttermilk) to rise quickly and simply. It’s meant to be a loaf you can make in an hour without patience for proofing.
Wrap-Up
This Brown Bread is practical, reliable, and flavored with honest ingredients. It’s built to fit real life: minimal fuss, dependable results, and a texture that plays nicely with both butter and sandwich fillings. Follow the method, respect the hot baking sheet and the brief knead, and you’ll have a loaf that earns its place on the countertop.
Bake it once for yourself, then tweak small things — a bit more bran, a dash of cinnamon, a handful of seeds — to make it your signature. And remember: cool completely before slicing. It’s the single-handed move that makes every slice sing.
Brown Bread
Ingredients
Ingredients
- 2 1/4 cups 250 gwhole wheat flour
- 2 3/4 cups 120 gwheat bran or wheat germ, or a combination
- 4 cups 500 gall-purpose flour
- 1 1/2 teaspoonsbaking soda
- 1 teaspoonsalt
- 2 ounces 60 gbutter, salted or unsalted
- 2 1/2 cups 600 mlbuttermilk*
- 2 teaspoonsmolasses
Instructions
Instructions
- Position a rack in the middle of the oven and preheat the oven to 350°F (180°C). Line a sturdy baking sheet with parchment paper or a silicone baking mat and place the lined sheet in the oven to heat while you prepare the dough.
- In a large bowl, stir together the 2 1/4 cups (250 g) whole wheat flour and the 2 3/4 cups (120 g) wheat bran or wheat germ (or a combination).
- In a separate bowl, sift or whisk together the 4 cups (500 g) all-purpose flour, 1 1/2 teaspoons baking soda, and 1 teaspoon salt. Add this flour mixture to the large bowl with the whole wheat flour and bran/germ and stir to combine.
- Cut the 2 ounces (60 g) butter into small pieces and add them to the combined flour mixture. Using your fingertips, rub the butter into the flour until the mixture resembles coarse crumbs with pea-sized pieces of butter distributed throughout.
- Stir in the 2 1/2 cups (600 ml) buttermilk and the 2 teaspoons molasses until the dough is uniformly damp and comes together. The dough will be somewhat sticky.
- Turn the dough out onto a lightly floured countertop and knead gently for about 20–30 seconds, just until the dough forms a smooth ball. If you prefer two smaller loaves, divide the dough into two equal pieces and shape each piece into a ball.
- Wearing oven mitts, remove the preheated baking sheet from the oven and set it on a heatproof surface. Transfer the shaped loaf (or loaves) onto the hot lined baking sheet. Use a sharp serrated knife to cut a cross about 1 inch (3 cm) deep into the top of each loaf.
- Return the baking sheet to the oven and bake for about 45 minutes for a single loaf, or until the top is firm and the bottom sounds hollow when tapped. If baking smaller loaves, begin checking for doneness after about 25 minutes.
- Remove the loaf (or loaves) from the oven and transfer to a wire rack. Cool completely for 1 hour before slicing.
Equipment
- Oven
- Baking Sheet
- Parchment Paper
- Mixing Bowl
- Knife
- Wire Rack
Notes
*For those who can’t get buttermilk, mix 1 part plain whole-milk yogurt with 1 part low-fat or regular milk and let stand for five minutes before using.