Black and White Cookies Recipe
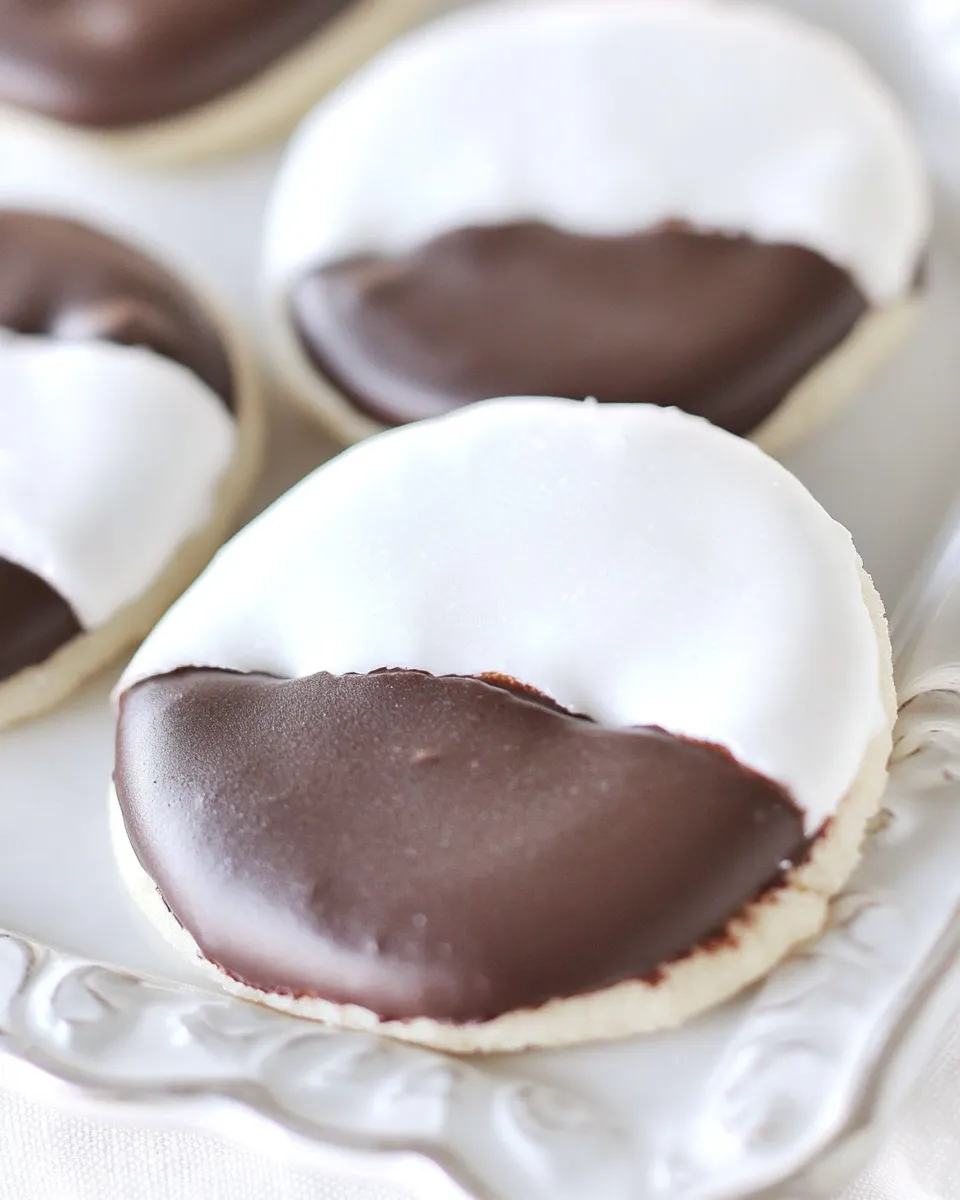
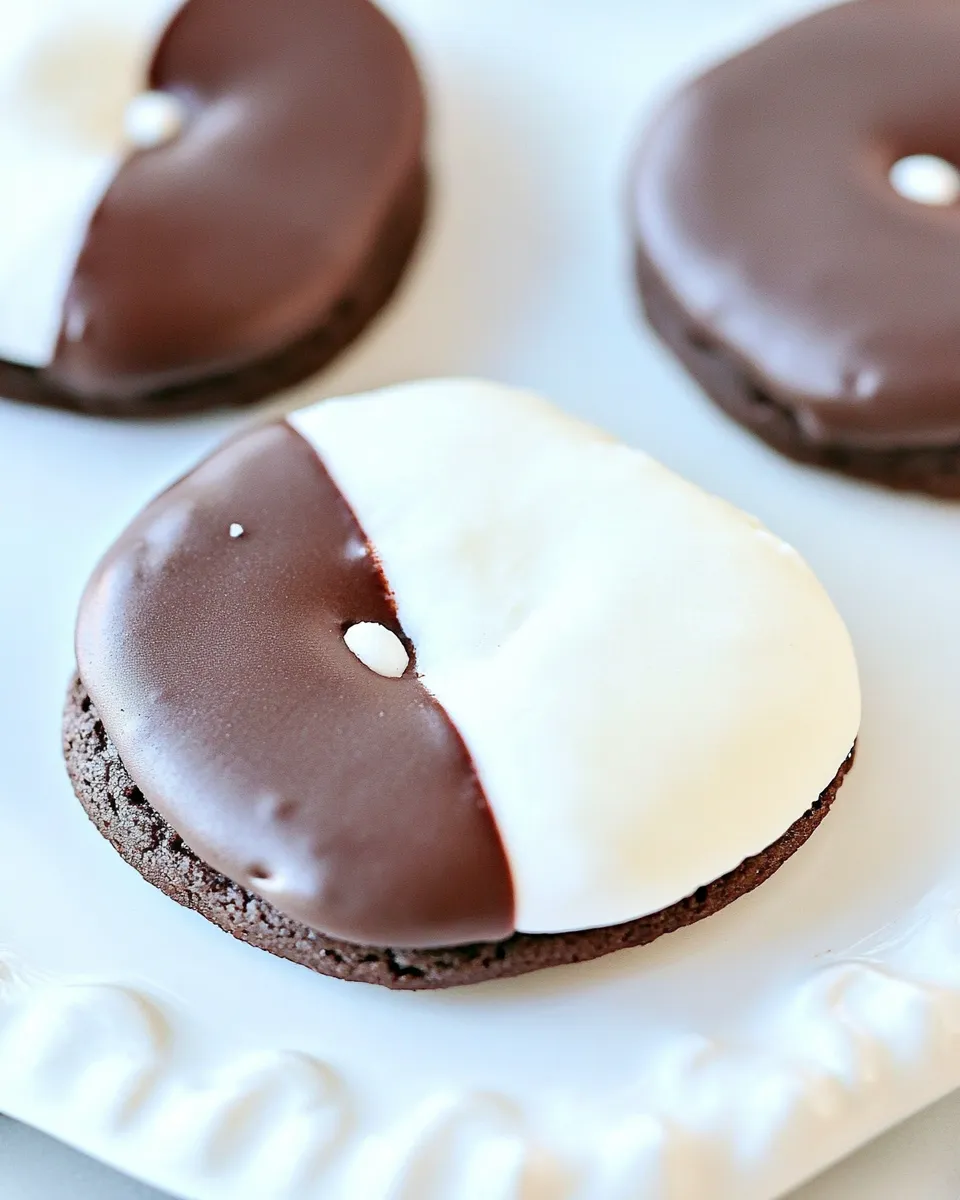
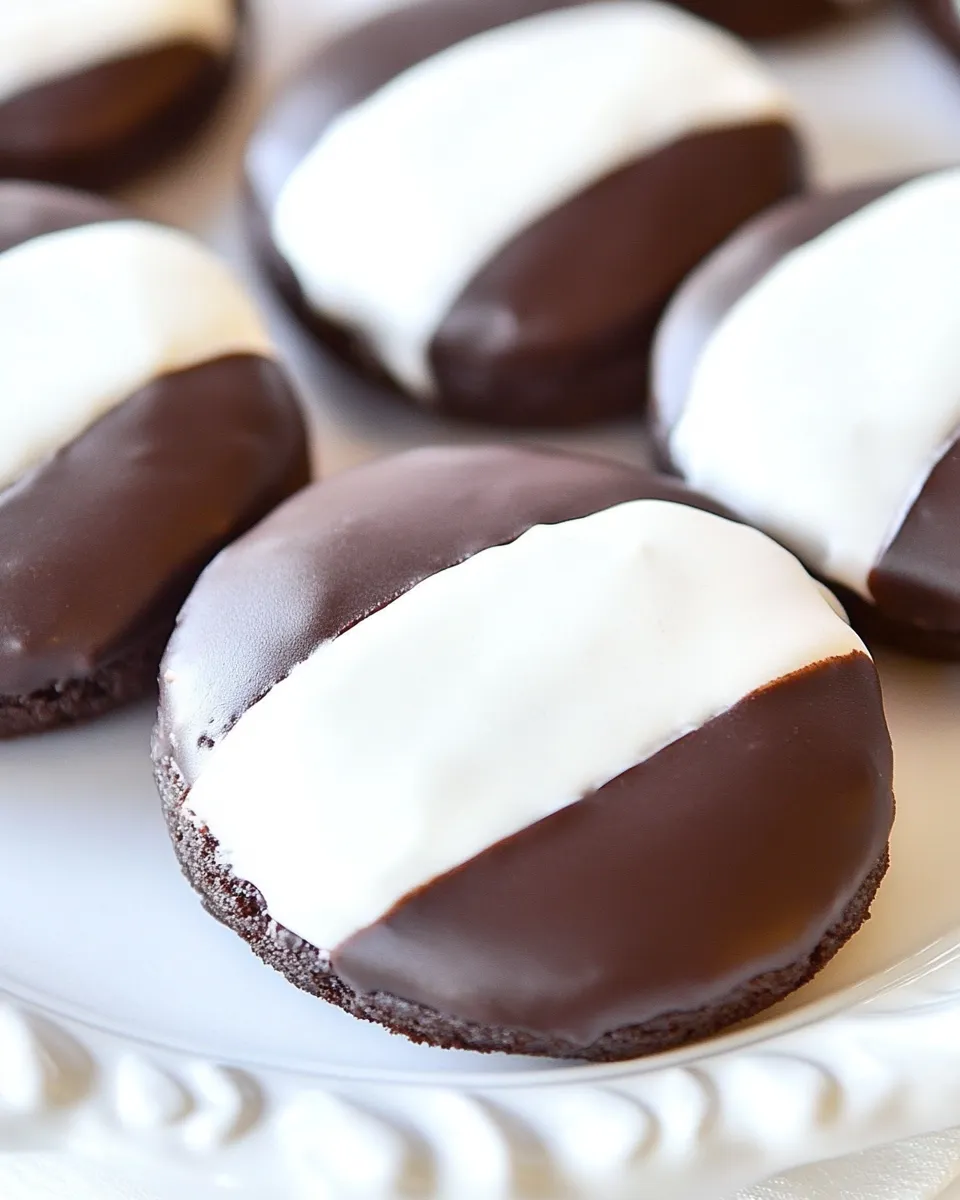
I grew up chasing the perfect black-and-white cookie at the corner bakery: soft, cake-like rounds with glossy icings—one side vanilla, the other chocolate. This version captures that nostalgic bite with a straightforward batter and two icings that set shiny and smooth. No need for special equipment beyond a stand or hand mixer and a sturdy cookie scoop.
These cookies are generous in size and forgiving in technique. The dough is thick and scoopable, so you don’t need to worry about rolling or cutting. The sour cream keeps the crumb tender and gives the cookie that gentle tang that balances the icing. The icings are simple — a vanilla base split in two, with cocoa added to one half for the chocolate side.
Ingredient Rundown

Ingredients
- 2 cups all-purpose flour — the structure for the cookie; the recipe notes a bit more if needed for thickness.
- 1/2 teaspoon baking powder — gives a light lift so the cookies are cake-like rather than flat.
- 1/4 teaspoon baking soda — reacts with the sour cream to help rise and tenderize.
- 1/4 teaspoon salt — balances sweetness and brings out flavor.
- 10 tablespoons unsalted butter — softened to room temperature; provides richness and tenderness.
- 1 cup white granulated sugar — sweetens and contributes to texture.
- 1 large egg — at room temperature; binds and helps structure.
- 2 1/2 teaspoons pure vanilla extract — primary flavoring in the cookie dough.
- 1/3 cup full-fat sour cream — at room temperature; adds moisture, tang, and a tender crumb.
- 5 1/2 cups powdered sugar — sifted; this is for the icings and the large quantity makes a thick, glossy icing.
- 7 tablespoons whole milk — divided; used to thin the icing to the right consistency.
- 2 tablespoons light corn syrup — gives the icing sheen and helps it set smoothly.
- 1 teaspoon vanilla extract — for the vanilla icing.
- 1/2 teaspoon salt — balances the sweet icing.
- 3 tablespoons unsweetened cocoa powder — makes the chocolate icing when mixed into a portion of the vanilla icing.
Black and White Cookies Made Stepwise
- Preheat oven to 350°F (180°C). Line 2 cookie sheets with parchment paper and set aside.
- In a medium bowl, whisk together 2 cups all-purpose flour, 1/2 teaspoon baking powder, 1/4 teaspoon baking soda, and 1/4 teaspoon salt. Set aside.
- In a large bowl using a mixer fitted with the paddle attachment, beat 10 tablespoons unsalted butter (softened) and 1 cup white granulated sugar on medium-high speed until smooth and creamy, about 2 minutes.
- Add 1 large egg and 2 1/2 teaspoons pure vanilla extract; beat on medium until combined, about 1 minute. Scrape down the sides and bottom of the bowl.
- Reduce mixer speed to low. Add the dry ingredients in three additions (about one-third of the flour mixture each time). After the first and second dry additions, add the 1/3 cup full-fat sour cream in two roughly equal portions (half after the first dry addition and the other half after the second). Beat until the dough is fully combined and very thick.
- Grease a 1/4-cup measuring cup or cookie scoop. Drop mounds of dough (1/4 cup each) onto the prepared baking sheets, spacing them about 4 inches apart (about 6 cookies per sheet).
- Bake for 16–18 minutes, or until the edges are lightly browned. Remove from oven and let cookies cool on the baking sheets for 5 minutes, then transfer to a wire rack to cool completely before icing.
- For the icings: In a medium bowl, whisk together 5 1/2 cups sifted powdered sugar, 6 tablespoons whole milk, 2 tablespoons light corn syrup, 1 teaspoon vanilla extract, and 1/2 teaspoon salt until smooth (this is the vanilla icing).
- Transfer 1 cup of the vanilla icing to a separate bowl. Add the remaining milk (the last 1 tablespoon) and 3 tablespoons unsweetened cocoa powder to that bowl and whisk until smooth to make the chocolate icing.
- To finish the cookies: Spread the vanilla icing over the entire top of each cooled cookie. Refrigerate the iced cookies for about 15 minutes, or until the vanilla icing is set. Then spread the chocolate icing over half of each cookie to create the black-and-white effect. Return cookies to the rack and allow the icing to set completely, about 1–2 hours, before serving.
What Sets This Recipe Apart
These are not thin crisp cookies; they’re large, soft, and almost cake-like. The combination of baking powder and baking soda with sour cream produces a tender crumb that still holds its round shape. That 1/3 cup of full-fat sour cream is a small detail that changes the texture dramatically—more tender and slightly tangy than a straight butter-and-flour cookie.
The icing technique is also straightforward and forgiving: make one vanilla icing, reserve a cup, then convert that reserved cup to the chocolate side by whisking in cocoa and the final tablespoon of milk. Using light corn syrup gives the icing a glossy finish and helps it set without becoming brittle, which makes for that smooth, bakery-style look.
If You’re Out Of…
If you’re missing one of the ingredients listed, there are practical, quick fixes that won’t derail the whole batch. Out of unsalted butter? Use salted and skip or reduce any additional salt in the dough. No sour cream? A thick plain Greek yogurt can work in a pinch—use the same volume; the texture and tang are similar. If you’re short on milk for the icing, water can thin it in a pinch, though milk gives a richer flavor. If you don’t have light corn syrup, the icing will still taste fine without it, but it may be less glossy and slightly more prone to drying out unevenly.
Tools of the Trade
These are the items I reach for when making this recipe. You don’t need anything exotic.
- Stand mixer or hand mixer with paddle attachment — creaming butter and sugar is faster and smoother this way.
- Mixing bowls — for dry and wet components.
- 1/4-cup measuring cup or cookie scoop — to portion the dough evenly for bakery-sized rounds.
- Baking sheets lined with parchment — prevents sticking and encourages even browning.
- Wire rack — essential for cooling and setting icing.
- Spatula and a small offset spatula or knife — to spread icings cleanly.
- Small bowls and whisk — for mixing and dividing the icing.
Things That Go Wrong
Common issues and quick fixes:
- Cookies spread too thin: The dough should be very thick. If your butter was too warm, chill the dough slightly before scooping or briefly chill the shaped dough on the tray for 10–15 minutes.
- Edges brown too much: Your oven may run hot; reduce oven temp by 10–15°F or rotate sheets halfway through baking.
- Icing is too runny: Add a touch more sifted powdered sugar to thicken, or chill briefly before spreading to help it set faster.
- Chocolate icing is lumpy from cocoa: Whisk vigorously or sift the cocoa before adding and whisk until smooth.
- Icing cracks after setting: That typically means it dried too quickly; try a slightly thinner icing next time or allow cookies to set at room temperature before refrigerating.
Substitutions by Diet
Dietary swaps are possible but will change texture or appearance slightly. For a gluten-free version, use a cup-for-cup gluten-free flour blend designed for baking—expect a slightly different crumb. For dairy-free needs, use a non-dairy butter substitute that behaves like butter at room temperature and swap the sour cream for a thick nondairy yogurt; results will be close but not identical. To make the icings vegan, choose powdered sugar without bone-char processing and use plant-based milk plus light corn syrup alternatives labeled vegan. If you need an egg-free version, use an egg replacer formulated for baking or try a commercial egg substitute, but note that structure and rise may differ.
Notes from the Test Kitchen
From repeated trials, a few practical notes: scrape the bowl well after adding the egg and vanilla so no streaks of butter remain. The three-part addition of the dry ingredients with sour cream split between the first two additions keeps the dough from curdling and helps you avoid overmixing. The dough should be very thick—scoopable and mound-able—so don’t panic if it seems dense. Bake until the edges are just lightly browned; overbaking dries these cookies quickly.
When icing, spread the vanilla fully and let it set in the refrigerator until tacky. If the vanilla icing isn’t set enough, the chocolate will bleed. For clean halves, use a small offset spatula or the back of a spoon and don’t overload the chocolate side—thin layers look neater and set faster.
Freezer-Friendly Notes
You can freeze the unbaked cookie dough scoops on the tray until firm, then transfer to a freezer bag for longer storage. Bake from frozen; add a couple of minutes to the bake time and watch the edges. Baked cookies freeze well too: flash-freeze on a rack or tray, then pack in airtight containers with parchment between layers. Freeze iced cookies only if you’re certain the icing is fully set; thaw in the fridge to avoid condensation on the icing.
Quick Q&A
Q: Can I make the icings ahead?
A: Yes. Store in airtight containers at room temperature for a day or two; stir gently before using. If refrigerated, bring the icing to room temp and whisk to restore spreadability.
Q: Why both baking powder and baking soda?
A: Baking powder gives lift, while baking soda reacts with the sour cream for tenderness and browning balance. Together they make a soft, cakey cookie.
Q: My cookies are cakier than bakery versions—what gives?
A: These are meant to be soft and cake-like. If you prefer a firmer texture, slightly reduce the sour cream next time or bake a minute or two longer, watching closely.
The Takeaway
This Black and White Cookies recipe is reliable, nostalgic, and approachable. The dough is forgiving, the icings are simple to make and split into two perfect halves, and the final cookie is satisfying in size and texture. Follow the order of additions, keep the dough thick, and let the icings set properly for that classic, elegant finish. Make a batch for a party, a picnic, or just because a good cookie brightens the week—these are worth the effort.

Black and White Cookies Recipe
Ingredients
Ingredients
- 2 cupsall-purpose floura bit more if needed
- 1/2 teaspoonbaking powder
- 1/4 teaspoonbaking soda
- 1/4 teaspoonsalt
- 10 tablespoonsunsalted buttersoftened to room temperature
- 1 cupwhite granulated sugar
- 1 large eggat room temperature
- 2 1/2 teaspoonspure vanilla extract
- 1/3 cupfull-fat sour creamat room temperature
- 5 1/2 cupspowdered sugarsifted
- 7 tablespoonswhole milkdivided
- 2 tablespoonslight corn syrup
- 1 teaspoonvanilla extract
- 1/2 teaspoonsalt
- 3 tablespoonsunsweetened cocoa powder
Instructions
Instructions
- Preheat oven to 350°F (180°C). Line 2 cookie sheets with parchment paper and set aside.
- In a medium bowl, whisk together 2 cups all-purpose flour, 1/2 teaspoon baking powder, 1/4 teaspoon baking soda, and 1/4 teaspoon salt. Set aside.
- In a large bowl using a mixer fitted with the paddle attachment, beat 10 tablespoons unsalted butter (softened) and 1 cup white granulated sugar on medium-high speed until smooth and creamy, about 2 minutes.
- Add 1 large egg and 2 1/2 teaspoons pure vanilla extract; beat on medium until combined, about 1 minute. Scrape down the sides and bottom of the bowl.
- Reduce mixer speed to low. Add the dry ingredients in three additions (about one-third of the flour mixture each time). After the first and second dry additions, add the 1/3 cup full-fat sour cream in two roughly equal portions (half after the first dry addition and the other half after the second). Beat until the dough is fully combined and very thick.
- Grease a 1/4-cup measuring cup or cookie scoop. Drop mounds of dough (1/4 cup each) onto the prepared baking sheets, spacing them about 4 inches apart (about 6 cookies per sheet).
- Bake for 16–18 minutes, or until the edges are lightly browned. Remove from oven and let cookies cool on the baking sheets for 5 minutes, then transfer to a wire rack to cool completely before icing.
- For the icings: In a medium bowl, whisk together 5 1/2 cups sifted powdered sugar, 6 tablespoons whole milk, 2 tablespoons light corn syrup, 1 teaspoon vanilla extract, and 1/2 teaspoon salt until smooth (this is the vanilla icing).
- Transfer 1 cup of the vanilla icing to a separate bowl. Add the remaining milk (the last 1 tablespoon) and 3 tablespoons unsweetened cocoa powder to that bowl and whisk until smooth to make the chocolate icing.
- To finish the cookies: Spread the vanilla icing over the entire top of each cooled cookie. Refrigerate the iced cookies for about 15 minutes, or until the vanilla icing is set. Then spread the chocolate icing over half of each cookie to create the black-and-white effect. Return cookies to the rack and allow the icing to set completely, about 1–2 hours, before serving.
Equipment
- Mixing Bowls
- mixer with paddle attachment
- Measuring Cups
- Measuring Spoons
- 1/4-cup measuring cup or cookie scoop
- Baking Sheets
- Parchment Paper
- Wire Rack
- Whisk