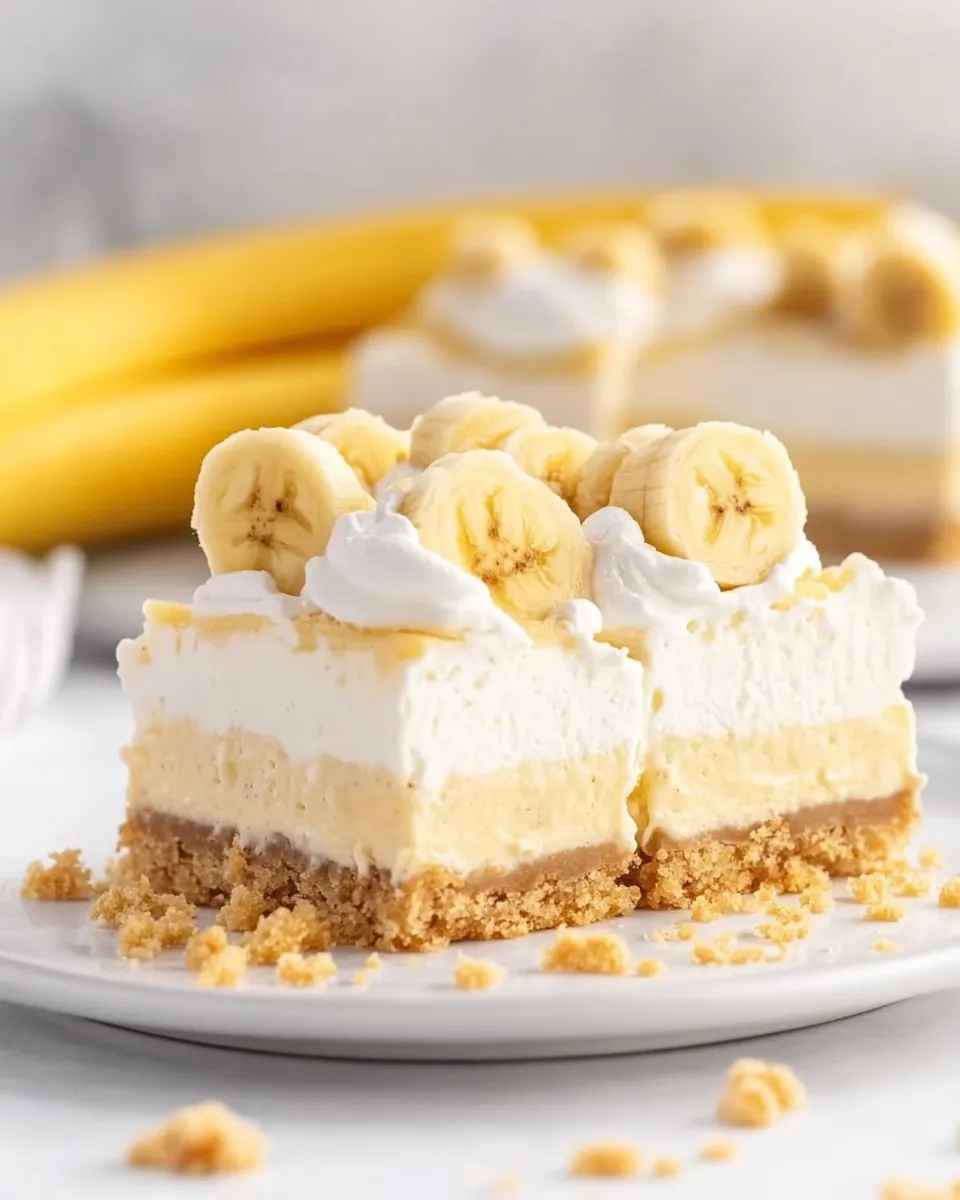
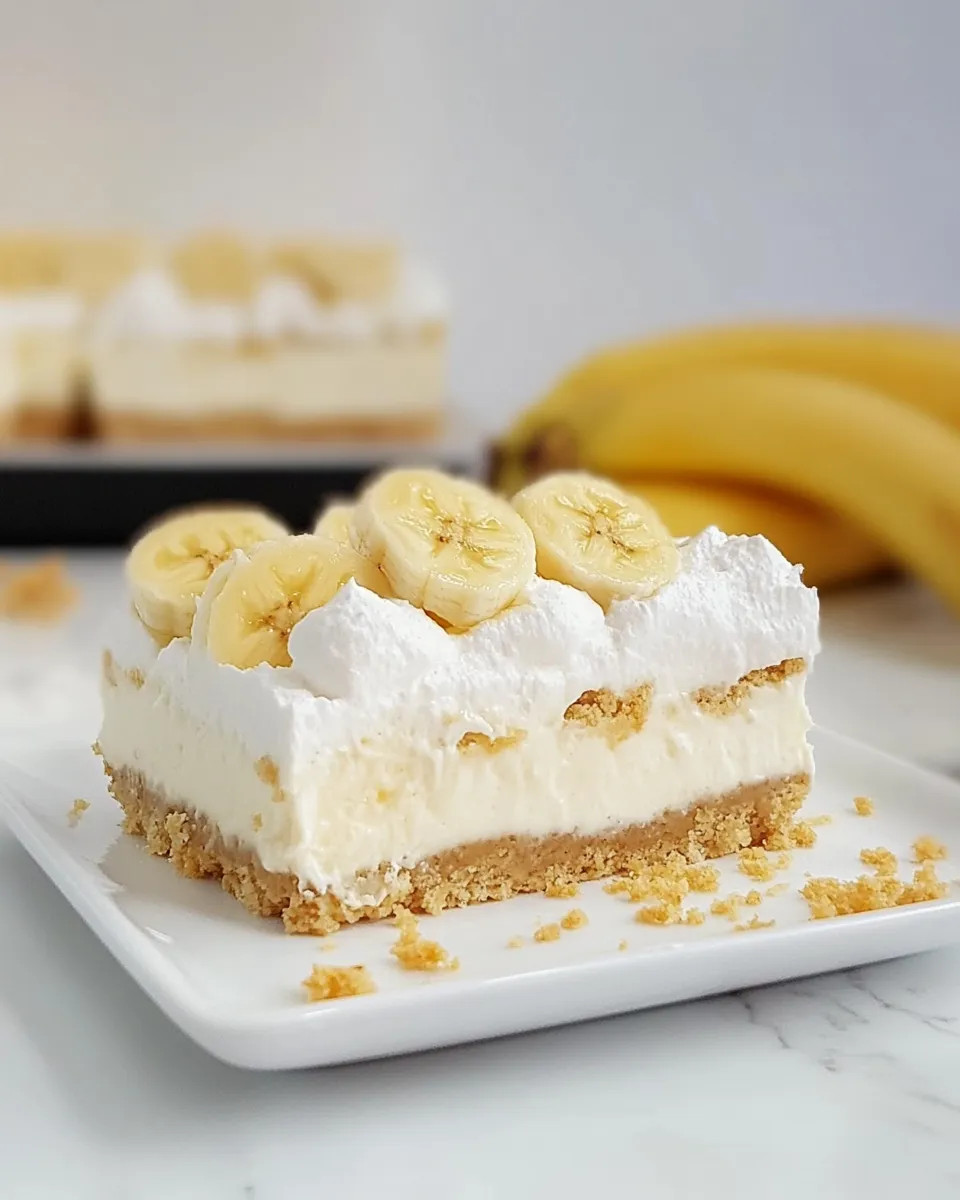
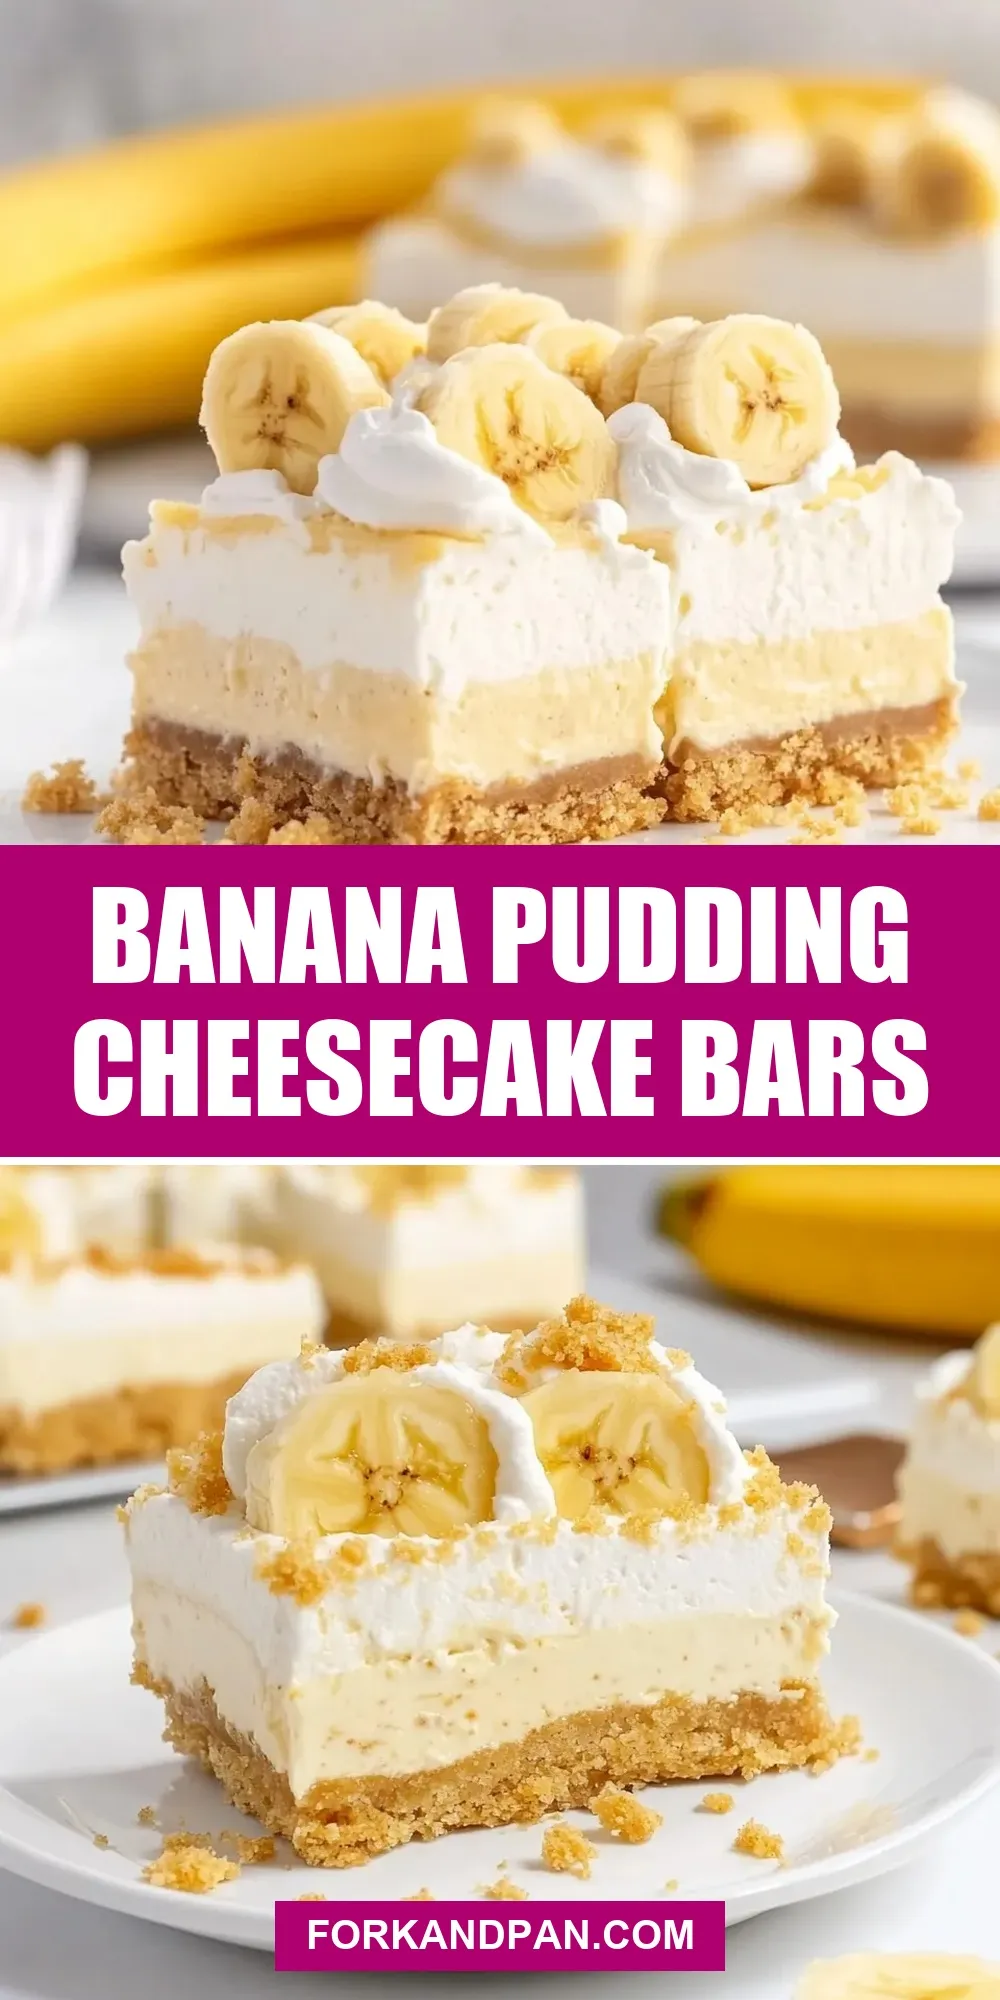
Banana Pudding Cheesecake Bars
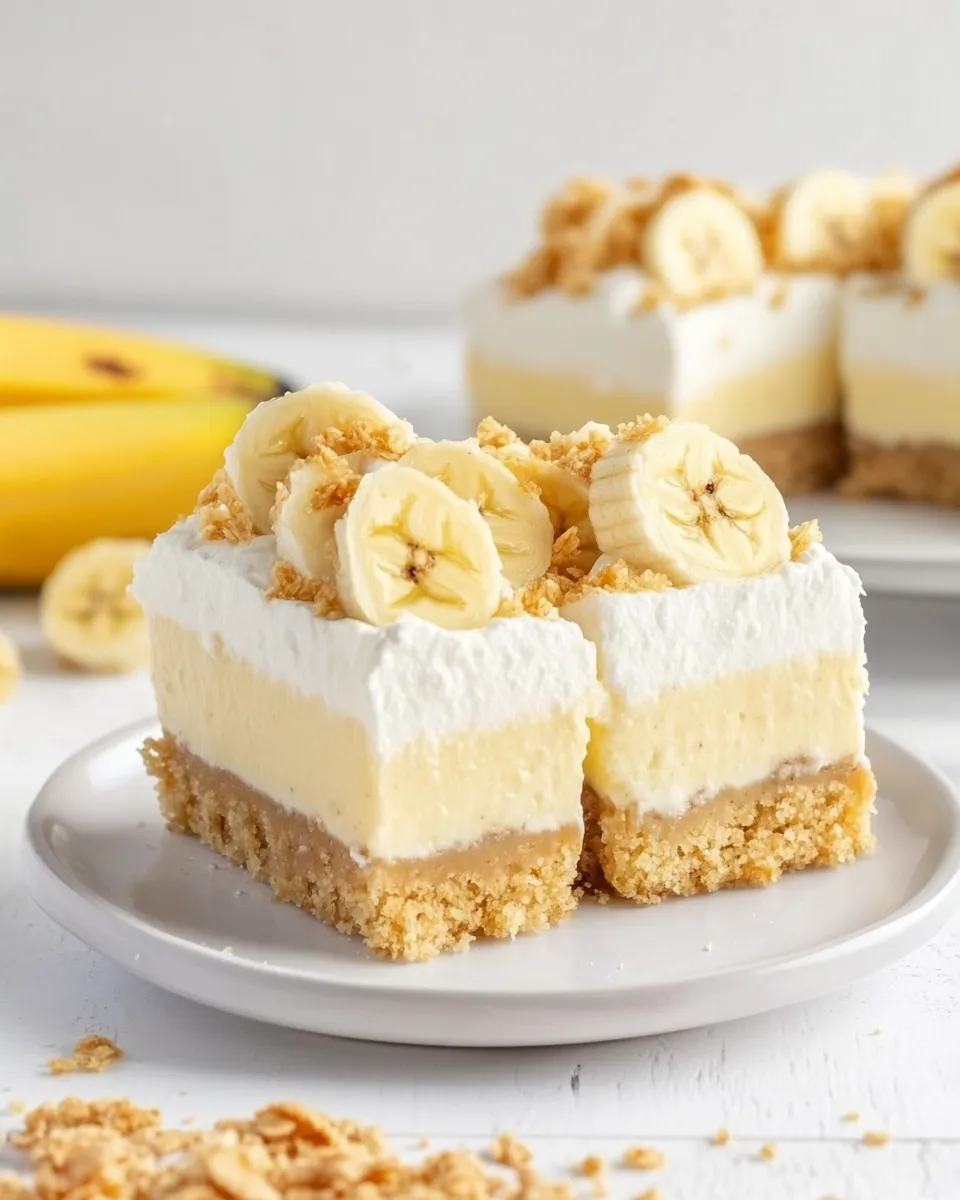
I love desserts that look like they took a day to make but really don’t. These Banana Pudding Cheesecake Bars are exactly that: creamy, banana-forward filling over a crisp vanilla wafer crust, finished with a cloud of whipped topping and a simple banana-and-wafer garnish. They set in the fridge, so most of the work is hands-off, leaving you free to do other things while the bars come together.
They’re great for casual get-togethers, potlucks, or a simple weekend treat. I keep the assembly straightforward — no baking required — so the texture is reliably smooth and slice-worthy as long as you follow a few basic steps. Below you’ll find the exact ingredients and the method I follow every time, plus tips for storage, substitutions, and troubleshooting if the filling seems soft.
What Goes In

Ingredients
- 2 cups crushed vanilla wafers — the base for the crust; press firmly for a stable foundation.
- 2 tablespoons granulated sugar — helps bind the crust and adds a touch of sweetness.
- ½ cup salted sweet cream butter (melted and cooled) — coats the crumbs and sets the crust when chilled.
- 16 ounces cream cheese (softened) — the primary structure and creaminess of the cheesecake filling; room temperature is important for a smooth mix.
- ⅓ cup granulated sugar — sweetens the cream cheese without overpowering the banana flavor.
- 3.4 ounces banana cream instant pudding mix — adds banana flavor and helps thicken the filling (any brand; the recipe used Great Value).
- 16 ounces whipped topping (thawed) — divided: 1¼ cups folded into the filling, the remaining portion of that container is for topping. Note: the directions reference a second container that will top the filling.
- 1¼ cups half-and-half cream — thins and smooths the filling; adds richness without baking.
- 2 tablespoons crushed vanilla wafer crumbs (optional garnish) — sprinkle over the tops for extra crunch and a pretty finish.
- 9 slices ripe bananas (garnish) — one slice per bar; use just-ripe bananas for best flavor and to avoid browning.
- 9 vanilla wafers (garnish) — one whole wafer per bar to complete the classic banana pudding look.
How to Prepare (Banana Pudding Cheesecake Bars)
- Line a 9×9-inch baking dish with parchment paper, leaving an overhang on two opposite sides to lift the bars out later.
- In a medium bowl, combine 2 cups crushed vanilla wafers and 2 tablespoons granulated sugar. Stir to distribute the sugar evenly.
- Pour ½ cup melted and cooled salted sweet cream butter over the crumbs and stir until all crumbs are evenly coated.
- Press the buttered crumb mixture firmly and evenly into the bottom of the prepared dish to form the crust. Refrigerate the crust while you make the filling.
- Ensure the 16 ounces cream cheese is softened. In a stand mixer or using a handheld mixer in a large bowl, beat the cream cheese and ⅓ cup granulated sugar on medium-high for 1 to 1½ minutes, scraping the bowl once, until smooth and lump-free.
- Add the 3.4 ounces banana cream instant pudding mix to the cream cheese mixture and beat on medium until just combined.
- Reduce mixer speed to low. Measure out 1¼ cups of the thawed whipped topping and add it to the bowl; mix on low until incorporated.
- While mixing on low, drizzle in 1¼ cups half-and-half and continue mixing just until the mixture is smooth and homogeneous. Do not overmix.
- Spread the banana cheesecake filling evenly over the chilled crust and smooth the top.
- From the same 16-ounce container of whipped topping, use the remaining whipped topping (about ¾ cup) to top the filling: spread it evenly over the filling. (You should have used 1¼ cups for the filling and the rest of that container for the top.)
- Cover and refrigerate the assembled bars for at least 6 hours or overnight to set.
- To serve, lift the set bars from the pan using the parchment overhang and place on a cutting surface. Using a large sharp knife, cut into 3 rows by 3 rows (9 bars). Wipe the knife clean between cuts for neat slices.
- If desired, sprinkle the 2 tablespoons crushed vanilla wafer crumbs over the tops (optional). For garnish, place one slice of ripe banana and one whole vanilla wafer on top of each bar (use the 9 banana slices and 9 vanilla wafers). If you want piped swirls, transfer the remaining whipped topping to a piping bag fitted with a large open star tip and pipe a small star in the center of each bar before adding the banana slice and wafer. Serve immediately.
What You’ll Love About This Recipe
First, the texture: the filling is dense enough to hold clean slices yet soft and creamy in every bite. That balance comes from the cream cheese, instant pudding mix, and the whipped topping folded in — they play nicely together to create a set, scoopable cheesecake without baking.
Second, the flavor is classic and familiar. The vanilla wafer crust and real banana slices read like old-school banana pudding, but the cheesecake base feels elevated. It’s the kind of dessert that everyone recognizes and reaches for a second piece of.
Finally, it’s practically effortless. Most of the time is chilling time. If you have a few simple tools and a clean countertop you can put these together in under 30 minutes of active work.
Smart Substitutions
- Crust: If you don’t have vanilla wafers, graham cracker crumbs work as a substitute — same approach: mix crumbs with sugar and melted butter and press into the pan.
- Butter: If you prefer unsalted butter, use it and add a pinch of salt to the crumb mix to balance flavors.
- Whipped topping: Stabilized whipped cream or homemade whipped cream can replace the store-bought whipped topping. If using fresh whipped cream, stabilize it with a touch of powdered sugar or gelatin so the filling holds up longer in the fridge.
- Half-and-half: Light cream or whole milk will work in a pinch. Use light cream if you want richer texture; use milk for a slightly lighter set.
- Pudding mix: Stick to banana cream instant pudding for the intended flavor and texture. If banana mix isn’t available, vanilla pudding can be used, but the banana flavor will rely entirely on the fresh banana garnish.
Gear Up: What to Grab
- 9×9-inch baking dish
- Parchment paper (enough to create an overhang)
- Mixing bowls (one medium for crust, one large for filling)
- Stand mixer or handheld electric mixer
- Measuring cups and spoons
- Rubber spatula for folding
- Sharp large knife for clean slicing
- Piping bag and large open star tip (optional, for swirls)
Frequent Missteps to Avoid
- Using cold cream cheese: If the cream cheese isn’t softened, you’ll have lumps in the filling. Let it sit at room temperature until easily dented with a finger.
- Not chilling the crust: Pressing the crust firmly and chilling it before adding the filling prevents the crust from becoming sandy or separating when you cut the bars.
- Overmixing after adding half-and-half: Mix only until smooth. Overmixing can introduce air or make the texture too loose, which affects the set.
- Skipping the chill time: The bars need at least 6 hours to firm up. Cutting them too soon leads to squished, messy slices.
- Using overly ripe bananas for garnish: Brown, mushy bananas will discolor the tops quickly. Use ripe but firm slices and add them just before serving.
Variations by Season
Spring
Brighten the top with a scattering of thinly sliced strawberries or a light dusting of citrus zest (lemon or orange) to add freshness without changing the base recipe.
Summer
Top each bar with a halved fresh blueberry or raspberries alongside the banana slice. Fresh berries add a welcome contrast and pair beautifully with chilled desserts.
Fall/Winter
Fold a pinch of warm spices — cinnamon or nutmeg — into the crust for cozy notes. You can also sprinkle a few toasted pecan pieces on top for crunch and seasonal depth.
Chef’s Notes
Measure the whipped topping out carefully: the recipe is specific about using 1¼ cups in the filling and the remainder of that container for the top, then a second container will finish the topping. If you accidentally use too much in the filling, the top layer will be thinner than intended, but the bars will still taste great.
When spreading the filling over the chilled crust, smooth it gently with an offset spatula or the back of a spoon. Firm, even pressure keeps the crust intact and produces clean edges when you cut the bars.
Keep-It-Fresh Plan
Store the bars covered in the refrigerator for up to 4 days. Because they contain fresh banana slices on top, add those fresh just before serving if you want the best presentation; otherwise the banana slices will darken and soften over time. Leftovers without banana garnish will keep well and still taste great.
For longer storage, you can freeze the uncut bars (wrapped tightly in plastic and then foil) for up to 2 months. Thaw overnight in the fridge before slicing; note that texture may be slightly softer after freezing.
Troubleshooting Q&A
Q: My filling is runny after chilling — what went wrong?
A: Most likely the filling was under-chilled or over-thinned. Make sure you used the exact 1¼ cups of half-and-half and didn’t add extra liquid. Also, refrigeration time is critical — allow at least 6 hours or overnight.
Q: The crust crumbles when I slice — how can I fix that?
A: Press the crust firmly when assembling and chill it before adding the filling. If it’s still crumbly, allow the filled bars to chill longer; the butter should firm up to hold the crumbs together.
Q: Can I make this gluten-free?
A: Yes — swap the vanilla wafers for a gluten-free crunchy cookie with similar sweetness. Keep the same amounts and press the crumbs into the pan as directed.
That’s a Wrap
These Banana Pudding Cheesecake Bars are a lovely, low-effort dessert that feels special. The process is straightforward: a pressed vanilla wafer crust, a whipped and banana-pudding-scented cheesecake filling, and a whipped topping with a classic banana-and-wafer finish. Make them ahead, slice them neat, and watch them disappear at your next gathering.
If you try them, let me know how you garnish yours — I’m always swapping tiny details to match the season or occasion. Happy baking (or rather, happy assembling).
Banana Pudding Cheesecake Bars
Ingredients
Ingredients
- 2 cupscrushed vanilla wafers plus 9 wafers for garnish
- 2 tablespoonsgranulated sugar
- 1/2 cupsalted sweet cream butter melted and cooled
- 16 ouncescream cheese softened
- 1/3 cupgranulated sugar
- 3.4 ouncesbanana cream instant pudding mix any brand; I used Great Value
- 16 ounceswhipped topping thawed (divide out 1 1/4 cups for the filling, the remainder of the container will be for the optional swirl garnish. The second container will top the filling)
- 1 1/4 cupshalf and half cream
- 2 tablespoonscrushed vanilla wafer crumbs optional garnish
- 9 slicesripe bananas garnish
Instructions
Instructions
- Line a 9×9-inch baking dish with parchment paper, leaving an overhang on two opposite sides to lift the bars out later.
- In a medium bowl, combine 2 cups crushed vanilla wafers and 2 tablespoons granulated sugar. Stir to distribute the sugar evenly.
- Pour ½ cup melted and cooled salted sweet cream butter over the crumbs and stir until all crumbs are evenly coated.
- Press the buttered crumb mixture firmly and evenly into the bottom of the prepared dish to form the crust. Refrigerate the crust while you make the filling.
- Ensure the 16 ounces cream cheese is softened. In a stand mixer or using a handheld mixer in a large bowl, beat the cream cheese and ⅓ cup granulated sugar on medium-high for 1 to 1½ minutes, scraping the bowl once, until smooth and lump-free.
- Add the 3.4 ounces banana cream instant pudding mix to the cream cheese mixture and beat on medium until just combined.
- Reduce mixer speed to low. Measure out 1¼ cups of the thawed whipped topping and add it to the bowl; mix on low until incorporated.
- While mixing on low, drizzle in 1¼ cups half-and-half and continue mixing just until the mixture is smooth and homogeneous. Do not overmix.
- Spread the banana cheesecake filling evenly over the chilled crust and smooth the top.
- From the same 16-ounce container of whipped topping, use the remaining whipped topping (about ¾ cup) to top the filling: spread it evenly over the filling. (You should have used 1¼ cups for the filling and the rest of that container for the top.)
- Cover and refrigerate the assembled bars for at least 6 hours or overnight to set.
- To serve, lift the set bars from the pan using the parchment overhang and place on a cutting surface. Using a large sharp knife, cut into 3 rows by 3 rows (9 bars). Wipe the knife clean between cuts for neat slices.
- If desired, sprinkle the 2 tablespoons crushed vanilla wafer crumbs over the tops (optional). For garnish, place one slice of ripe banana and one whole vanilla wafer on top of each bar (use the 9 banana slices and 9 vanilla wafers). If you want piped swirls, transfer the remaining whipped topping to a piping bag fitted with a large open star tip and pipe a small star in the center of each bar before adding the banana slice and wafer. Serve immediately.
Equipment
- 9x9-inch baking dish
- Parchment Paper
- Mixing Bowls
- Stand mixer or hand mixer
- Measuring Cups
- Measuring Spoons
- Spatula
- large sharp knife
Notes
Make sure your cream cheese is at room temperature, or it may leave lumps in the cheesecake mixture.
You can layer fresh banana slices over the crust before layering the banana cheesecake filling. Just remember that bananas will turn brown the longer they sit.
Wait until just before serving to slice the banana for garnishing. Bananas will turn brown if they are not used right away.