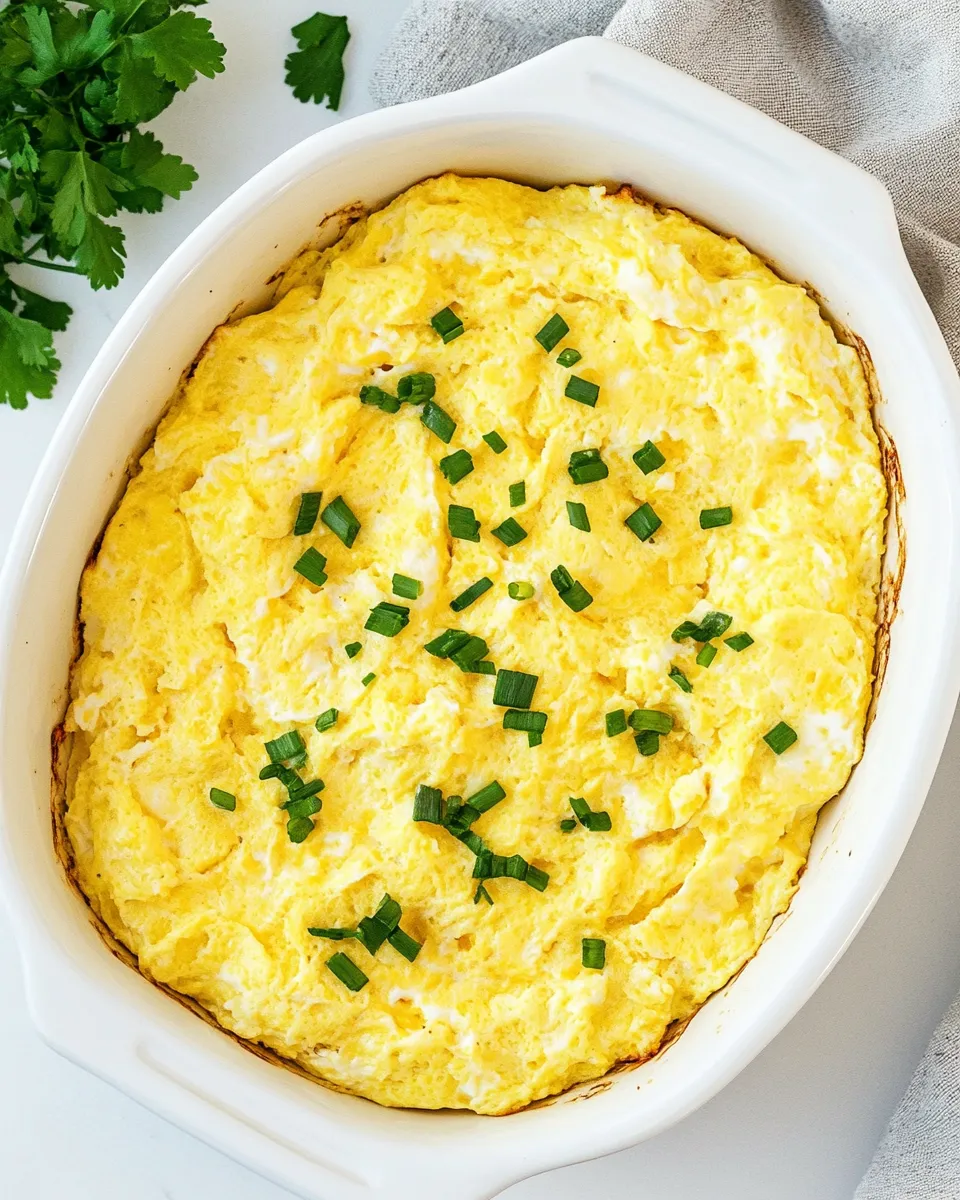
Baked Scrambled Eggs
I love mornings that start simple and end with something that feels homemade and a little indulgent. Baked scrambled eggs are one of those dishes: minimal hands-on time, forgiving, and built to feed a crowd or make weekday breakfasts easier. You get the soft, creamy texture of scrambled eggs without standing at the stove and stirring every minute.
This recipe scales well, reheats nicely, and is perfect when you want breakfast on the table without the usual babysitting. I reach for it when I have guests, when the oven is already warm, or when I want to prep breakfast ahead and let the oven do the work.
Below you’ll find everything you need: the exact ingredients, the step-by-step bake-and-stir method, troubleshooting, tools, storage tips, and simple season-to-serve ideas that keep the dish approachable and useful, not fussy.
What You’ll Gather

- 12 large eggs — the structure and main protein; room temperature eggs will cook more evenly.
- 1 cup milk — thins the eggs for a softer set; contributes to creaminess.
- 1/4 cup water — adds steam during baking to lighten the texture.
- 1 teaspoon salt — seasons the eggs throughout; adjust to taste after cooking if needed.
- 1/4 cup butter, melted and cooled — adds richness and keeps the eggs tender; let it cool so it doesn’t cook the eggs prematurely.
From Start to Finish: Baked Scrambled Eggs
- Preheat the oven to 350°F. Spray a 9×13-inch glass baking dish with nonstick cooking spray.
- In a large bowl, crack 12 large eggs. Add 1 cup milk, 1/4 cup water, 1 teaspoon salt, and 1/4 cup melted, cooled butter.
- Whisk the mixture until well blended and uniform.
- Pour the egg mixture into the prepared baking dish and spread it evenly.
- Bake uncovered for 10 minutes.
- Remove the dish from the oven and gently stir the eggs with a spatula to break up any set edges and mix partially cooked portions.
- Return the dish to the oven and bake an additional 12 minutes, or until the eggs are mostly set and no longer runny (they should be moist but cooked through).
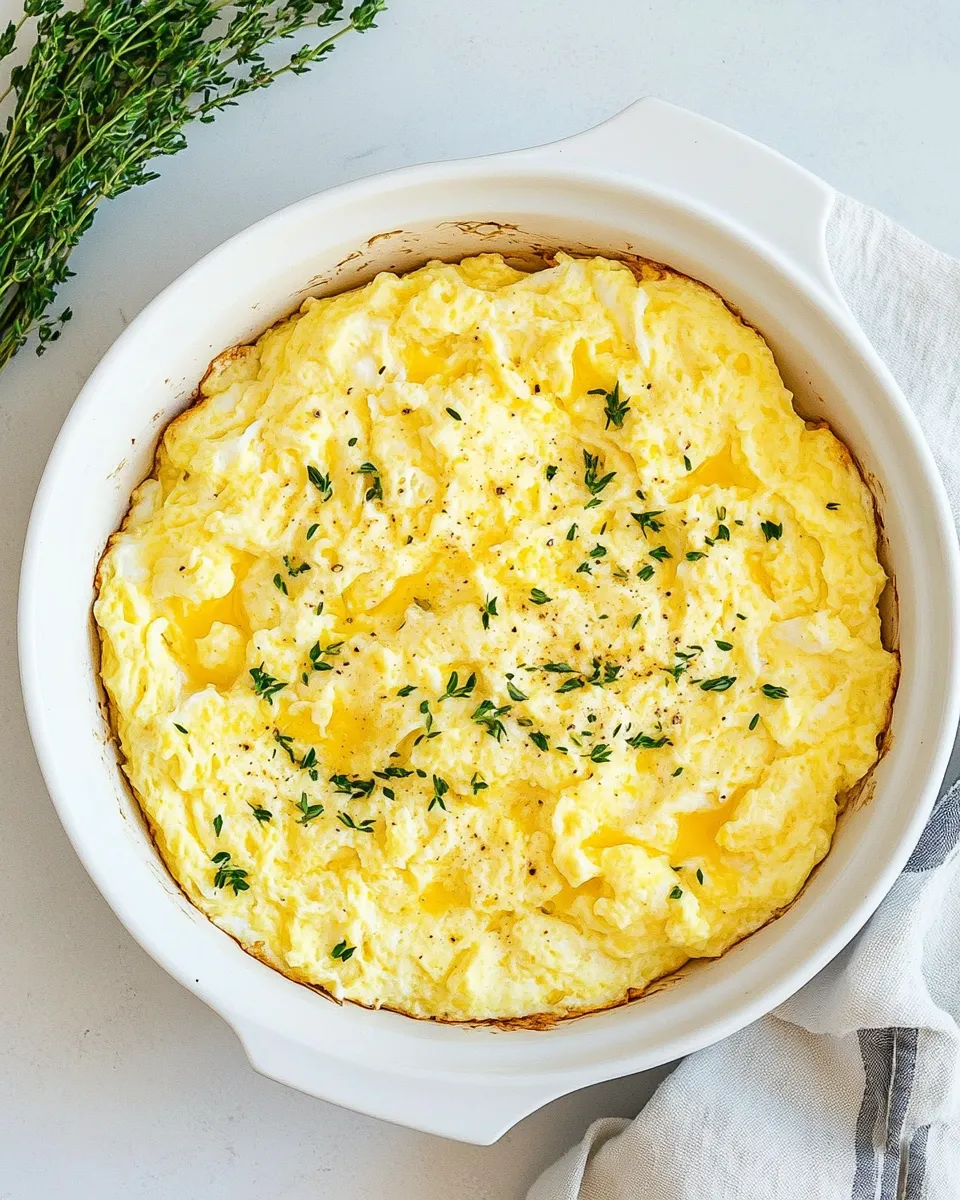
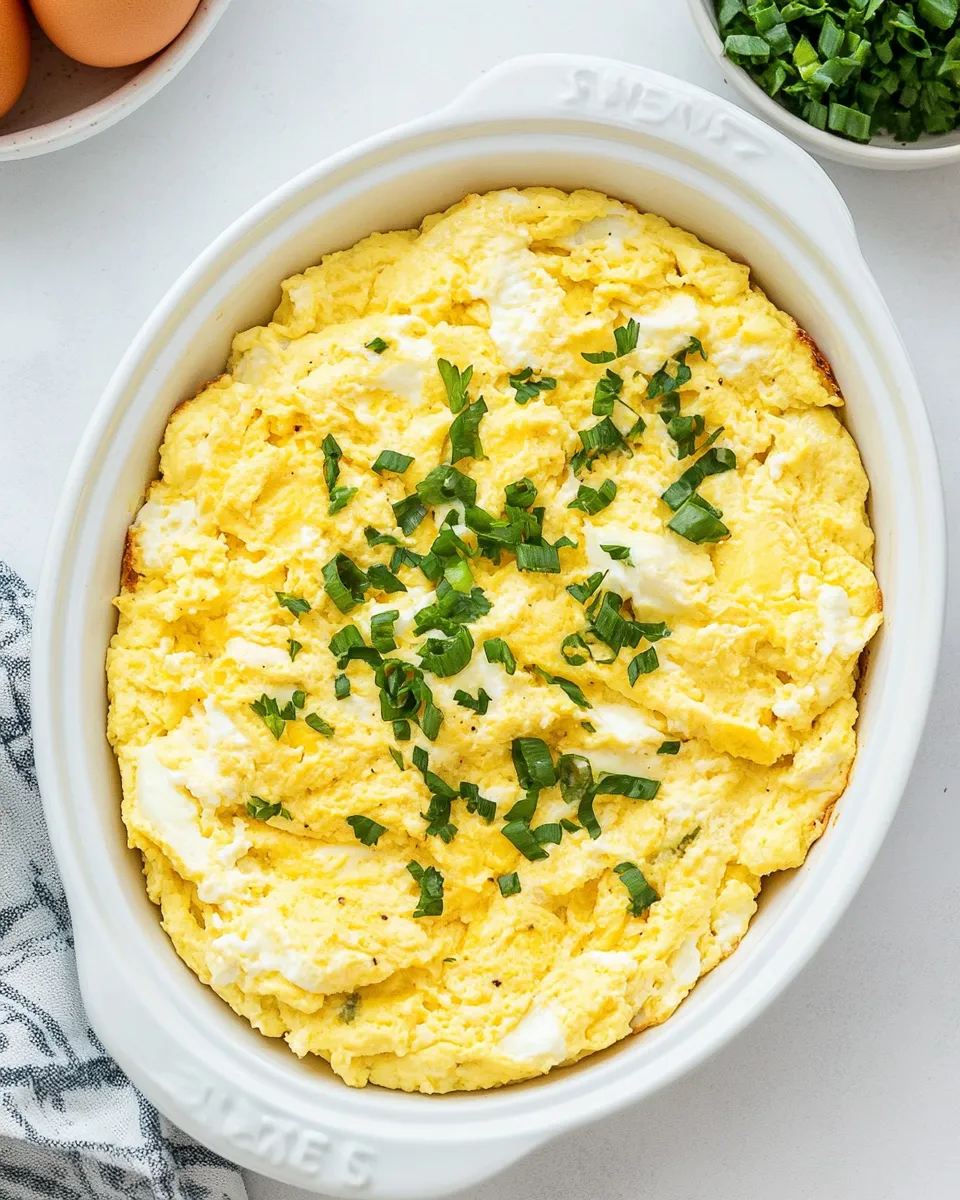
- Remove from the oven, let rest 1–2 minutes, then fluff with a fork and serve warm.
Why Baked Scrambled Eggs is Worth Your Time
This method turns a hands-on task into a set-it-and-check-it routine. Instead of constant stirring over the stove, you whisk, bake, and stir once mid-bake. The result is reliably tender eggs with minimal effort.
It’s also great for feeding people. A 9×13 pan serves several people without crowding the skillet, and the texture is consistent across the whole pan. If you’re serving brunch or packing breakfasts for the week, this method saves time and mental energy.
Finally, the finished texture—moist, soft curds rather than rubbery overcooked eggs—makes a simple breakfast feel intentional. It’s a reliable base you can dress up or keep very plain depending on the morning.
Low-Carb/Keto Alternatives
Eggs themselves are low-carb, so the recipe already fits a low-carb or keto-friendly approach in spirit. To reduce carbs further while staying within the ingredients listed here, keep the milk amount minimal or use less milk and omit the water; reducing milk lowers the small amount of lactose-derived carbs. Increasing the butter fraction (using the 1/4 cup already in the recipe as richness) leans the dish toward higher fat and less carbohydrate by relative proportion.
If you follow a strict plan that limits dairy, consider techniques rather than swapping in new items: reduce the milk and bake a bit longer if the mixture seems wetter. The core technique—baking, stirring mid-cycle, finishing in the oven—remains the same and is forgiving of small swaps.
Tools of the Trade
- 9×13-inch glass baking dish — the size in the recipe; glass gives even heat and makes it easy to see set edges.
- Nonstick cooking spray — prevents sticking; oiling the dish is worth the small step.
- Large mixing bowl — roomy enough to whisk the eggs without splashing.
- Whisk — for a uniform egg mixture; a fork will work in a pinch but whisking helps emulsify the butter.
- Spatula — a heat-resistant one for gently stirring halfway through baking without tearing the set curds.
- Oven — set at 350°F; accurate oven temperature matters more here than you might expect.
- Fork — for final fluffing before serving.
What Not to Do
- Don’t skip preheating the oven. Starting in a cold oven changes the timing and can give you an uneven set.
- Don’t pour very hot melted butter into the eggs. The recipe calls for melted, cooled butter—if it’s too hot it can begin to cook the eggs prematurely and create grainy spots.
- Don’t overbake. Eggs continue to carryover cook after the oven. Follow the 10-minute, stir, then 12-minute guideline and check for moistness rather than dryness.
- Don’t skip the mid-bake stir. That quick gentle break-up of the set edges creates pieces and a better overall texture; skipping it risks a rigid edge and an undercooked center.
- Don’t assume all ovens are the same. If your oven runs hot, check a few minutes early; if it runs cool, you might need a little extra time. Watch for moistness, not perfect jiggle.
Spring to Winter: Ideas
The finished eggs are a neutral, comforting base. In spring and summer, serve them alongside bright salads, toasted bread, or fresh tomatoes for contrast. In fall and winter, they’re excellent with warm roasted vegetables, a slice of hearty bread, or a bowl of beans for a heartier plate.
For casual brunches, set out bowls of mix-ins and let guests top their portions. Think textures and temperatures: something crunchy, something acidic, something fresh. The eggs handle gentle toppings and sides very well because their texture is forgiving and mild.
Recipe Notes & Chef’s Commentary
A few small details change the outcome more than you’d expect. Let the melted butter cool so it doesn’t cook the eggs when it hits the bowl. Whisk until uniform—small streaks of fat or white can lead to uneven cooking. The water in this recipe isn’t a mistake: it generates steam in the oven and keeps the curds tender, preventing a chalky dry set.
When you pull the dish at the 10-minute mark, stir gently. You’re not aiming to beat the eggs into a froth—just break the set edges and fold the partly cooked parts together so everything finishes evenly. The final bake is shorter than the first because you want a moist finish. If you prefer firmer eggs, add a minute or two, but check frequently.
Keep It Fresh: Storage Guide
Let the eggs cool slightly, then transfer to an airtight container and refrigerate. They hold well for 3–4 days. Reheat gently: use a low oven (about 300°F) for a short period or microwave in brief bursts, stirring between intervals, until warmed through. Overheating will dry them out, so aim for just-warm rather than piping hot.
If you plan to freeze, note the texture changes—eggs can become a bit grainy after freezing and reheating. For best results, refrigerate and consume within a few days rather than freezing.
Quick Q&A
- Can I halve or double the recipe? Yes. The method and bake/stir timing are the same; use a proportionally sized baking dish and watch the set—larger or deeper pans may need a few extra minutes.
- Can I add mix-ins before baking? You can, but keep them low-moisture and not overly dense. If you choose to add ingredients, distribute them sparingly so the eggs still cook through in the given time.
- Why is the butter melted and cooled? Melting allows it to blend evenly into the egg mixture. Cooling prevents it from cooking the eggs on contact.
- My eggs looked wet after the second bake—are they undercooked? If they’re still runny, return to the oven in short increments. The goal is moist but not liquid. Resting 1–2 minutes after removing helps residual heat finish the set.
- How do I keep the texture creamy instead of rubbery? Follow the timing, avoid high heat, stir halfway, and remove when mostly set. Carryover heat will finish them without drying them out.
See You at the Table
This is the kind of recipe I reach for when I want ease and consistency. It’s forgiving, quick to assemble, and gives you creamy eggs without standing over a hot skillet. Make it plain, make it for a crowd, or use it as your weekday shortcut—either way, you’ll have a reliable, satisfying breakfast with minimal fuss.
If you try it, tell me how you like the texture and what you served alongside it. Small tweaks make a big difference, and I love hearing which version becomes your go-to.

Baked Scrambled Eggs
Ingredients
Ingredients
- 12 largeeggs
- 1 cupmilk
- 1/4 cupwater
- 1 teaspoonsalt
- 1/4 cupbutter melted and cooled
Instructions
Instructions
- Preheat the oven to 350°F. Spray a 9x13-inch glass baking dish with nonstick cooking spray.
- In a large bowl, crack 12 large eggs. Add 1 cup milk, 1/4 cup water, 1 teaspoon salt, and 1/4 cup melted, cooled butter.
- Whisk the mixture until well blended and uniform.
- Pour the egg mixture into the prepared baking dish and spread it evenly.
- Bake uncovered for 10 minutes.
- Remove the dish from the oven and gently stir the eggs with a spatula to break up any set edges and mix partially cooked portions.
- Return the dish to the oven and bake an additional 12 minutes, or until the eggs are mostly set and no longer runny (they should be moist but cooked through).
- Remove from the oven, let rest 1–2 minutes, then fluff with a fork and serve warm.
Equipment
- Oven
- 9x13 inch Baking Dish
- Mixing Bowl
- Whisk
- Spatula